There are multiple ways to create an estimate:
Most methods require you to be inside the client profile. From there, you can start in several ways:
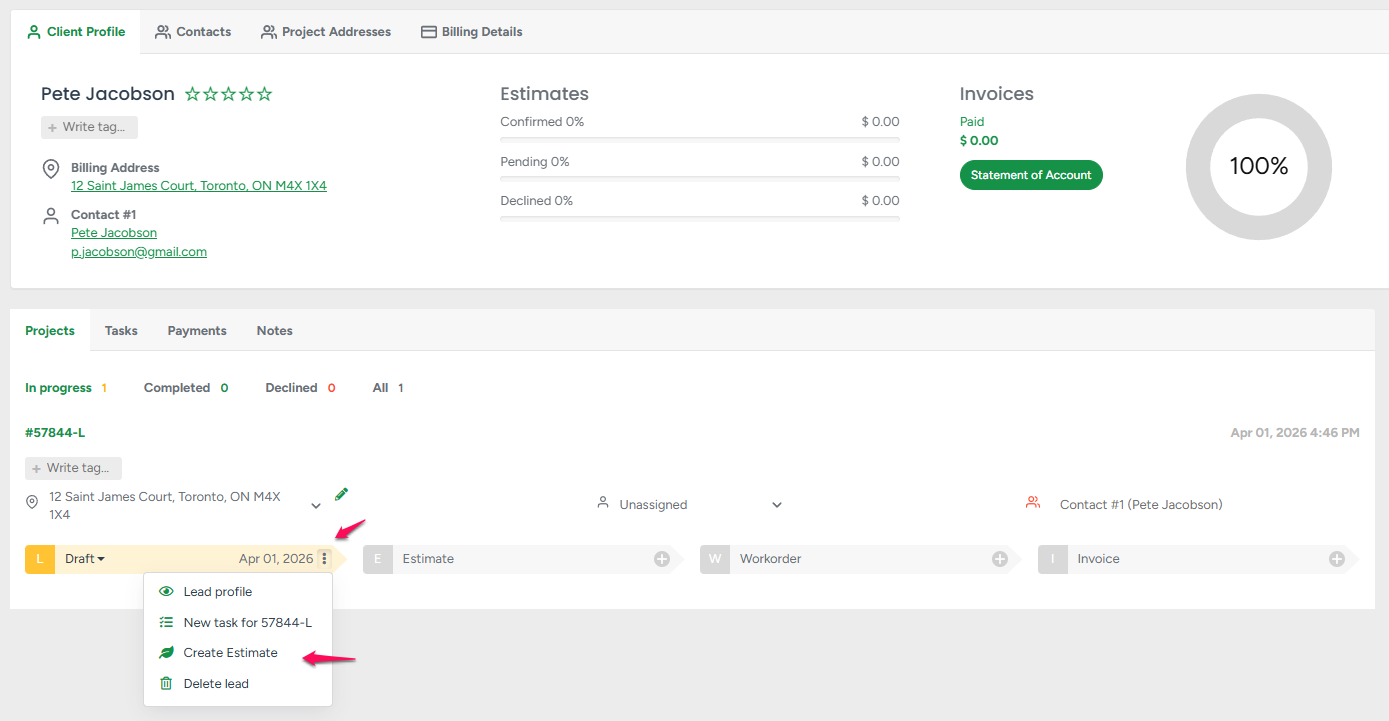
- If there’s an existing lead, you can create an estimate from it—whether or not the lead is assigned to you.
Just click the three dots on the lead stage and select Create Estimate.
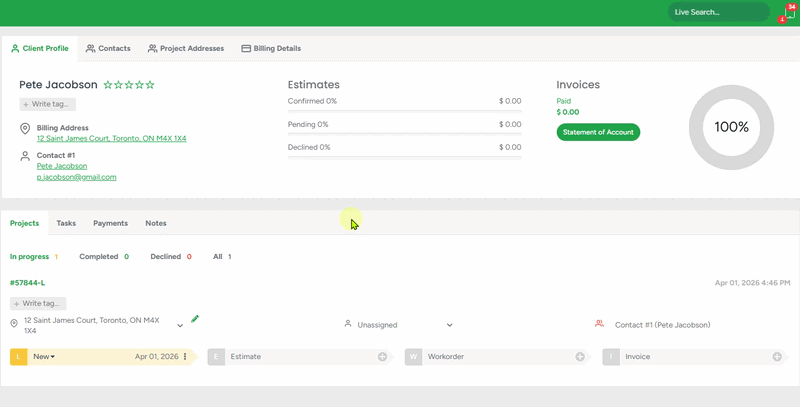
- You can also force the system to create an estimate:
Click the Estimate stage next to the lead, then select Yes when prompted with:
“Estimate is not created. Do you want to create a new estimate?”
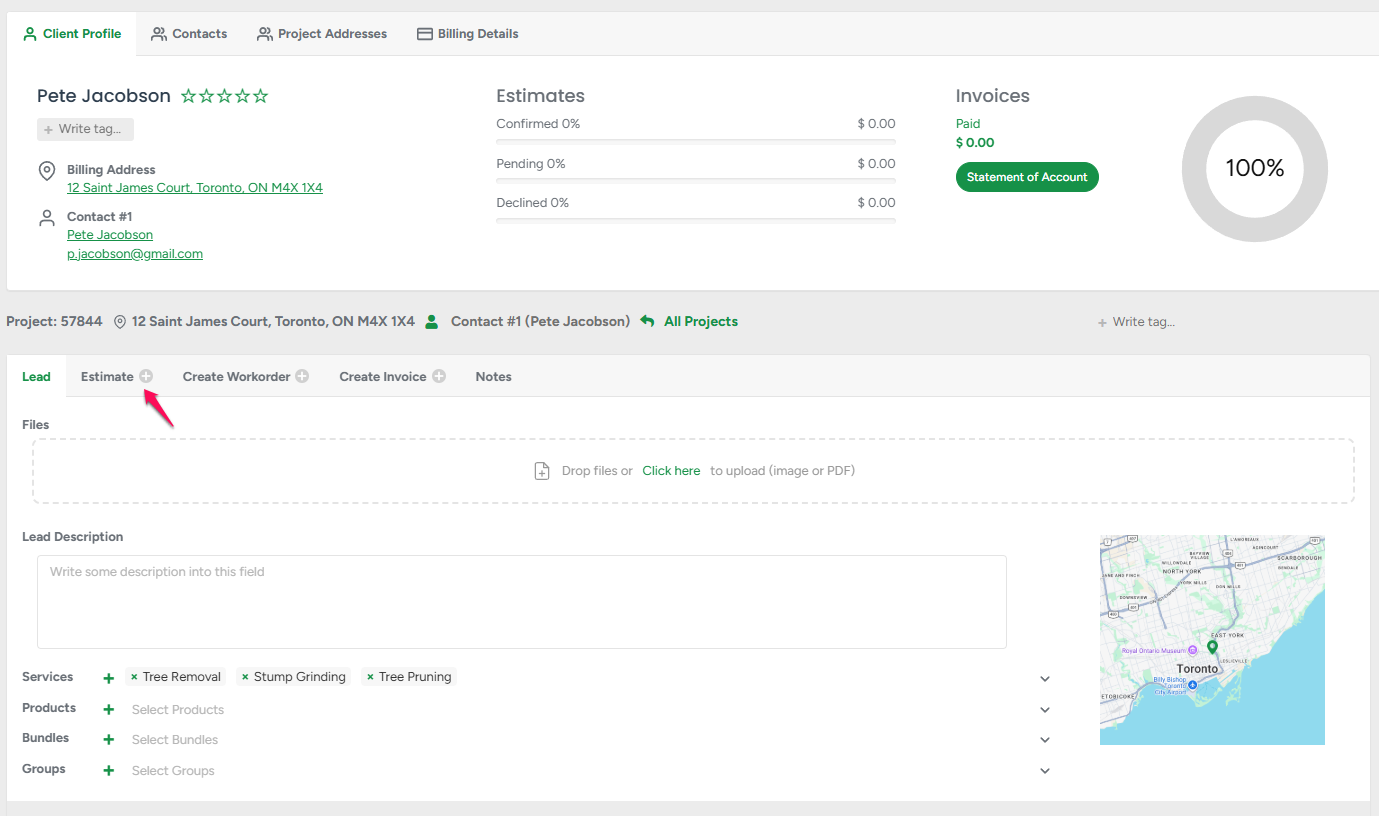
- If you’re inside the lead profile, simply click the Estimate tab to begin.
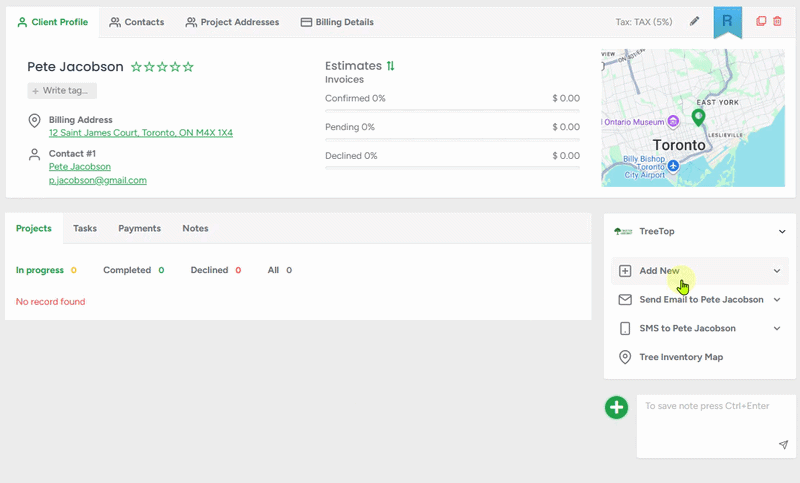
- You can also use the Add New button to go straight to creating an estimate without going through lead creation. This will take you directly to the estimate profile so you can start building it right away.
You can also create an estimate outside of the client profile using the Leads Map:
- Go to Leads → Leads Map, apply the filter to show only leads assigned to you, click the pin icon to select the lead, then click Create Estimate.
Note: Whichever method you choose, you’ll be taken to the same estimate profile screen, where you can build and send an estimate to your client.
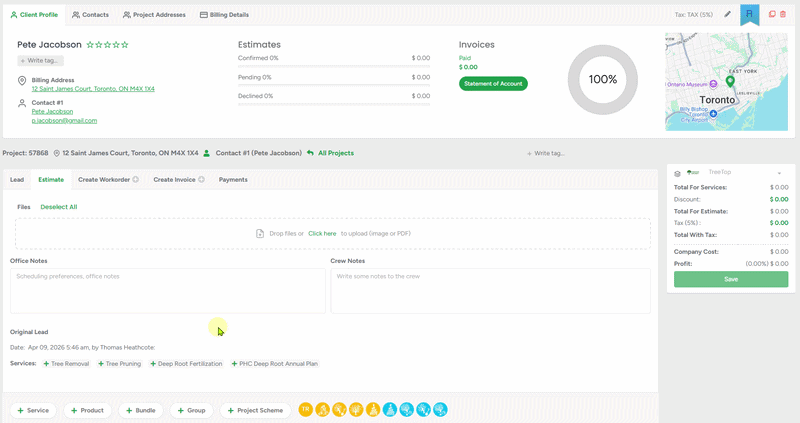
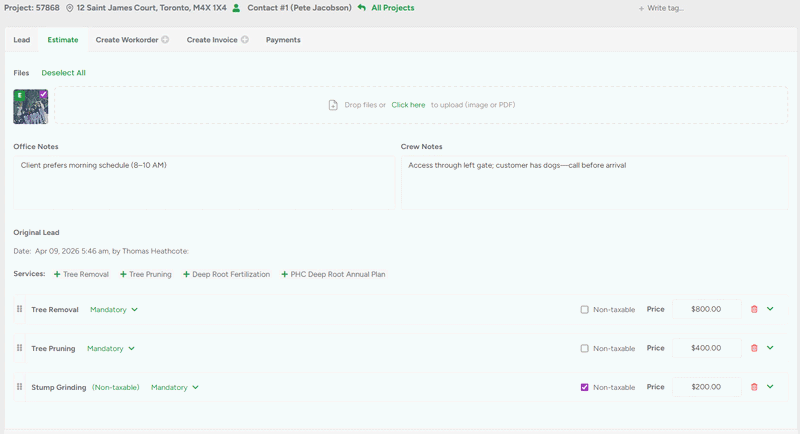
Building an Estimate:
If services, products, bundles, or groups were added during the lead creation stage or within the lead profile, simply clicking them will add them to the estimate.
At the bottom of the estimate profile, you can also use the Service, Product, Bundle, or Group buttons to add items manually—especially if nothing was added during the lead stage or if you skipped the lead stage entirely.
Customizing Service Line Items in the Estimate:
You can set each service line item as Mandatory, Recommended, or Optional. A good example is stump grinding—if the client initially booked tree removal, you can add stump grinding and make the service requirement Recommended. This gives the client the option to include or decline it when confirming the estimate through the estimate portal.
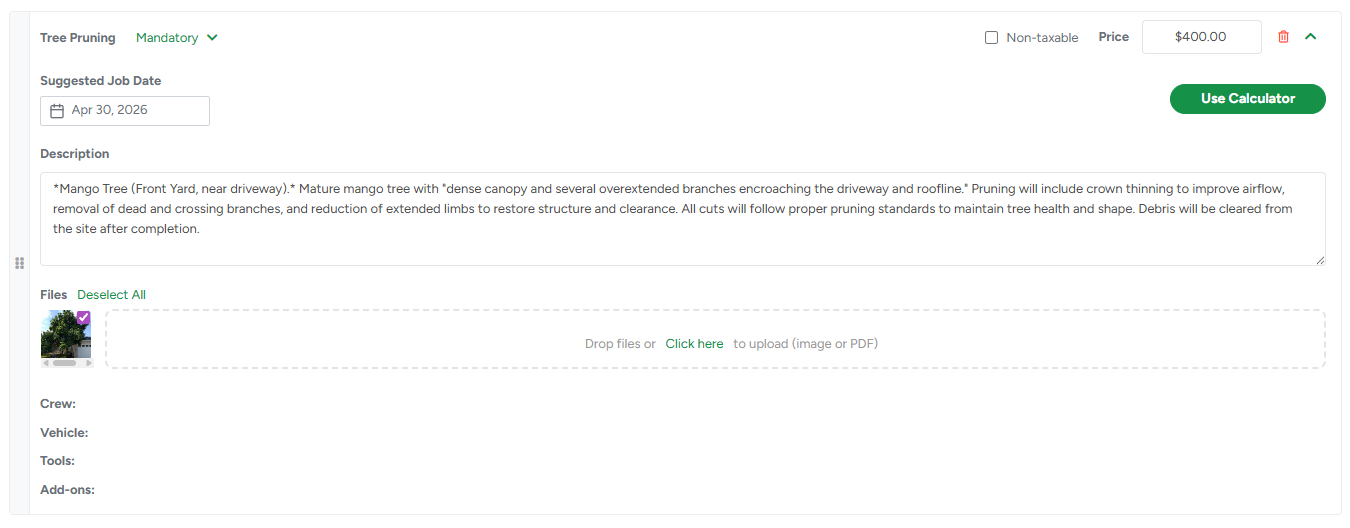
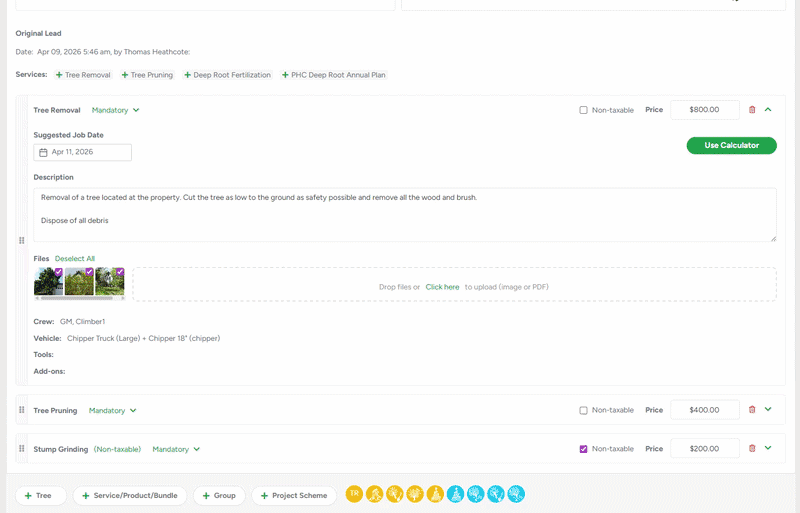
- Suggested Job Date: You can propose a preferred schedule for when the service can be completed. This helps set expectations and gives the client a timeframe to review or approve.
- Description: Use this field to note the condition or status of the tree (or job site). This provides helpful context for both the client and your field crew.
- If you want to make the text bold, please input the preferred text in between star signs ("mango tree" → mango tree)
- If you want to make the text italic, please input the preferred text in between ~ signs, ("~mango tree~" → mango tree)
- If you want to make the text underlined, please input the preferred text in between "_" signs, ("mango tree" → mango tree)
- Files: You can upload up to 20 images per service line item, as well as a PDF, to support the scope of work.
To assign a crew, vehicle, tools, and include add-ons in the estimate, click the Use Calculator button. This expands additional options where you can assign resources and factor in travel time, overhead markup, and expenses. For more details on how to use the calculator, click here.
You can also apply tax to specific service line items and manually enter a price if you choose not to use the calculator. Marking a service as taxable and adding a price will automatically update the total in the Services section on the right side of the page.
Drag the gray six-dot icon to reorder line items—this updates the PDF as well. The revision date on the PDF shows the latest price change for transparency.
Project scheme - Visualizing the location for the work is an optional feature, but it may be a good help for the crew on site. If you're up to it, click the Project Scheme button.
- Mark the location of the work by dragging and dropping the pin on the map, and click Create Screen to add the specifications. You can switch between Map and Satellite views to get the perspective that works best for your planning and on-site needs.
- Double-click on the icon to delete it from the scheme. After you are done with creating the project scheme, click on the Save Scheme button. If you need to move the pin on the map, click on the Edit Map button.
Once the project scheme is added to the estimate, it will be available on the Estimate PDF and customer Portal.
While Project Schemes cannot be edited once added, they can be deleted and re-added directly from the Estimate, just like any other attachment at any time if updates are needed. Hover over the file and click the Delete icon. To prevent accidental deletion, a confirmation message appears before the file is permanently removed.
Before sending the estimate
Once all services, products, bundles, or groups are added, review the estimate and make any final adjustments as needed. You can also include additional details to support your team and the client:
- Add notes for the crew and/or office staff

- Apply a discount and/or adjust the tax amount (you can name the discount to reflect a promotion—this will appear in the client portal and PDF)
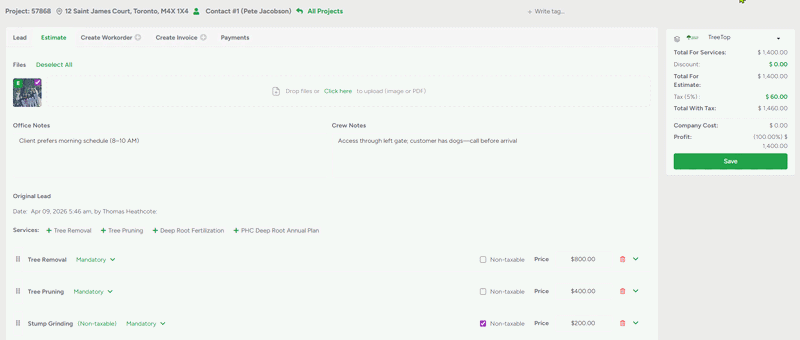
- Save the estimate, then preview it as a PDF before sending.
Auto Tax applies the correct rate based on the address and can be enabled in Company Management (U.S. only). A default client tax is set for new leads, but you can change it per case.
Edit Estimate
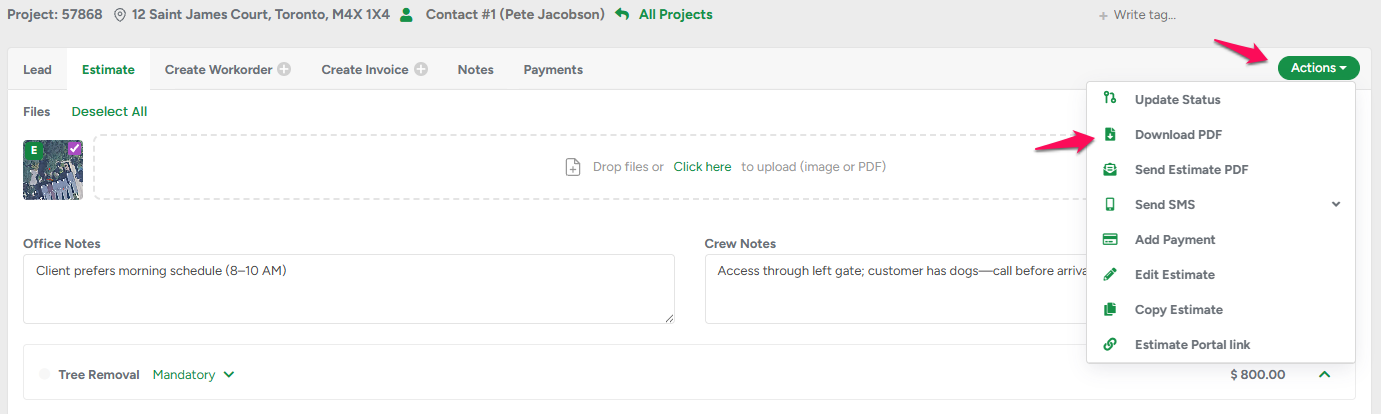
In case you need to update your estimate, please click on the Actions button and select the Edit Estimate option from the dropdown. The Pencil icon on the sidebar has the same function and serves as a shortcut. After editing, the total price for the estimate is going to be adjusted accordingly, and now it's ready to be sent to the client for approval.
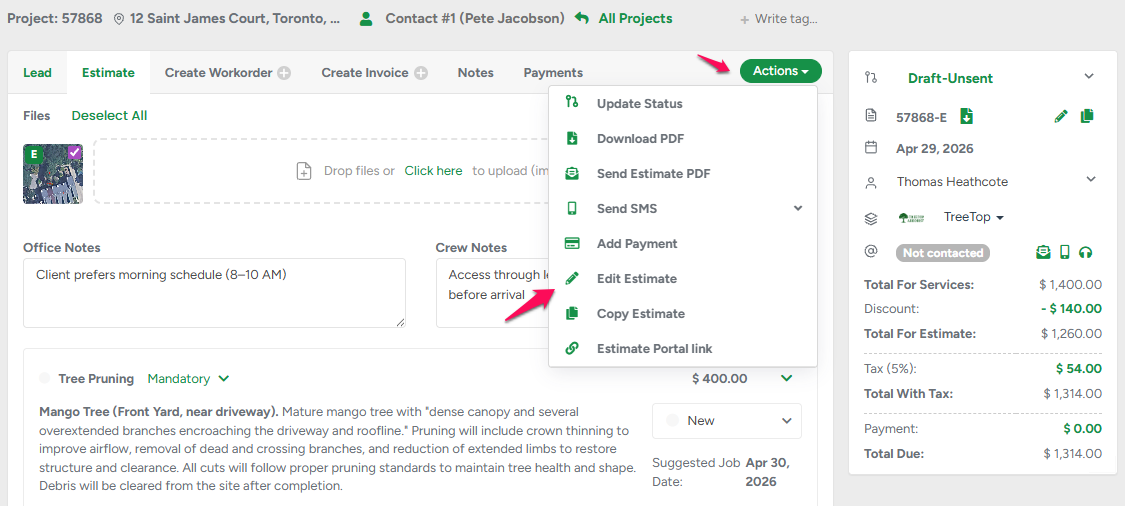
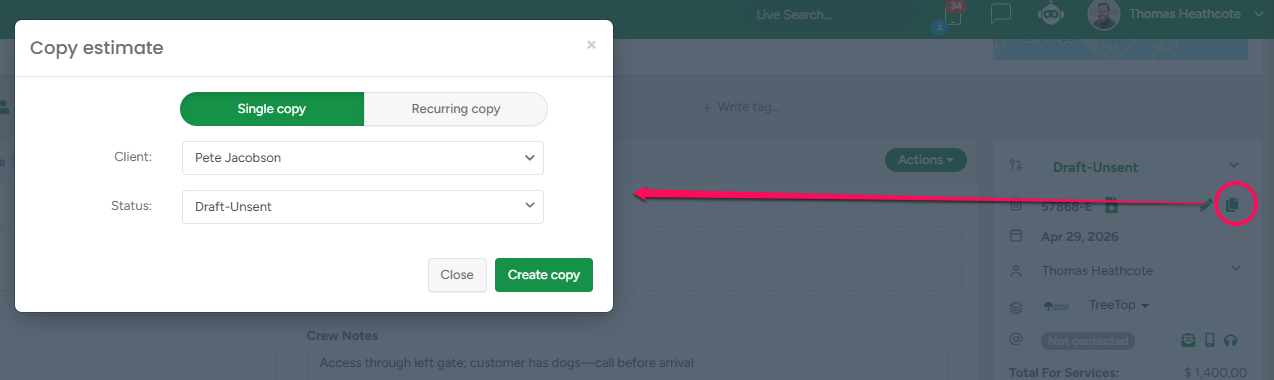
Copy Estimate
You can copy an existing estimate to any client. The Copy estimate button is accessible from the estimate's sidebar panel. The same feature is also applicable to Workorders and Invoices.
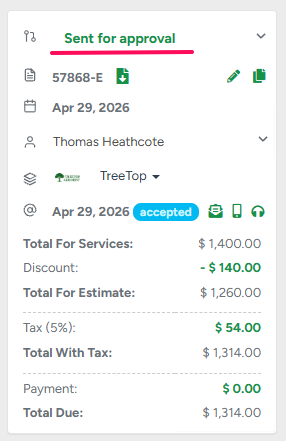
Sending the Estimate to the Client:
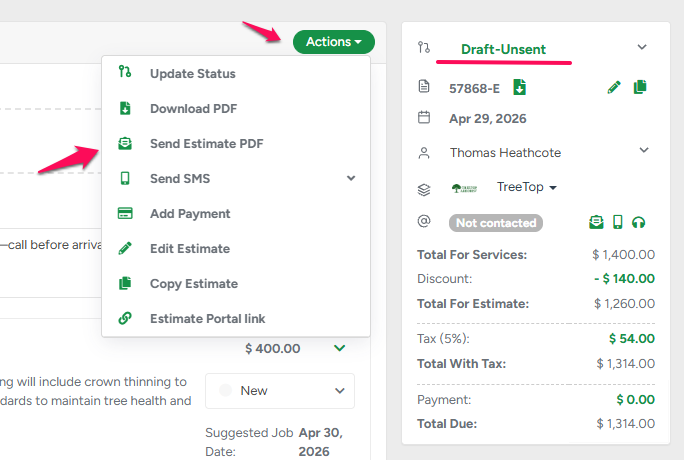
The Actions button appears in the estimate profile once the estimate is saved. Click it and select Send Estimate PDF.
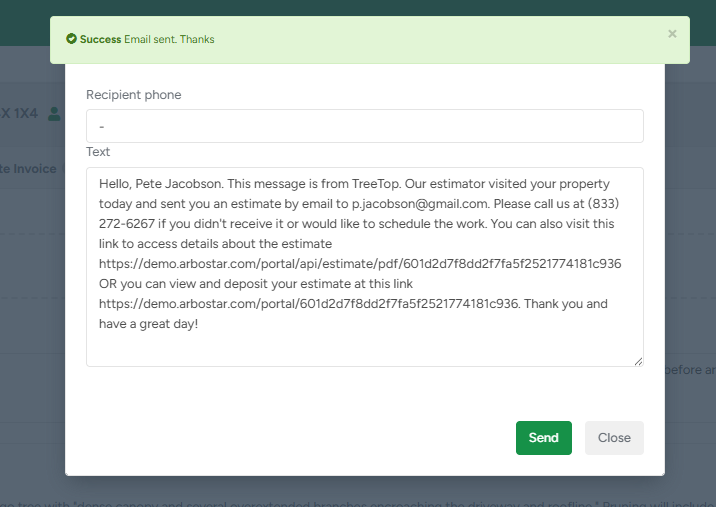
In the email preview pop-up, you can choose to send an SMS by checking the box, and make sure the PDF file option is selected.
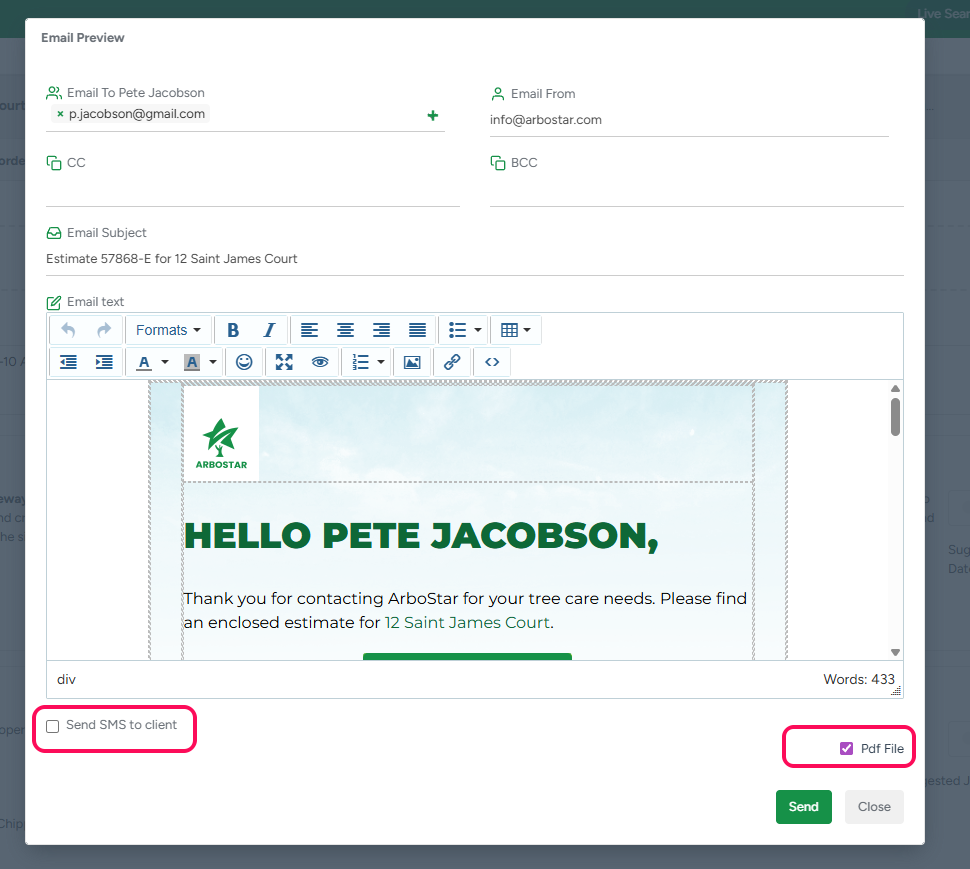
You can edit the new estimate email and SMS templates in the Clients module.
If you choose to send an SMS to the client, a window will appear after the email is sent. If a mobile number is already saved in the client profile, it will auto-fill; otherwise, you’ll be prompted to enter one.
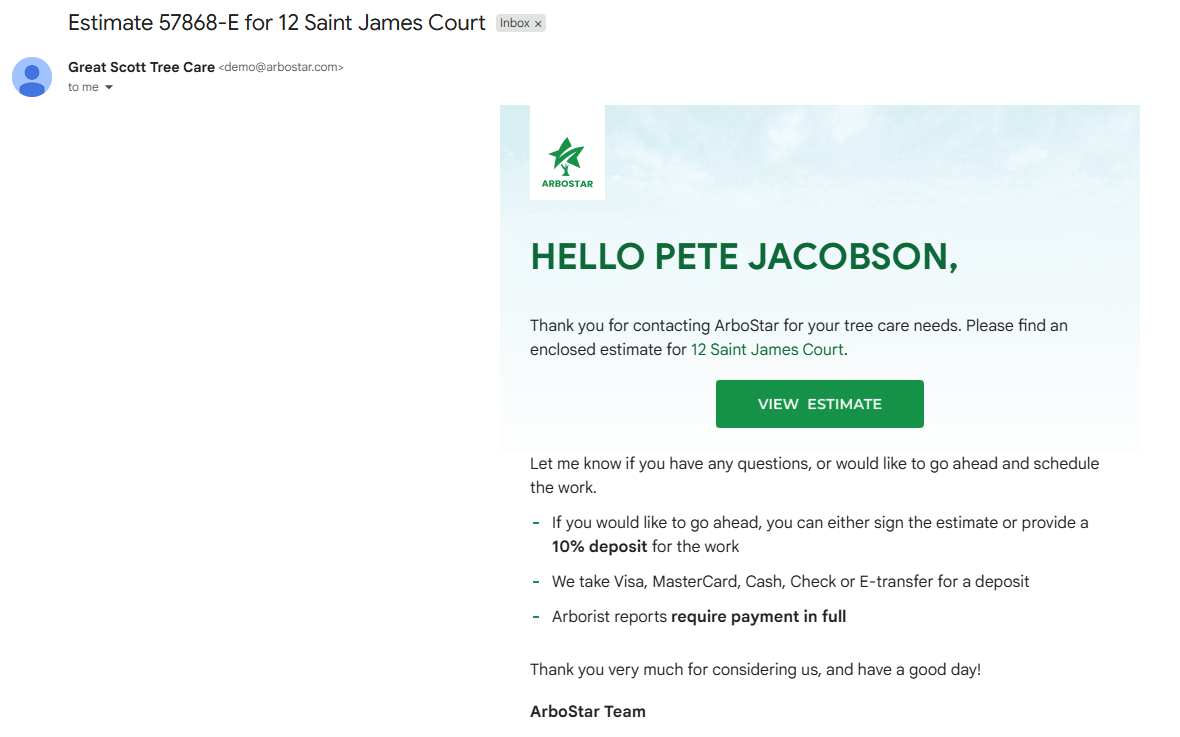
What Your Client Will See in Their Inbox:

Clicking the View Estimate button takes them to the estimate portal, where they can review your proposal and confirm it.
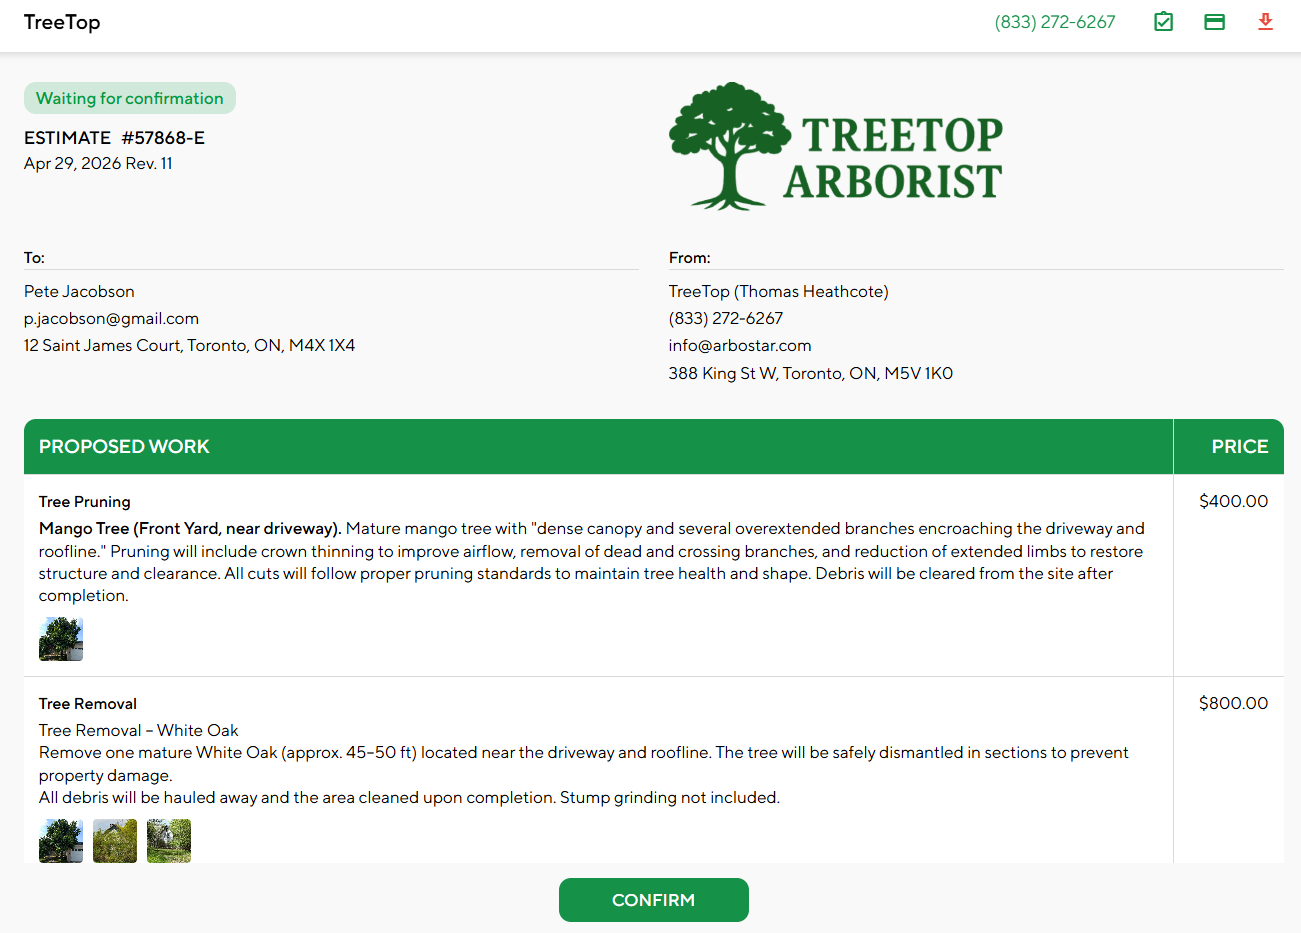
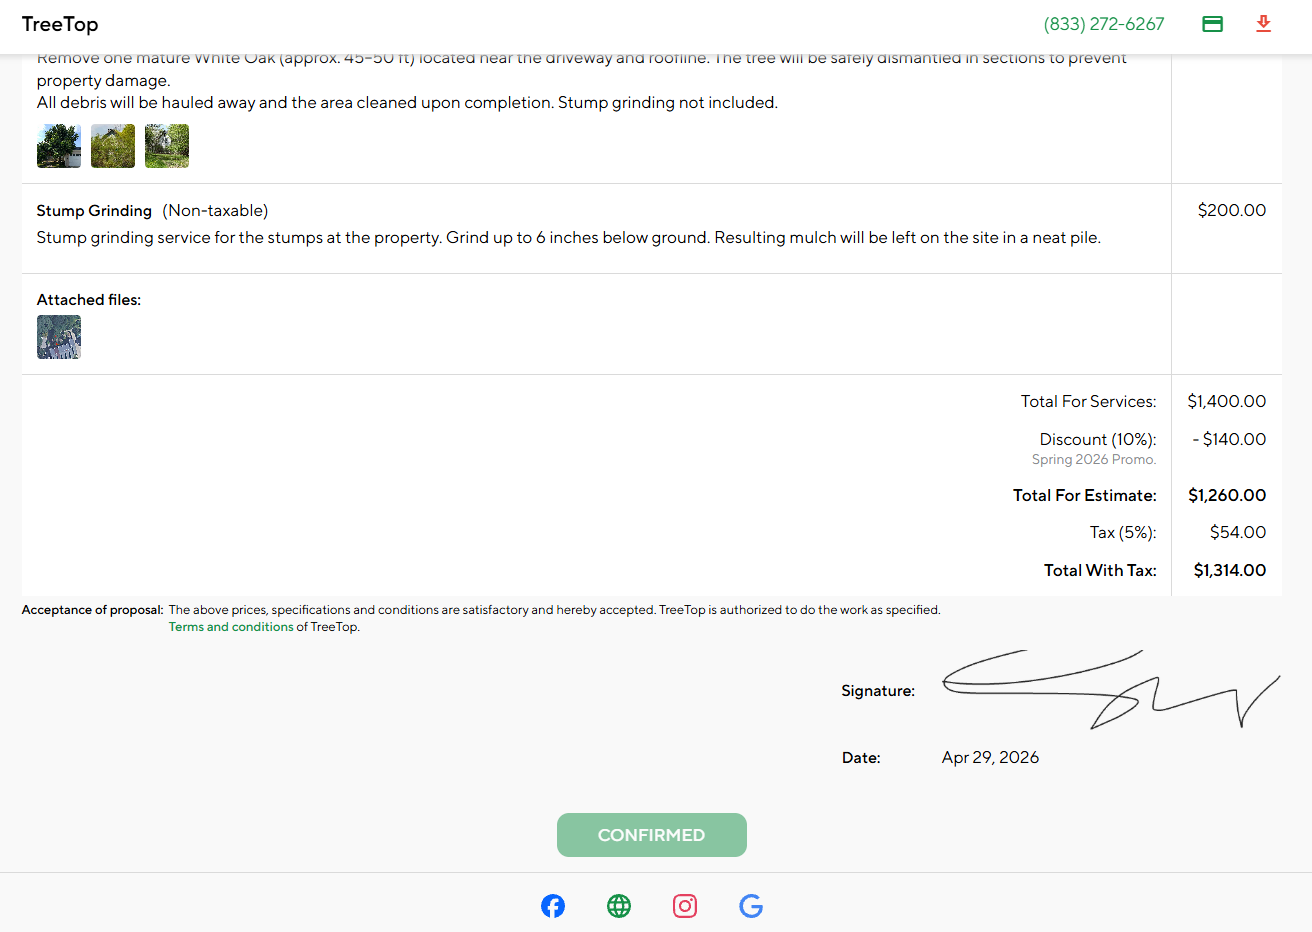
Estimate Portal:
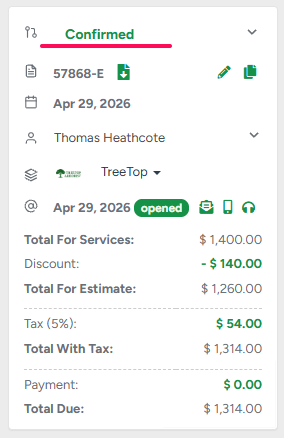
The From section includes your company information and the assigned estimator. Clicking Confirm updates the estimate status from Sent for approval to Confirmed online. It also automatically creates a workorder profile, ready for scheduling.
After Estimate Confirmation:
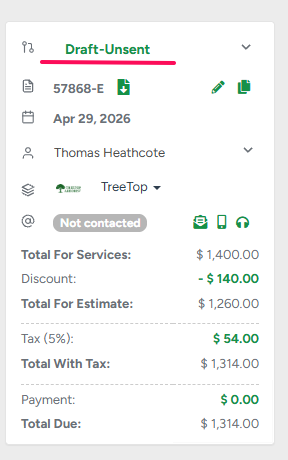
Estimate Statuses: System and Client Triggered
 |  |  |
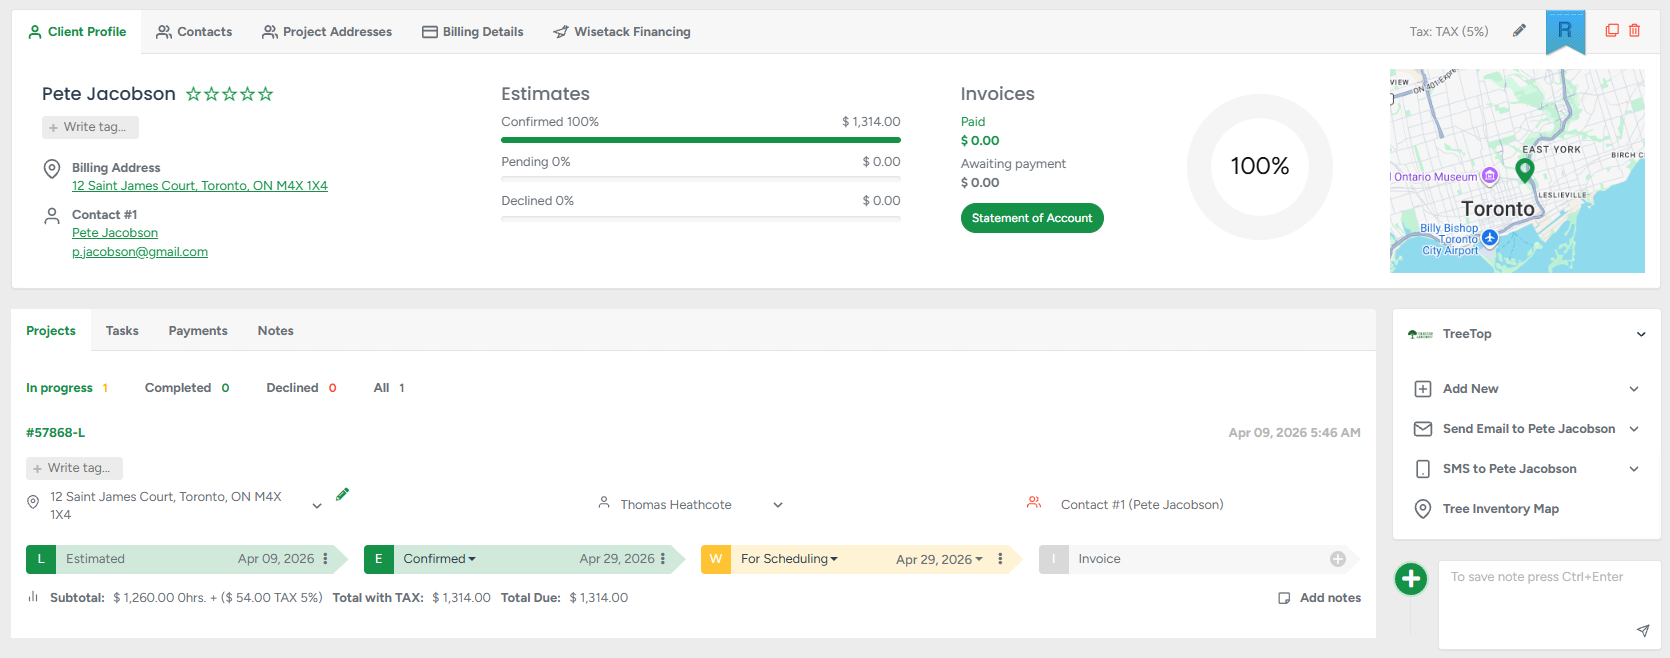
Client Profile After Estimate Confirmation (Work Order Created)