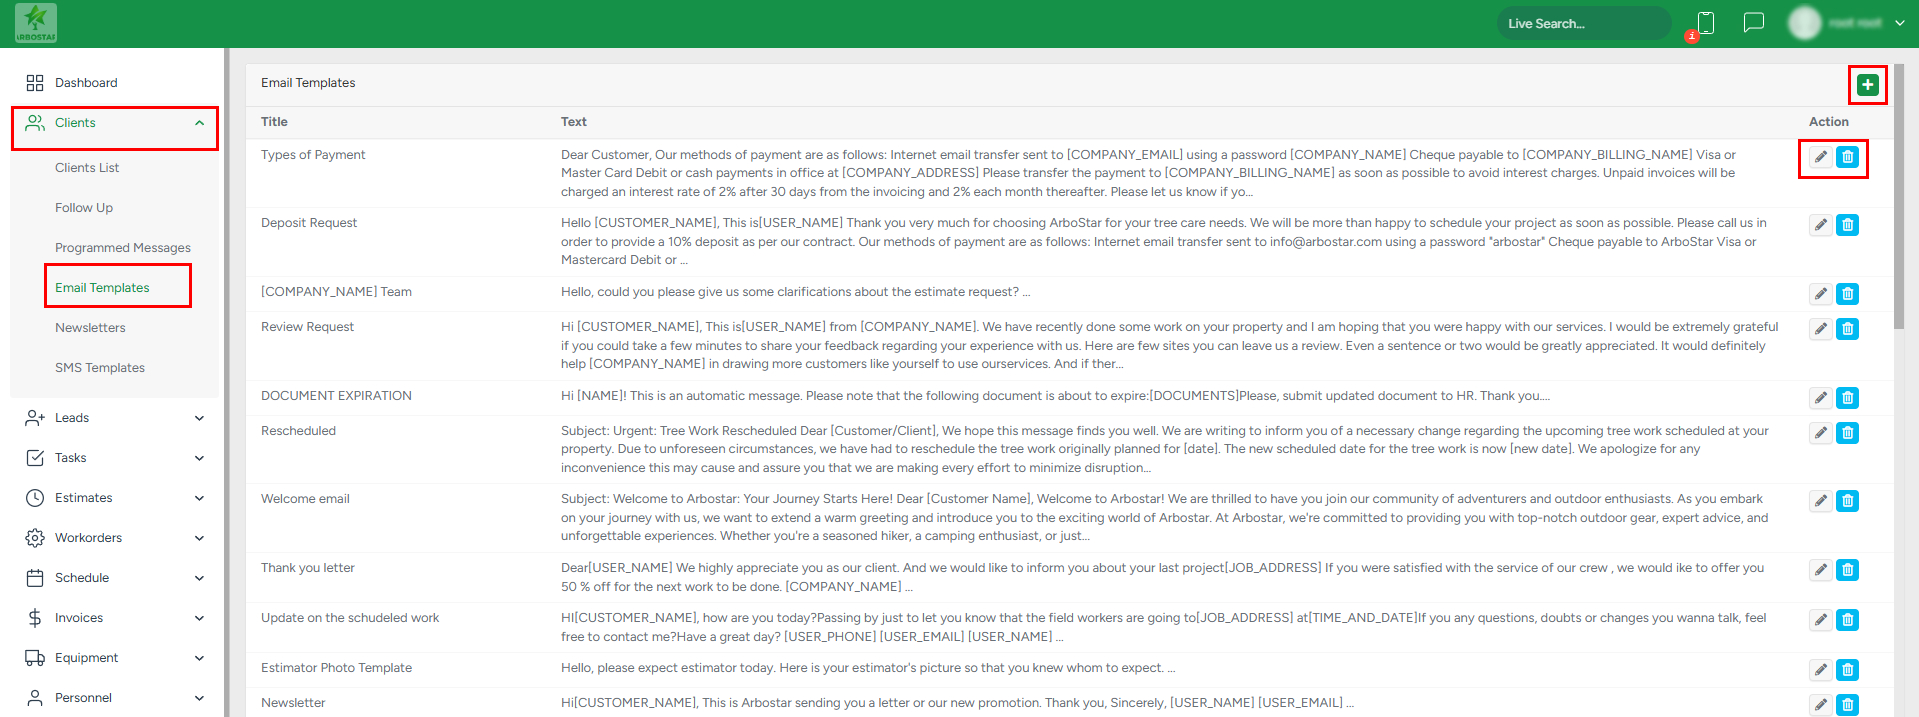
Email templates are designed to streamline and optimize email communication for various work scenarios, ensuring consistency and efficiency.
- To access this feature, go to Clients → Email Templates.

Adding a new template
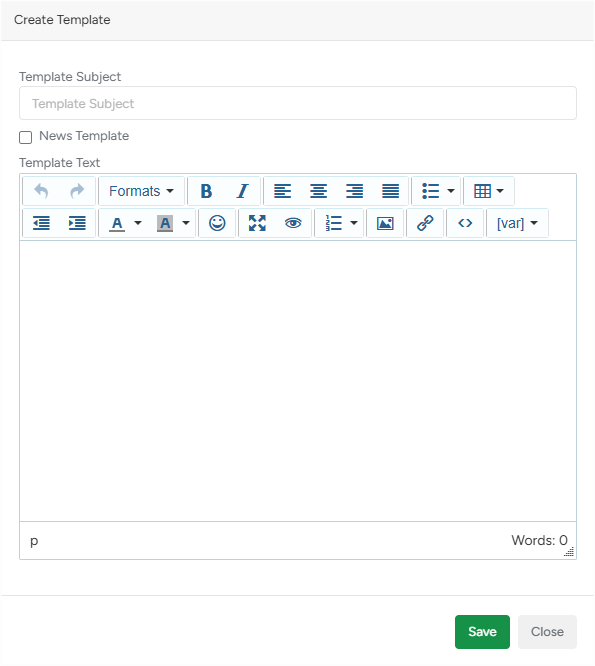
Start: Click the + icon in the top-right corner to open the Add Template pop-up window:

Fill in the Template Details:

- Template Subject: Enter the subject of the email. This will be the title displayed in the email list.
- News Template: Check this box if you want the template to appear as a default option in the Clients → Newsletters submodule.
Basic Editing Controls:
- Undo/Redo: Use the undo and redo buttons to revert or restore the last changes made;

- Formatting: Add headings, inline styles, or blocks. Adjust the alignment to left, center, right, or justify.


Text Styling Options:
- Bold/Italic: Highlight text for emphasis using bold or italic styles.

- Alignment: Set text alignment for left, center, right, or justify.

List and Table Options:
- Bulleted Lists: Insert a bulleted list. You can choose bullet styles such as default, circle, disc, or square.

- Ordered Lists: Add ordered lists with customizable numbering styles (e.g., default, lower Alpha, lower Greek, lower Roman, upper Alpha, upper Roman).

- Tables: Insert tables and modify their properties. You can customize table properties, add extra rows or columns, and adjust cell settings.

Other Customization Tools:
- Indents: Adjust the space between text and the left margin for better structure.

- Colors: Change text and background colors using the color palette.

- Emoticons: Add emojis to make your message more engaging.

- Resize Field: Expand the text input area for easier editing (by dragging the bottom right corner of the text input field).

- Preview: Preview the email to ensure everything looks correct before saving or sending.

- Images: Add images by uploading them directly into the email.

- Hyperlinks: Insert links into the text by highlighting the desired section and clicking the hyperlink button.

- HTML Editor: Open an HTML editor to customize the structure of the email directly.

- Variables: Use dynamic placeholders (e.g., client name, service details) by selecting variables from the [var] dropdown.

More detailed information on variables can be found in this Help Center article.
Save the Template: After finalizing the email content, click Save to store the template.
Managing Existing Templates
Editing: To edit an existing template, click the pencil icon next to the template name. This will open the editing interface where you can adjust the subject, content, or any other details.
Deleting: To delete a template, click the bin icon. Note that only custom templates can be deleted. Default system templates cannot be removed.
Custom Templates: All user-created templates appear on a white background. These templates are fully editable and deletable.
Default Templates: System-generated templates are shown on a gray background. These templates cannot be removed, ensuring core functionality remains intact.

Email templates offer a flexible and efficient way to standardize communication. By utilizing the advanced formatting and customization options, you can create professional, tailored messages for any scenario.


