Tasks are essentially office staff and estimators' appointments. Intuitive and easy to use, you can create and assign tasks to your crew members in just a few clicks.
The feature offers a flexible scheduling interface, allowing you to view available time slots and book appointments based on availability.
Create a task
There are several ways to create tasks on the WEB version of the system:
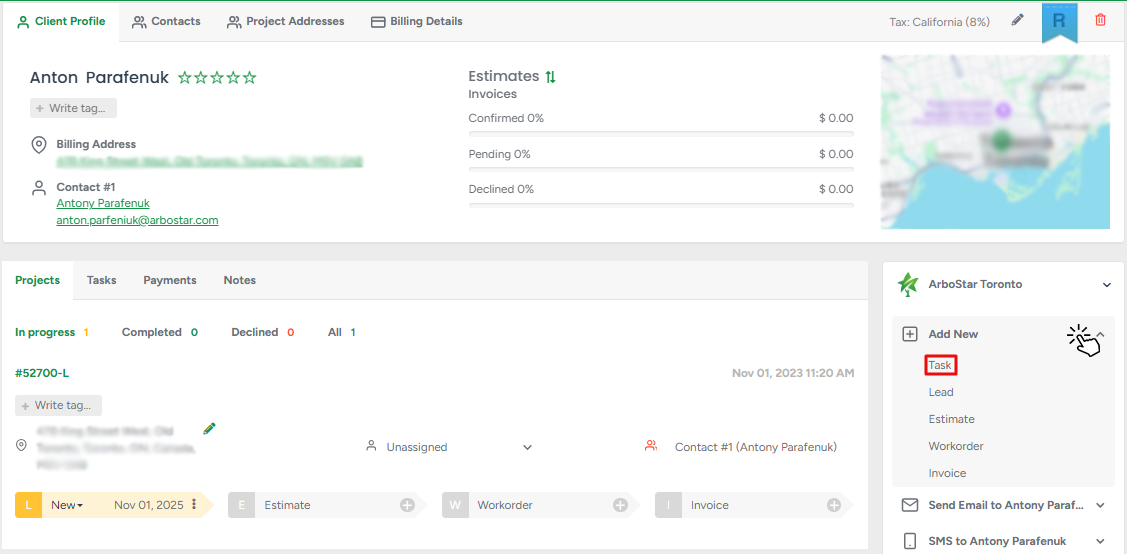
- Client-related tasks can be created individually for each client from their Client Profile. To create a task, click Add New → Task.
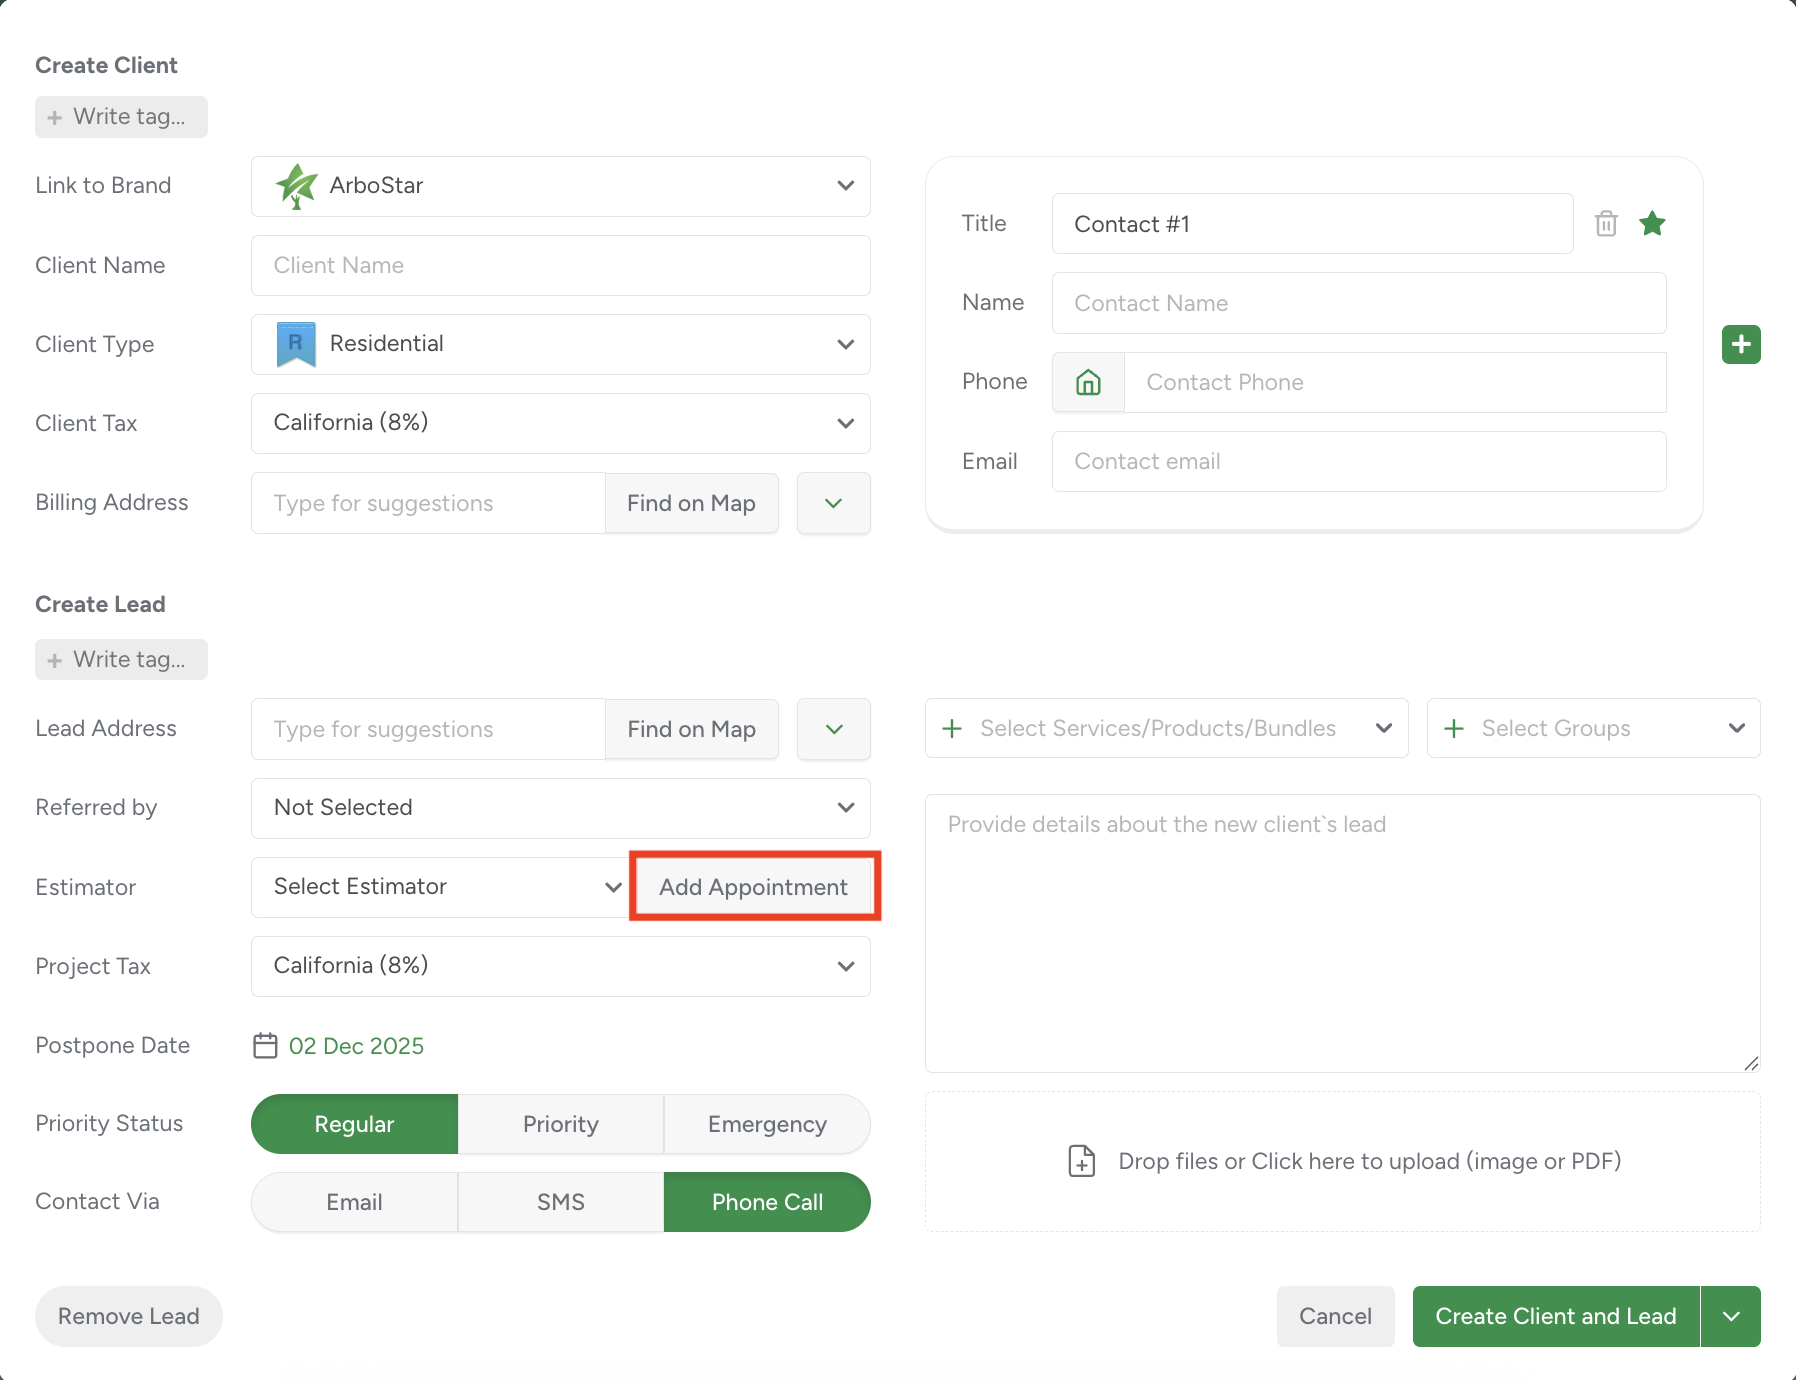
- You can also create a new task during the new client/lead creation process by clicking the Add Appointment button.
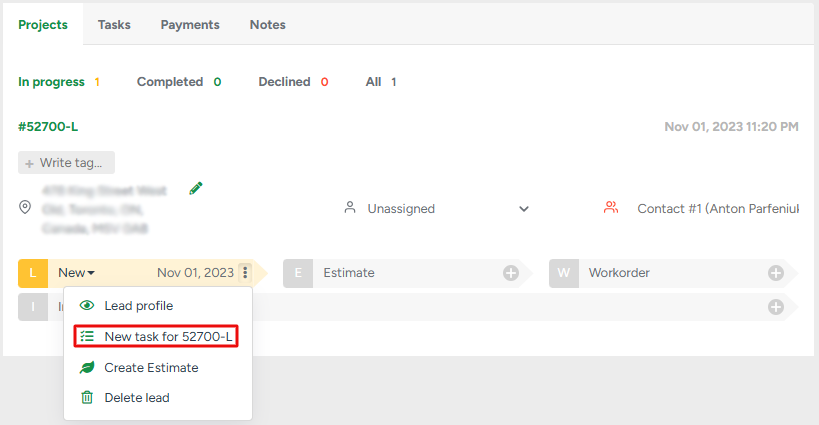
If you want to add a task to an already created project, please click on the lead's quick Options button and choose the create New task for the lead.
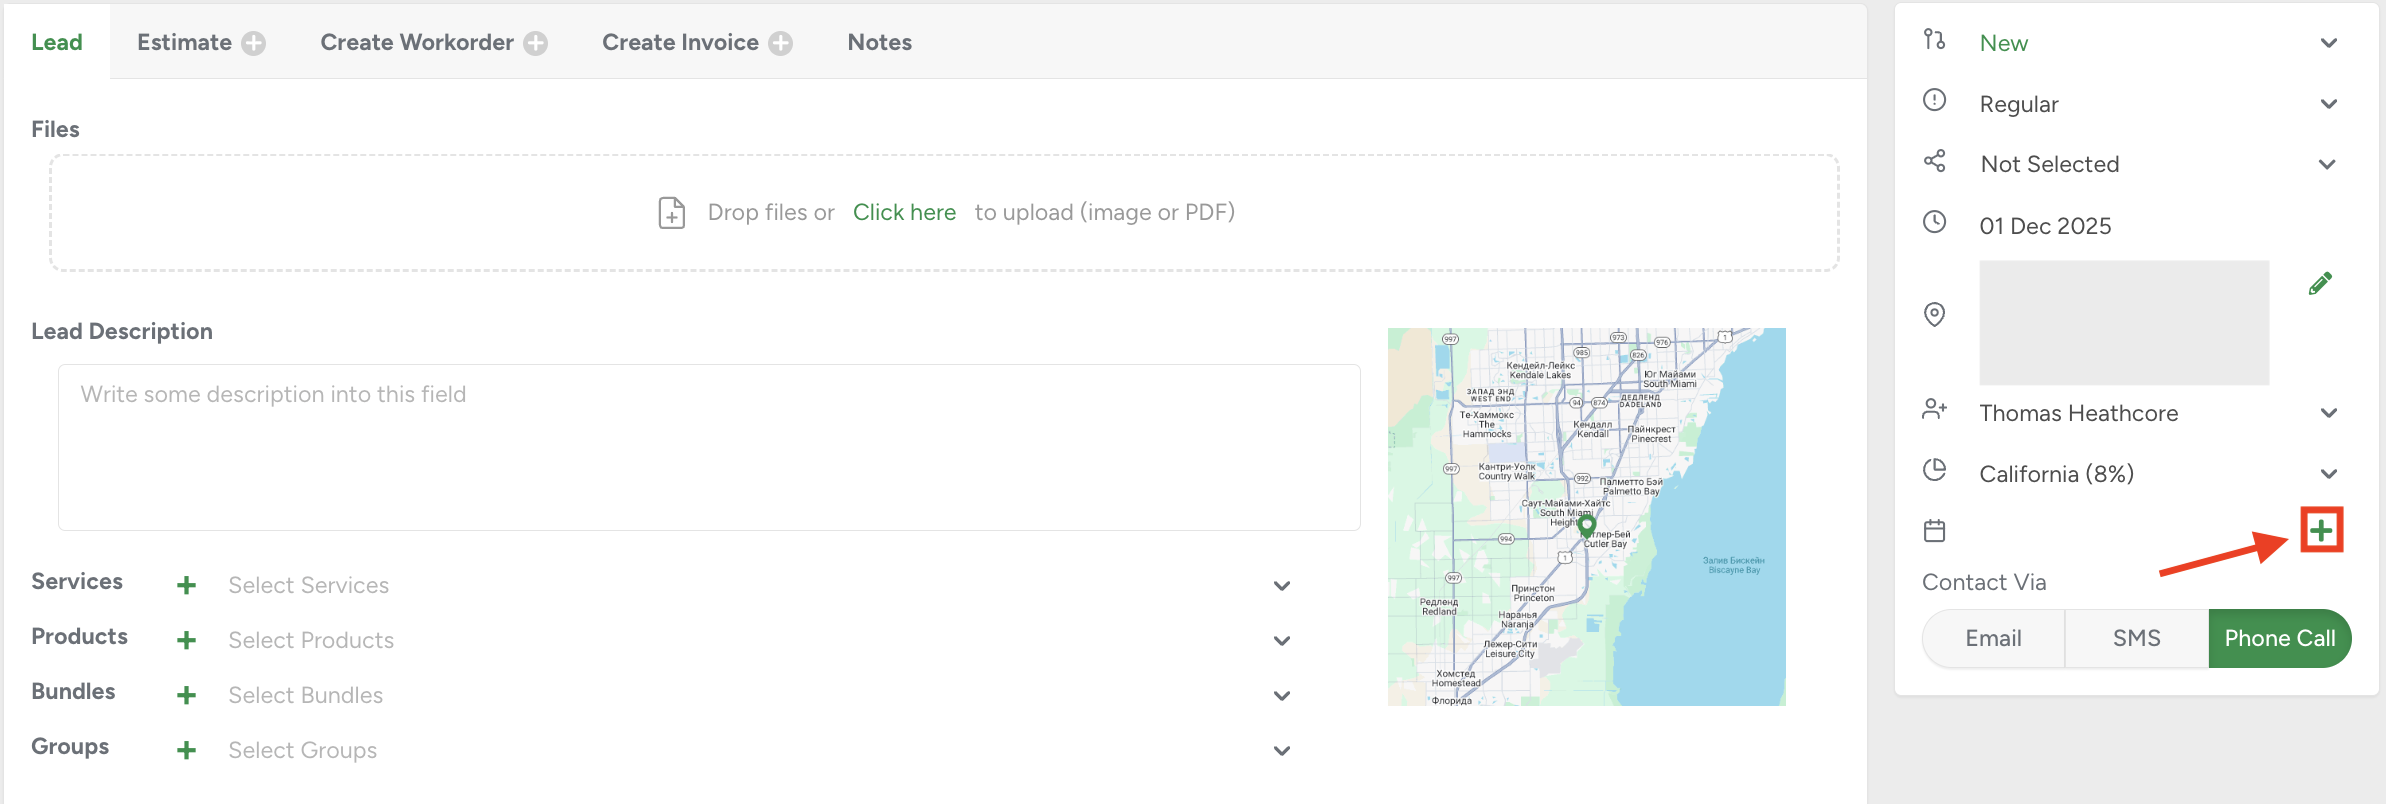
- Alternatively, you can schedule an appointment from the lead's profile itself by pressing the + button.
Schedule Appointment Window
After clicking on the Schedule Appointment or Create Task button the new modal window will appear, helping to set an appointment with the client.
The order in which estimators appear for the day shows their availability and distance from the client. The first estimator from the list would be the best option to choose.
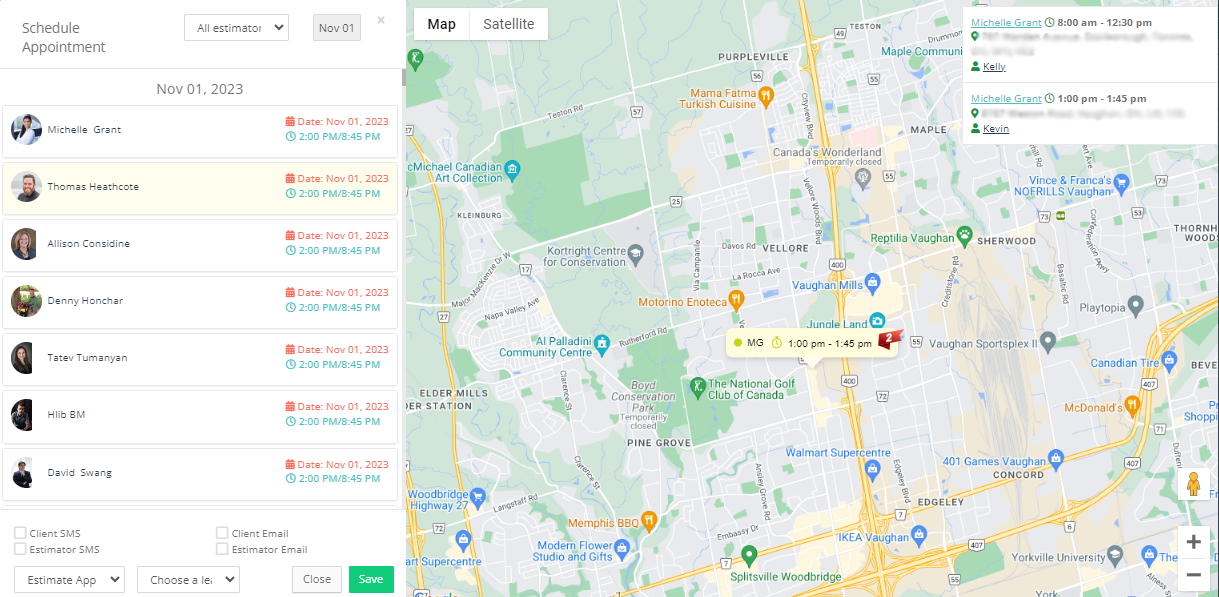
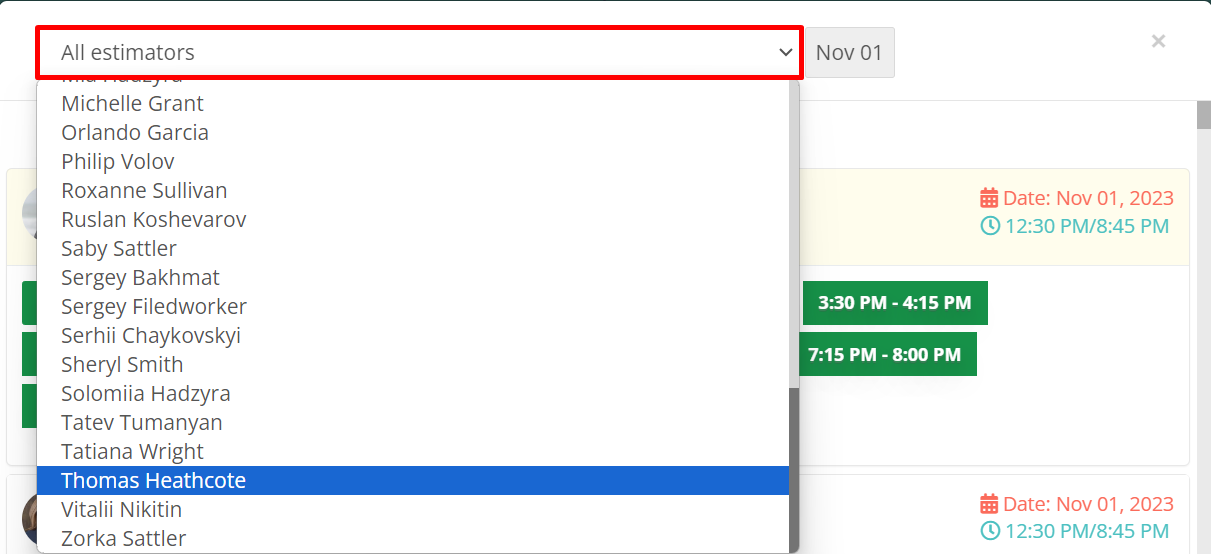
- To access the required estimator quickly, you can select them from the filter in the top left corner of the page.
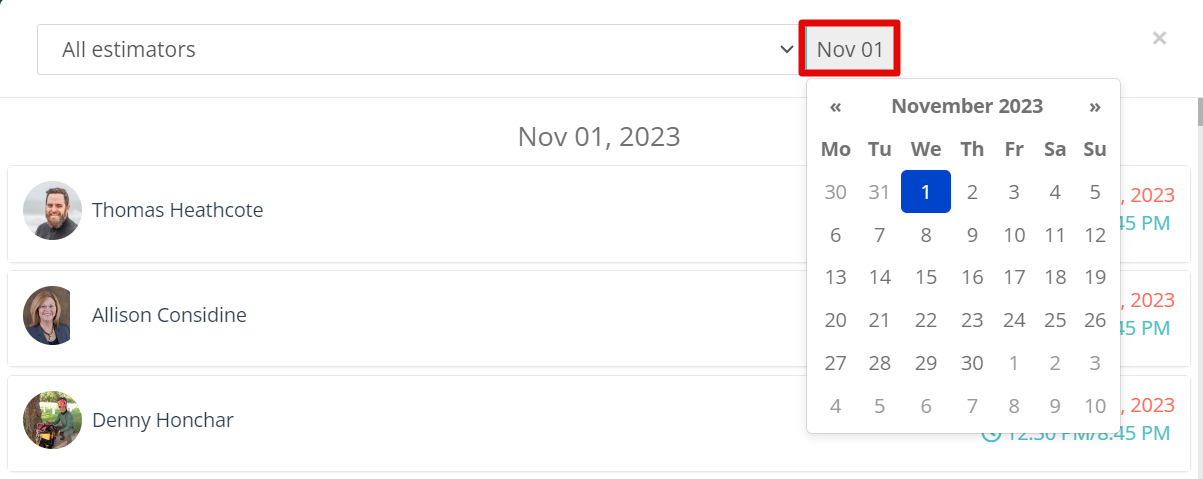
- If you need to schedule an appointment for another day, please choose the required date from the calendar.
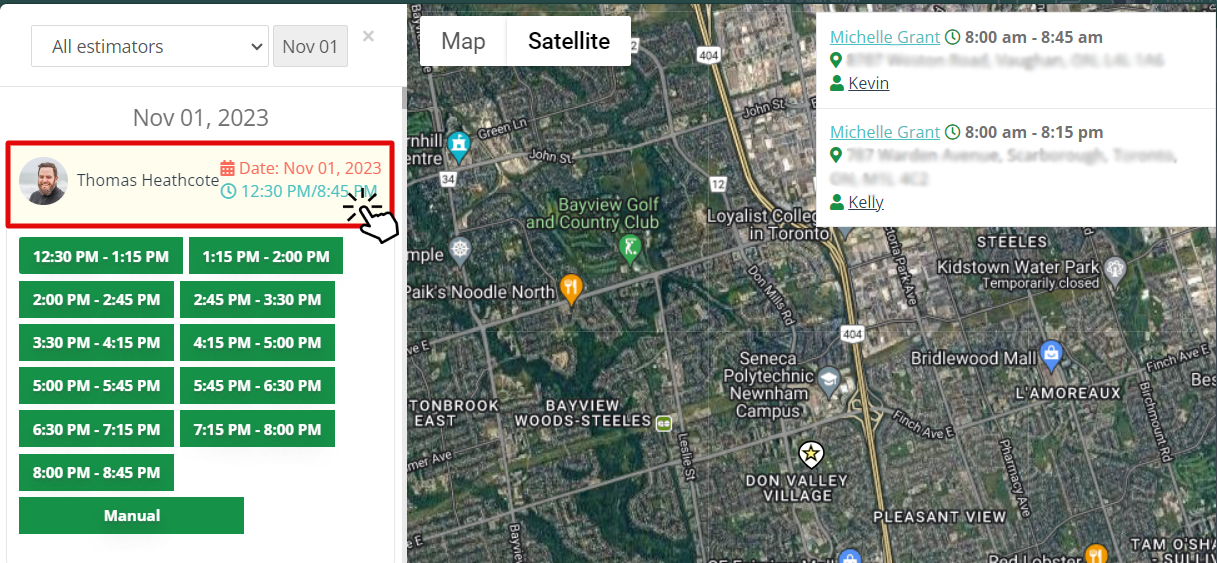
- Once the estimator is chosen, please click on their name to set the time for this meeting. You can choose among available time blocks or set the time for an appointment manually.
- Under the list of estimators, there are 4 selectors that you can use to notify the client and the estimator about this event.

- Using drop-down menus, you can
1. Set the type of the appointment.
2. Attach a task to an already existing lead.
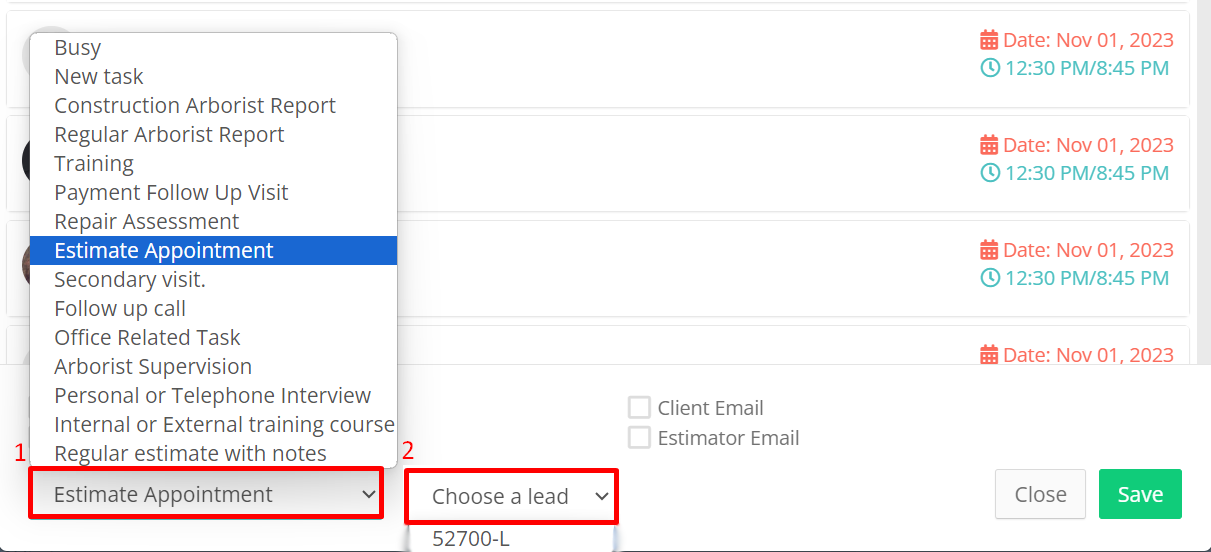
Please be advise that tasks created from the Client Profile won't be attached to any lead.
- In the top right corner of the window, you can see the list of upcoming tasks and their details such as estimator names, task start and end time, task address, and client's name. If you click on the task, the system will pinpoint the location of the task on the map.

Please note, the client's name is clicable and it will redirect you straignt to the client's profile.
- On the map, pins display the task summary with the estimator's initials, appointment time, and task number.

Once everything is set, click on the Save button.
The tasks created on the client profile are available in the Tasks and Leads / Task Map sub-modules. It it also is going to be presented in the Office Schedule.
Tasks on the Client Profile
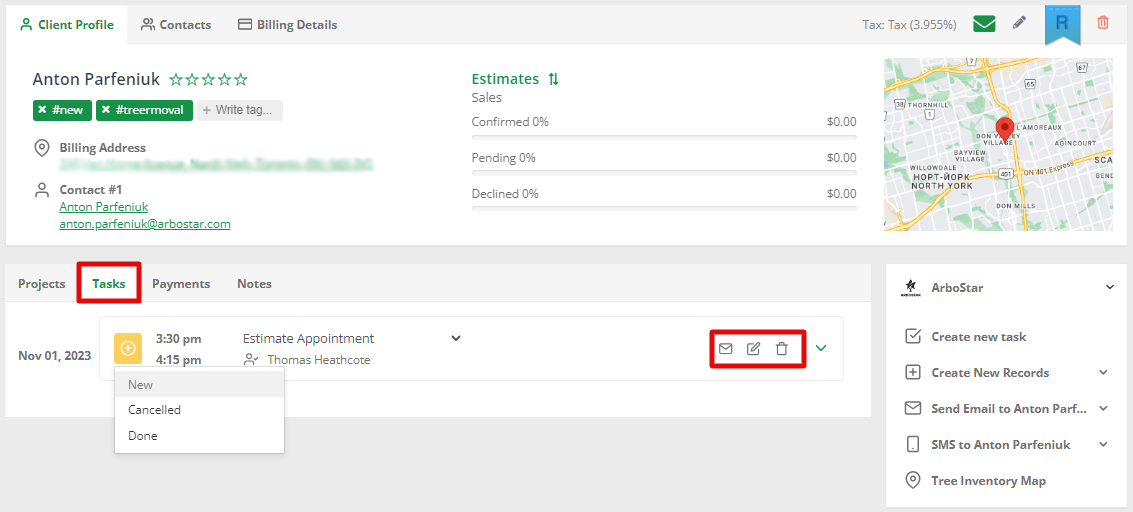
All tasks connected to a client are available on their Client Profile in the Tasks section.
- To change the task's status, please click the + button
- To send appointment reminders by email or SMS, click the Envelope button.
- To view and edit the task, click the Pencil button.
- To delete the task, click the Bin button.
Task Behaviour Rules
1. Tasks when Lead status is set to Declined(No Go)
When a Lead is changed to Declined, all related Tasks with the status New are automatically updated to Cancelled.
While the Lead remains Declined, all status-change actions for those tasks are disabled.
If a status-change attempt is made, a warning modal appears:
You cannot change the task status assigned to the cancelled lead. Change the status of the 'Lead' to continue.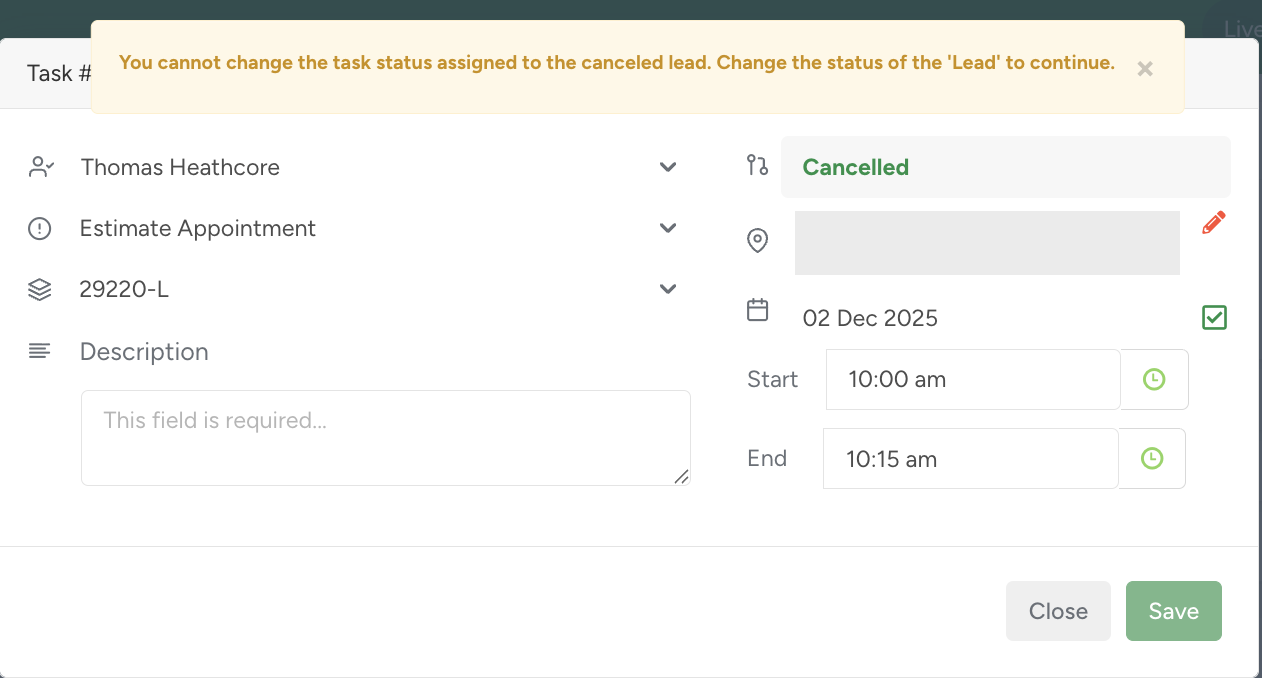
If the Lead is switched back to an active status, the Tasks become unlocked and can be updated manually again.
If the Lead status changes from Declined to any other status, all Tasks that were previously set to Cancelled remain Cancelled. No automatic status updates occur.
2. Tasks when Lead is Completed
If the user changes the Lead status to Estimated, all related Tasks with the status New are automatically updated to Done.
After this automatic change, the Task status can be updated manually.
Automatic status updates occur only if:
The Task is linked to the same Lead
The Task and Lead are assigned to the same user
In all other situations, the Task status must be changed manually.
3. Estimator assignment when creating or reassigning a Task
If an Estimate already exists for a Lead, creating a new Task or reassigning it to another estimator does not change the estimator assigned to the Lead.
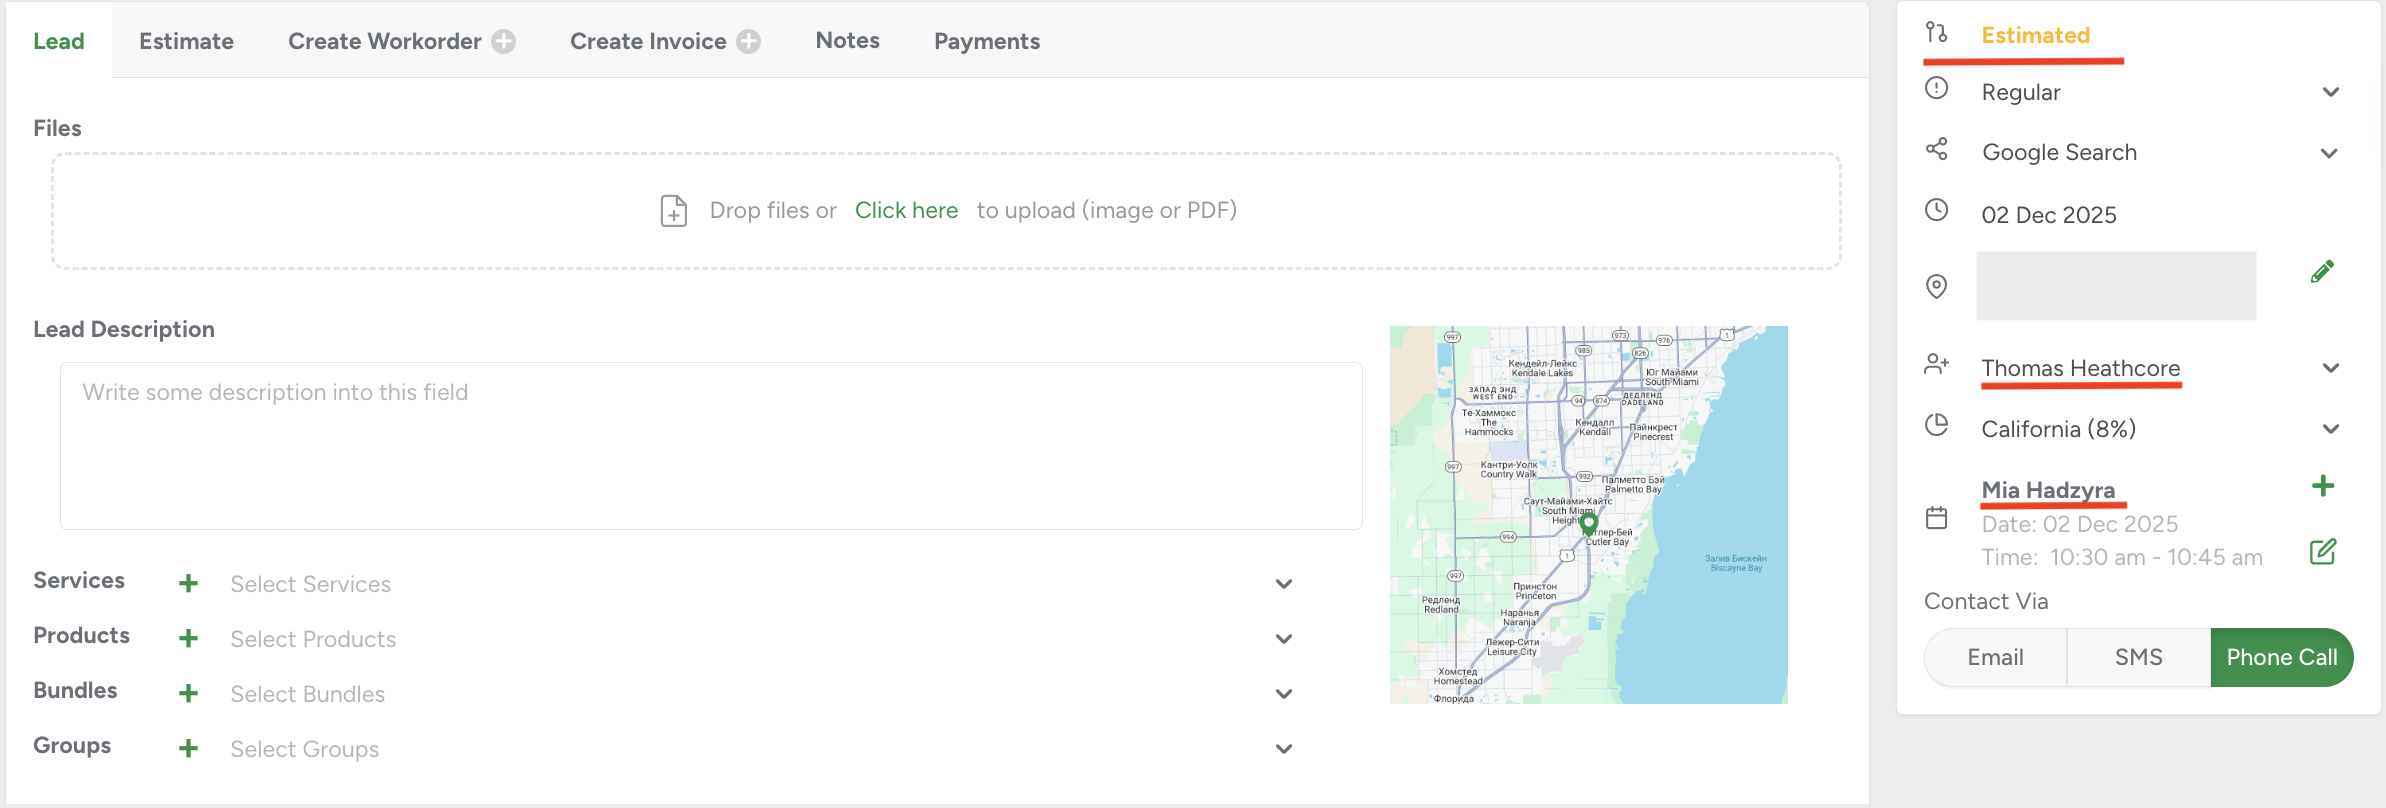
If the Lead does not have an Estimate yet, and a Task is created or reassigned to another estimator, the Lead’s estimator is updated to that user.
If the Lead’s estimator is Unassigned, and a Task is created or reassigned with an assigned estimator, the Lead automatically receives that estimator.
This logic applies to all Task types and statuses.
