The "Tree Inventory" allows you to mark and track trees on the map and use them for estimation.
The feature is available both on the web and the app.
You can create tree inventory for all the clients.
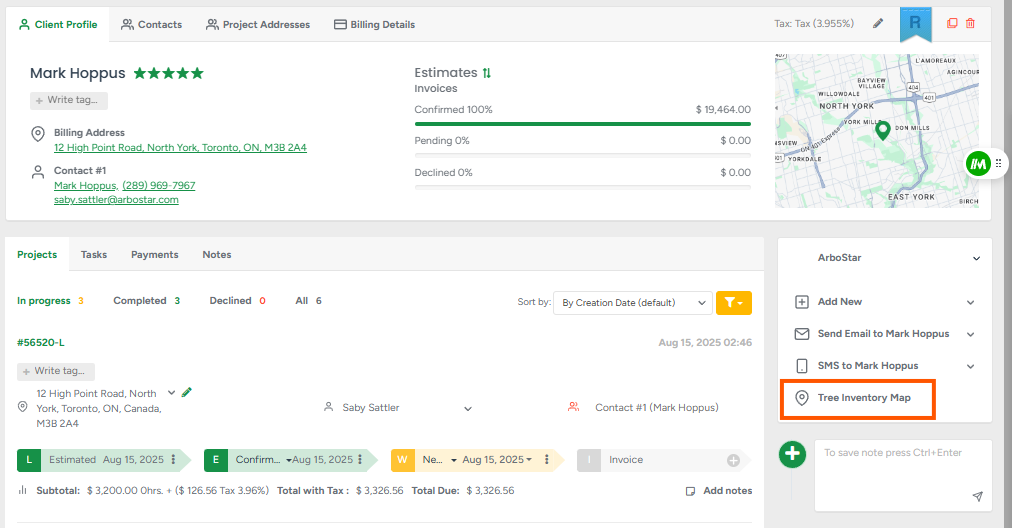
To access the "Tree Inventory" page, navigate to the required client's profile and click on the "Tree Inventory Map" button from the right side menu.
Create Tree Inventory
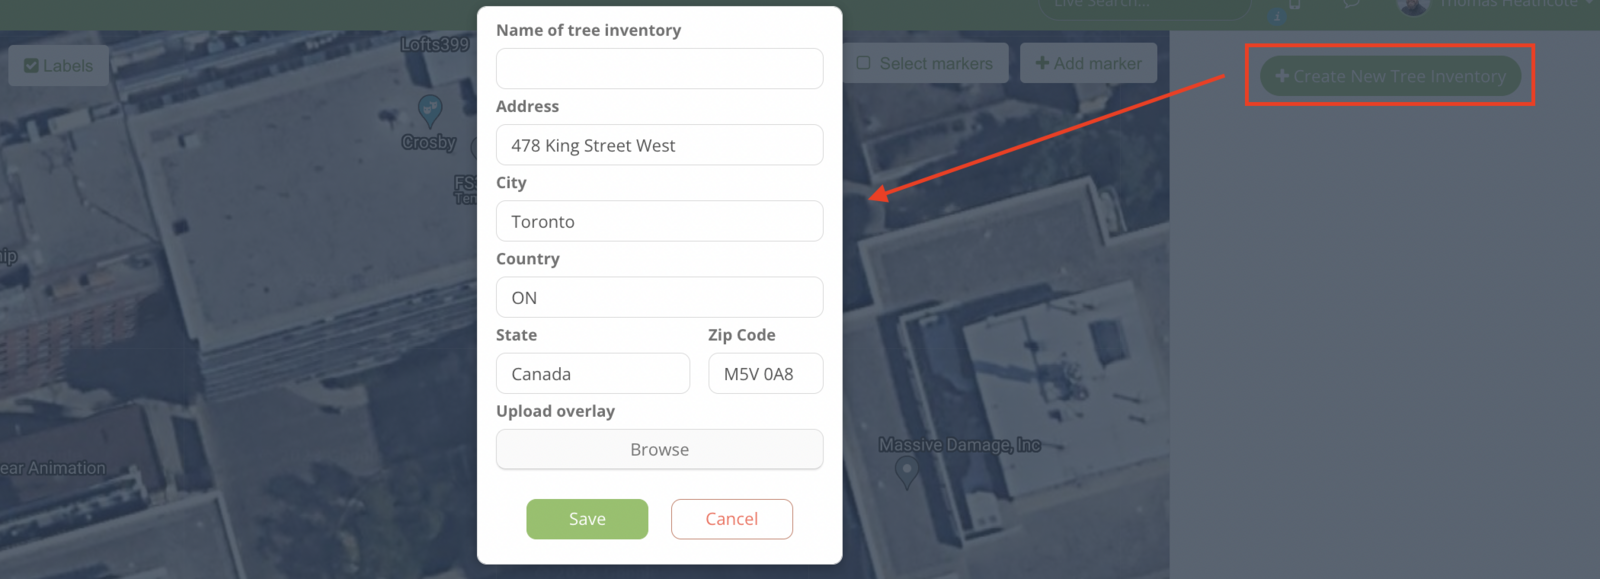
To start the tree inventory process, click on the "Create New Tree Inventory" button.
- In the pop-up window fill in the name for the inventory.
- The address is added automatically, but can be edited.
- You can also upload a picture to use instead of a map. For that click on the “Upload Overlay” and add the picture you would like to create pins on.
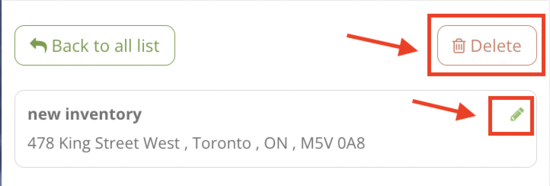
Note that after creating a tree inventory, you can edit, copy or delete it.
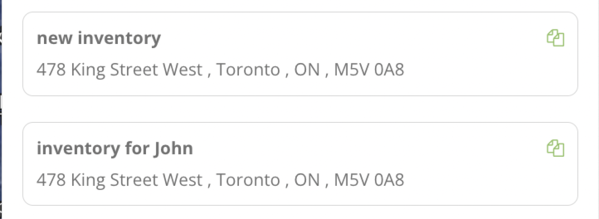
To copy, click on the "Copy" icon.

- To edit, from the tree inventory's section click on the "Pencil" icon.
- To delete, from the tree inventory's section click on the "Delete" icon.
You can create as many tree inventories for a client as needed.
If you have already created a tree inventory or several tree inventories, click on the required one from the list to access it.
Adding Markers to the Inventory
After creating a new tree inventory or accessing an already existing one from the list, you can go ahead and start adding markers to the map.
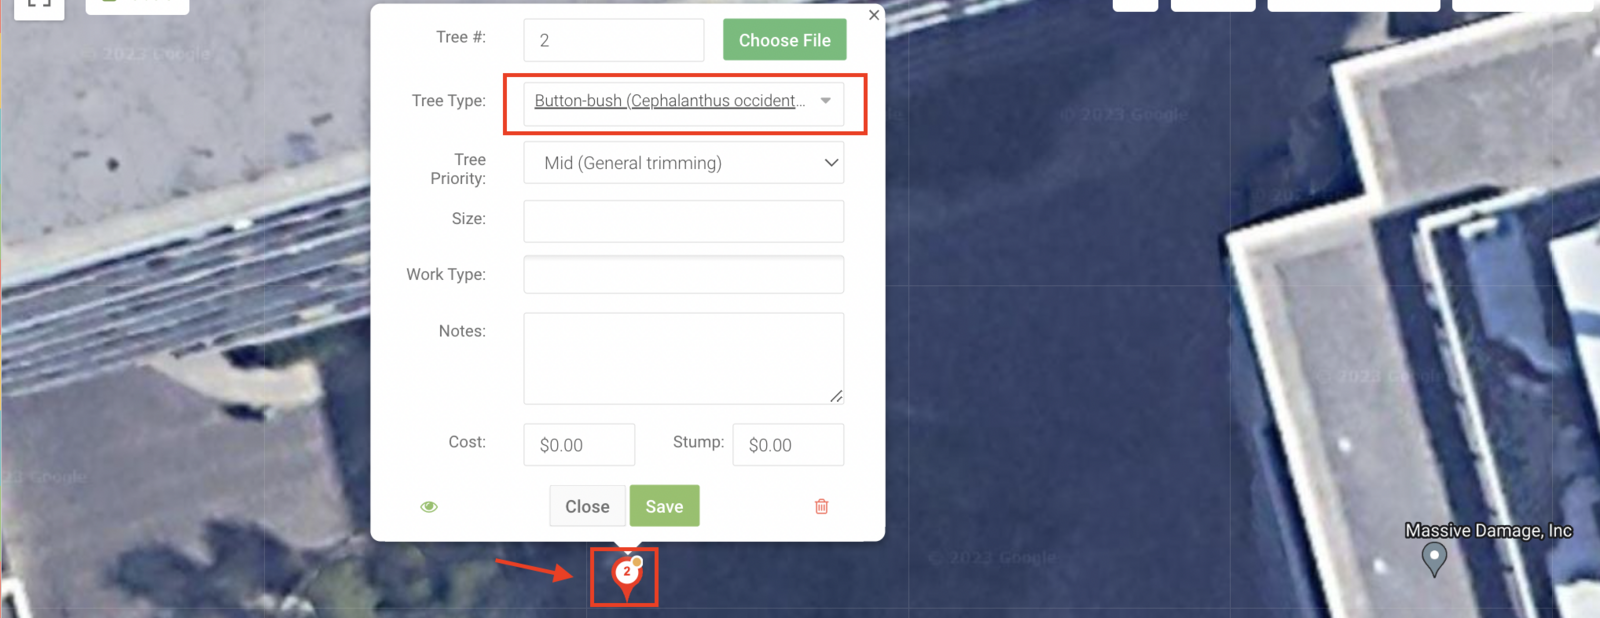
For that either click on the "Add Marker" icon or double-tap on the map. In the pop-up window fill in and choose the required details for the marker.
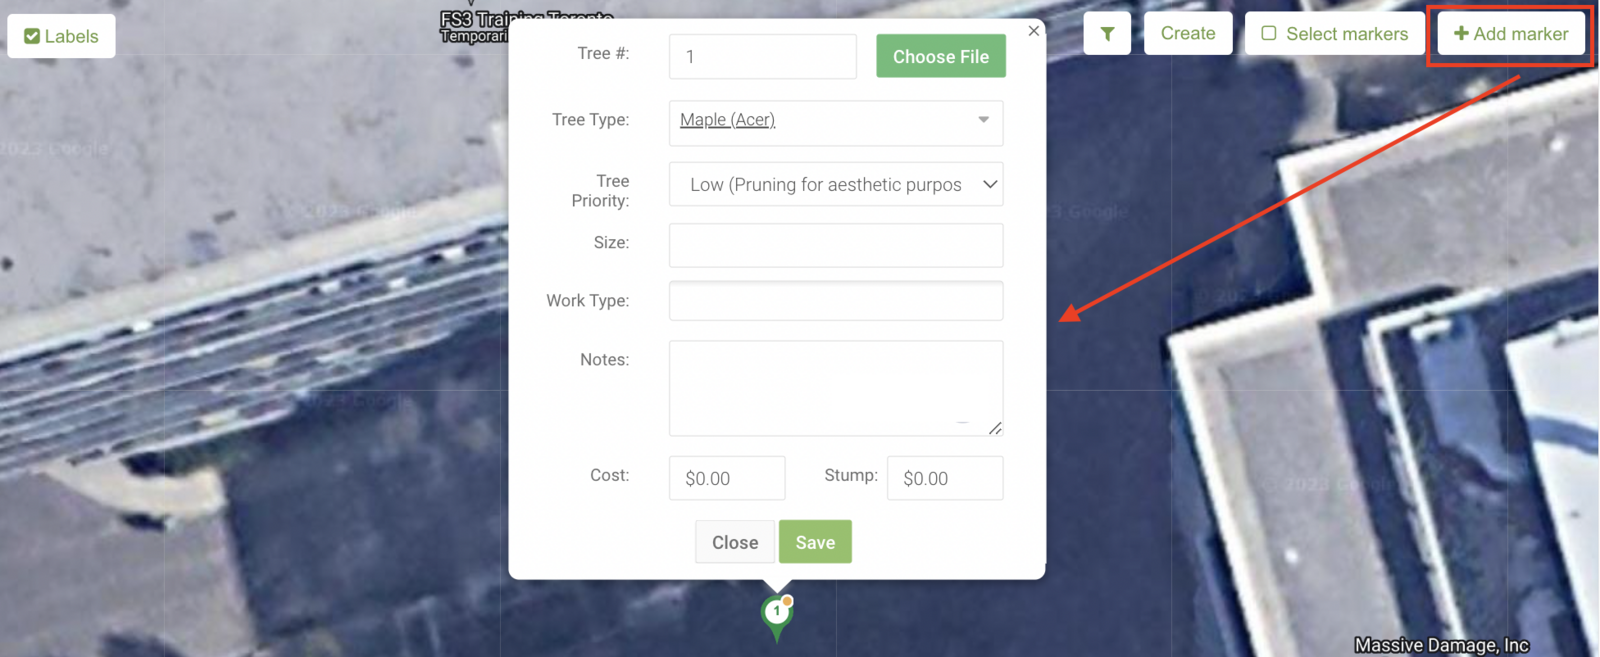
Note that the marker can be moved around on the map to be placed in the required location.
After the markers are created, they are available in the right side of the screen.
- If you click on the required one, its information will open in a pop-up window, where you can edit it.
- To delete, click on the 'Bin" icon.
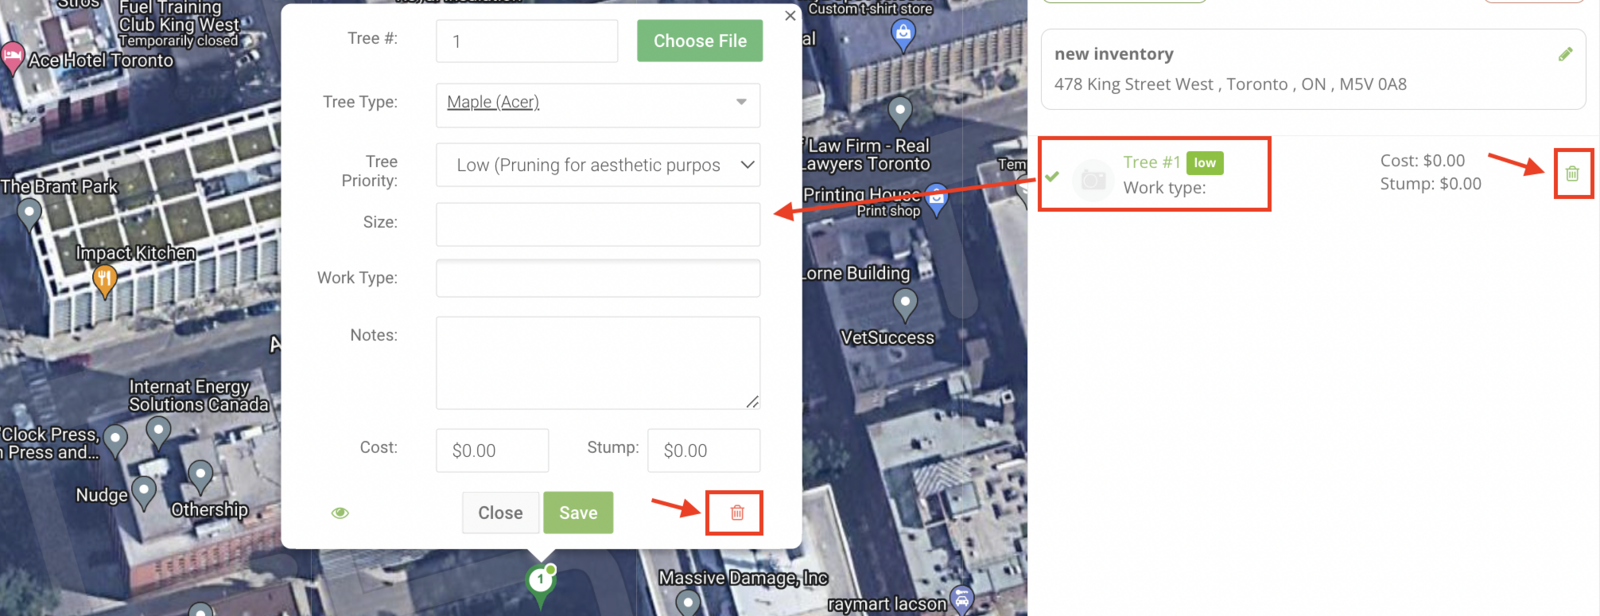
Alternatively, tap on a marker on the map to edit its information or delete it.
Creating Leads from Tree Inventory Page
After markers are added on the map, you can select the markers that you would like to use for estimation. To select, click on the “Select Markers'' icon.

You can choose the most comfortable way of outlining the markers from the offered options.
- Use the first icon to navigate around the map.
- Use the second icon to add a new marker.

- If you want to manually track the area around the markers to be added to a lead, click on the "Pen" icon, and tap around to create the trace. Note that it is mandatory for the first and last dots to connect. After tracking, you can move it around.

- To track the markers in a form of a round or a square, use the icons accordingly.

To delete the tracing, tap on the tracked area and click on the "Bin" icon.

If you don't trace the required markers, all the markers will be included for estimation.
After the preferred markers are outlined, click on the “Create” button. Here you can either assign the inventory to an existing lead or create a new lead.

After choosing the lead from the existing ones or creating a new lead, you will be forwarded to the “Create an Estimate” page. The estimation page includes the “Cost” and “Stump” fields for the trees. Note that they can be edited.

Filtering the Inventory
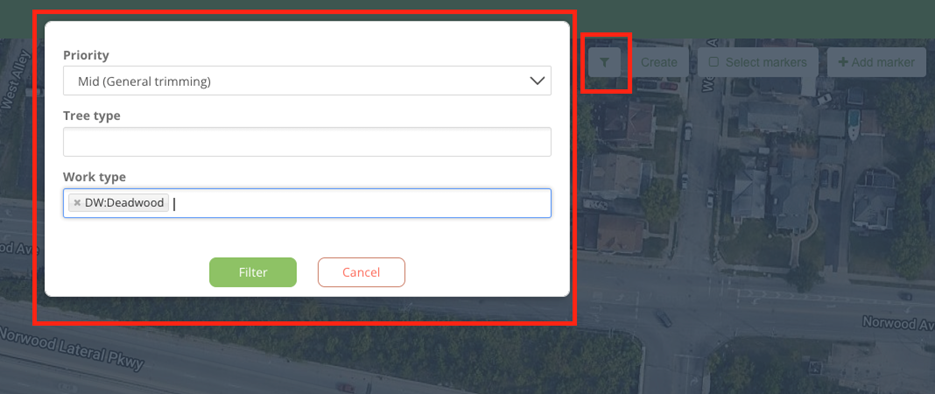
With the filter icon you can filter the inventory based on priority, work and tree type. Note that after filtering, when creating a lead, only the filtered trees will be included in the lead.
Map Labels
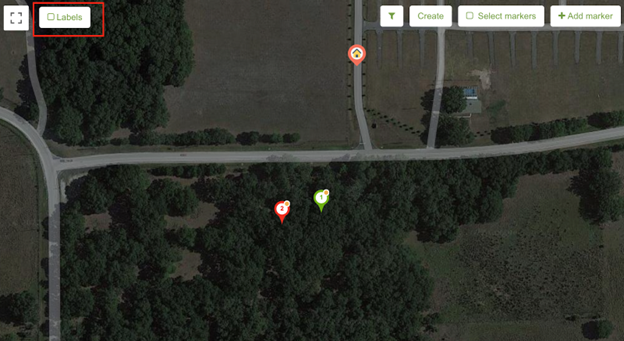
If you don’t want the map to show map labels and building names, untick “Labels”.
Tree History on Tree Inventory
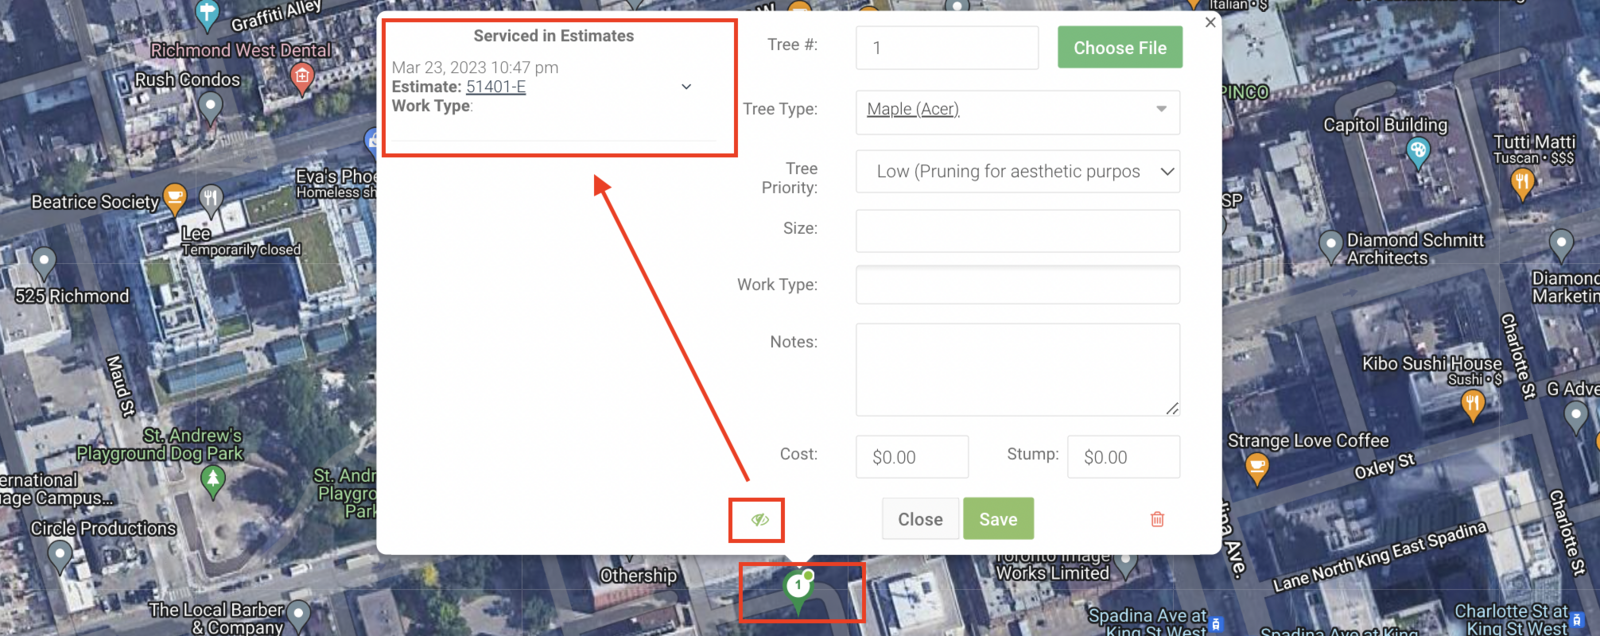
On the "Tree Inventory" page, you can view the tree history enabling you to see all the estimates that contain this tree. To view the history, click on the “Eye” button. If you click on the estimate ID, you will be forwarded to its "Edit Estimate" page.
Estimate PDF and Tree Inventory
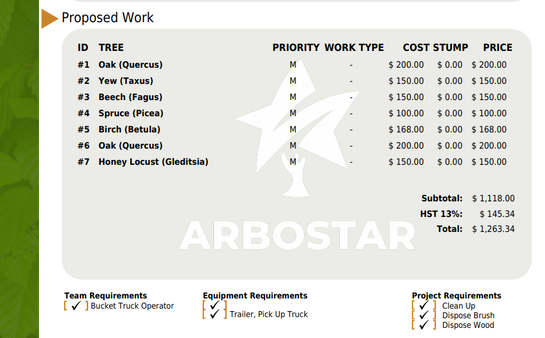
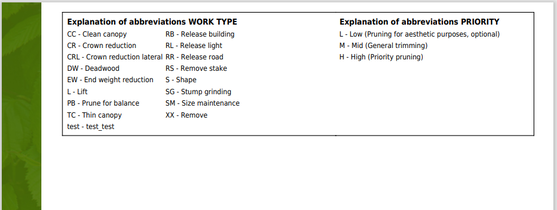
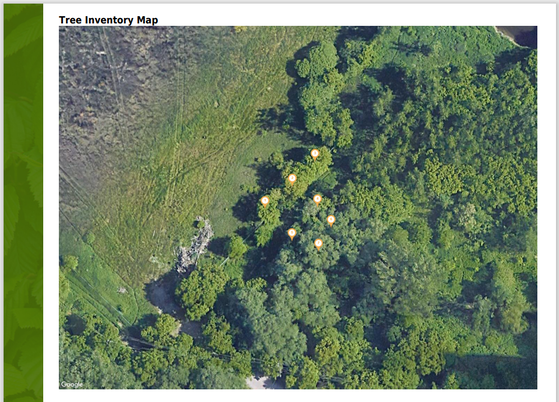
After creating an estimate that includes trees from the "Tree Inventory" page, the PDF file will include proposed work in the form of a table, explanation of abbreviations and a map.
The tree inventory is also added to the Workorder PDF.
Tree Type Colors
In the “Leads” → “Tree Types”, you can pick a color for a tree type and the chosen color will be implemented as the marker color for the tree on the “Tree Inventory” page.

To learn more about the “Tree Types” section, click here.
