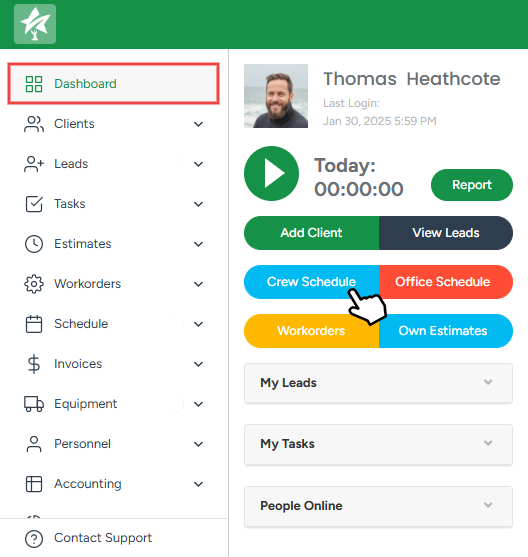
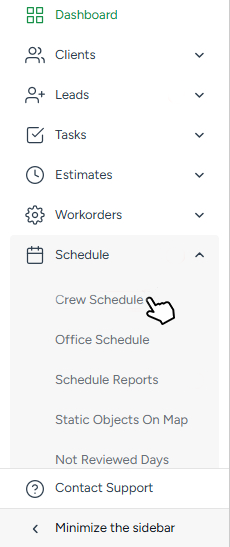
Access the Crew Schedule page
There are two main ways to access the Crew Schedule:
- Click the Crew Schedule button on the Dashboard,
- Or access the Crew Schedule directly from the module list.
Create a Crew
In order to work with the crew schedule, you need to create a crew first.
Scheduling is impossible without a crew.
To learn how to create and edit the crew details to meet your requirements at any point in time, click here.
Schedule window
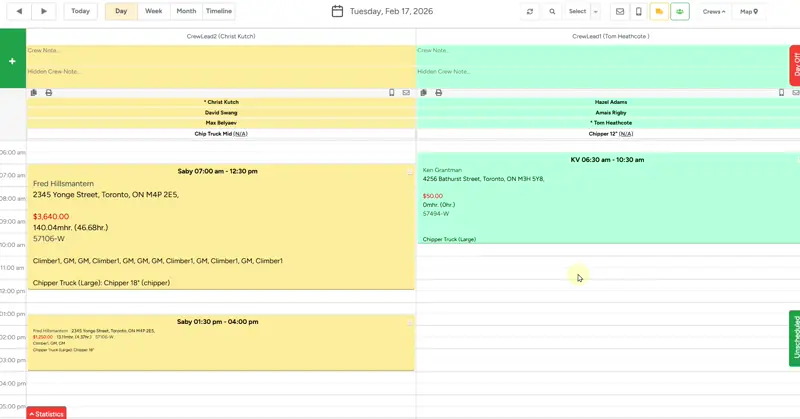
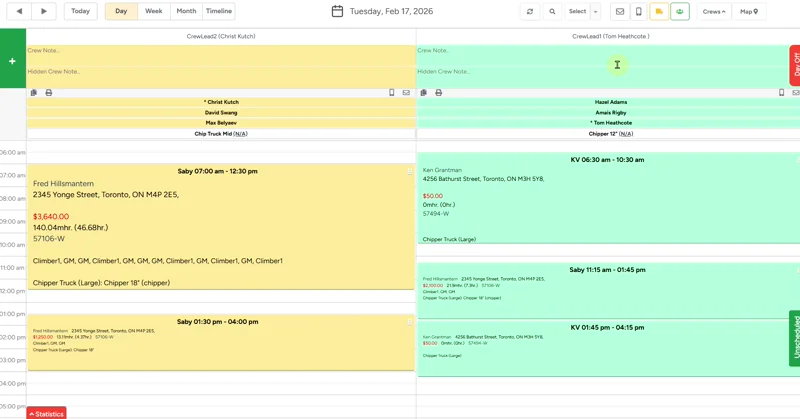
After the crew is created, you can now schedule jobs for the team. To add a job, click on the required start time in the crew column, hold and drag down the cursor to set the time frame for the job.
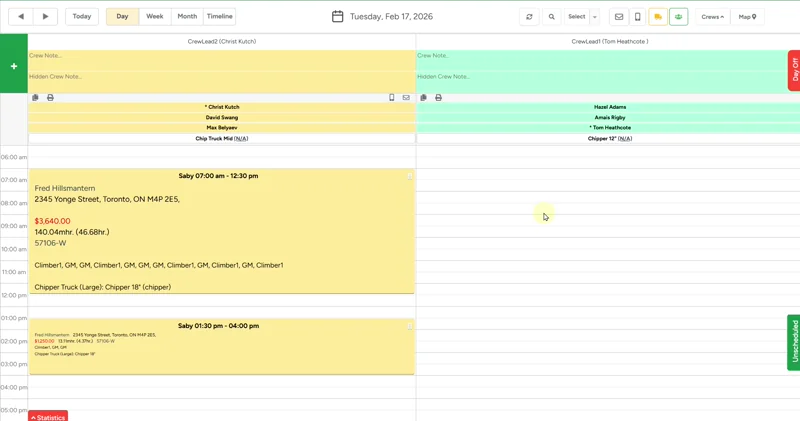
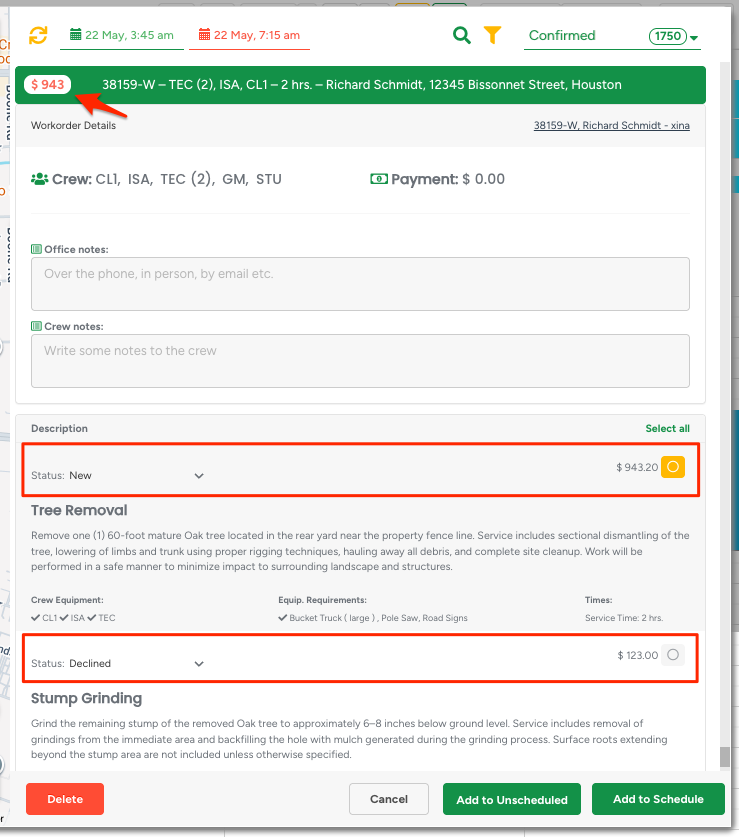
Once the time frame is selected, a window with the list of Workorders appears. The same Workorder are also available on the map.
- The buttons on the right side of the window allow you to refresh the list, apply time/date filter, search for a WO or pick a Workorder status from the list.
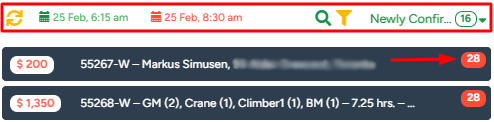
The number on the right side of the WO shows how long the project has existed in the system, while the one on the left shows the price.
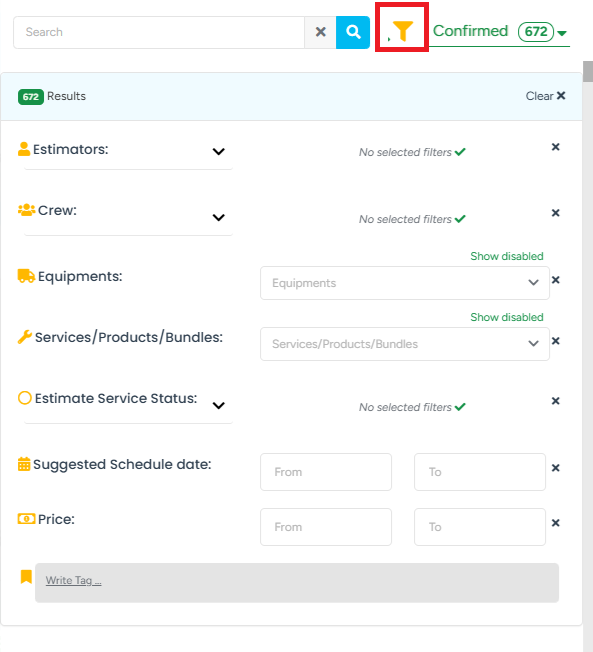
- For more advanced search, use the Filter, where you can adjust the workorder list based on estimator, equipment, crew, services, product, project price, etc.
On the mini-map, the colorful indicator next to the Workorder pin helps to determine for how long a workorder has been on the map. Each color corresponds to the designated number of days that you can set in the Company Management → Crew Schedule Management settings. Click on a pin to see the project address.

This feature is fully customizable and you can learn more about it in our June 2023 Release Notes here.
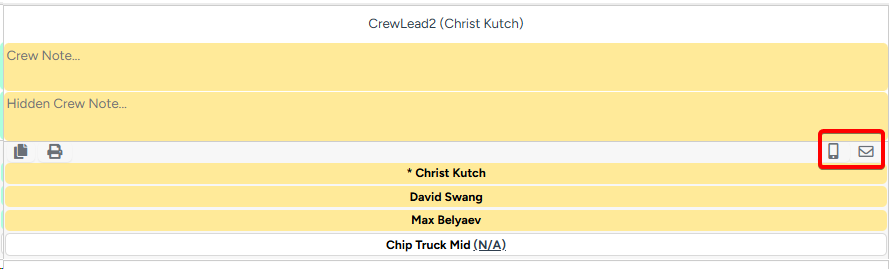
Once the required Workorder has been selected, the Workorder Details section appears. From here you can edit Office Notes and Crew Notes. When it's done, make sure to press the Save button.
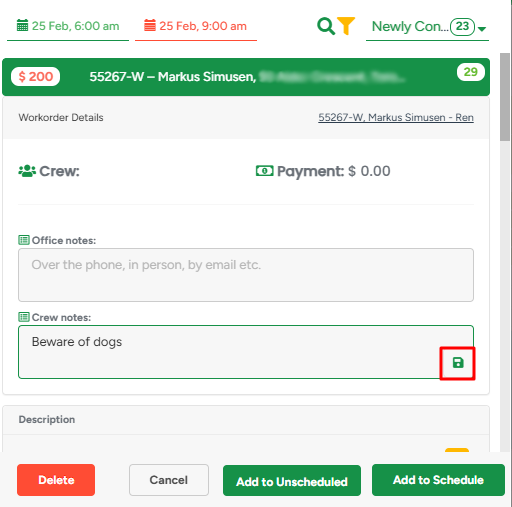
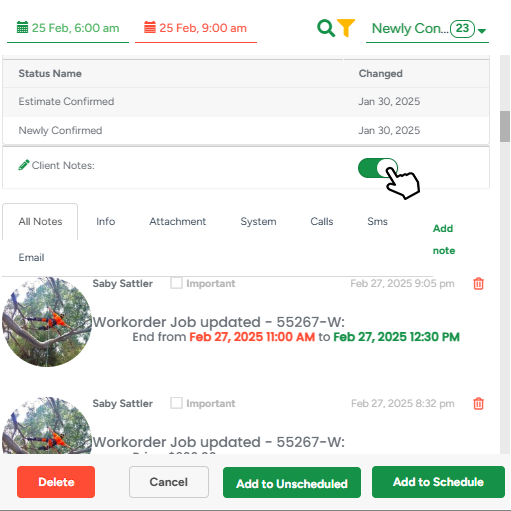
- To access the list of client notes, scroll down and turn ON the Client Note toggle.
Crew notes are available in the Workorder overview pdf file for your crew members.
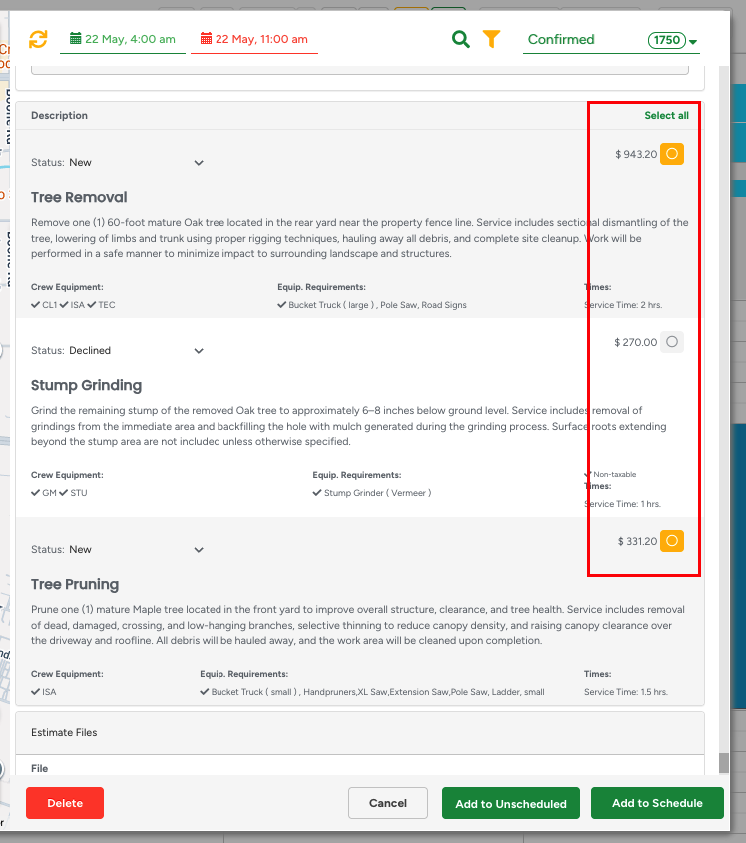
- To schedule a job, pick the required WO from the list, in the Description section click on the Square next to the service(-s) and click Add to Schedule.
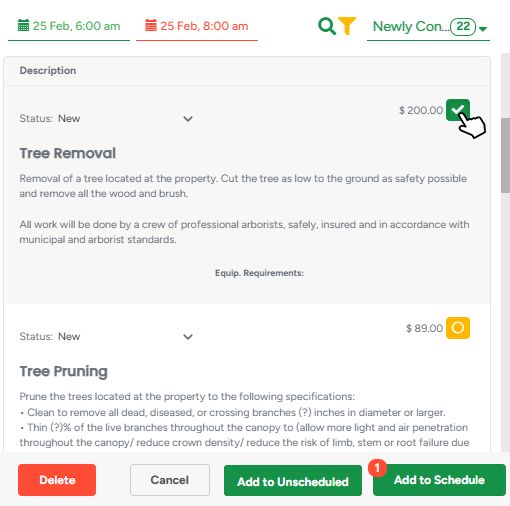
- Alternatively, you can add the job to the unscheduled list by clicking the Add to Unscheduled button and schedule it later once you know the exact date of the event. To learn more about the Unsheduled Jobs, click here.
Make sure to tick all the required services if you don't want to schedule more than one job, or press the Select All button if you want to schedule all services at once.This button will help you select or deselect all services with a single click, saving you time and making scheduling smoother.
If you want to know how to create a recurring job, make sure to visit this article.
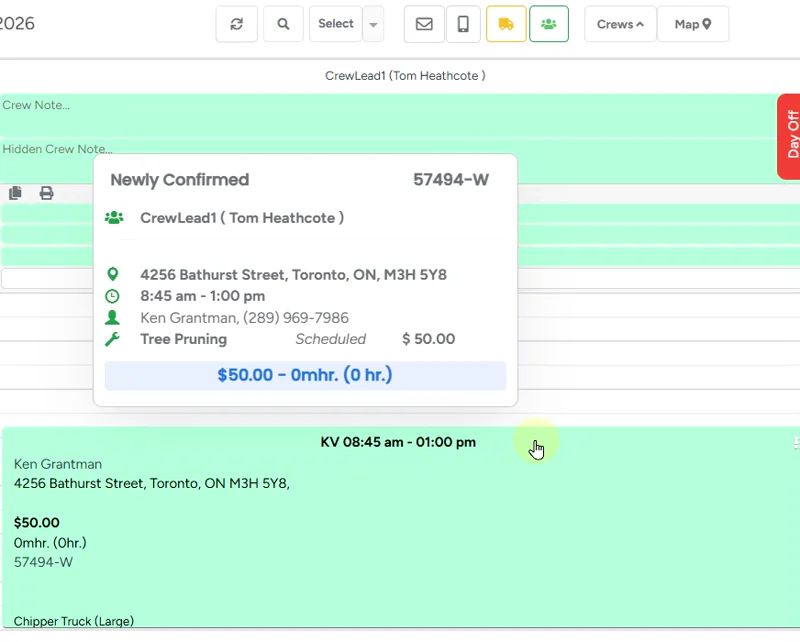
After the job is scheduled, you can click on it to summon a window with the event's management options: 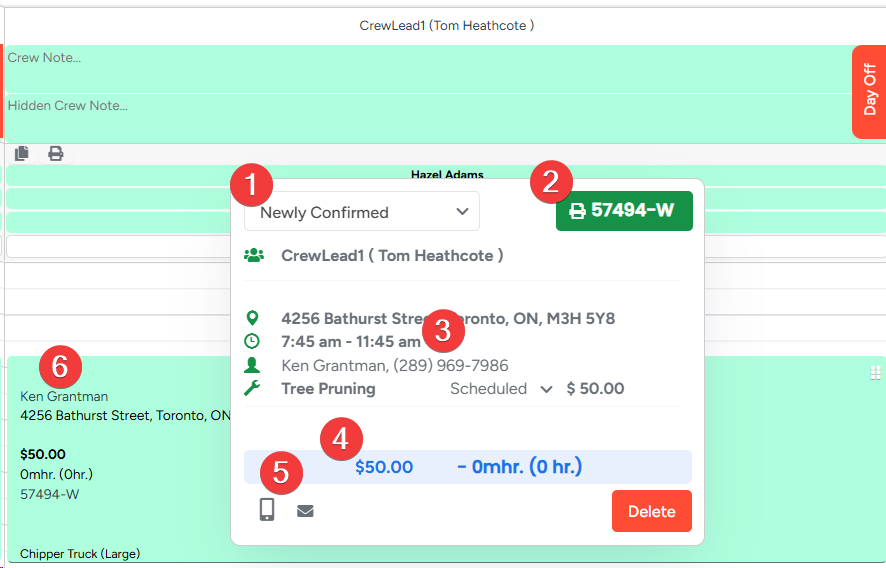
- Updating Work Order Status – Easily modify the work order status by selecting the desired option from the drop-down menu.
- Work Order PDF Access – The PDF button, located next to the status bar, always includes the project’s unique number for easy reference.
- Managing Scheduled Services – Each scheduled service status can be updated individually to reflect progress accurately.
- Editing Job Total – The total job amount can be adjusted as needed.
- Client Communication – To send an email or SMS to the client, click the Envelope or Phone icons, respectively.
- Quick Navigation – Clicking on the Work Order number or the client’s name redirects you to their respective profiles for more details.
- To adjust the event time, make it longer or shorter, move the mouse to the bottom of the job and move the arrow up or down to match your time requirement.
- To move the whole event, click and hold the left mouse button and then drag it to another time slot.
When opening an already existing event, you’ll see only services and map data from that Workorder, with search and filters hidden to keep things clear. You can still add or remove services, delete the event, or save changes, but switching to another Workorder requires deleting the existing event first.
Job Status
By default, job colors on the Crew Schedule are based on Workorder Status. If Job Color Scheme for Crew Schedule is enabled in Company Management, job colors will instead reflect their real-time Job Status.
This helps dispatchers quickly identify job states without opening each event. |  | 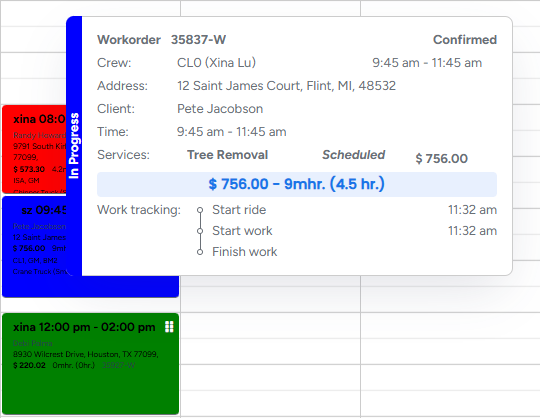 |
Check out our guide: Understanding Job Statuses: Real-Time Scheduling Guide (Web & App) to see how each status works and what triggers them.
Bulk Booking
Bulk booking allows you to add multiple work orders to the selected time range. Please set a time range on the Crew Schedule, then choose the desired work orders in the modal and click the Add to Schedule. The allocated time range will then be divided among jobs equally.
After the time range is set, open the preferred workorders and select services for a job. These workorders will be marked with a tick. The total number of selected projects will be displayed above the Add to Schedule button.
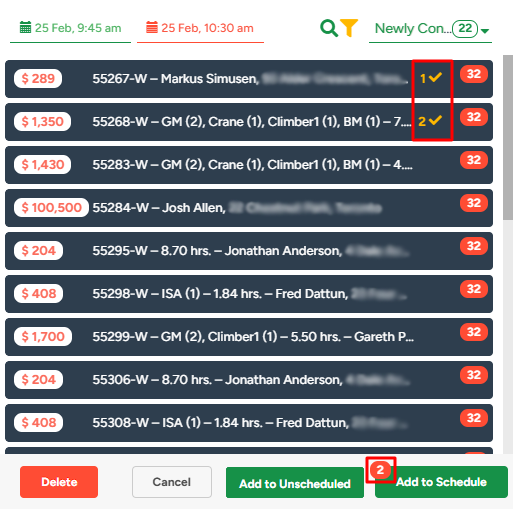
Please be advised that the number of selected workorders is limited by the size of the time range.
Sending notifications to clients
If you have two or more crews on a schedule with multiple jobs, you can send notifications simultaneously to all clients that are scheduled for the day.
- To do it please click on the Email or SMS button at the top of the screen. After that choose the required Email/SMS preset and in the pop-up window click Send.
- To preview a message, click on the event tab;
- To remove a client from the dispatch list, simply unselect the event.
- Additionally, there’s an option to send notifications to all clients of only one particular crew.
Multiple job event selection
You can select multiple workorder events on the Crew Schedule and change their statuses simultaneously and/or delete the chosen jobs.
- Once you press the Select button, you will be able to select the preferred jobs among the transparent events.
- After completing the job selection, please click on the drop-down menu to see the expandable options.
Please be advised that the job event selection applies to the bulk SMS and Email distribution as well.
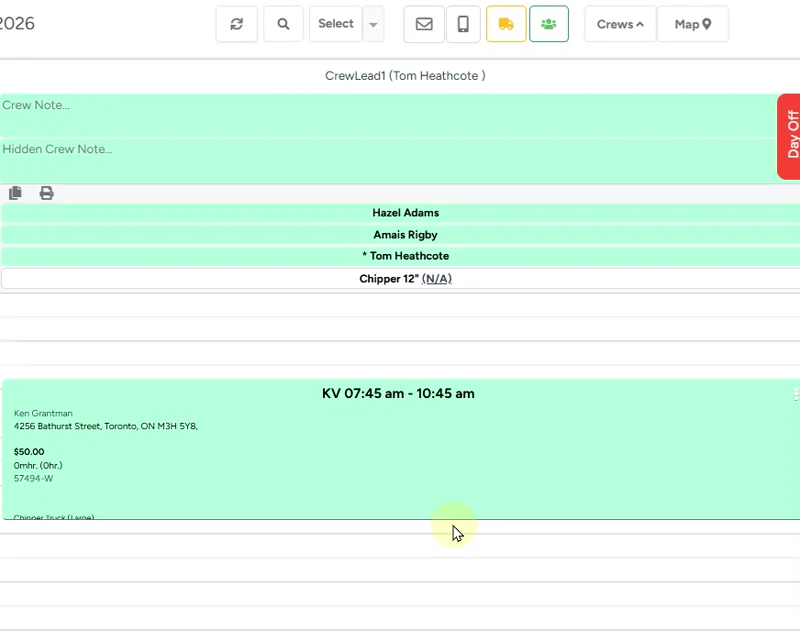
Different modes of view

The Crew Schedule page has Day, Week, Month and Timeline view modes. More detailed information on all of them you can find in our dedicated article View modes on the Crew Schedule.
Estimated Hours on the Crew schedule
When scheduling jobs on the Crew Schedule, the system automatically calculates estimated hours based only on active services that are still pending work, excluding the services with the Declined and Completed statuses. This helps office staff and schedulers see a more accurate representation of the remaining workload for the crew. This applies automatically and does not require any additional setup.
The estimated hours is shown in the Workorder Map, Crew Schedule, Job Profiles and in the Estimator App.
- If a service was declined by the client, its estimated time will no longer be counted toward the total job duration.
- If a service has already been completed, its hours will also be excluded from the remaining estimated time.
Scheduling Services Using “Select All”
When adding services to the Crew Schedule:
- Open the Workorder from the crew schedule
- Review the available service line items
- Click the checkbox next to individual services or use the Select All button - the system will skip adding the Declined and Completed services and only active services eligible for scheduling will be selected.