Once a lead comes in, it has to be estimated properly. The estimate is based on multiple factors, such as the type of service(s) ordered, the equipment needed, the crew involved, etc.
Find the estimate
To proceed with estimation, first, you need to search for the lead through the Live search, Leads List, Leads Map, or create one from the client's profile.
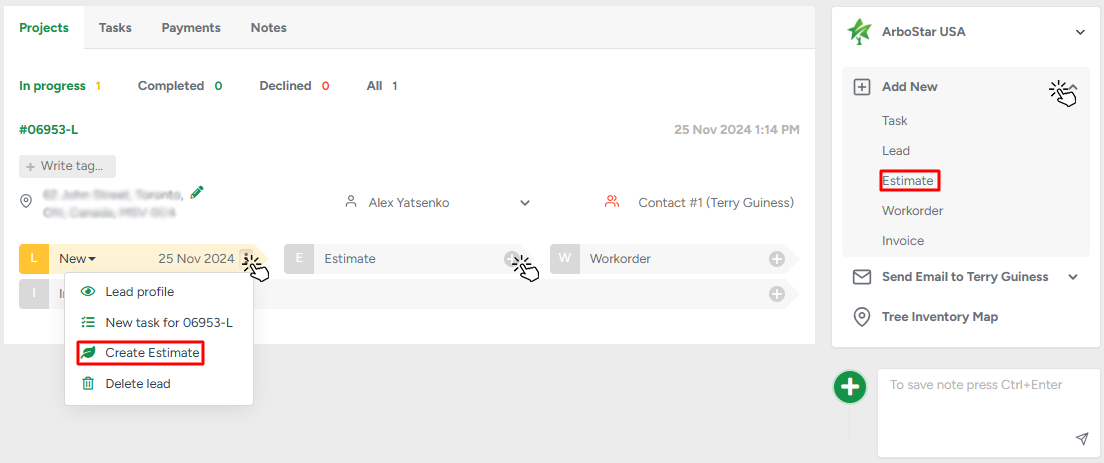
- On the client's profile, you can either create an estimate for an already existing lead by clicking on the Leaf or the + icon. Alternatively, you can create an estimate for the new project, skipping the lead stage, by pressing Add New → Estimate on the sidebar of the profile.
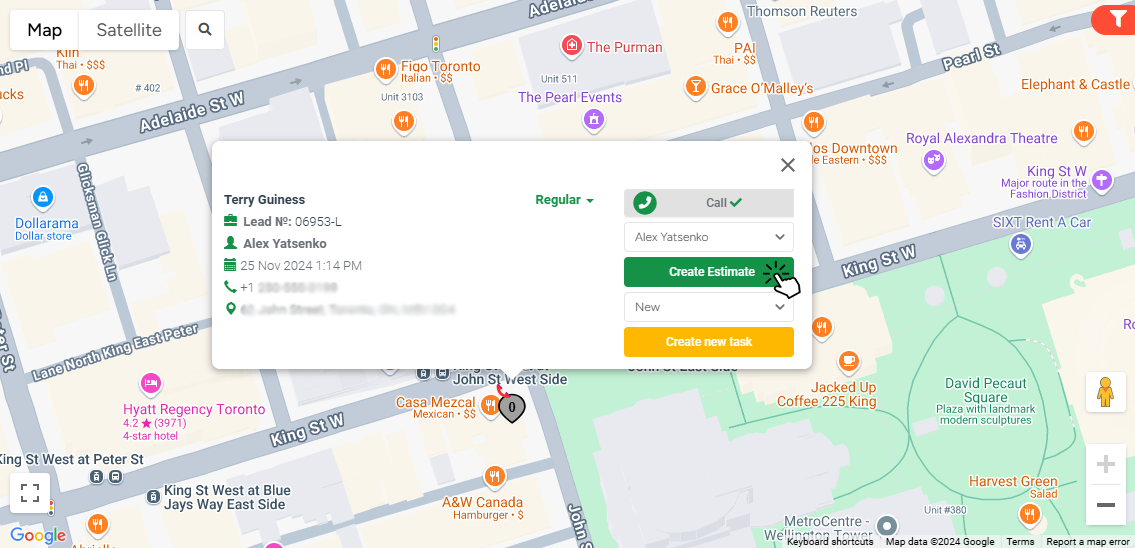
- To create an estimate from the Leads Map submodule, click on the lead bubble and select Create Estimate in a pop-up window:
Starting estimation
On the New Estimate page, you can now start the estimation.
- If you click on any service/product/bundle from the original lead, it will be added to the estimate.
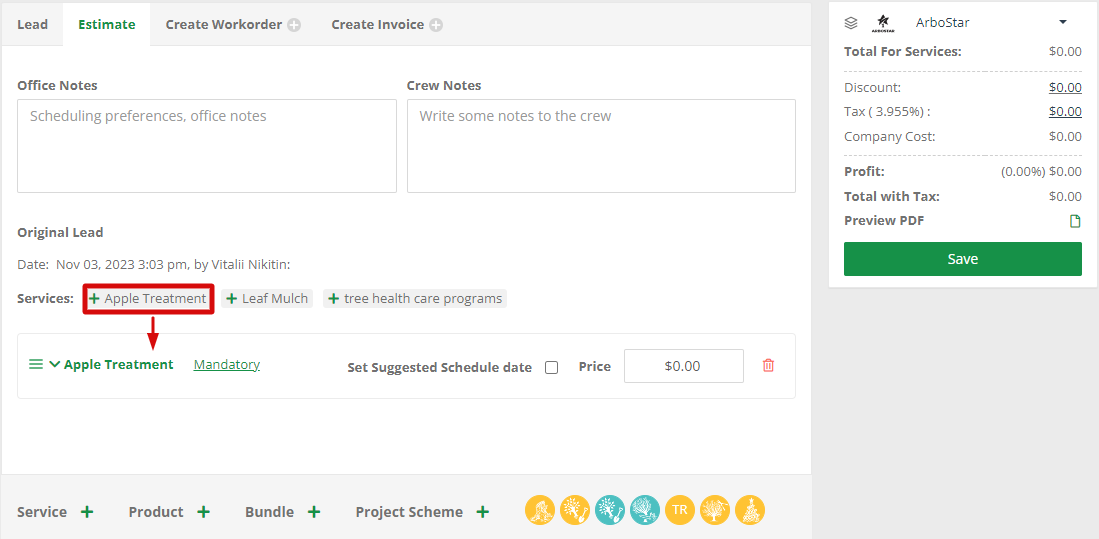
Note that you can also select multiple services that have previously been set at once. Click here to learn more.
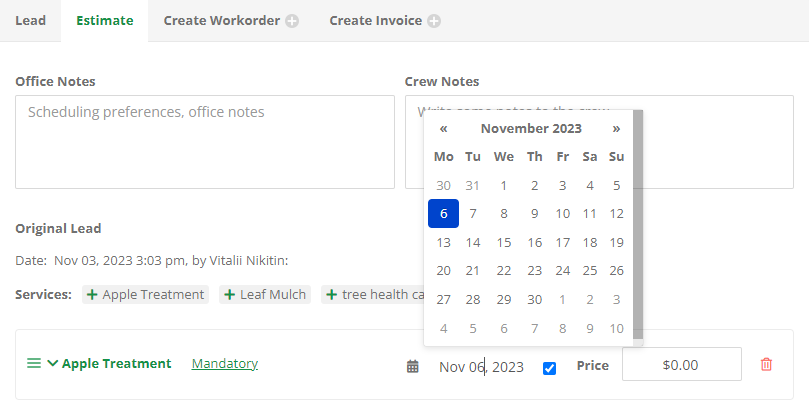
- You can also set the suggested date for estimation by ticking the checkbox next to the service and selecting the date from the mini calendar.
Choosing services, products, and bundles
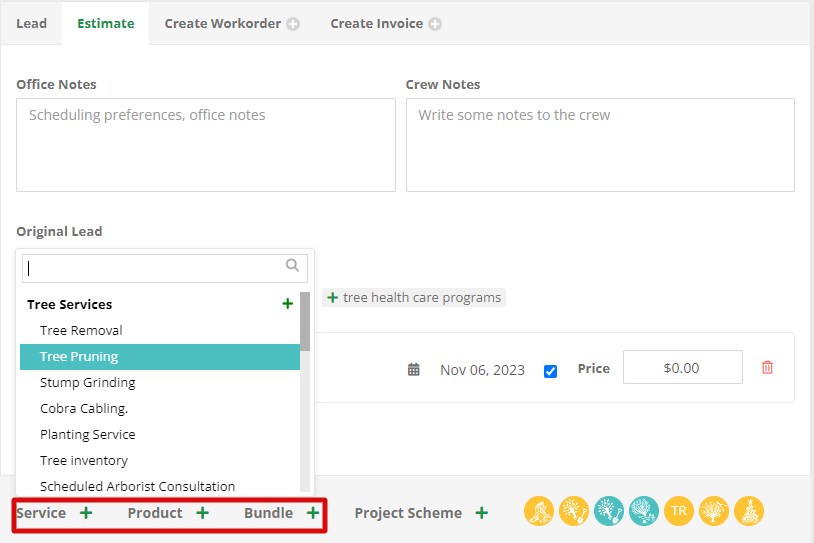
It's possible to add more services, products, and bundles that were not presented in the original lead by choosing them from the corresponding options at the bottom of the page.
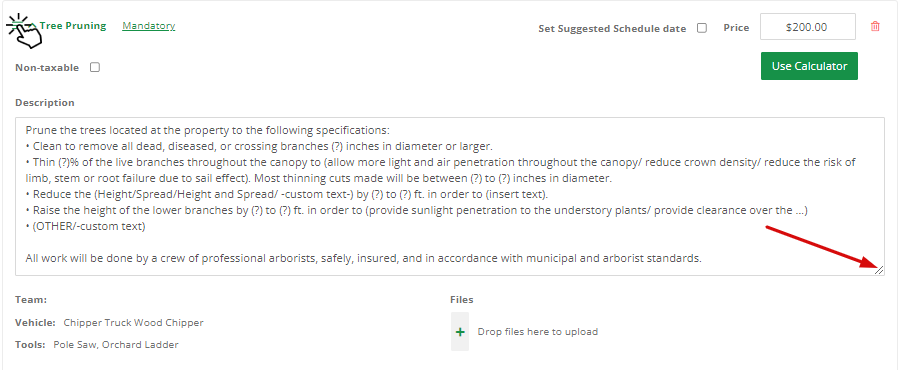
By pressing on the service, you'll be presented with the options to add or edit the service or product description, choose equipment, and the crew. For your convenience, text boxes are adjustable so that you can view your entire description in one single text without having to scroll or navigate through multiple lines.
- Hover your mouse over the lines in the bottom-right corner, press, and drag the box down as much as needed.
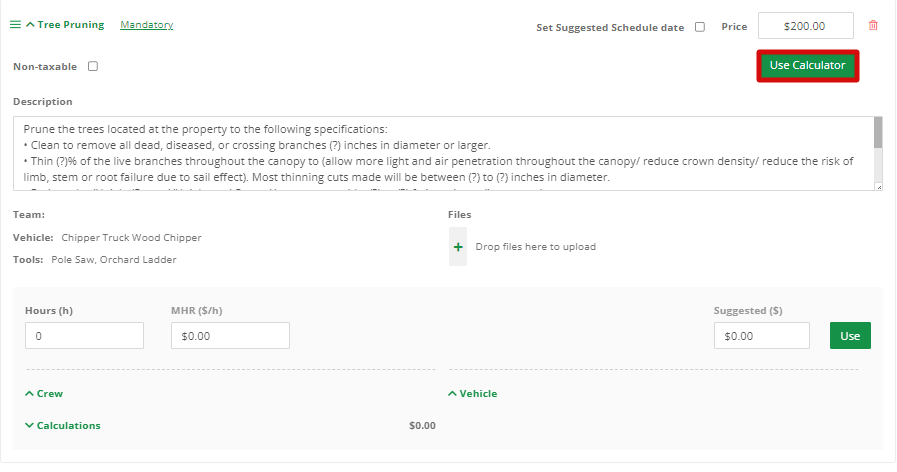
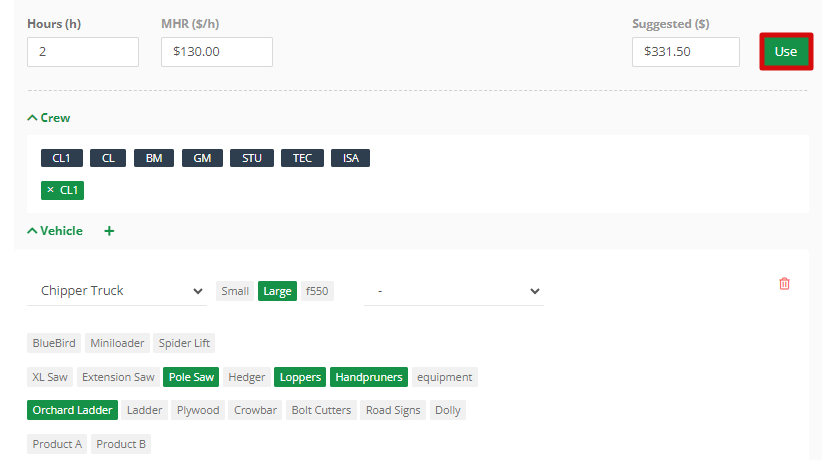
- For the service price, you either can fill it in the Price field manually or you can use the calculator for the automatic calculation.
If the service or product is non-taxable, click the Price button and tick it as non-taxable.
While using the calculator, the price gets calculated automatically according to the estimated time of work, the MHR rate, the crew and equipment chosen also the markup and overhead being set.
- To sum up and apply the calculation after selecting all the required fields, click on the Use button.
If you are estimating multiple services/products/bundles in a single estimate, make sure to go through the steps above for each of them. The total estimate price you receive in the end will include all the services/products/bundles you specified.
To learn more about how the service price is calculated, click here.
Optional services and products
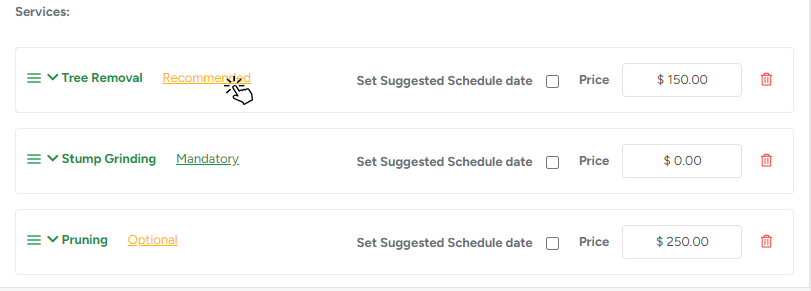
Products and services can be marked as optional, recommended, or mandatory. Recommended services are advised to be performed but are not essential for the project, while Optional services aren't a part of the proposal unless the client chooses otherwise.
- To switch between those options, click the field next to the preferred service/product/bundle.
- After the Estimate is sent, the client can either confirm the service/product/bundle or decline it via the Portal.
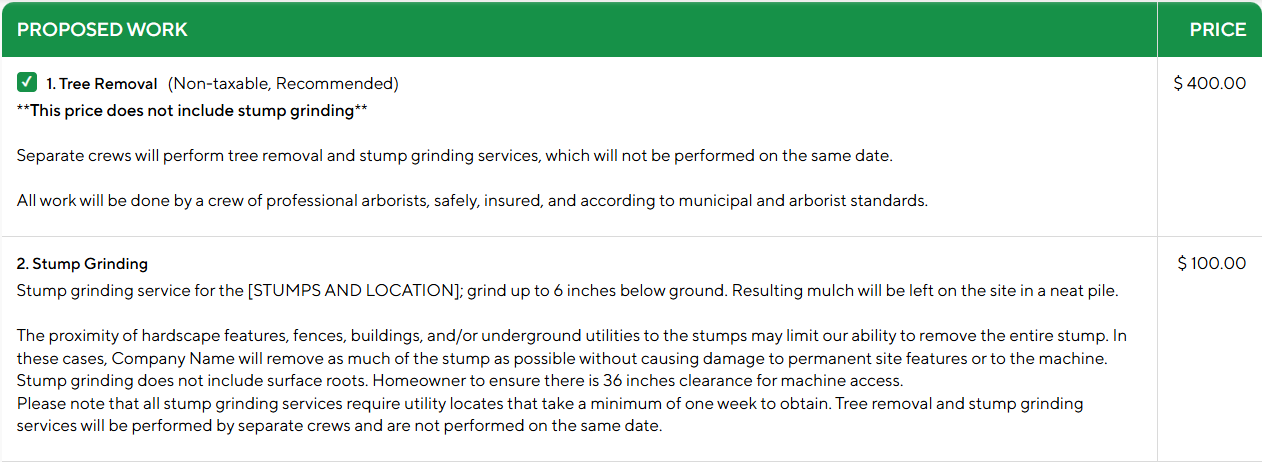
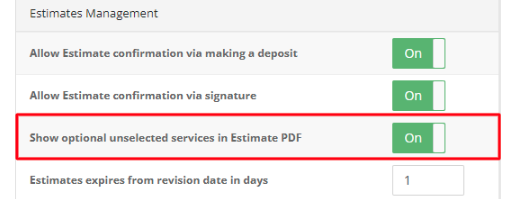
- The declined optional and recommended services aren't displayed on the Estimate PDF file by default; however, it can be changed at any point from the Company management → Estimate management block.
Project scheme
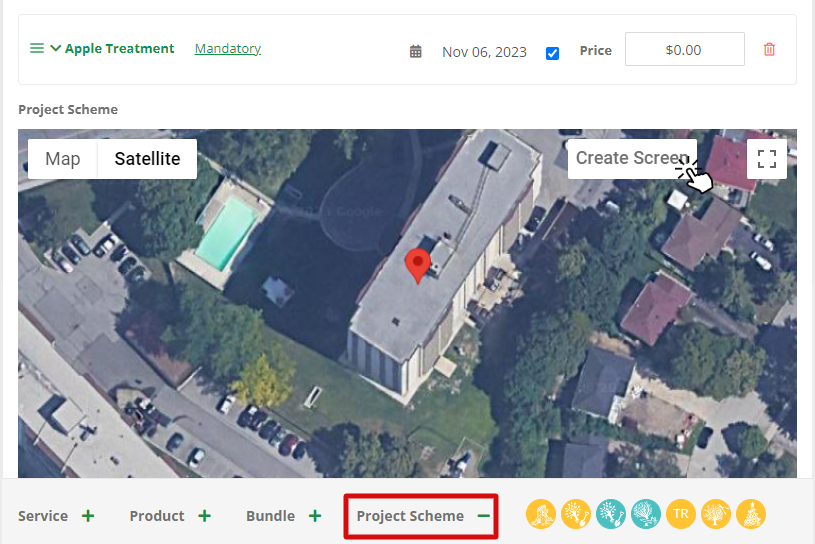
Visualizing the location for the work is an optional feature, but it may be a good help for the crew on site. If you're up to it, click the Project Scheme button.
- Mark the location of the work on the map by dragging and dropping the pin on the map, and click Create Screen to add the specifications:
- Drag and drop the icons at the top of the scheme to illustrate the place:
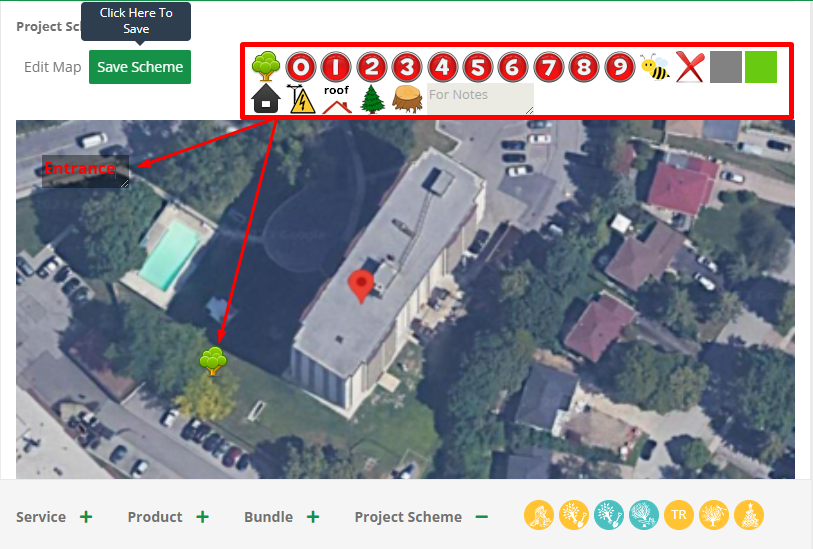
- Double-click on the icon to delete it from the scheme. After you are done with creating the project scheme, click on the Save Scheme button. If you need to move the pin on the map, click on the Edit Map button.
Once the project scheme is added to the estimate, it will be available on the Estimate PDF and customer Portal.
Uploading pictures to services
When creating or editing estimates, uploading pictures to the project by pressing the Plus icon under the service description is possible. Pictures are clickable, and they appear in a pop-up window. It helps to understand if you have uploaded the right images for the right service.
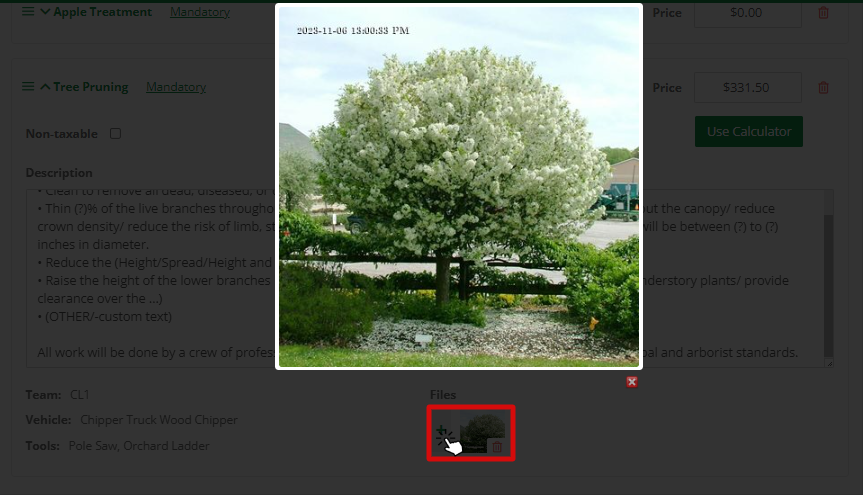
To learn more about how to add files to the estimate, click here.
Before saving the estimate
After all the services, products, and bundles are added, it's time to make final adjustments (if required). Please feel free to:
- Add notes for the crew and/or office workers.
- Add a discount and/or edit the tax amount. You can name a discount to reflect a specific promotion. The name will be visible both on the portal and in PDF files.
- Preview the estimate PDF.
The Auto Tax feature automatically applies the correct tax rate based on the address and can be enabled for U.S. companies via Company Management. The selected Client Tax will be selected for each new Lead as default. However, for each individual case, the system allows selecting a different tax system if needed.
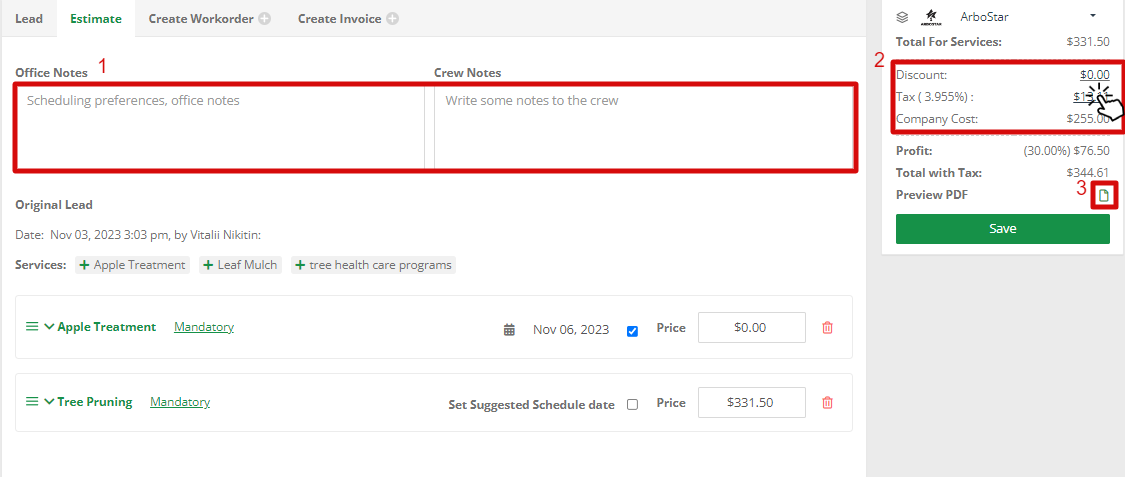
You can change the order of line items by clicking the three-bar icon next to the service and dragging it. Please note that these changes will also affect the PDF file. The revision date clearly displays the last price change and its date on PDFs, giving you and your clients full transparency on every update.
Edit Estimate
In case you need to update your estimate, please click on the Actions button and select the Edit Estimate option from the dropdown. The Pencil icon on the sidebar has the same function and serves as a shortcut.
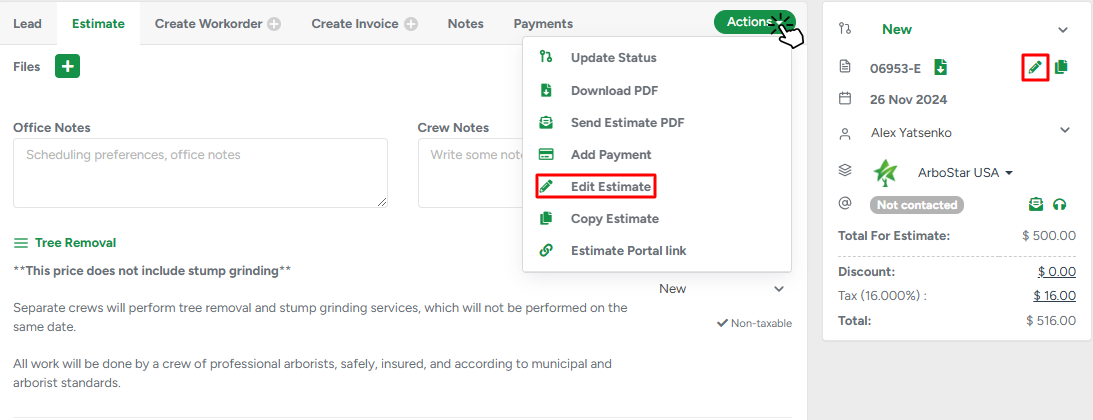
After editing, the total price for the estimate is going to be adjusted accordingly, and now it's ready to be sent to the client for approval.
Copy Estimate
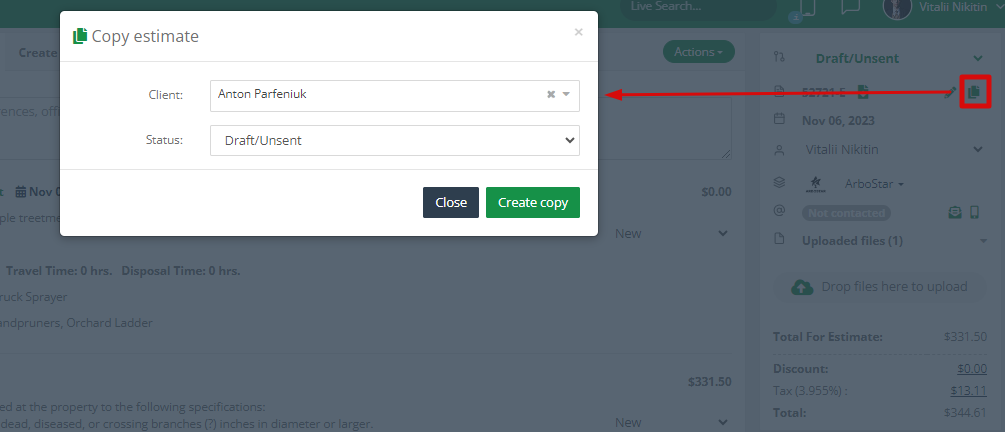
You can copy an existing estimate to any client. The Copy estimate button is accessible from the estimate's sidebar panel. The same feature is also applicable to Workorders and Invoices.
