On the Equipment page, you can find all the information about the equipment, as well as edit it or add different requests.
Accessing Equipment page
You can navigate to the equipment page:
- Through Equipment → Equipment submodule by clicking on the name of the equipment under the Name column;
- Through the Equipment → Services submodule by clicking on the name of the equipment under the Equipment column;
- Through Equipment → Service Reports submodule by clicking on the name of the equipment under the Equipment column;
- Through Equipment → Repair Requests submodule by clicking on the name of the equipment under the Equipment column;
- Through Equipment → Sold Equipment submodule by clicking on the name of the equipment under the Name column.
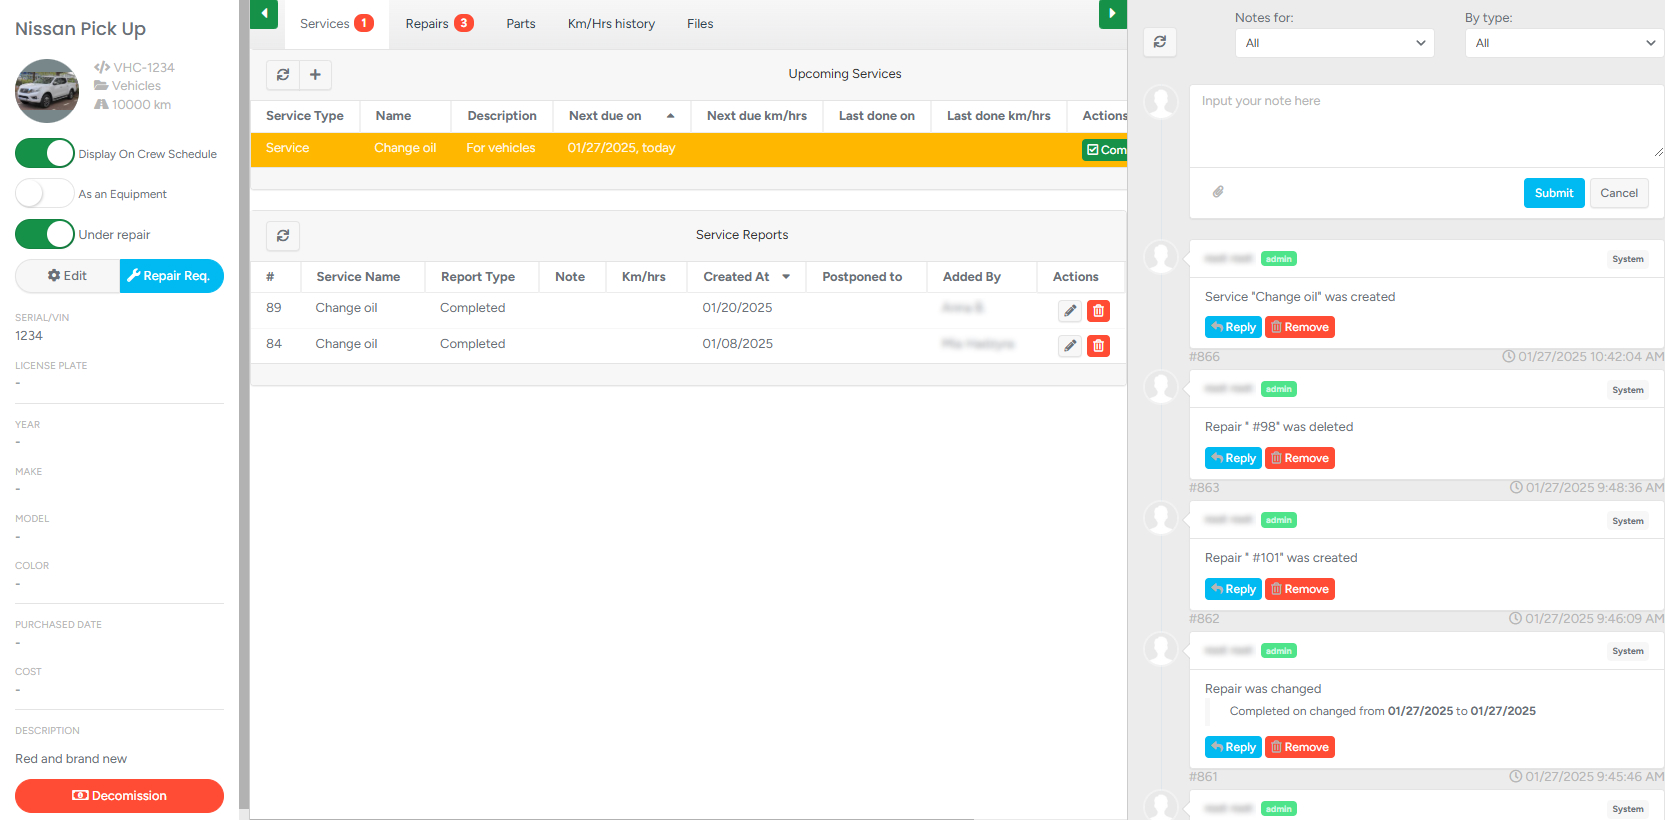
Equipment page example:
Left side panel
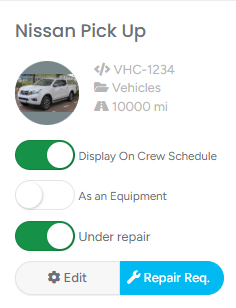
On the left side of the screen, detailed information about the equipment is available.
- Switch the toggle on if you want the equipment to be displayed on the crew schedule page.
- Switch the toggle on if the equipment is a tool on schedule.
Switch the toggle on if the equipment is under repair.
To edit the equipment, click on the Edit icon and make the necessary changes in the new window.
- To create a new repair request, click on the Repair Req. icon.
- To change the equipment's photo, click on the photo and select an image from local storage (Mac/PC).
- To mark the equipment as Sold, click on the Decommission button (at the bottom of the left side panel).

If the equipment is already marked as “Sold”, you will have an “Return” icon instead.
Sold equipment example: 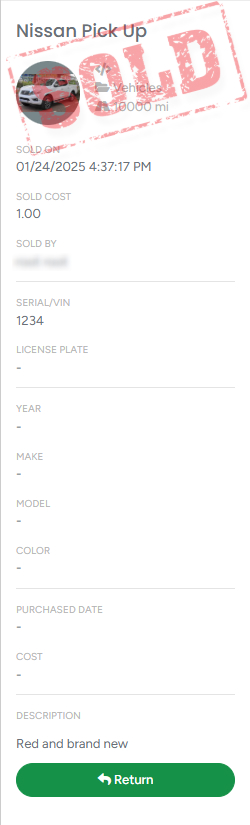
In the middle of the page, you will be presented with 5 sections:

Services
In the Services section, you can find the services required for the equipment.
The services are divided into Upcoming Services for the required future services and Service Reports for the finished services.
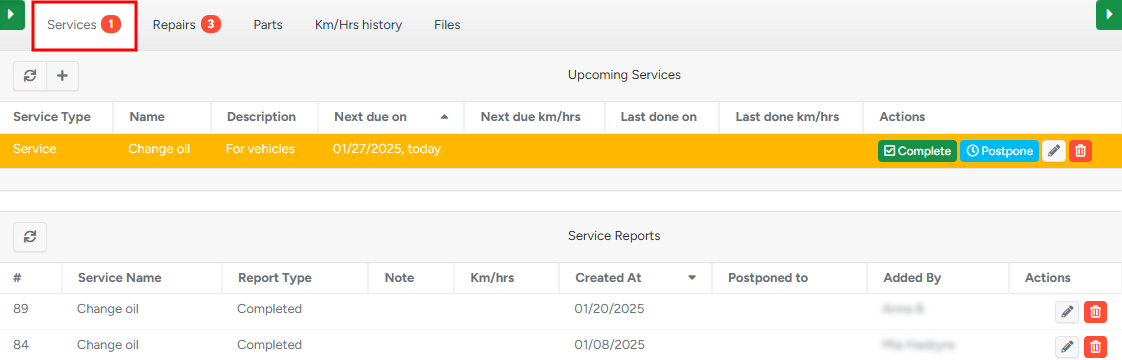
You can edit, delete, postpone, or complete the upcoming services.
- To edit, click on the Pencil icon and make the necessary changes in the new window.ф
- To delete, click on the Bin icon.
- If the service is completed, click on the Complete button and in the new window, fill in the required information.
- If the service is postponed, click on the Postpone button, choose the new date, and save it.

- The color of the services in the list under Upcoming Services refers to the time fact that a specific service was outdated (not performed in time) in red. Yellow shows that the upcoming service should be done.
- Note that you can edit or delete the finished services.
- To edit, click on the Pencil icon and make the necessary changes in the pop-up window.
- To delete, click on the Bin icon.

With the buttons in the top left corner:

- To refresh, click on the Refresh button.
- To create a new service, click on the Plus sign and fill in the information in the new window.
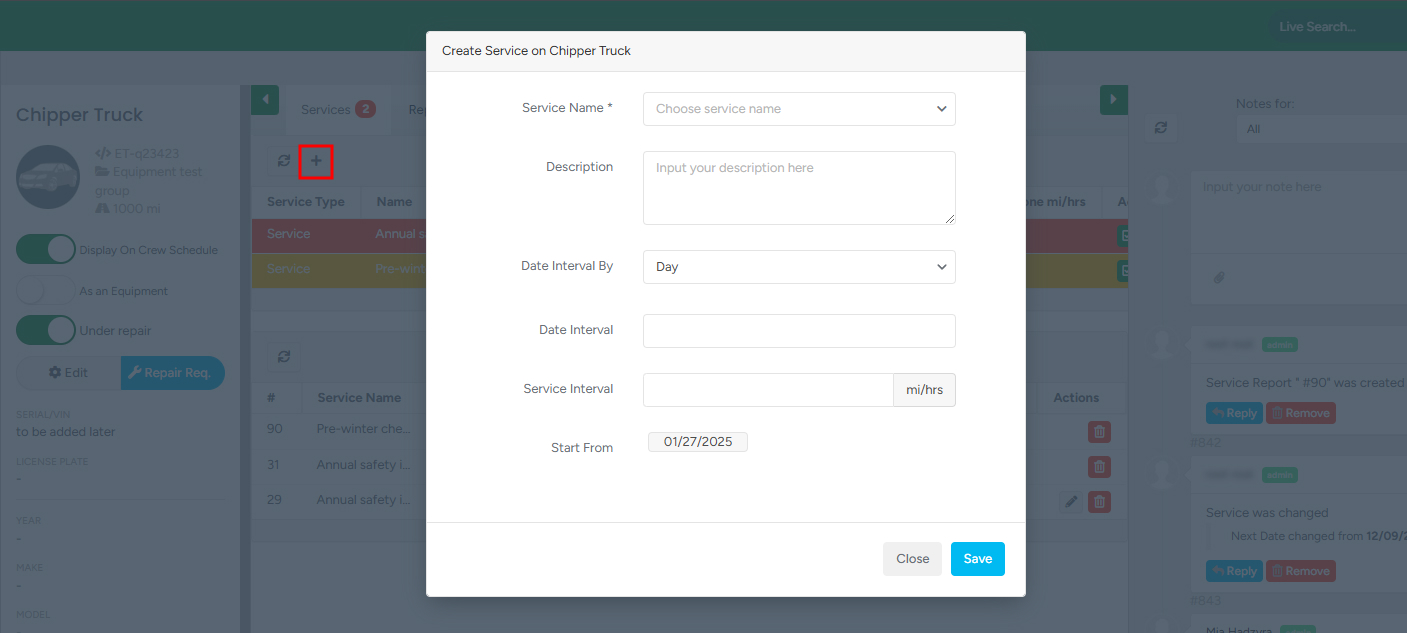
Note that all the fields marked with * are mandatory.
Repairs
In the Repairs section, you can find the list of all the repair requests with their detailed information, as well as create new ones. Note that the repair requests that have been created on the app for the equipment are also available here.
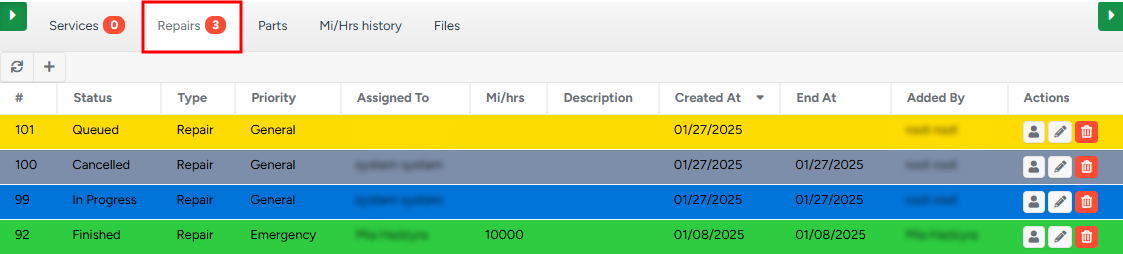
Note that the colors of each item under Repairs depends on the status and can be adjused within Equipment → Settings under Repair Statuses tab. For more details, please check this article
The repair requests can be edited, deleted, or assigned to a specific person:
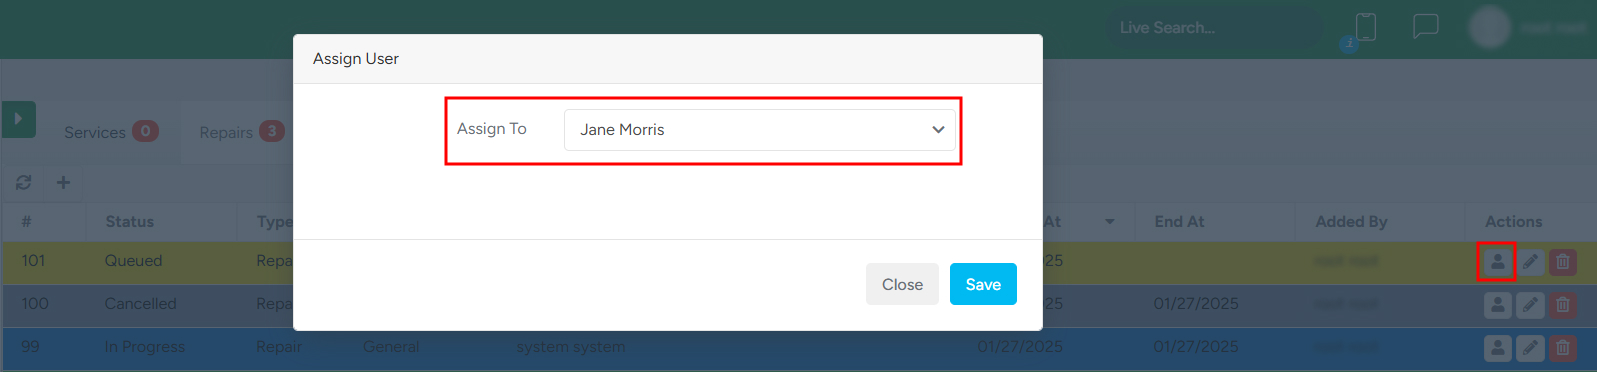
- To assign a user to the repair request, click on the “User” sign and in the pop-up window choose the required user.
- To edit, click on the Pencil icon and make the necessary changes in the pop-up window.
- To delete the existing request, click on the Bin icon.
- To refresh the list, click on the Refresh icon at the top of the page.

- To create a new repair request, click on the Plus sign and fill in the information in the new window.
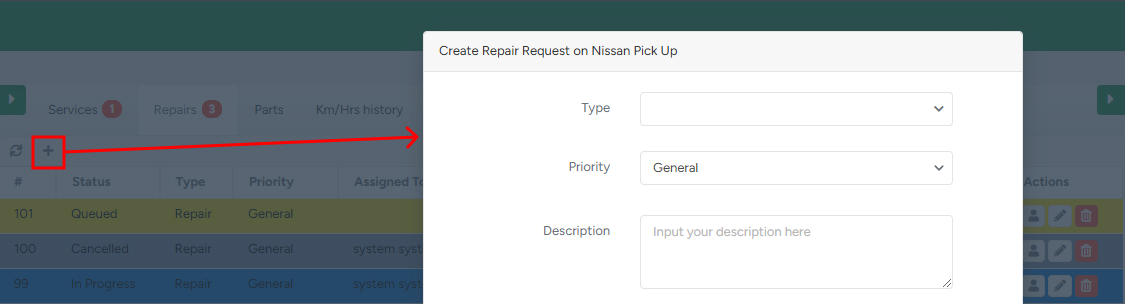
Note that all the fields marked with * are mandatory.
Parts
In the Parts section, you can find the list of the purchased parts for the equipment with their detailed information.

For quick access, you can filter the list based on the part name. To filter, fill in the part's name in the Filter by Name field and click Go.

You can edit or delete the existing parts as well as add new ones.
- To edit, click on the Pencil icon and make the necessary changes in the pop-up window.
- To delete, click on the Bin icon.
- To refresh the list, click on the Refresh icon at the top of the page.

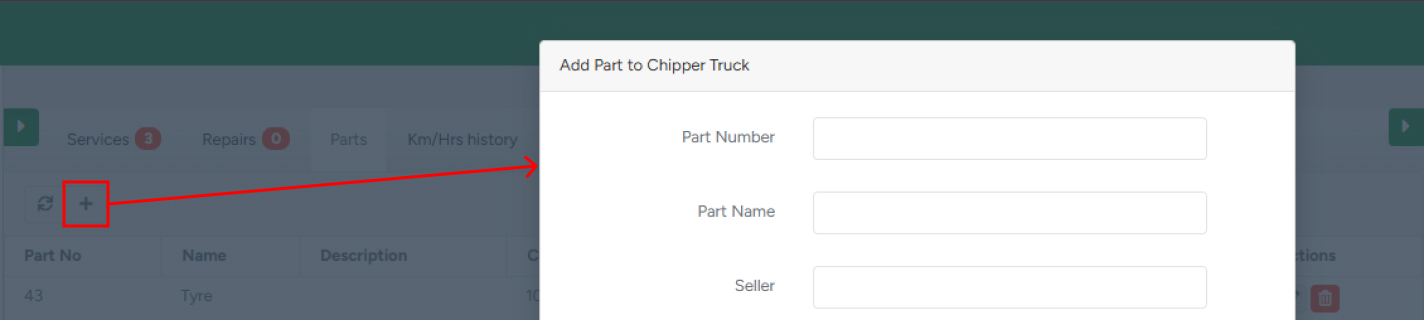
- To add a new purchased part, click on the Plus sign and fill in the information in the new window.
Kms/Hrs History
In the Kms/Hrs History section, you can find the list of the kilometers per hour history for the equipment.

You can edit or delete the existing Kms/Hrs as well as add new ones.
- To edit, click on the Pencil icon and make the necessary changes in the pop-up window.
- To delete, click on the Bin icon.
- To refresh the list, click on the Refresh icon at the top of the page.

- To add a new Kms/Hrs, click on the Plus sign and fill in the information in the new window.
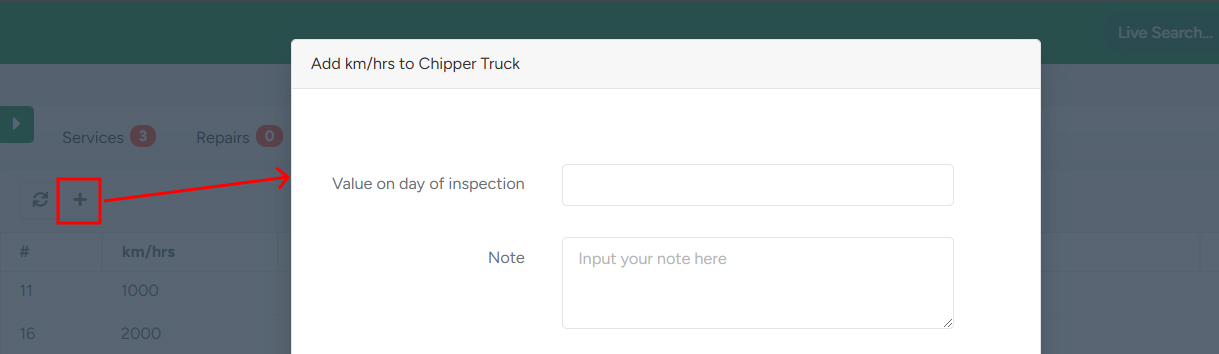
By default, km unit of measurement is set. However, if needed you can change kilometers to miles within Company Management under Units of Measurements Management

Files
In the next Files section, you can find the added files as well as add new ones.
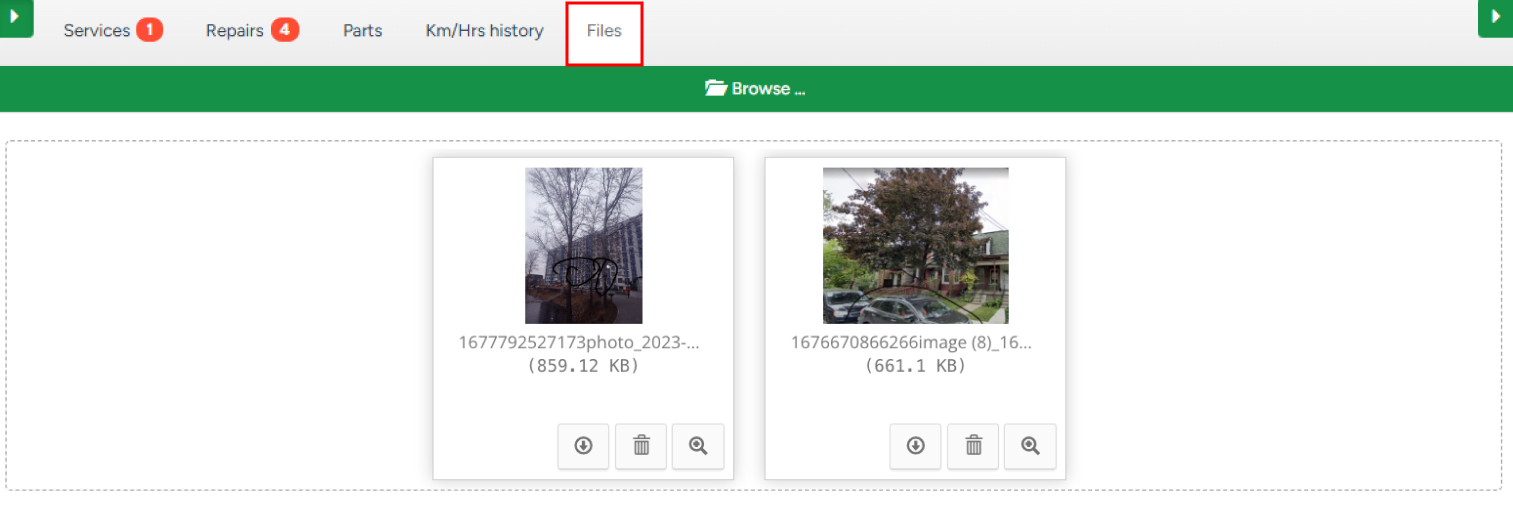
For the existing files:
- To download the file, click on the Download sign.
- To delete the file, click on the Bin sign.
- To view the file, click on the Magnifier sign.

To add a new file, click on the Browse icon and choose the necessary files.
Notes
On the right side of the page, you can find all the notes concerning the equipment.
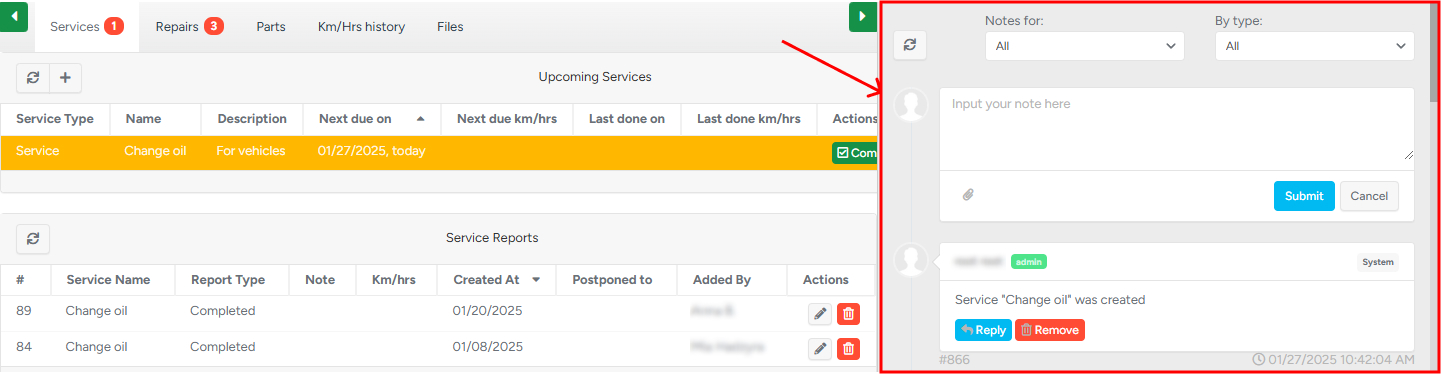
The notes can be filtered.
- To filter the notes based on the operation type, click on the Notes for and choose the appropriate type from the drop-down menu.
- To filter the notes by type, click on the By Type and choose the appropriate type from the drop-down menu.
- To refresh the notes, click on the Refresh icon at the top of the page.

For the already existing notes, there are 3 options:

- To reply to the note, click on the Reply button.
- To remove the note, click on the Remove button.
- To edit the note text, click on the Edit button. Note that you can edit only the notes created by you.
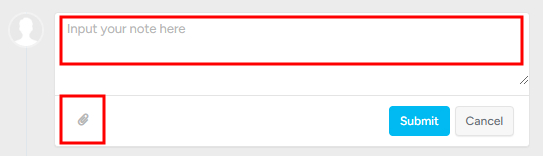
To add a new note, fill in the text in the Input field and click Submit. If you want to add a file to the note, click on the Clip sign.