
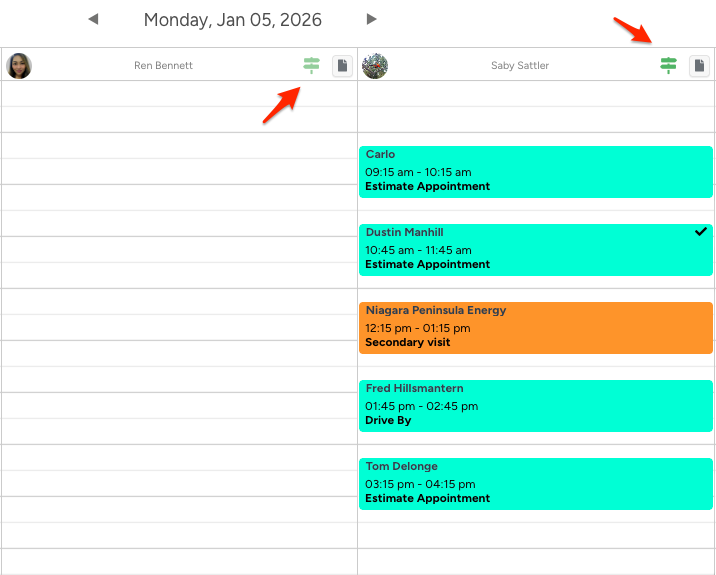
Accessing Route Optimization
In the Office Schedule submodule, the Optimize Route icon appears when the estimator has tasks in their schedule that are eligible for route optimization.
If no eligible tasks exist, the feature and icon will not be clickable.
How Route Optimization Works
Starting the Optimization
When you click the Optimize Route icon:
The system checks for tasks marked as eligible for route optimization.
If eligible tasks are found, an optimized route is immediately generated.
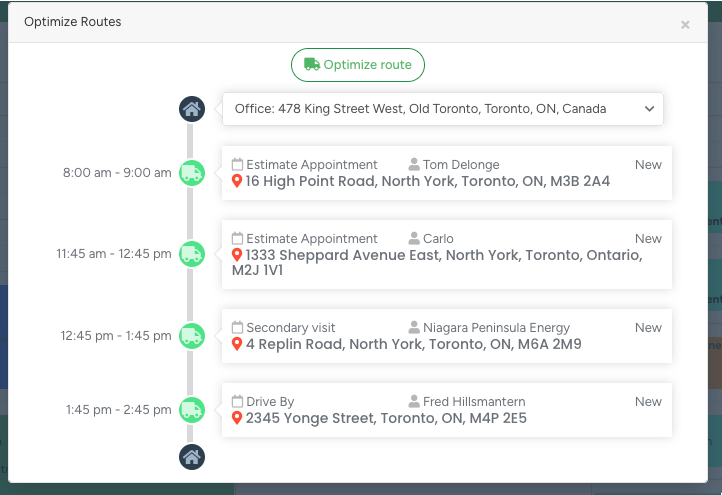
The optimized sequence is displayed in a modal window for review before applying it to the schedule.
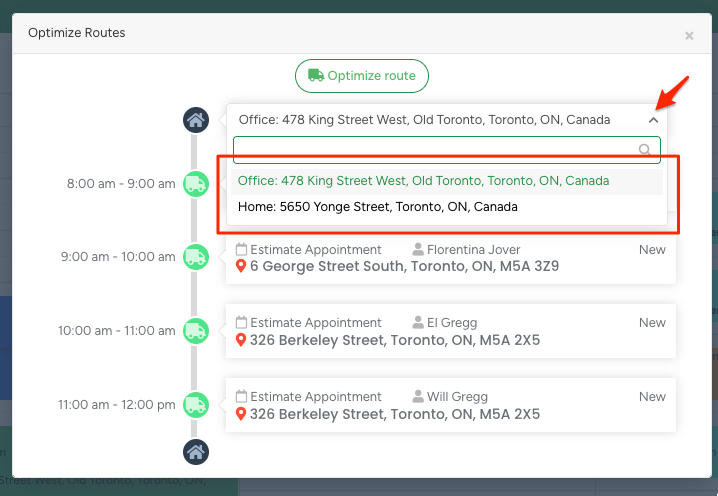
Start Location Selection
By default, the route starts and ends at the Office address, which is pulled from the default brand address.
You can change the start location using the dropdown in the optimization modal. Available options may include:
Office - Default brand address (from the Brands module)
Home Address - From User Management - User Profile - Contact - Address
(This option is only shown if an address is set.)
Each option is displayed in the format:
[Location Name] [Full Address]
Example:
My Home 543 Bogert Avenue, Toronto
The first stop in the optimized route will be the selected start location.
The last stop will also match the selected start location.
Automatic Re-Optimization
If you change the start location in the dropdown:
The system automatically recalculates the optimized route.
The updated route is displayed immediately in the modal.
No additional action is required to re-run optimization.
Once reviewed, click the Optimize Route button to apply the route to the main schedule.
Optimize Route Button Behavior
If the route is already optimized, the button is disabled and displays:
“Route is already optimized.”If the start location is changed and the route is no longer optimized, the button is re-enabled and displays:
“Optimize route.”
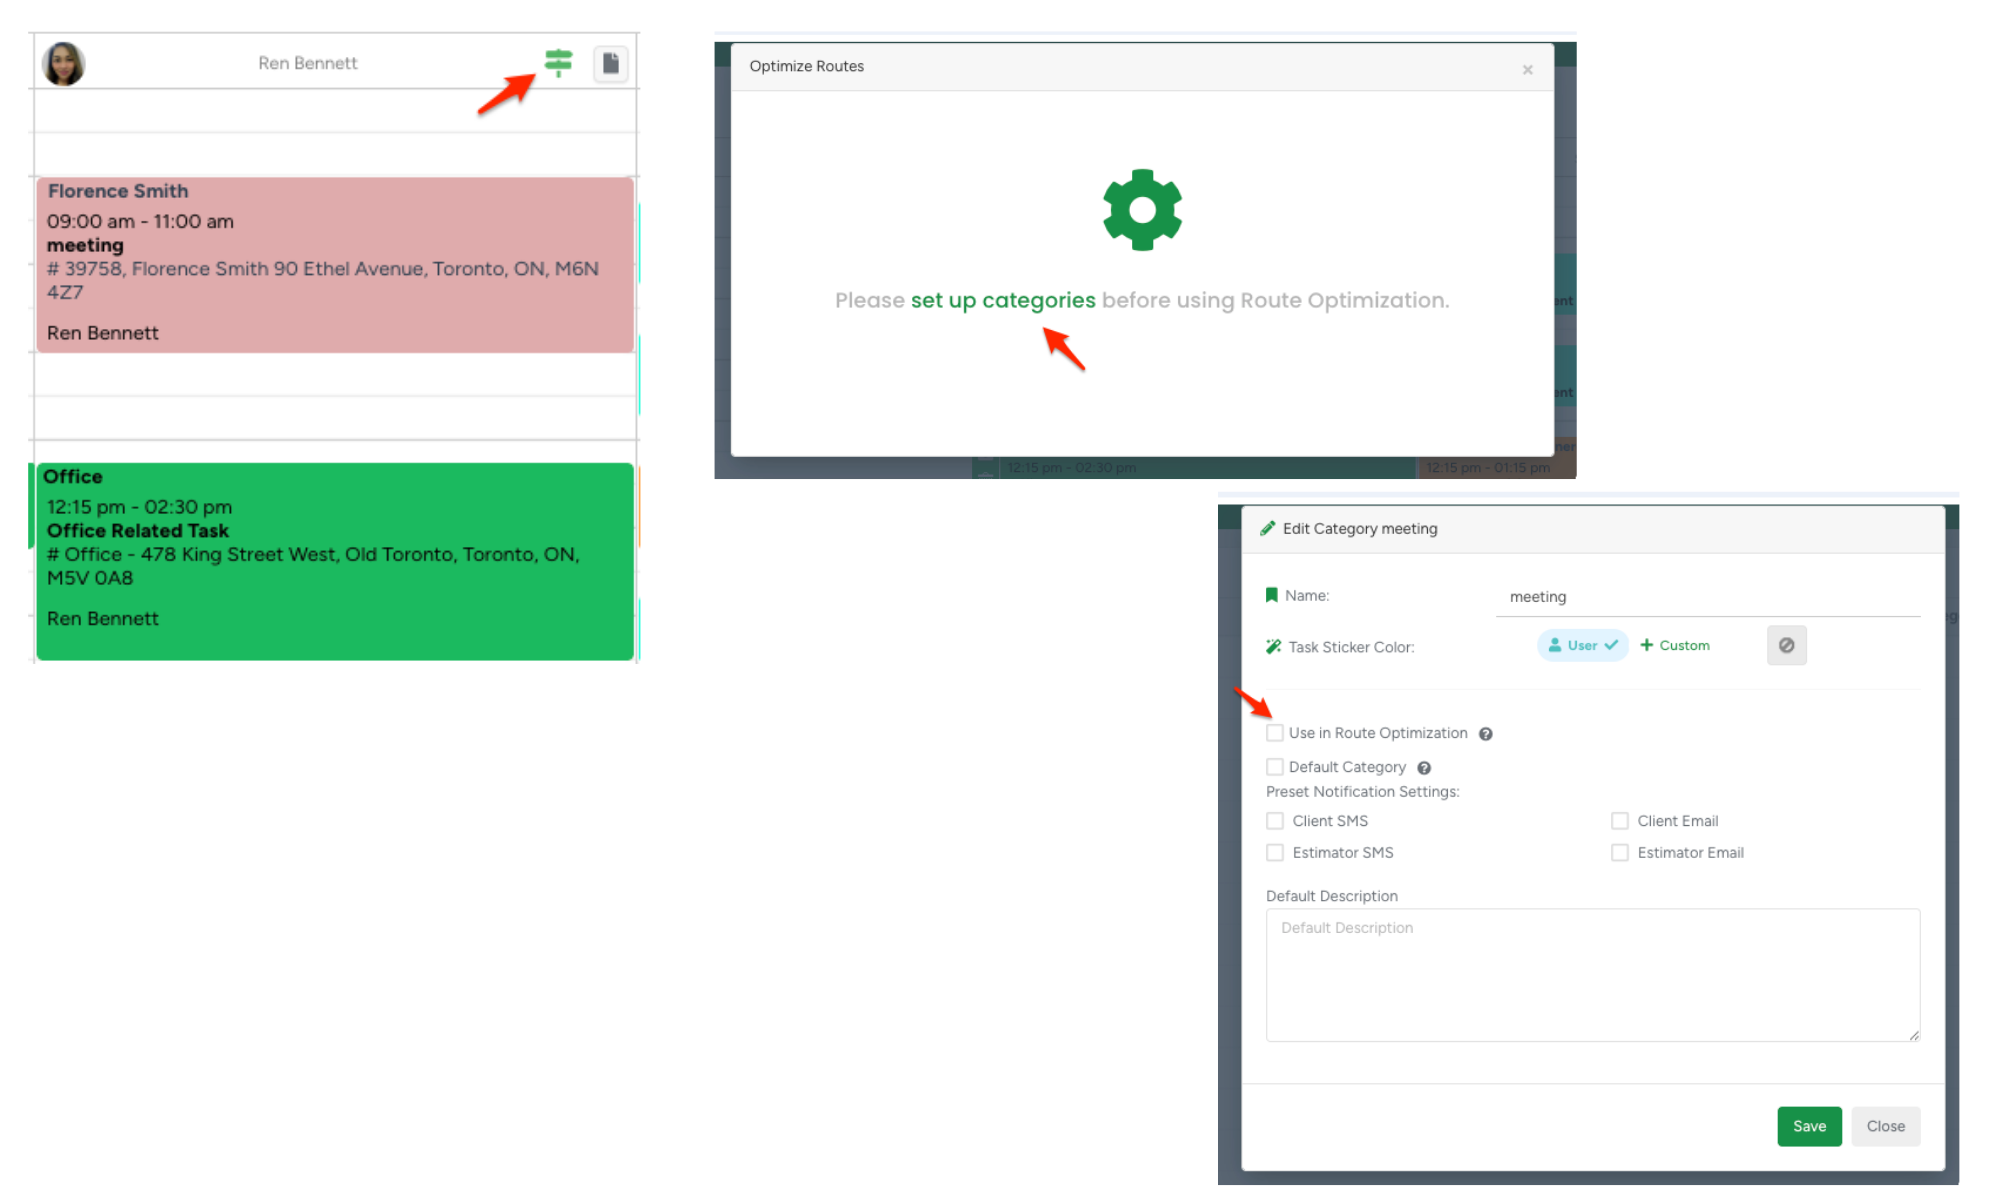
Category Configuration Requirement
If task categories are not configured for route optimization, the system will display a message:
“Please set up categories before using Route Optimization.”
The phrase “set up categories” is clickable and redirects to:
Task Module - Task Categories
This allows admins to quickly enable optimization for relevant task types.
Address Validation
Before building the optimized route, the system validates that:
All task addresses are in the same country as the selected start location.
If a mismatch is detected, route optimization will not proceed. The system displays the following message:
“We cannot optimize the route. Ensure your Brand address matches the task address or choose a different start location.”
The word “Brand” is clickable and redirects to the Brands module.
A dropdown is shown below the message, allowing the user to select a different start location.
When a new start location is selected, the system automatically re-optimizes the route - no button click required.
Task Categories and Route Inclusion
Route optimization depends on task category settings.
Enabling Categories for Optimization
In Task Module → Task Categories, admins can enable the checkbox:
“Use in Route Optimization”
When enabled, all tasks in that category are included in route optimization and reordered based on address and estimated time.
When disabled, tasks remain fixed in the schedule and are excluded from optimization.
A tooltip is displayed next to the checkbox:
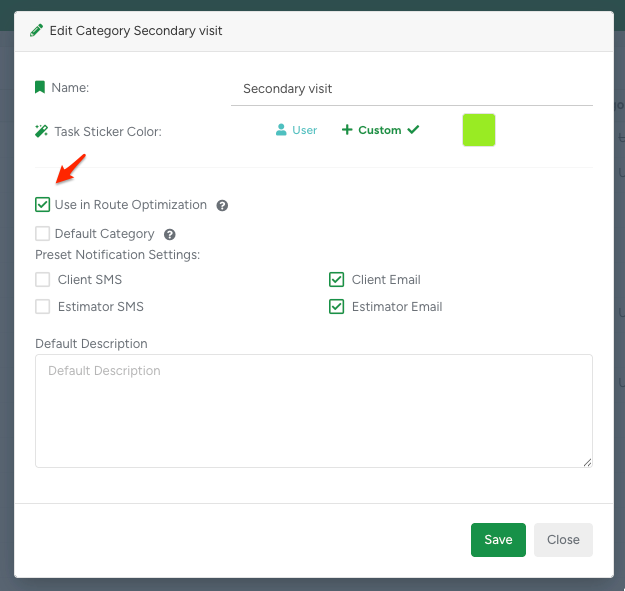
“Check this box if this task type requires a specific job location (not an office).
When enabled, tasks of this category will be included in Route Optimization.”
Task Types in Office Schedule
Office Schedule handles three main task groups:
1. Tasks Included in Optimization
Examples: Estimate appointments
Reordered during optimization
Shown in the route
2. Non-Location-Based Tasks
Examples: Follow-up calls
Excluded from optimization
Not shown on the route
May share time slots with other tasks
3. Office Tasks
Examples: Internal office work
Not shown on the route
Can be scheduled alongside non-location-based tasks
Learn how to manage Task Categories here
Scheduling Rules
Tasks included in route optimization cannot overlap with each other.
Route optimization tasks can overlap with non-location-based tasks.
Non-location-based tasks can overlap with similar tasks.
Office tasks can overlap with non-location-based tasks.
Office tasks cannot overlap with route optimization tasks.
Google Maps Optimization Limit
Route optimization uses Google Maps API, which has a limit of 25 locations per request, including the start and end points.
If this limit is exceeded:
Optimization will not proceed.
The following message is displayed:
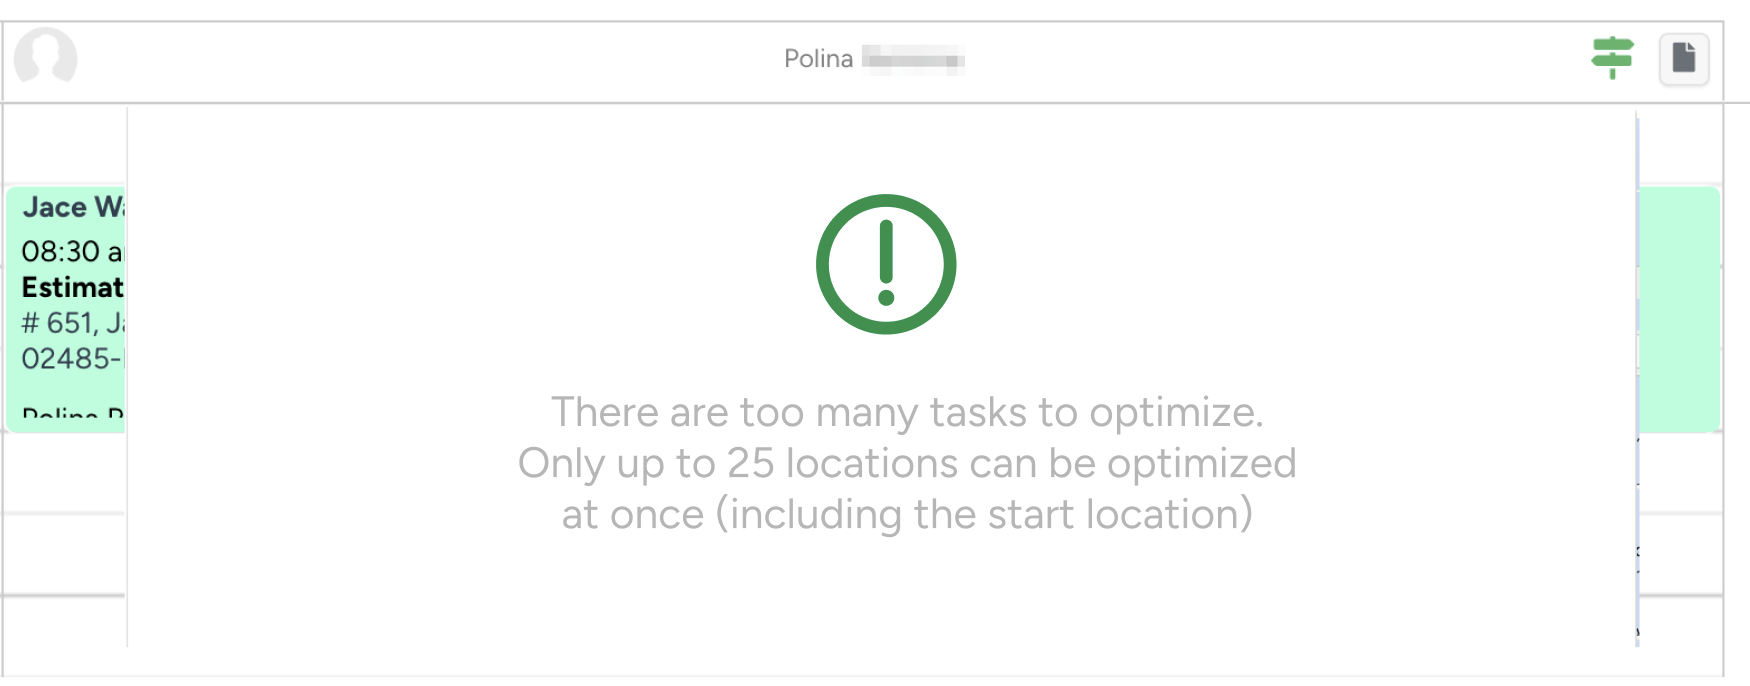
“There are too many tasks to optimize. Only up to 25 locations can be optimized at once (including the start location).”