
The Repair Requests submodule displays a comprehensive list of all repair requests, complete with detailed information, and facilitates the creation of new requests. This is valuable for reviewing current repair, maintenance, or damage requests related to equipment. Here, employees can also view assigned requests, create new ones, and monitor their progress.
Please note that repair requests initiated through the mobile application for equipment are also accessible within this section.
- To access, navigate to Equipment → Repair Requests.
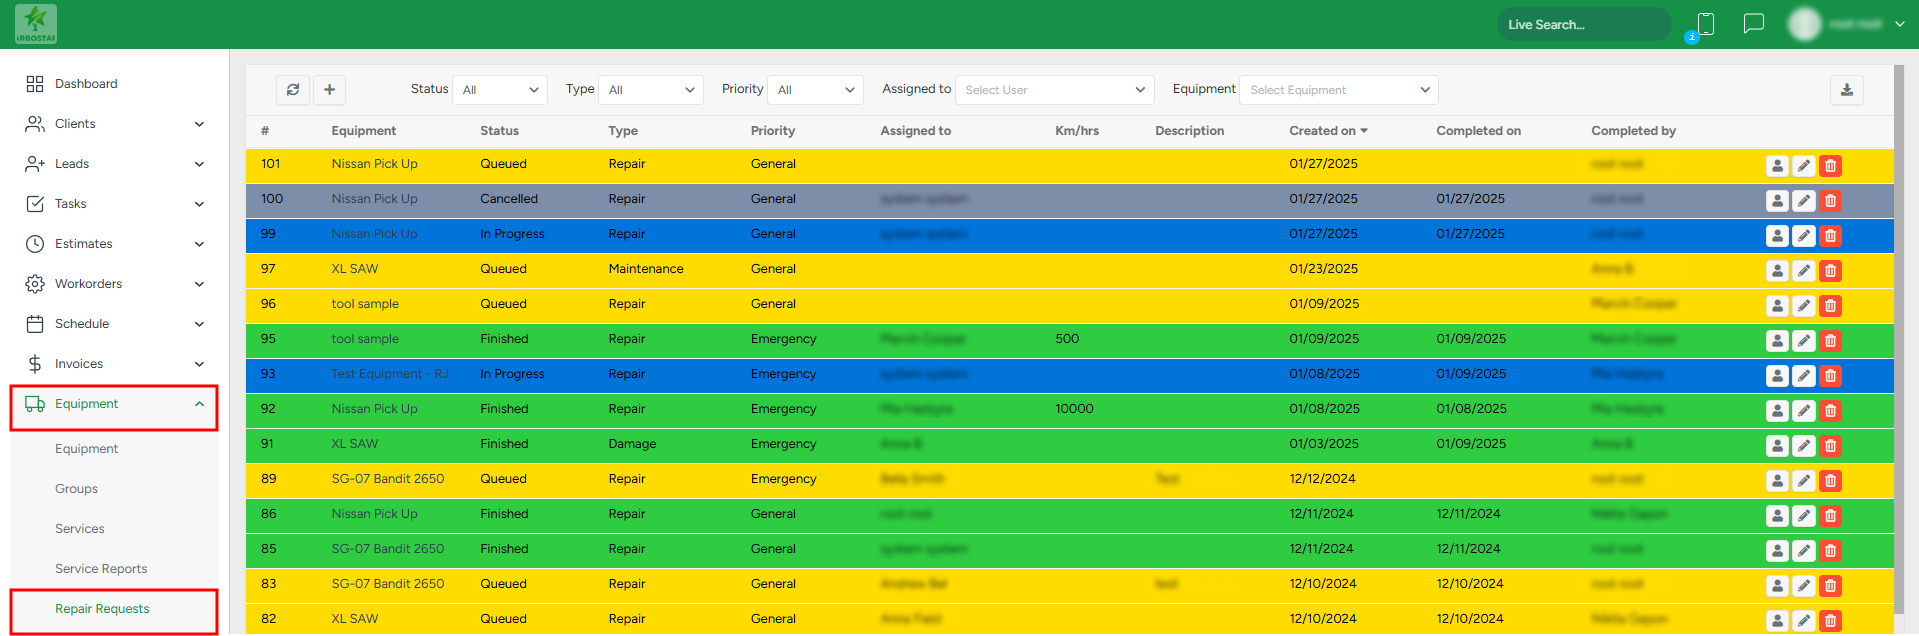
The color of each repair request refers to the status that was selected. You can adjust the status color within Equipment → Settings under the Repair statuses tab. Please see this article for more details.
Filtering repair requests
The list can be filtered based on the status, repair type, repair priority, assignee, and equipment:

- To filter the list based on the repair status, click on the Status filter and choose the required option from the drop-down list.
- To filter the list based on the type, click on the Type filter and choose the required option from the drop-down list.
- To filter the list based on the priority, click on the Priority filter and choose the required variant from the drop-down list.
- To filter the list based on the assignee, click on the Assigned to filter and choose the required variant from the drop-down list.
To filter the list based on the equipment, click on the Equipment filter and choose the required variant from the drop-down list.
To refresh the list, click on the Refresh icon at the top of the page.

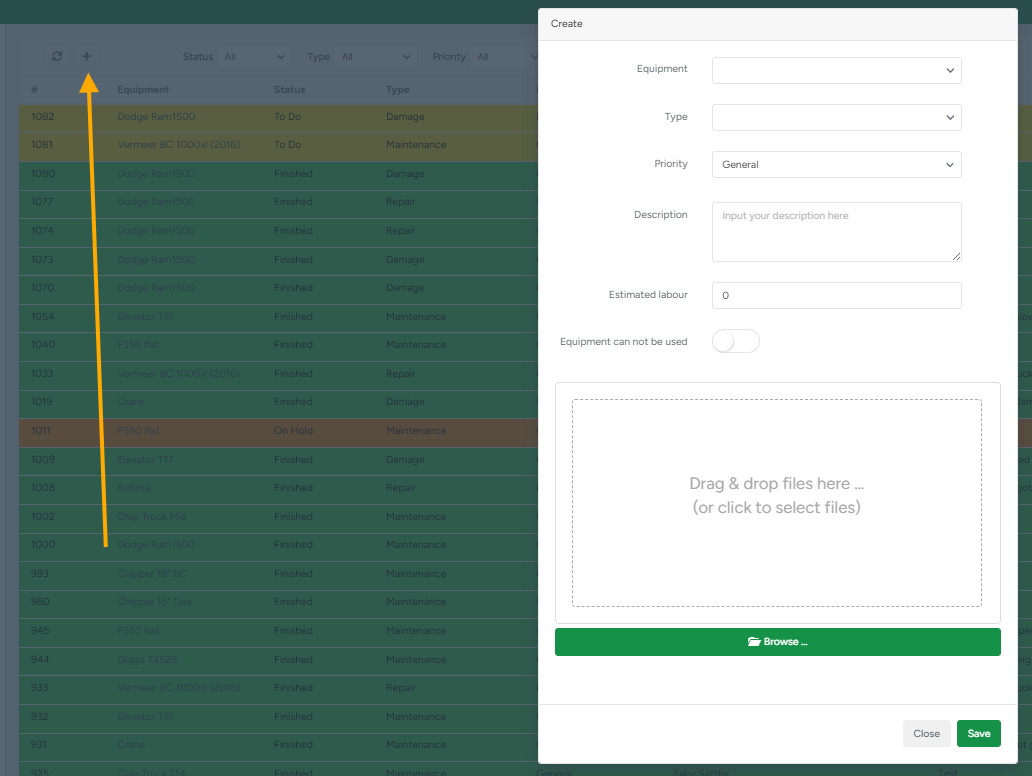
Creating a new repair request
To create a new repair request, click on the “Plus” sign, in the pop-up window, fill in all the information, and click “Save”.
Access equipment page
Note that clicking on the equipment name will redirect you to the equipment page, where you can view full equipment information.
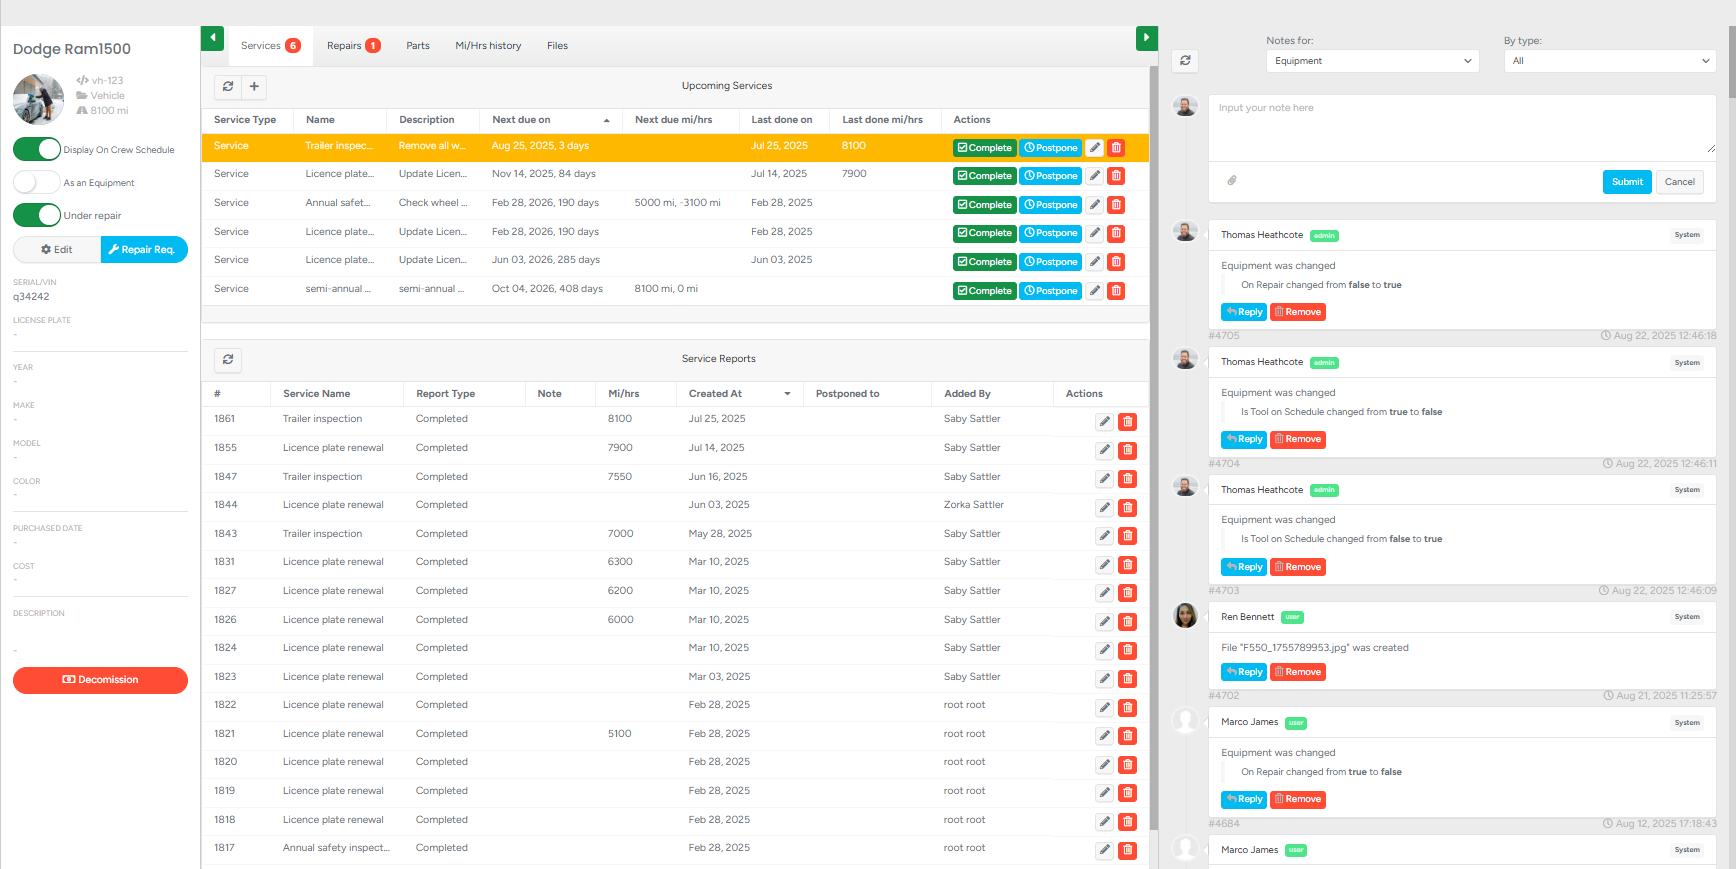
The Equipment Profile page in ArboStar provides a centralized view of a vehicle or equipment unit, allowing users to track service history, schedule upcoming maintenance, and log related notes or updates.

This is designed for fleet/equipment managers and crew supervisors to ensure proper maintenance scheduling, maintain transparent service records, and ensure accountability with a clear history of updates.
Key Sections and Functions:
General Equipment Information (Left Panel)
Displays basic details such as vehicle type, serial number, and license plate.
Options available:
Display on Crew Schedule – Show/hide the equipment in crew planning.
Mark as Equipment – Toggle item classification.
Under Repair – Mark equipment as currently unavailable.
Edit – Update equipment details.
Repair Request – Create and submit a repair request.
Decommission – Retire equipment from active use.
Upcoming Services (Top-Center Panel)
List scheduled or required services with details:
Service Type
Next Due (date, mileage, or hours)
Last Service Completed (date and mileage/hours)
Actions Available:
Complete – Mark a service as finished.
Postpone – Delay service and update the schedule.
Edit/Delete – Modify or remove scheduled service.
Service Reports (Bottom-Center Panel)
Displays historical service reports, including:
Service Name and Report Type
Mileage/Hours at time of service
Created Date
Responsible User
Actions Available:
Edit – Modify service report details.
Delete – Remove report from history.
Notes & Activity Log (Right Panel)
Notes Section – Add notes related to equipment or service. Notes can be filtered by type.
Activity Log – Displays a chronological history of changes and actions (e.g., repairs, status changes, file uploads).
Actions on Notes:
Reply – Add responses to specific notes.
Remove – Delete note or system log entry.
Managing existing repair requests
The existing repair requests can be edited, deleted, or assigned to a specific person:

- To assign a user to the repair request, click on the User sign and in the pop-up window, choose the required user.
- To edit, click on the Pencil icon and make the necessary changes in the pop-up window.
- To delete the existing request, click on the Bin icon.
Repair Request Form
The Repair Request Form is used to log, assign, and track equipment or vehicle repair needs within ArboStar. It allows users to document issues, assign responsibilities, estimate costs, and upload supporting files for better record-keeping.
1. Header Information
Status – Select the current state of the repair (e.g., To Do, In Progress, On Hold, Finished, Rejected).
Type – Define the nature of the issue (e.g., Damage, Maintenance, Repair).
Assigned To – Assign responsibility to a specific user.
Priority – Set urgency (e.g., General, Emergency).
Description – Enter details about the issue (e.g., “Flat tyre”).
Estimated Labour – Provide an estimate of labor hours required.
2. Parts Section
Add parts required for the repair.
Fields include:
Name – Part name.
Part No. – Manufacturer or internal reference number.
Seller – Supplier/vendor.
Purchase Date – When the part was acquired.
File – Upload related documents (e.g., receipts).
Description – Extra details about the part.
Tax / Cost – Record financial details for the part.
The system automatically calculates Total Parts Cost.
3. Labour Section
Log labor hours for employees working on the repair.
Fields include:
Employee – Select from staff list.
Date – When the work was done.
Hours – Duration of work performed.
Hourly Rate – Staff rate.
Cost – Auto-calculated from hours × rate.
The system automatically calculates the Total Labour Cost.
4. Files Section
Upload supporting files (e.g., images of the issue, invoices, documents).
Options available:
Preview – View file.
Download – Save locally.
Delete – Remove file.
Example: Uploading a picture of a flat tire for documentation.
5. Cost Summary
Total Parts Cost – Sum of all part entries.
Total Labour Cost – Sum of all logged labor.
Total Repair Cost – Auto-calculated final repair cost (Parts + Labour).
6. Actions
Download PDF – Export the repair request details into a PDF file.
Save – Save the request and log it in the system.
Close – Exit without saving changes.
