Manage task categories
Within the Task Categories submodule, you are presented with a list of task categories that can be chosen for appointment scheduling. Here you can also create a new category, edit an existing one, or disable it.
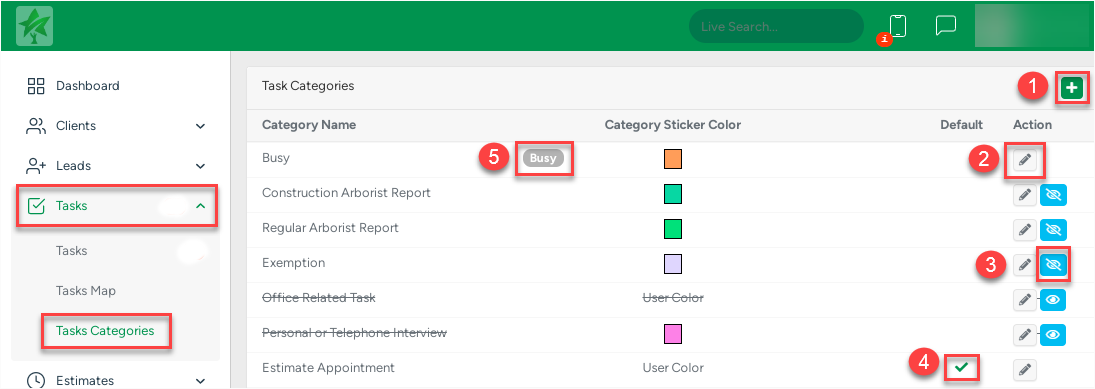
1. Clicking on the + button in the top right corner will summon the Create New Category modal window.
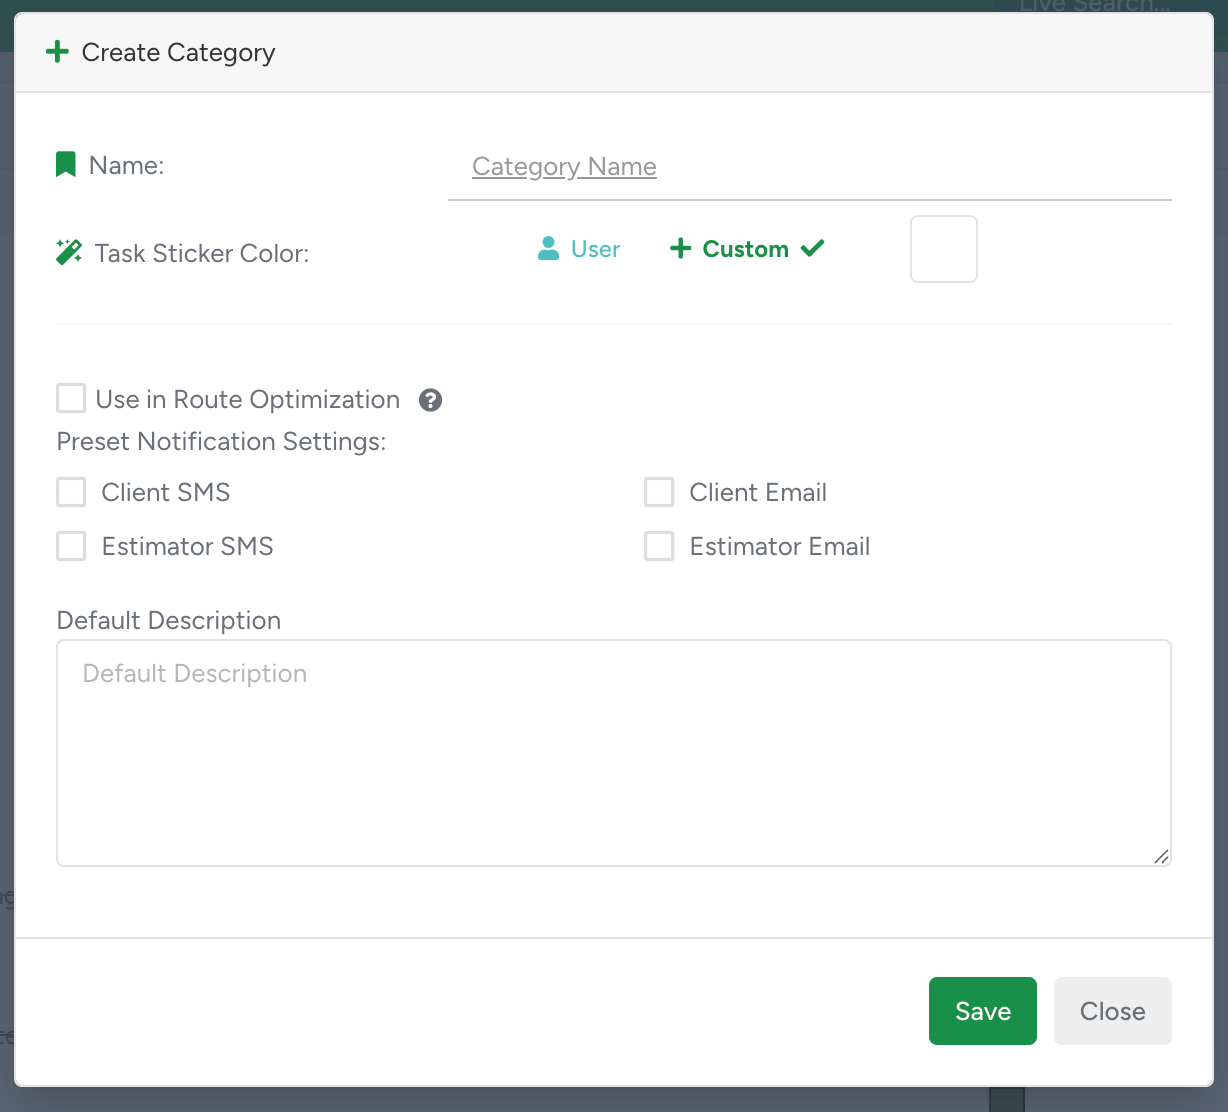
The Task Sticker Color selector sets the color for tasks of such category on the Office Schedule. It has 2 options: User and Custom. The check mark shows which one is active right now. By clicking the square box on the right you'll be presented with an option to choose a custom color for the category. Alternatively, if the User option is selected, a category will take the color of the assigned user.
The Route Optimization feature helps estimators efficiently reorder daily tasks that require travel to external locations. It uses task addresses and Google Maps optimization to determine the most efficient job sequence for the day.
Under Preset Notification Settings, you can find the following options:
Client SMS;
Estimator SMS;
Client Email;
Estimator Email.
After one or a few of them are selected, these options are going to be auto-populated on the Schedule Appointment screen during the task creation process. As you can see, in the image below all options are selected.
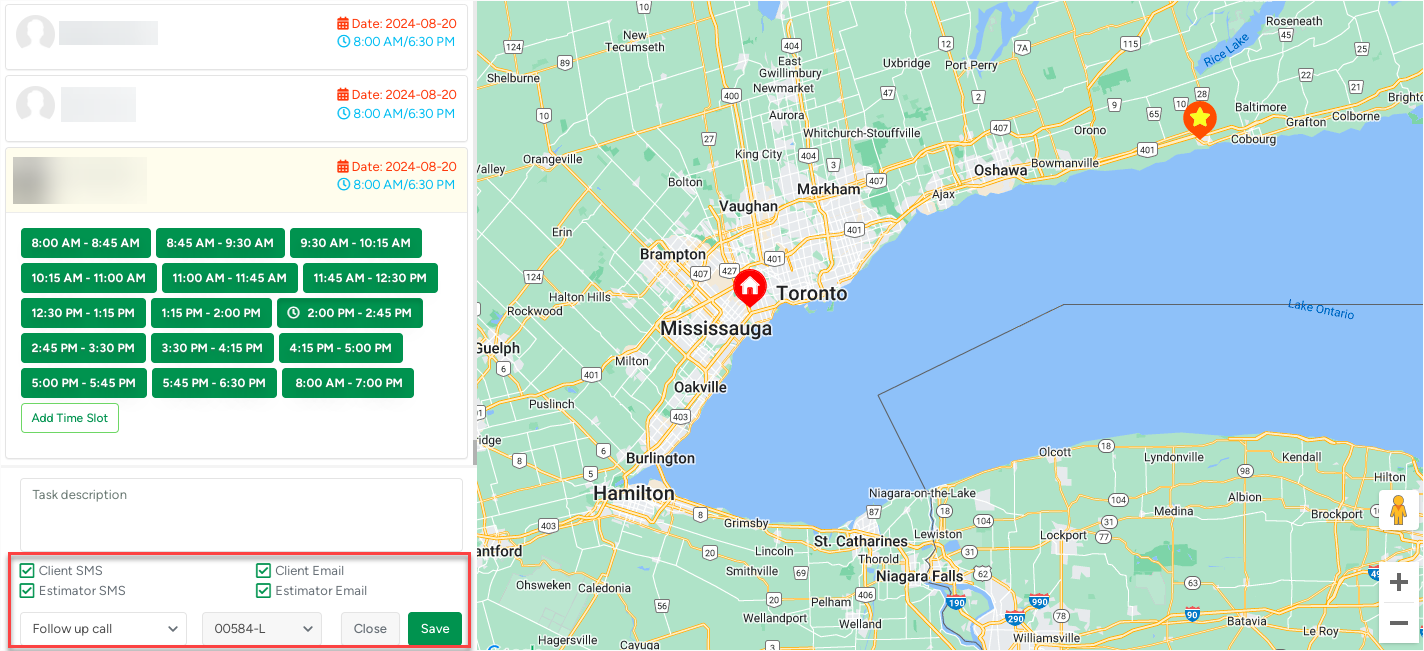
If the checkboxes are checked, you'll be asked to fill out the send Email/SMS templates and then send it to the the client.
Please, feel free to input a brief text explanation for the task in the Default Description field.
2. Clicking on the pencil button allows you to make adjustments to the category.
3. Clicking on the blue button with the eye icon makes the task category disabled or enabled (hidden/unhidden). 
4. A checkmark under the Default column shows which task category is currently set as the default.

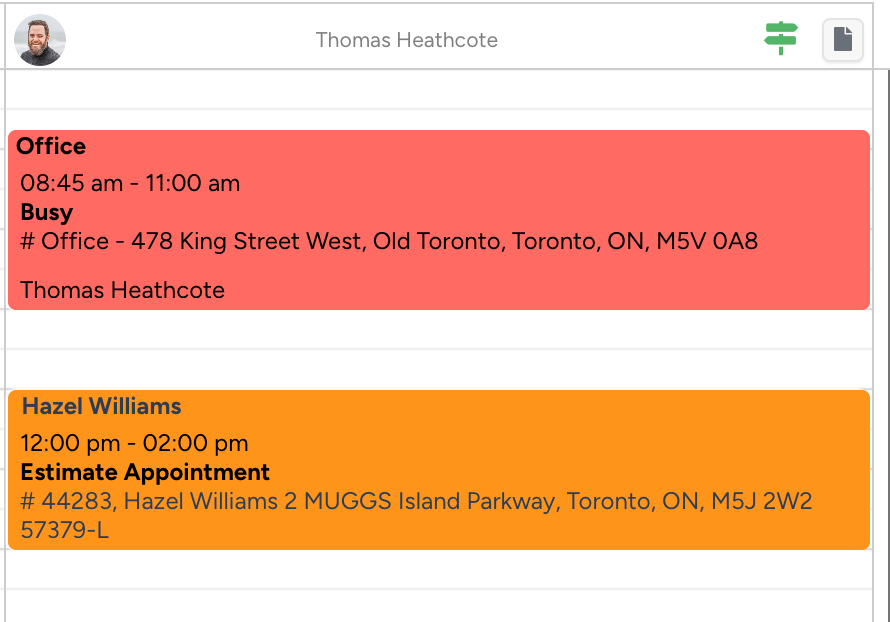
5. The Busy category is embedded into and can't be deleted. It is used to indicate periods during which a user is unavailable, for some reason. For the duration of those periods, no other tasks can be assigned to the same user.

Consequently, the Busy category does not display project-related and client profile information and cannot be selected from the Schedule Appointment and Task module sections.