
ArboStar's Company Management module is a comprehensive tool designed to streamline the management of a company's various functions. It helps you personalize the system for your company's needs and automate the company's workflow.
- To visit the company management page, click the profile button and select Company Management.

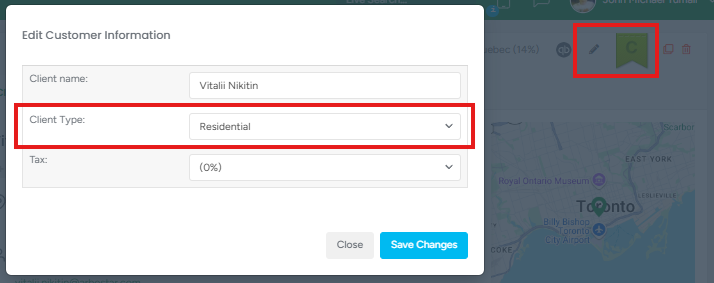
Estimates Management for types of clients
Under Estimates Management, you can choose how you'd like clients to confirm estimates based on the client type:
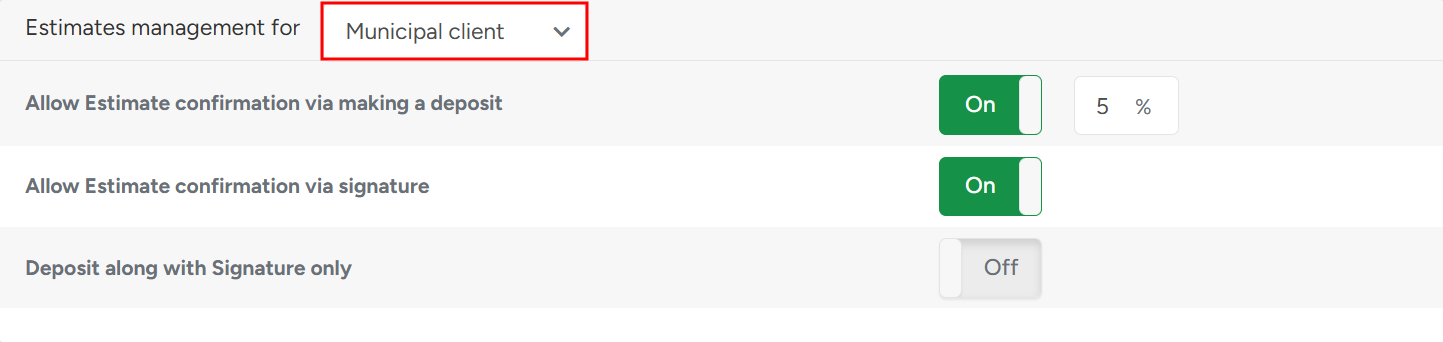
- Specify the client's type from the dropdown list to make unique settings for all clients of the selected type.
- If you want your clients to confirm estimates by depositing a Portal, enable Allow Estimate confirmation via making a deposit, and specify the deposit value.
- If you want your clients to confirm estimates via signature, enable Allow Estimate confirmation via signature.
- If you want your clients to confirm estimates by making a deposit and via signature at the same time, enable Deposit along with Signature only.
Prices Management
The Prices Management section helps you set the details for the estimation price calculation:
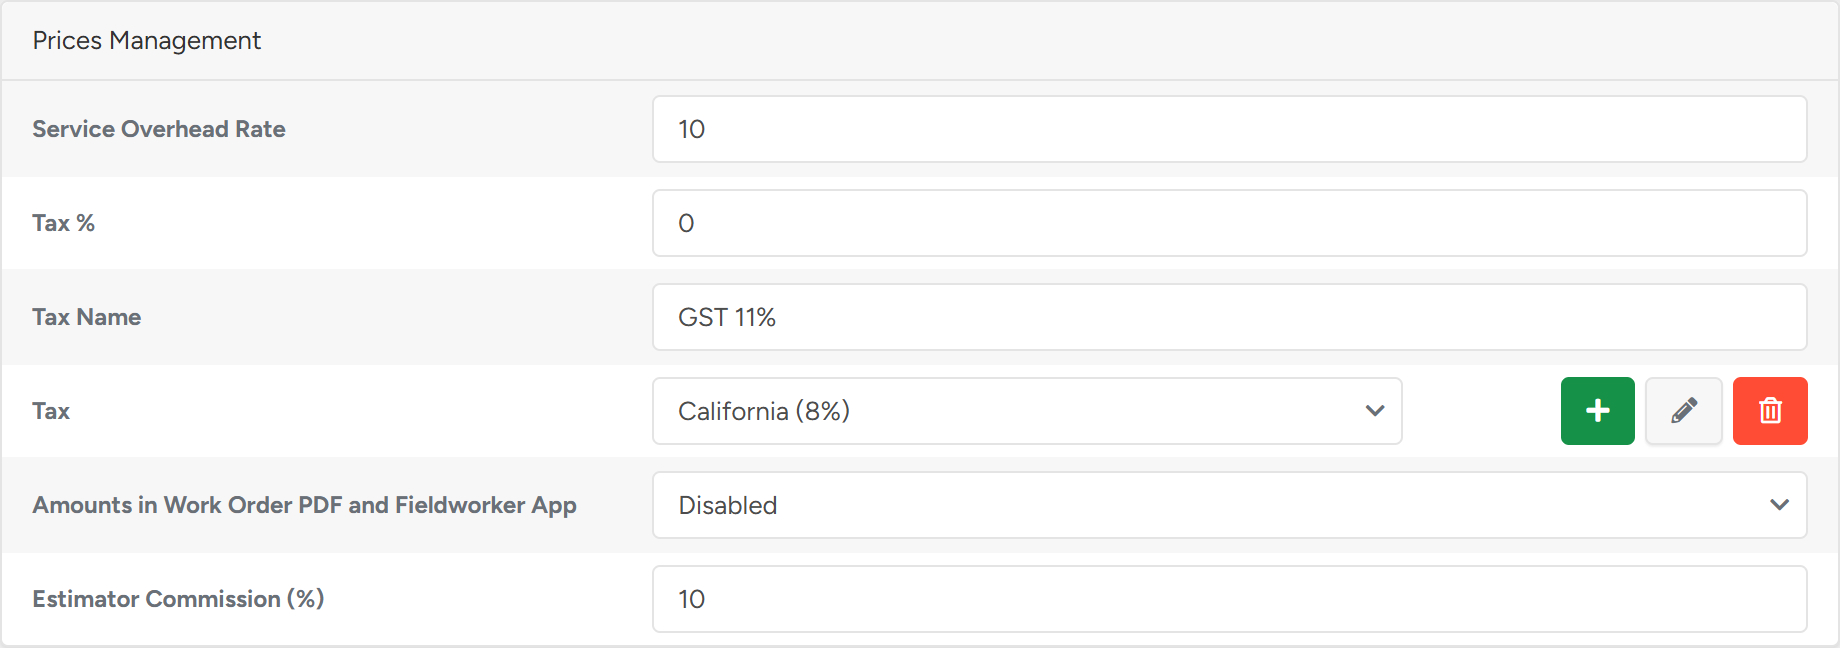
Service Overhead Rate - is your office expense. This is a set amount, but it can be manually changed for each service using a calculator.
You can read more about it in this article about price calculation for an estimate.
In the Tax field, the taxes can be added, edited, or deleted.
- To create a new tax, click on the green Plus button and fill in the tax name as well as the tax percentage.
- To edit an already existing tax, click on the Pencil button.
- To delete an already existing tax, click on the Bin button.
If you want the Workorder PDF to include dollar amounts for the services and for the total WO, choose the Enabled option in the Amounts in the workorder PDF and Fieldworker App field.
If the estimators receive a commission, add the commission percentage in the Estimator Commission (%) field.
The system now supports tax rates with up to 4 decimal places. Tax rates can be entered and saved using this precision and are consistently applied across all areas of the system, including tax creation, price management, and invoice calculations.
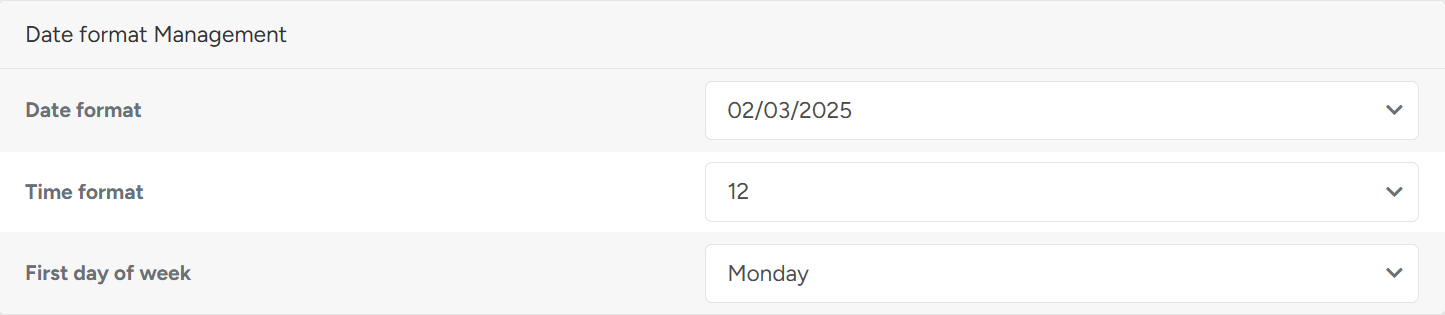
Date Format Management
In the Date Format Management, you can choose the date and time formats to be used by the system and set the first day of the week on the Crew Schedule.
Integration Management for the connected accounting system
ArboStar currently offers QuickBooks, Sage, Fortnox, and Xero integration. By default, all switches are set to ON, which means invoices are automatically synced with the connected accounting system at the time they are created.
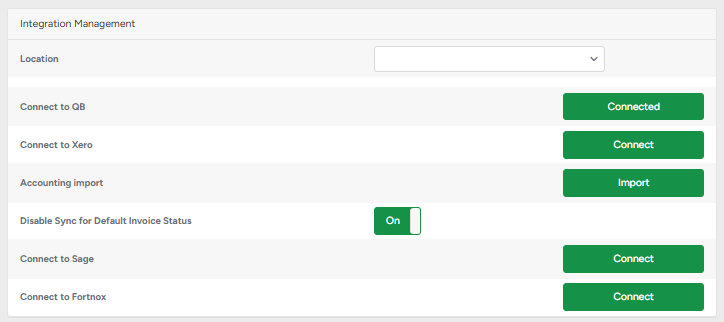
By default, Auto-sync Invoices are turned on. This means invoices will automatically sync with your connected accounting system, as soon as they are created. However, if you change a client’s type, old invoices keep the old settings, and new invoices use the new settings.
- Auto-sync Invoices for Residential Clients
- Auto-sync Invoices for Commercial Clients
- Auto-sync Invoices for Municipal Clients
If you would like to turn off Auto-sync Invoices syncing, please contact your dedicated manager or send an email to info@arbostar.com for assistance. If a switch is turned OFF for a specific client type, invoices for that type will not sync automatically and must be manually approved for synchronization from the Invoice Profile.
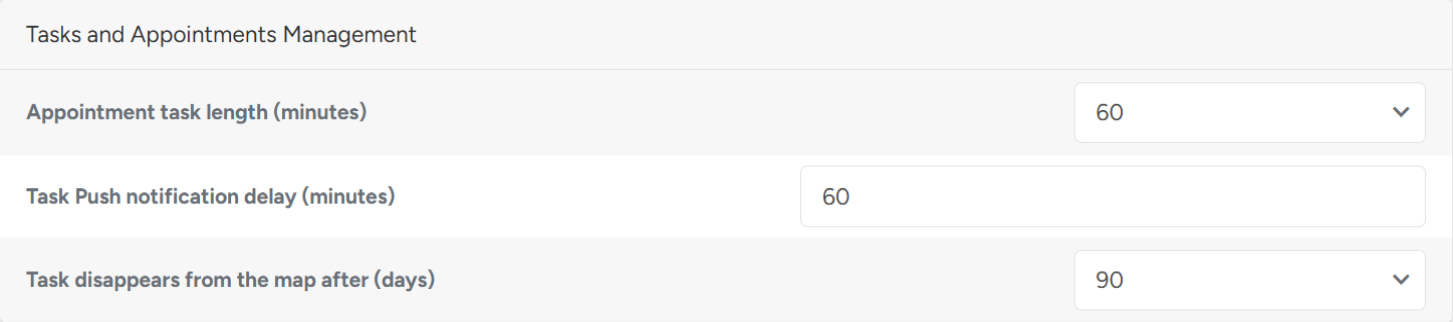
Task and Appointment Management
Here, you can set the appointment task length to be automatically used for the tasks.
- If you set the Task Push Notification Delay (minutes), the estimator will receive the push notification with the corresponding delay.
- If you set the Task disappears from the map after (days), appointments would disappear from the Leads/Tasks map after the set days.
Schedule Preferences Management
Under the Schedule Preferences Management, you can set the start and the end of a working day on the Office and Crew Schedules
- In the Crew Schedule Starts From and Crew Schedule Ends At, set the start and end times for the Crew Schedule.
- In the Office Schedule Starts From and Office Schedule Ends A,t set the start and end times for the Office workers.

- If you want the Timeline view in the Crew Schedule to display the weekends, enable the Timeline Show Weekend option.
- If you prefer to see the project address on the Office Schedule Cards instead of a client’s name, enable the Office Schedule Address as card Title option.

Currency Management
In the Currency Management section, fill out the currency symbol and choose the currency symbol position to be used across the system and in the PDFs.

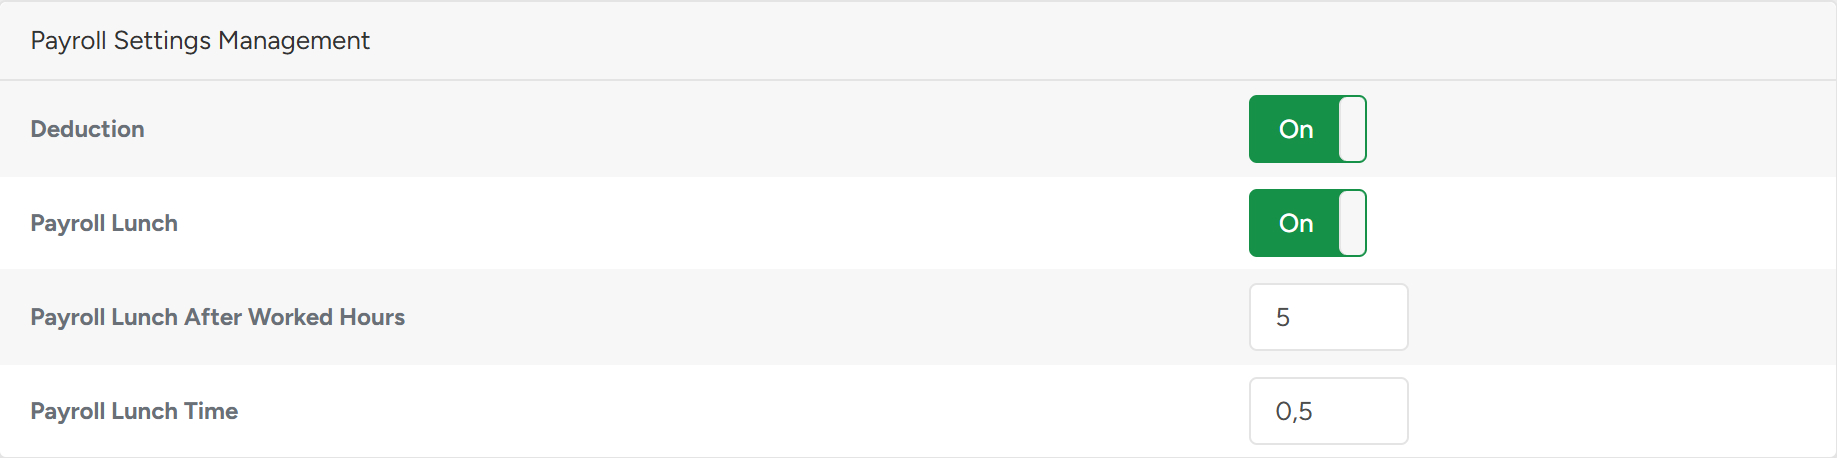
Payroll Settings Management
In the Payroll Settings Management section, switch the toggle on if deductions from payroll are allowed.
If the lunch break is mandatory:
- Switch the Payroll Lunch toggle on
- Set the hour duration after which the lunch break is added to the payroll in the Payroll Lunch After Worked Hours section.
- Set the lunch duration under the Payroll Lunch Time section. The minimum amount you can put is 15-minute breaks (0.25 of an hour). This gives more flexibility and ensures more accurate time tracking in schedules and reports.
Invoice Management
In the Invoice Management section, you can set the overdue settings for invoices.

- If residential clients have to pay overdue invoices after a set number of days, set the required number of days in the Overdue invoice for Residential client after (days) field.
- If corporate clients have to pay overdue invoices after a set number of days, set the required number of days in the Overdue invoice for Corporate client after (days) field.
- If municipal clients have to pay overdue invoices after a set number of days, set the required number of days in the Overdue invoice for Municipal client after (days) field.
- If the Allow Tips option is ON, customers can add tips on the invoice portal while paying for the invoice.
Please note that tips can also be refunded when refunds are processed. The amount will be listed but marked inactive if no tips are given.
- If the Taxable Overdue Interest option is ON, tax is applied to the overdue interest amount (current system behavior).
If the Taxable Overdue Interest option is OFF, overdue interest is calculated without tax applied.
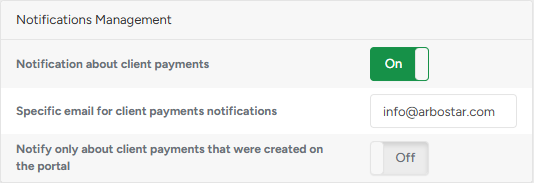
Notifications Management
With this permission, you can configure whether the company receives notifications related to client payments and estimate confirmations, ensuring a secure, controlled, and adaptable company workflow.
Use the switchers to:
Enable or disable notifications about client payments and estimate confirmations
Define specific recipients for notifications when using Custom Email or Phone by filling out the corresponding field.
Notify the employee with alerts of payments that were specifically made through the client portal.
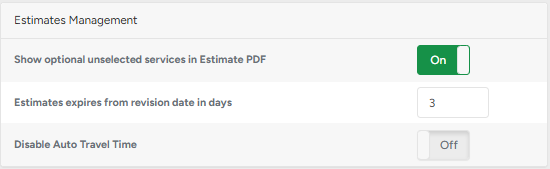
Estimates Management
Unlike the Estimates Management for types of clients, these settings apply to all estimates in the system, regardless of the client type. This is a great tool to keep interactions between a client and the company open and transparent, as the client will always have a grasp of confirmed services.
- Show recommended services in estimate PDF - Enable the toggle to display all recommended and declined items on the estimate PDF
- Estimate expires from the revision date - set the number of days the estimate stays under revision until the expiration in the corresponding field.
- Disable Auto Travel Time- lets you turn off automatic travel time calculation in estimates. When enabled, travel time defaults to zero and can be entered manually, giving you more precise control over job timing. This works consistently on both Web and App.
Crew Schedule Management
This permission enables the visual indicators on a Crew Schedule Map that show how long a workorder has been in the system. It is especially useful for monitoring project timelines, helping teams spot delays, prioritize aging workorders, and keep operations moving efficiently.
- Press the plus button to set day thresholds and assign unique colors to reflect how long each workorder has been in the system.
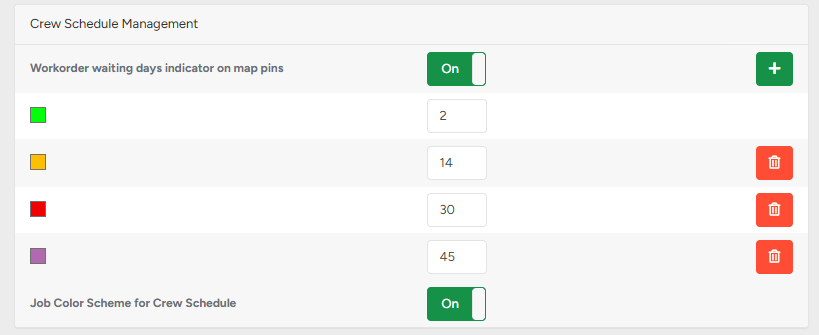
- If Job Color Scheme for Crew Schedule is enabled in Company Management, job colors will reflect their real-time Job Status in Crew Schedule.
Check out our guide: Understanding Job Statuses: Real-Time Scheduling Guide (Web & App) to see how each status works and what triggers them.
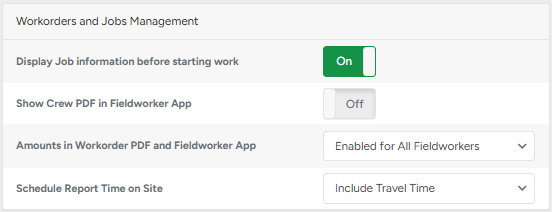
Workorders and Jobs Management
The Display Job information before starting work setting allows admins control over what details fieldworkers can access before officially starting a job (APP). By hiding job services, products, and prices until the crew leader presses Start Job, companies can prevent situations where fieldworkers review the job beforehand, decide it’s too demanding, and leave without even beginning work. This ensures crews commit to the job first, improving accountability, reducing no-shows, and helping keep operations more reliable.
The Show Crew PDF in Fieldworker App setting allows admins to control whether crews can access the Crew PDF from the Fieldworker application. It helps companies manage visibility and access to job-related documents based on their operational needs.
When enabled (default), the Crew PDF button is visible in the app.
When disabled, the Crew PDF button is completely hidden from fieldworkers.
The Amounts in Workorder PDF and Fieldworker App setting controls whether fieldworkers can see the prices of services and products in the app. Admins can choose to disable amounts completely, show them only to crew leaders, or make them visible to all fieldworkers, giving flexibility in how much pricing information is shared with the team.
The Schedule Report Time on Site setting defines whether travel time is counted as part of the total working hours on a job. Admins can choose to include travel time in the report or exclude it, depending on how they want to track and calculate employee hours.
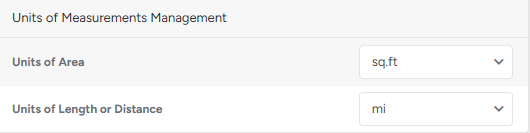
Units of Measurement Management
This permission allows companies to set the default unit of measurement for area-based service calculations. The selected units are used by tools like the Area Calculator and Service Interval Type under the Equipment module, ensuring pricing and calculations align with regional standards or business preferences. Both Metric and Imperial systems are available, so you can work with the measurement format that suits your business best.
ArboCloud Management
Any files that you need for your projects can now be stored in our File Library. Those files can be accessed by pressing the Select from ArboCloud option on the project profile from any device.
- Press the Open button to add new files to the storage.

Portal Management
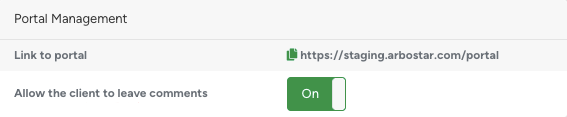
Link to portal
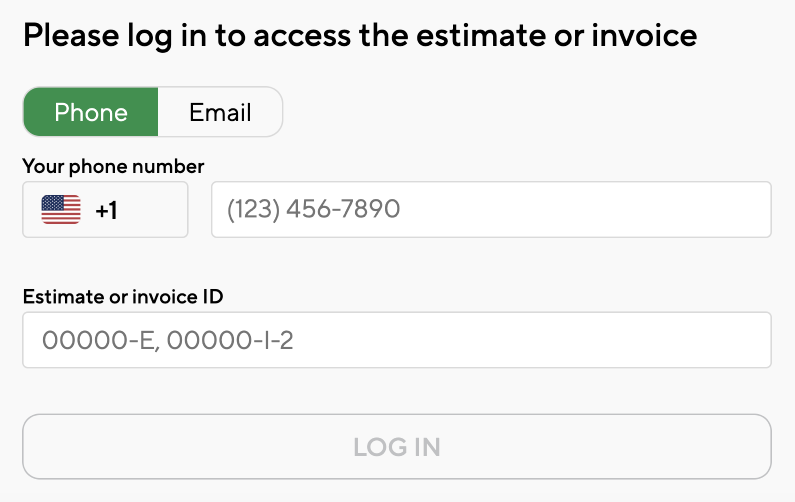
This link can be embedded into your website, giving clients direct access to their portal—ideal for actions like confirming estimates or making payments, even if they no longer have the original email. This improves client autonomy and reduces dependency on office staff.
For example, if your client has only a hard copy of the estimate or invoice and wants to make a payment, there’s no need for him to contact the office. The person can navigate to your website and press the Pay Bill button that will open the individual Customer Portal without searching a bunch of emails for a direct link.
Allow the client to leave comments
This setting enables a comment field on the client-facing estimate portal. When the toggle is turned on, clients can leave comments during the estimate confirmation process. These comments are automatically saved to the Workorder profile as a non-editable note, helping your team capture client feedback or requests directly within the workflow.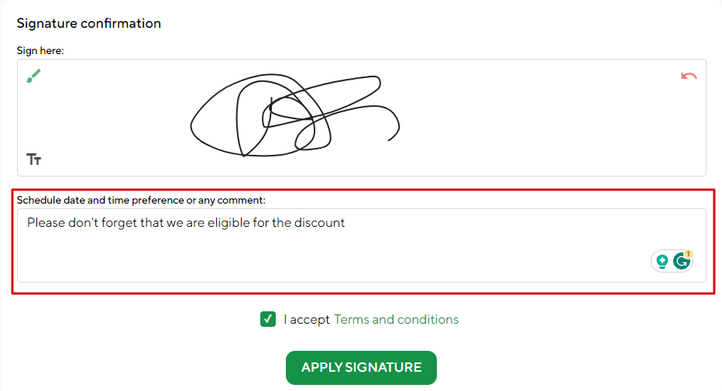
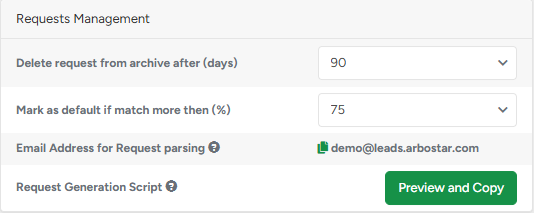
Requests Management
The Requests Management allows you to control how incoming client submissions from your website form are processed. By customizing these options, you gain better control over client data quality and request processing
Mark as default if match more than (%) – This defines the percentage required for the system to suggest merging a new request with an existing client based on matching fields like name, address, phone, and email.
Configure request history retention – Decide how many days Confirmed and Declined requests are stored before being permanently deleted.
These settings directly affect how the Requests module works. When a submission is received, the system uses the Match Rate logic to help you avoid duplicate client creation by suggesting whether to create a new Lead or merge with an existing one.
Once a Request is confirmed, a new client with a lead will be generated in case of a new client or just a Lead with the status For Approval if merged.
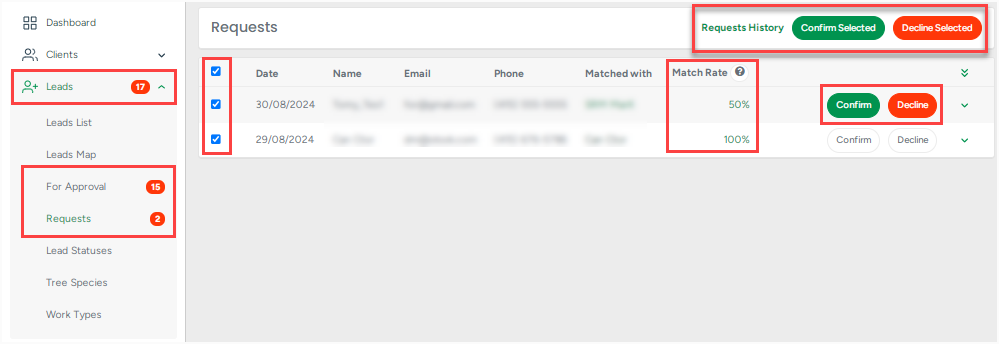
All reviewed submissions, whether confirmed or declined, are stored in the Requests History according to your retention settings.
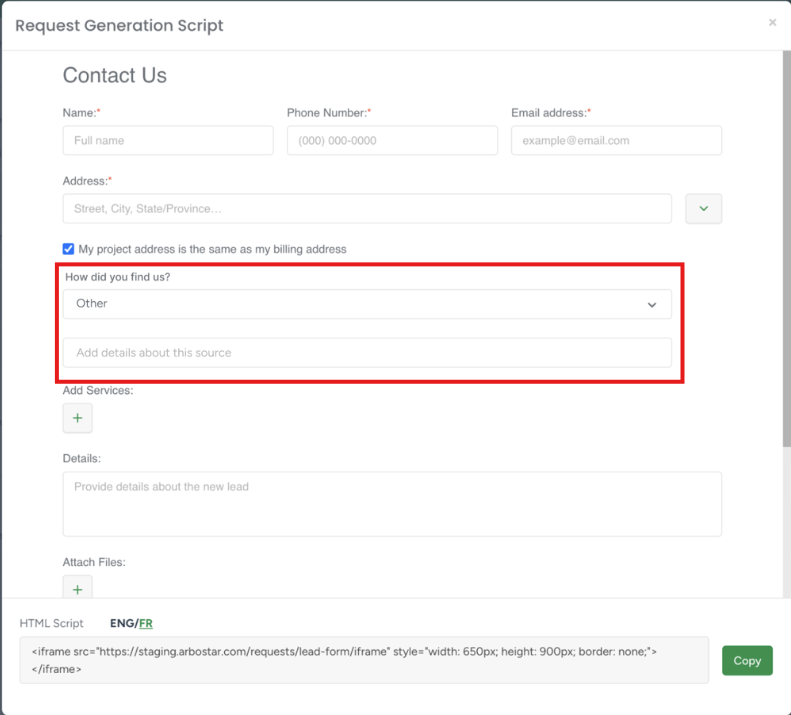
“How did you find us?” Field
This allows customers or staff to provide more specific information about how the lead was generated. If a Lead Source selected on the form has Allow adding details for this lead source turned ON:
An additional text field will appear.
Placeholder text: Add details about this source
See how to track Google Click ID and Form ID here
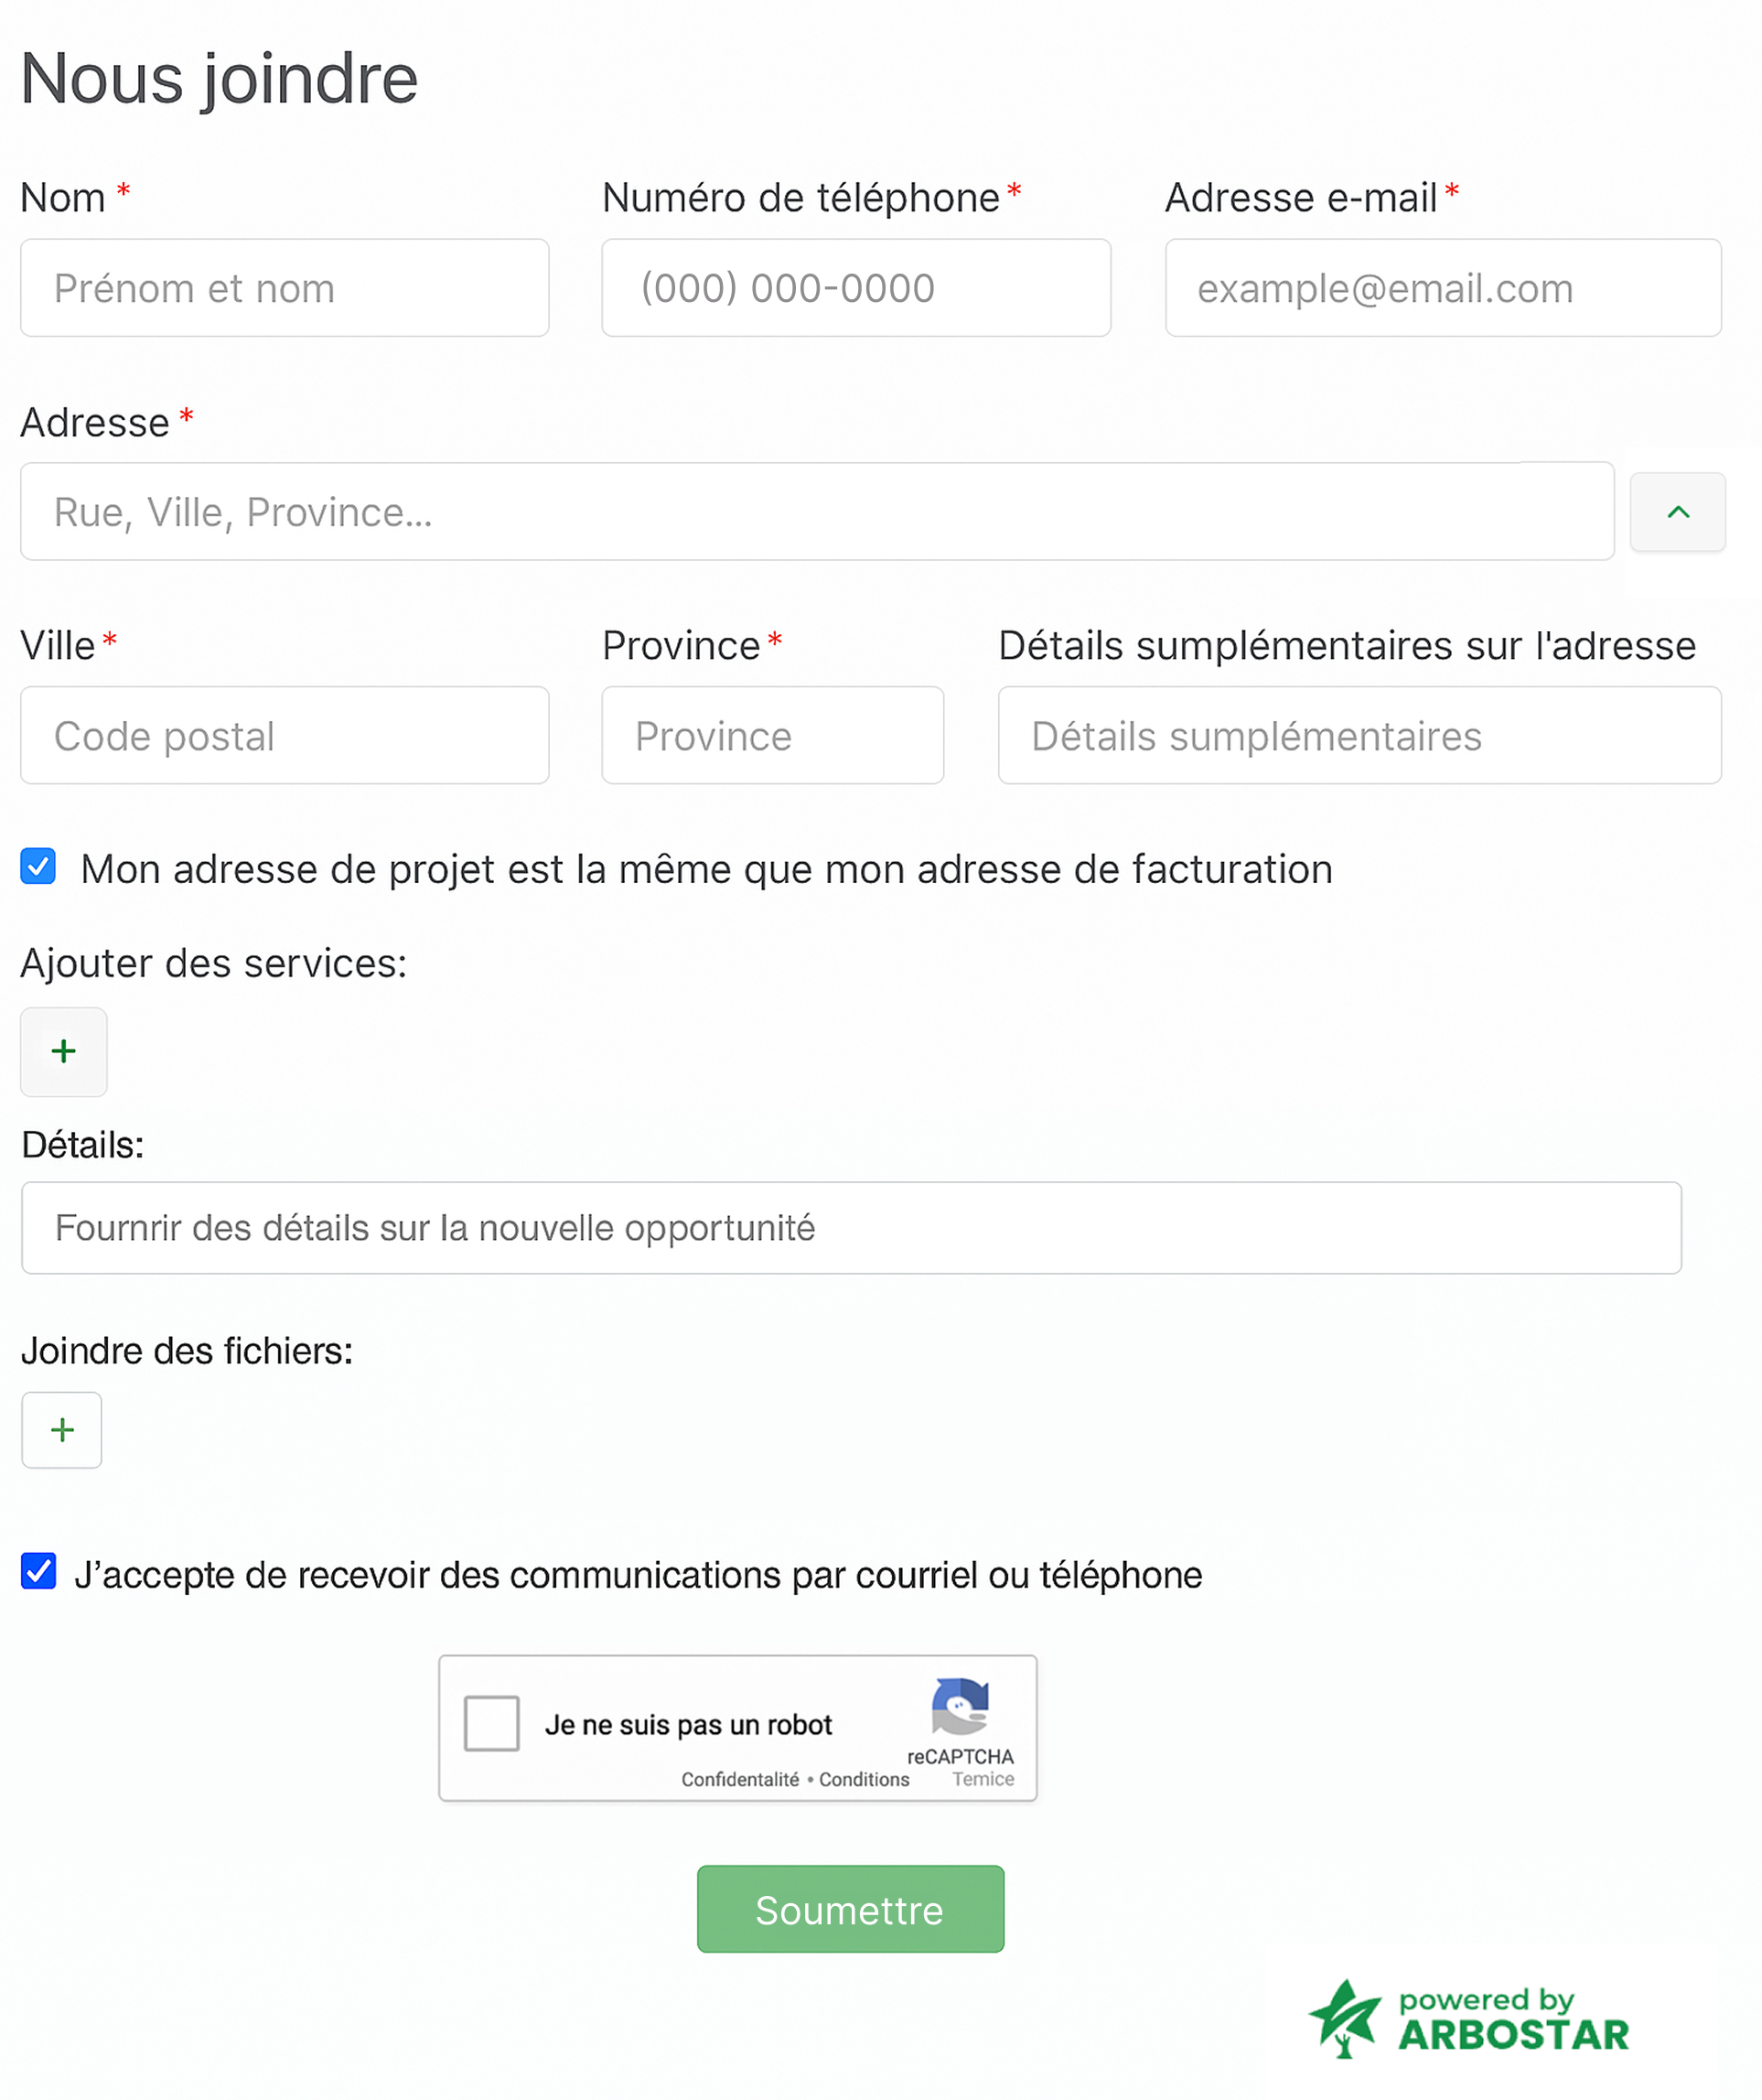
Multilingual Form Support
To provide a better client experience, especially for French-speaking visitors, the Request Form can now be displayed in different languages (English or French).
Form Labels and Messages
All form labels, field names, and interface messages are fully translated into French to ensure clarity for French-speaking users. This includes titles, field descriptions, and button names.
Examples of translations:
- Name → Nom
- Phone Number → Numéro de téléphone
- Email Address → Adresse e-mail
- Submit → Soumettre
Placeholder texts are also localized and updated with neutral, consistent values. For example, the phone number format is displayed as (000) 000-0000, and the email field uses example@email.com. These placeholders are applied consistently in both the English and French versions of the form to maintain a standardized appearance.
Validation & Error Messages
Validation rules remain identical across both languages, but the system automatically displays them in the selected interface language. This ensures that users clearly understand what corrections are required before submitting the form.
Examples of validation messages:
- English: “The field cannot be blank”
- French: “Ce champ ne peut pas être vide”
All error messages use neutral placeholders (e.g., (000) 000-0000, example@email.com) instead of real phone numbers or email addresses, ensuring consistency and avoiding confusion for users.
Photo example of the form displayed in French with translated field labels, placeholders, and error messages.

Request Form Language Selection
In Company Management → Request Management → Preview and Copy, you can now choose in which language the request form will be displayed.
If you copy the English version (default), the generated script will look like this:
https://[YOUR_COMPANY].arbostar.com/requests/lead-form/iframeIf you select the French version, the script will include a language parameter:
https://[YOUR_COMPANY].arbostar.com/requests/lead-form/iframe?lang=fr
By embedding the selected script on your website, the request form will automatically appear in the chosen language.
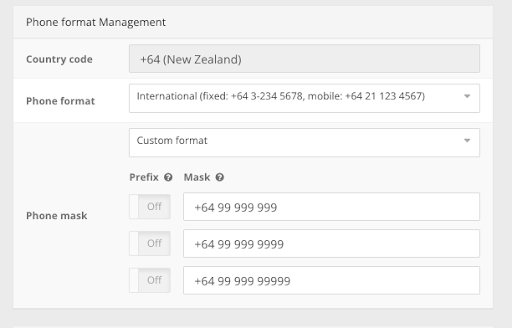
Phone Format Management
With the dynamic phone number length, the system allows for different phone number formats and sizes based on regional and country standards, accommodating local conventions and avoiding fixed-digit limitations.
- In the Country code section, pick the code of the country you currently operate in.
- In the Phone format section, pick the format you would like to be used around the system.
- From the Phone mask section, you can either pick the auto format or set a custom format.
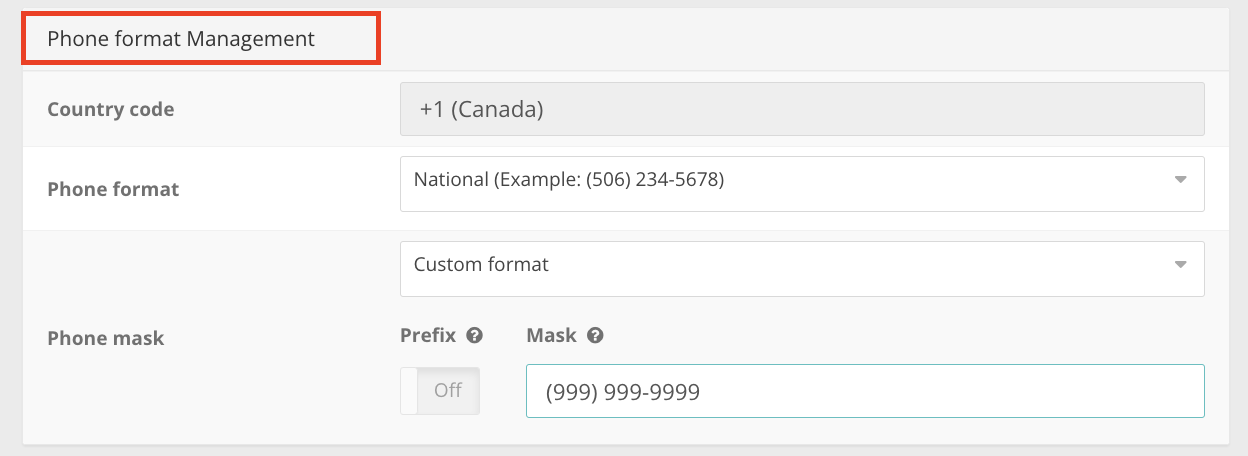
If you pick the Custom format option, you'll have different options for phone number length available in the system.
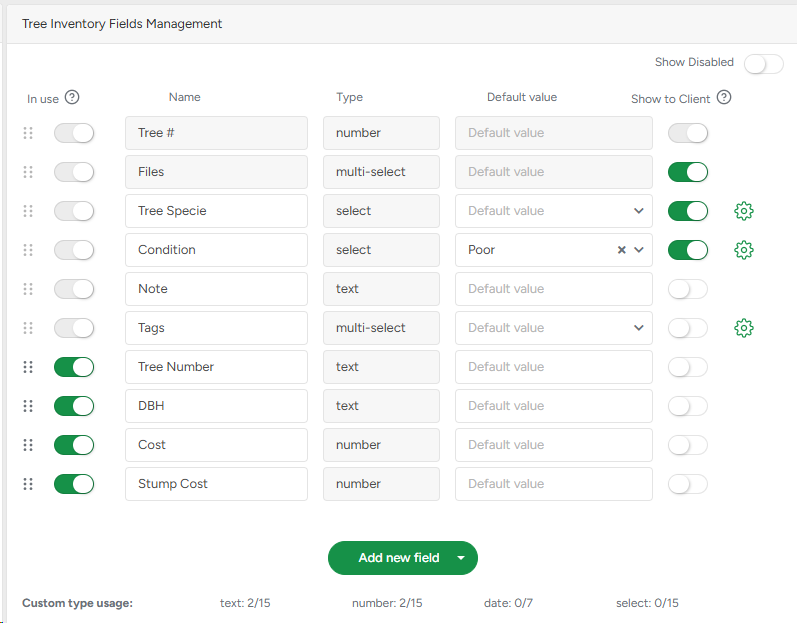
Tree Inventory Fields Management
Here you can fine-tune your settings for tree inventory.
Read more in the full article.
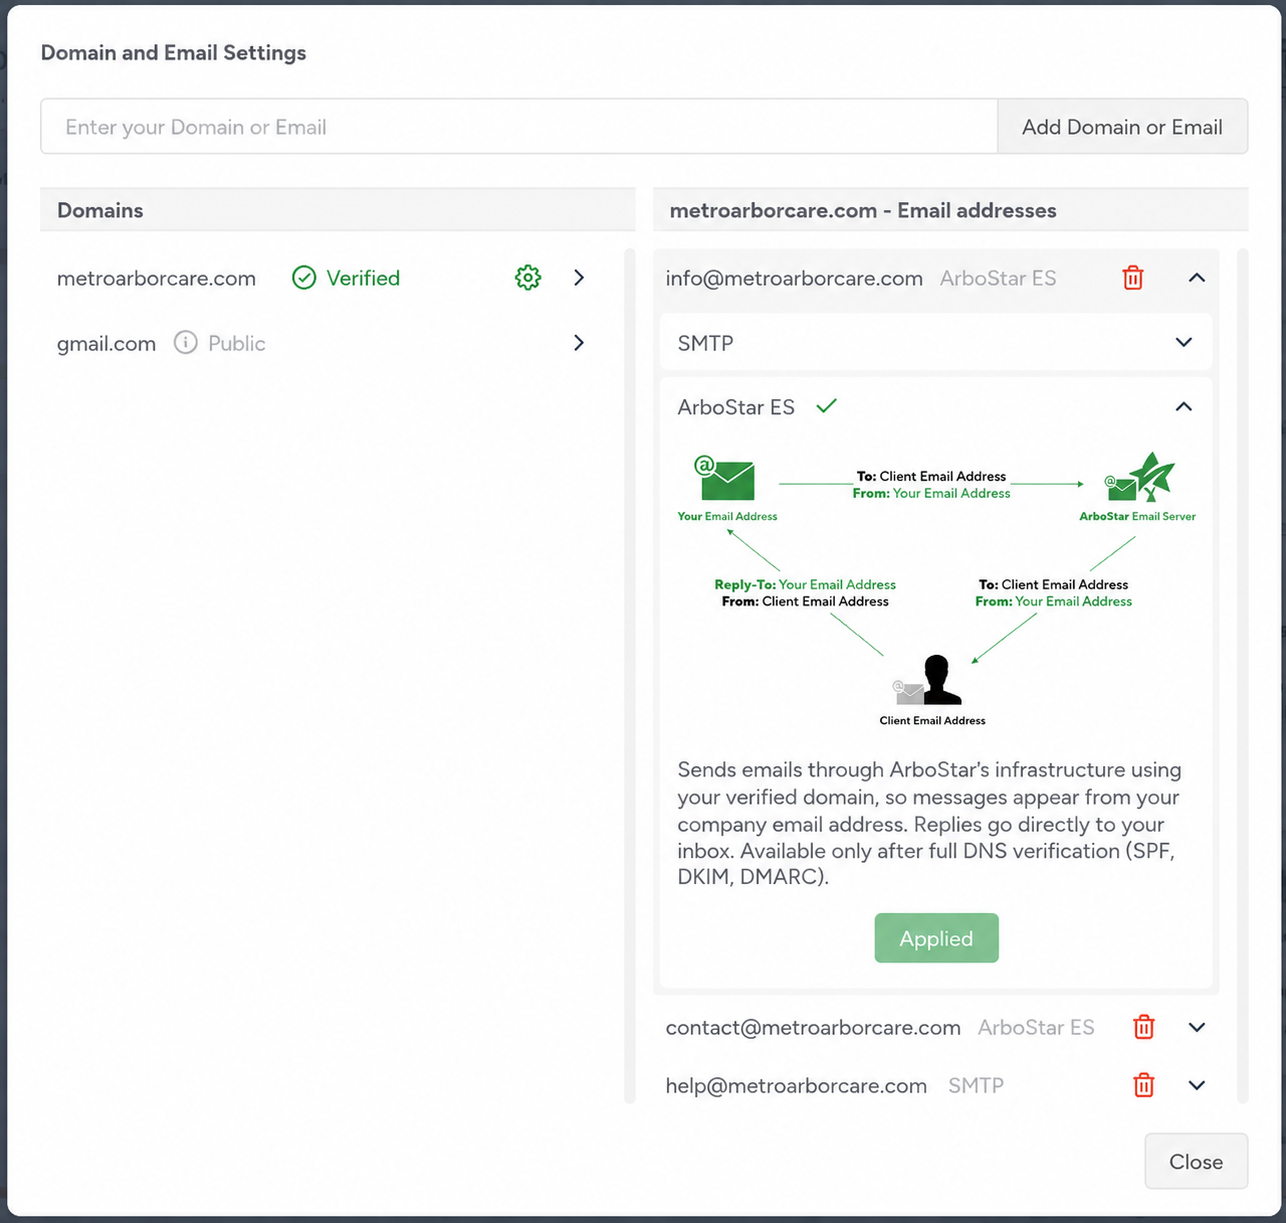
Verify a new sender email address/domain
Before you and your employees can send emails through the system using your email addresses, the domain and email addresses must first be verified. To get started, click the Manage button under Domains & Emails, then add and verify your domain and email addresses.

Email and domain verification help prove that the emails sent from ArboStar are legitimately coming from your business. This improves your email reputation and helps prevent your messages from being marked as spam or rejected by your clients’ email providers.
For more information on this topic, please check out Email Address and Domain Verification
Tag Management
Tags Management feature can be a useful tool for improving organization, efficiency, and collaboration within a system by enabling you to quickly locate and access relevant information.
All tags that are used in the system are displayed in the Tag Management section:

If the option Allow users other than Admin to add tags is on, all employees within the user type: users can add tags and edit them. If this setting is turned off, non-admin users will not see the Create button for tags in the mobile app and cannot add tags.
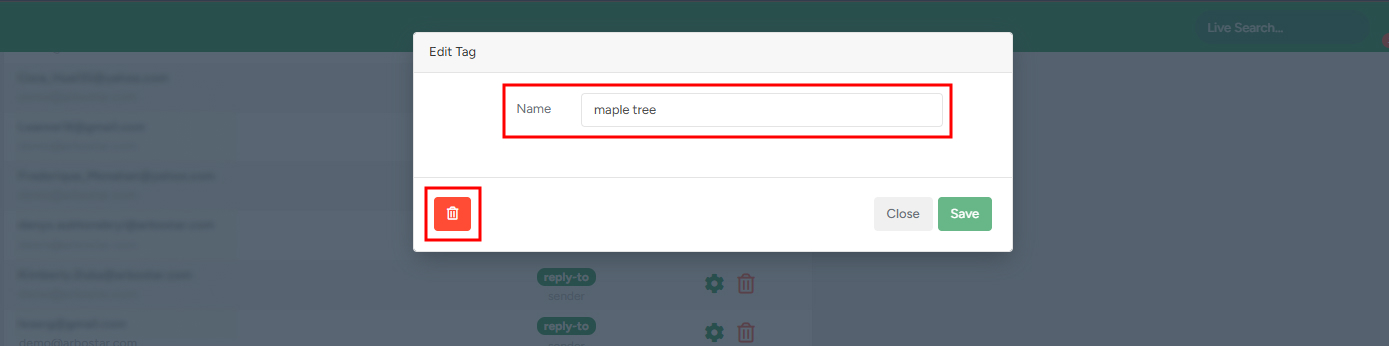
You have the option to Rename and Delete the tags. To do so, click on the tag, and an Edit tag pop-up will appear.
- To rename the tag, fill in the Name section and click Save.
- To delete the tag, click on the Bin button.
To learn more about how tags work on the web, click here and to learn more about how tags work on the mobile app, click here.
References
In the References section, you can moderate the client reference list and add references tailored to your company's needs. It allows administrators to create and manage values used throughout the system.
Only users with the Admin role can create, modify, enable, disable lead sources. Non-admin users can continue using available reference values but cannot change their configuration.
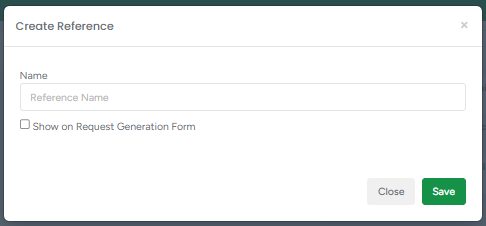
- To add a new reference option, click on the green Add button, fill out the reference type name, and click Save.
To display the Lead Source field for the "How did you find us?" question in the Contact Us form, enable the option by checking the corresponding box. This will allow the lead source to appear on the form for customers to select their response.
Additionally, you can control the behavior of the Lead Source field when creating leads in both the Web and App versions:
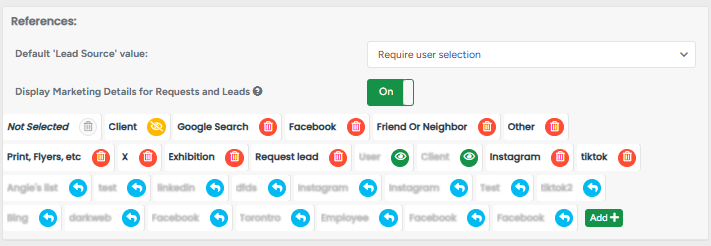
The Default Lead Source drop-down allows you to set a default value for all newly created leads (e.g., Google, Facebook, Client, etc.).
If the Require user selection option is chosen, the Lead Source field becomes mandatory during the lead creation process. Only active lead source can be selected
If Not Selected is chosen, the system will continue working normally without interrupting automated processes, and no manual selection is required.
This setup ensures consistent data collection, improves lead source tracking, and simplifies the lead creation process for your team.
Display Marketing Details for Requests and Leads - Enable this option to display marketing details (UTM, Google Click ID, and Form ID) in the Lead List, Lead Statistics, and Lead CSV exports. Disable it to hide marketing details from the system interface. Data is still collected in the background.
Disabling Lead Sources
Lead sources can be disabled without affecting historical data and does not modify any existing lead records. To disable a lead source, click on the bin icon. This will not be available to be selected on the lead source dropdown.
- Historical records retain the original value of the lead even after disabling the lead source
- Existing reports and data continue displaying the original lead source
Note that Client and Employee references cannot be renamed, deleted, only disabled. To disable it, click on the Eye button.
Editing Existing Leads
When editing an existing lead that already uses a disabled source:
- The disabled source remains visible on the lead profile but will appear greyed out
- Saving without changing the field keeps the original source attached to the lead
This ensures historical information remains intact while preventing disabled values from being reused for new entries.
Duplicate Name Validation for Custom Reference Fields
When creating a new custom Reference field, the system checks for duplicate names and is case insensitive.
Examples of duplicate entries and treated as identical values:
- Referral
- referral
- REFERRAL
If a duplicate name is entered the system displays a validation error. This helps prevent duplicate reference fields and keeps data organized.