
Add New Lead
You can initiate the new Lead Adding in two ways:
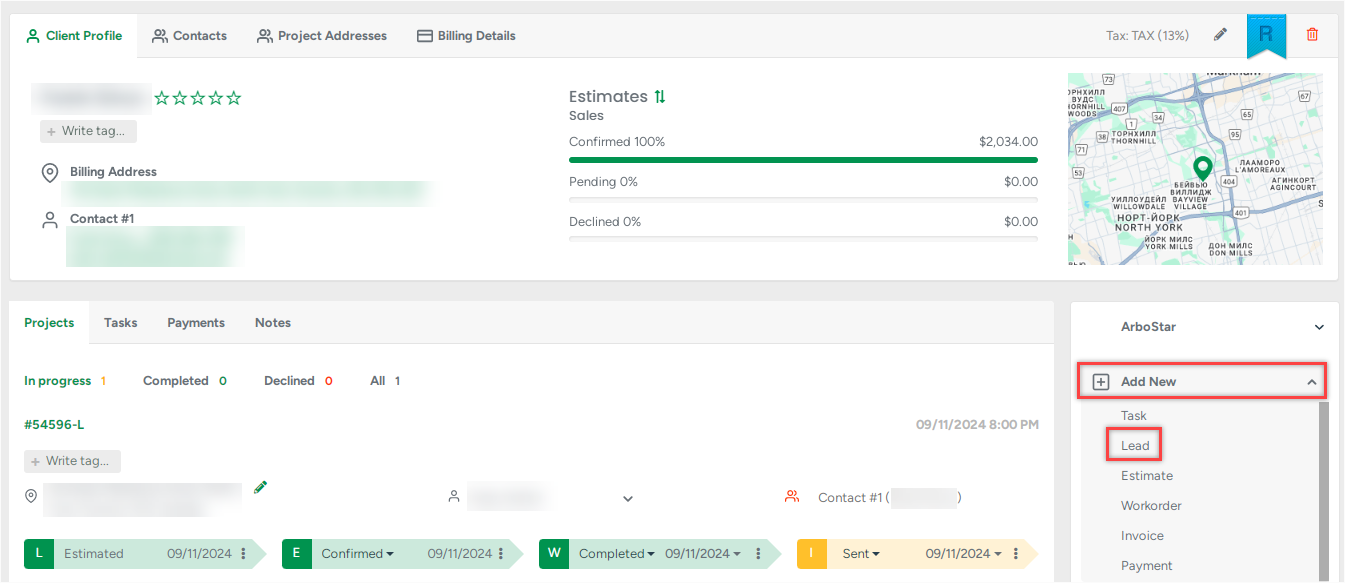
1. On Client Profile:
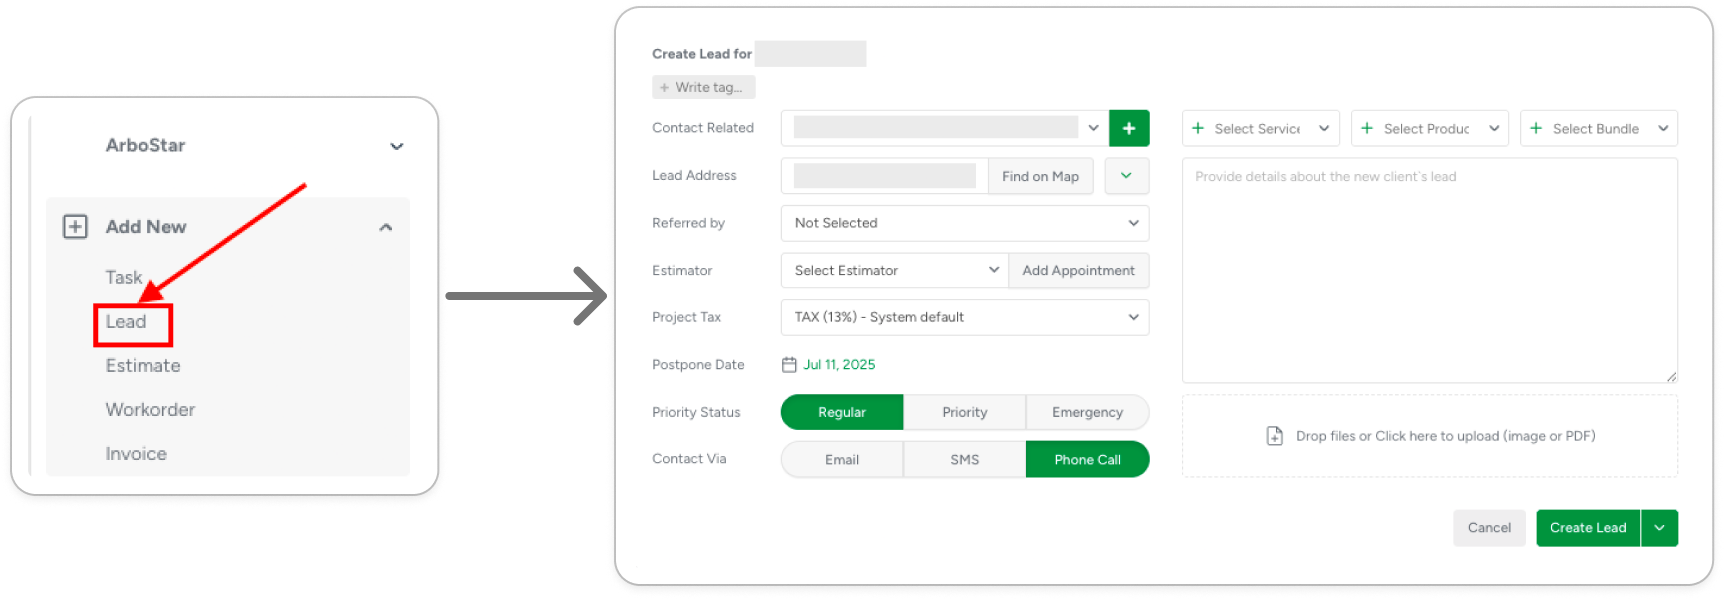
- To add a new Lead for an existing Client, navigate to the Client’s profile and click on Add New → Lead:
2. On the Create Client form:
- While adding a new Client, click on 'Create Lead':
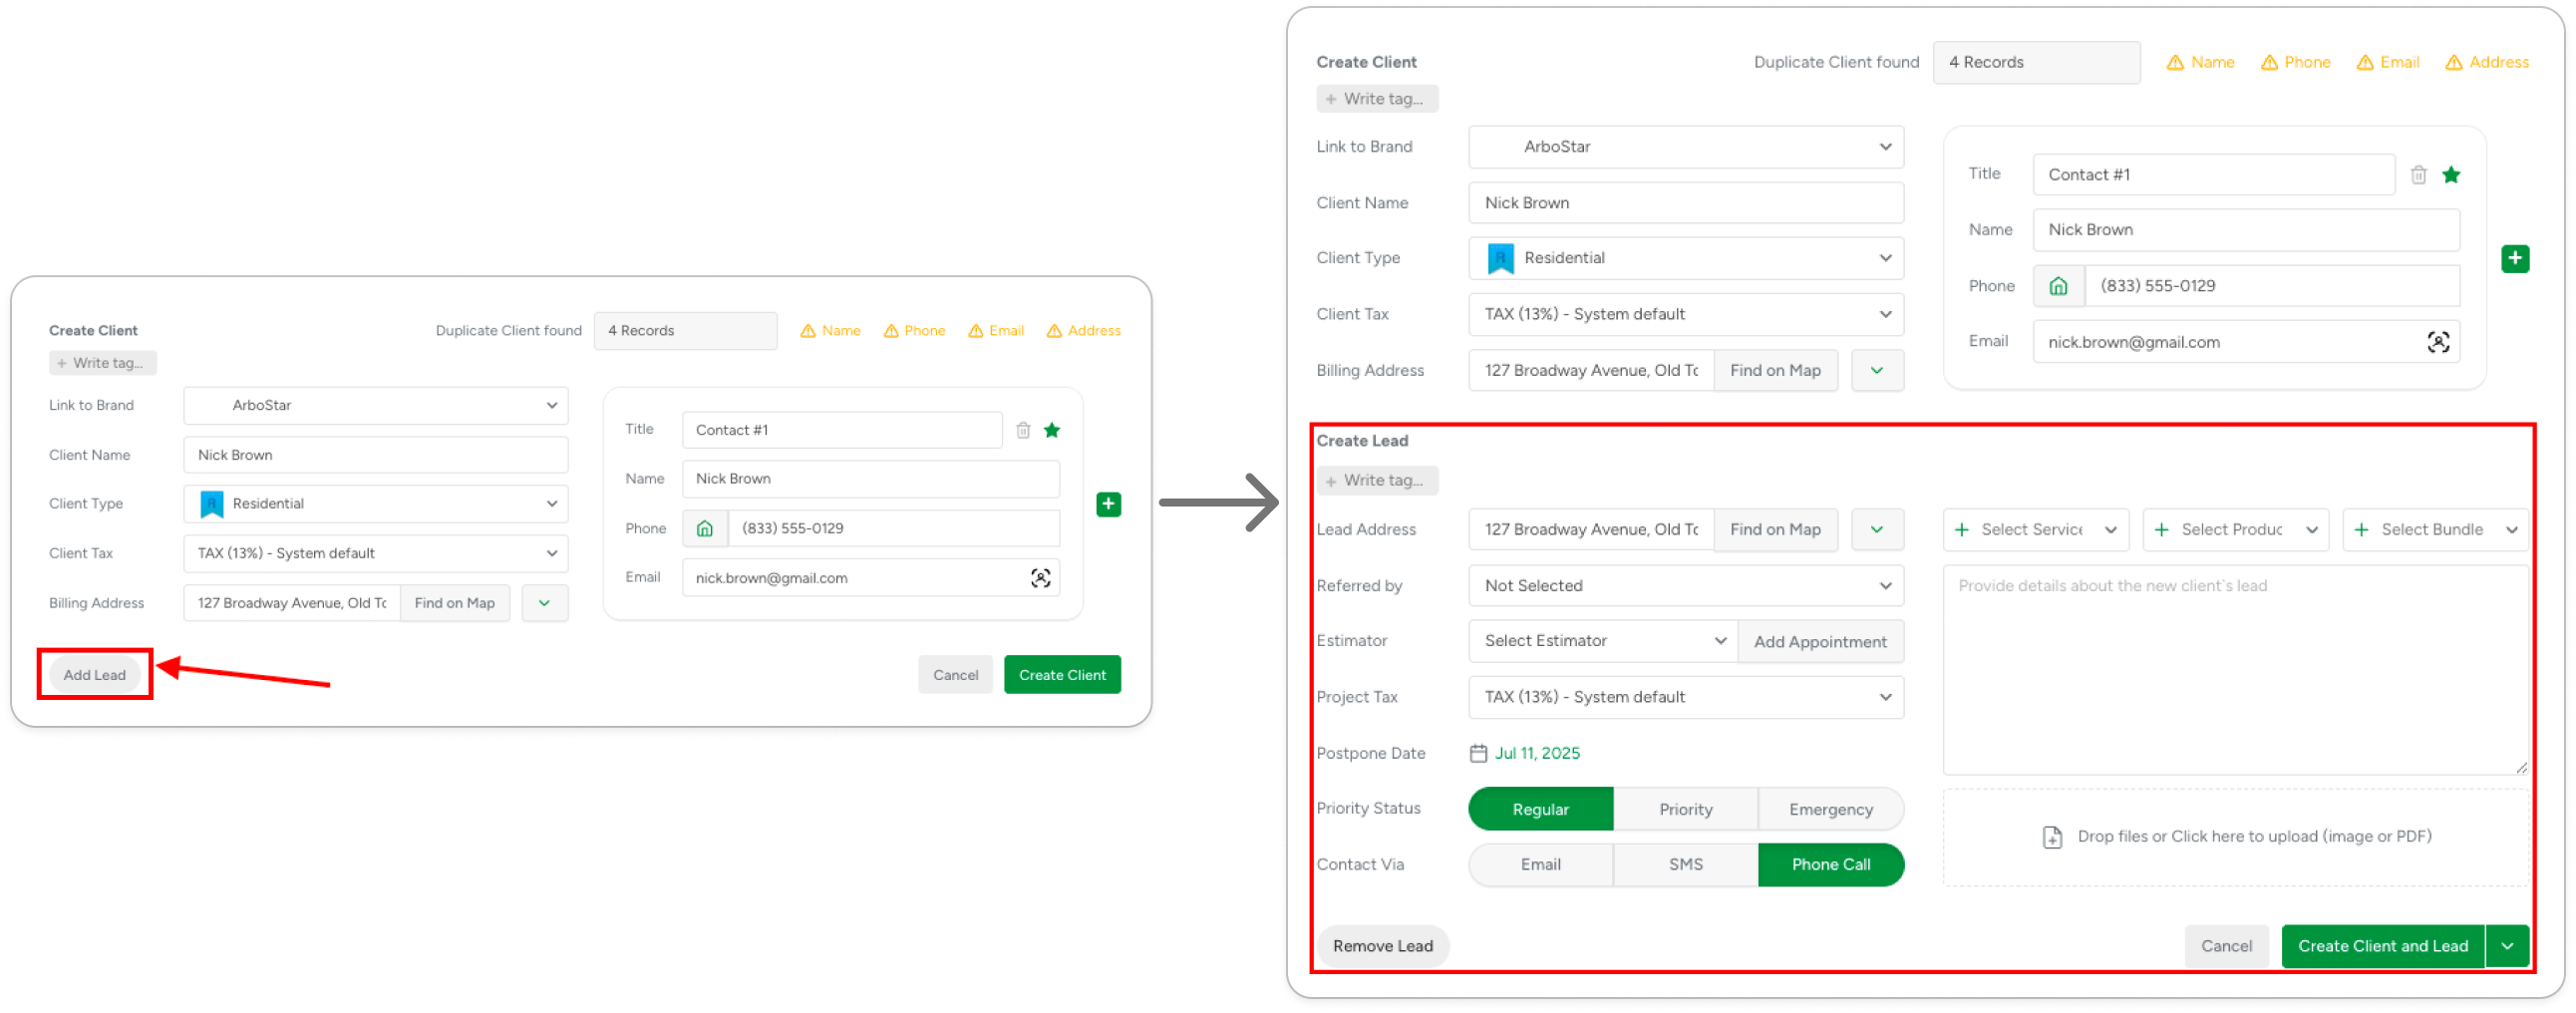
In the pop-up window, you can enter Lead details, select initially requested Services, Products, and Bundles, assign an Estimator, Schedule an appointment, upload files, and more
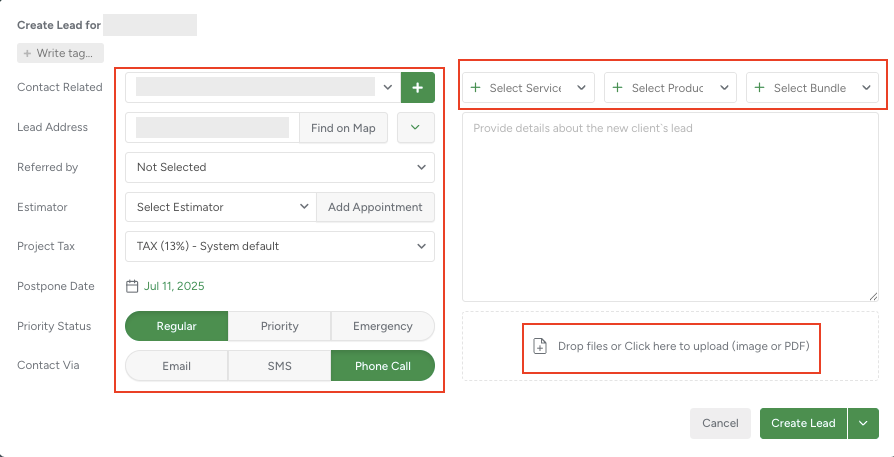
While adding new Lead, you can specify the additional information, such as:
Priority Status:
- Regular: standard service request with no urgency; scheduled as per usual availability.
- Priority: requires faster attention due to specific Client needs or time sensitivity.
- Emergency: immediate attention needed due to urgent or hazardous conditions.
Contact Via:
- Email: communication should be sent to the Client’s email address, including confirmations or documents.
- SMS: short text messages should be used for quick updates, reminders, or confirmations.
- Phone Call: the Client prefers to be contacted through voice calls for updates or coordination.
To learn how Schedule Appointment works, click here.
Viewing and Editing on the Lead Profile
After saving the lead:
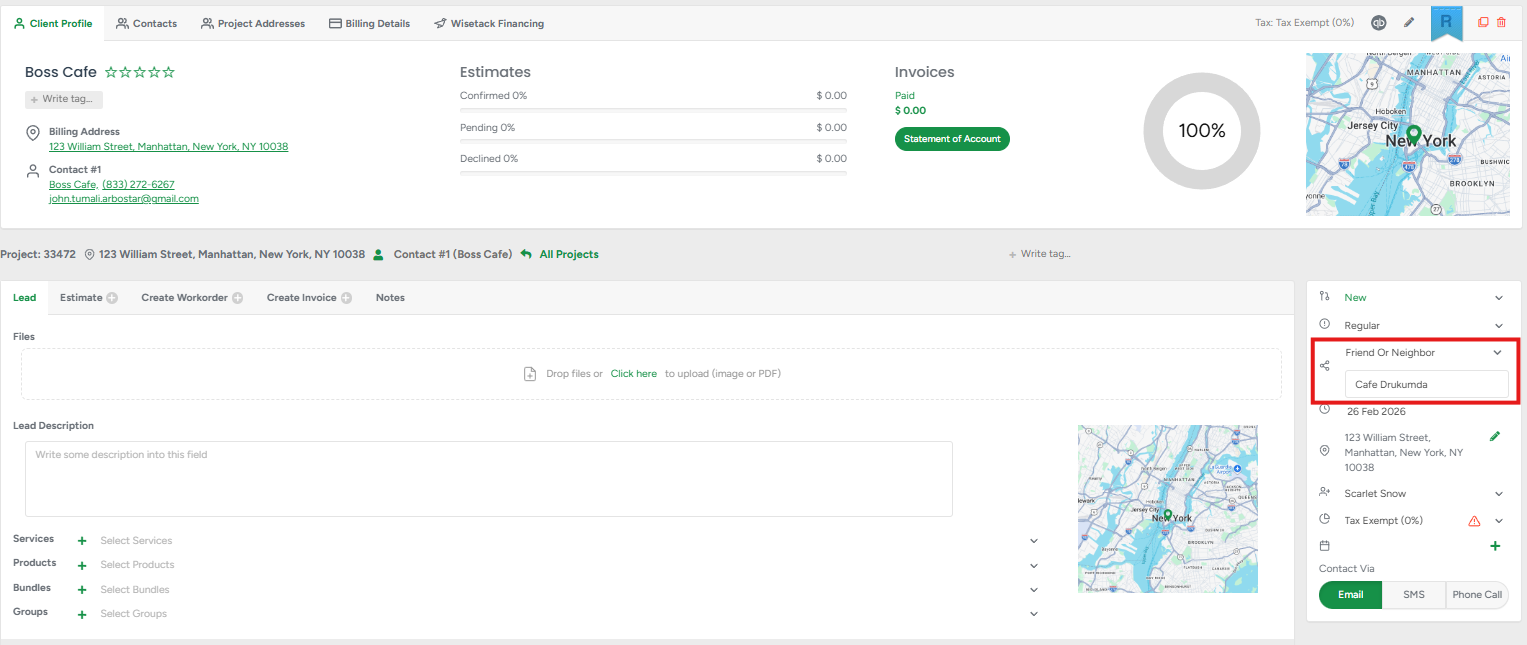
The selected Referred By value will appear on the Lead Profile.
The entered referral details will be shown directly below it.
You can:
Edit the Referred By value
Edit the referral details directly from the Lead Profile
If you change Referred By to a Lead Source where the additional details option is turned OFF, the custom details field will disappear. The previously entered custom text will no longer be available for editing.
If you switch back to a Lead Source where the option is ON. The custom details field will appear again, and you can enter or edit referral details. All entered referral details are saved with the lead and remain available when viewing or editing the lead.
Newly created leads will appear under the Projects → In Progress tab:
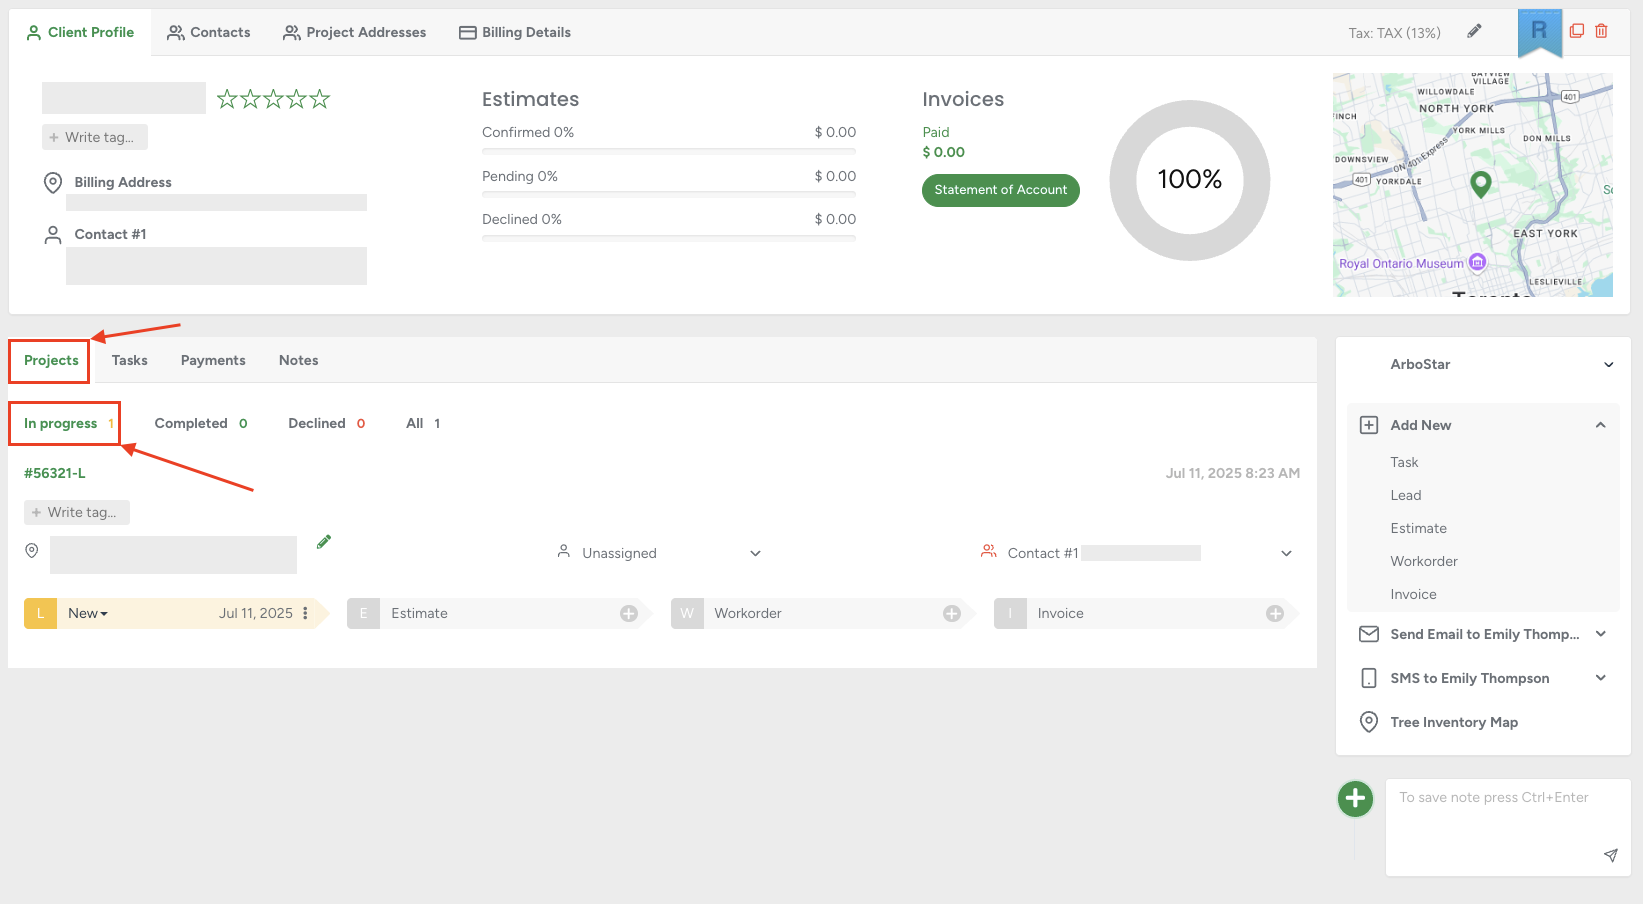
The Project flow is designed to help you easily track each stage, assign a Contact to the job, and update the status of each step—all from a single, centralized page

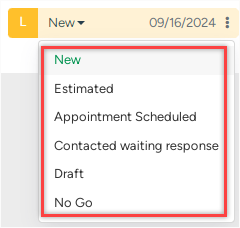
1. Lead Status change:
To change the Lead status, click the drop-down menu and select the appropriate status:
2. Estimator Assign:
To assign an Estimator, click on the Estimator’s name and choose the desired Employee from the list.

3. Project Contact Assign:
To assign a Project Contact, click on the Client’s Name and select the appropriate contact from the list.
4. Additional Options:
Click the Options button to open the pop-up menu.
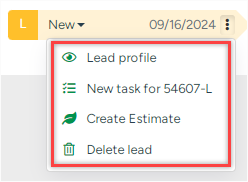
The following options will appear:
Lead profile: navigate to the Lead’s profile page.
New task for [Lead ID]: Initiates a new Task creation for the Lead.
Create Estimate: initiates the Estimate creation.
Delete lead: remove the selected Lead and related Lead's data.
Please note that it’s possible to change the assigned contact and estimator for the project at any stage of the job.
Lead Profile
On the lead profile page, you can add new information or edit any existing details related to the lead.
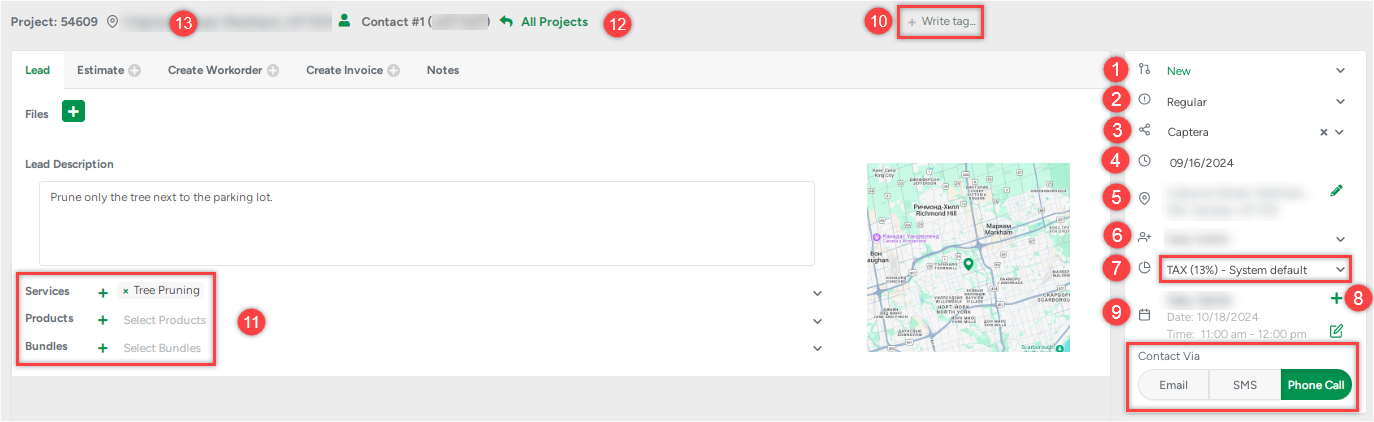
1. Update the Lead’s Status.
2. Set the Lead’s Priority.
3. Select a Reference source for the Lead.
4. Postpone the Lead to a specific date.
5. Edit the Project address.
6. Assign an Estimator to the Lead.
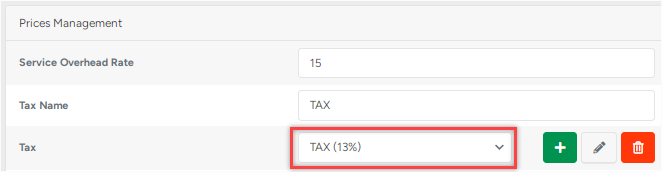
7. Modify applicable Taxes.
The Auto Tax feature automatically applies the correct tax rate based on the address and can be enabled for U.S. companies and adding/editing/removing Tax rates is configured in the Prices Management section of Company Management. The selected Client Tax will be selected for each new Lead as default. However, for each individual case, the system allows selecting a different tax system if needed.
8. Schedule an Appointment.
9. Notify the Estimator about a call request from the Client.
10. Add Tags.
11. Add or Remove Services, Products, or Bundles (at the Lead Step before the Estimate).
12. Return to the Client Profile.
13. View Project Address – The Lead represents the first stage of a Project. For more details, please refer to the Client Profile and Editing section.