
Ways to Create a New Lead
You can create a Lead in two ways:
From the Create Menu:
Tap the + (Create) icon.
Select Lead.
The system navigates to the New Lead form, where the user can:
Select an existing Client, or
Create a new Client.
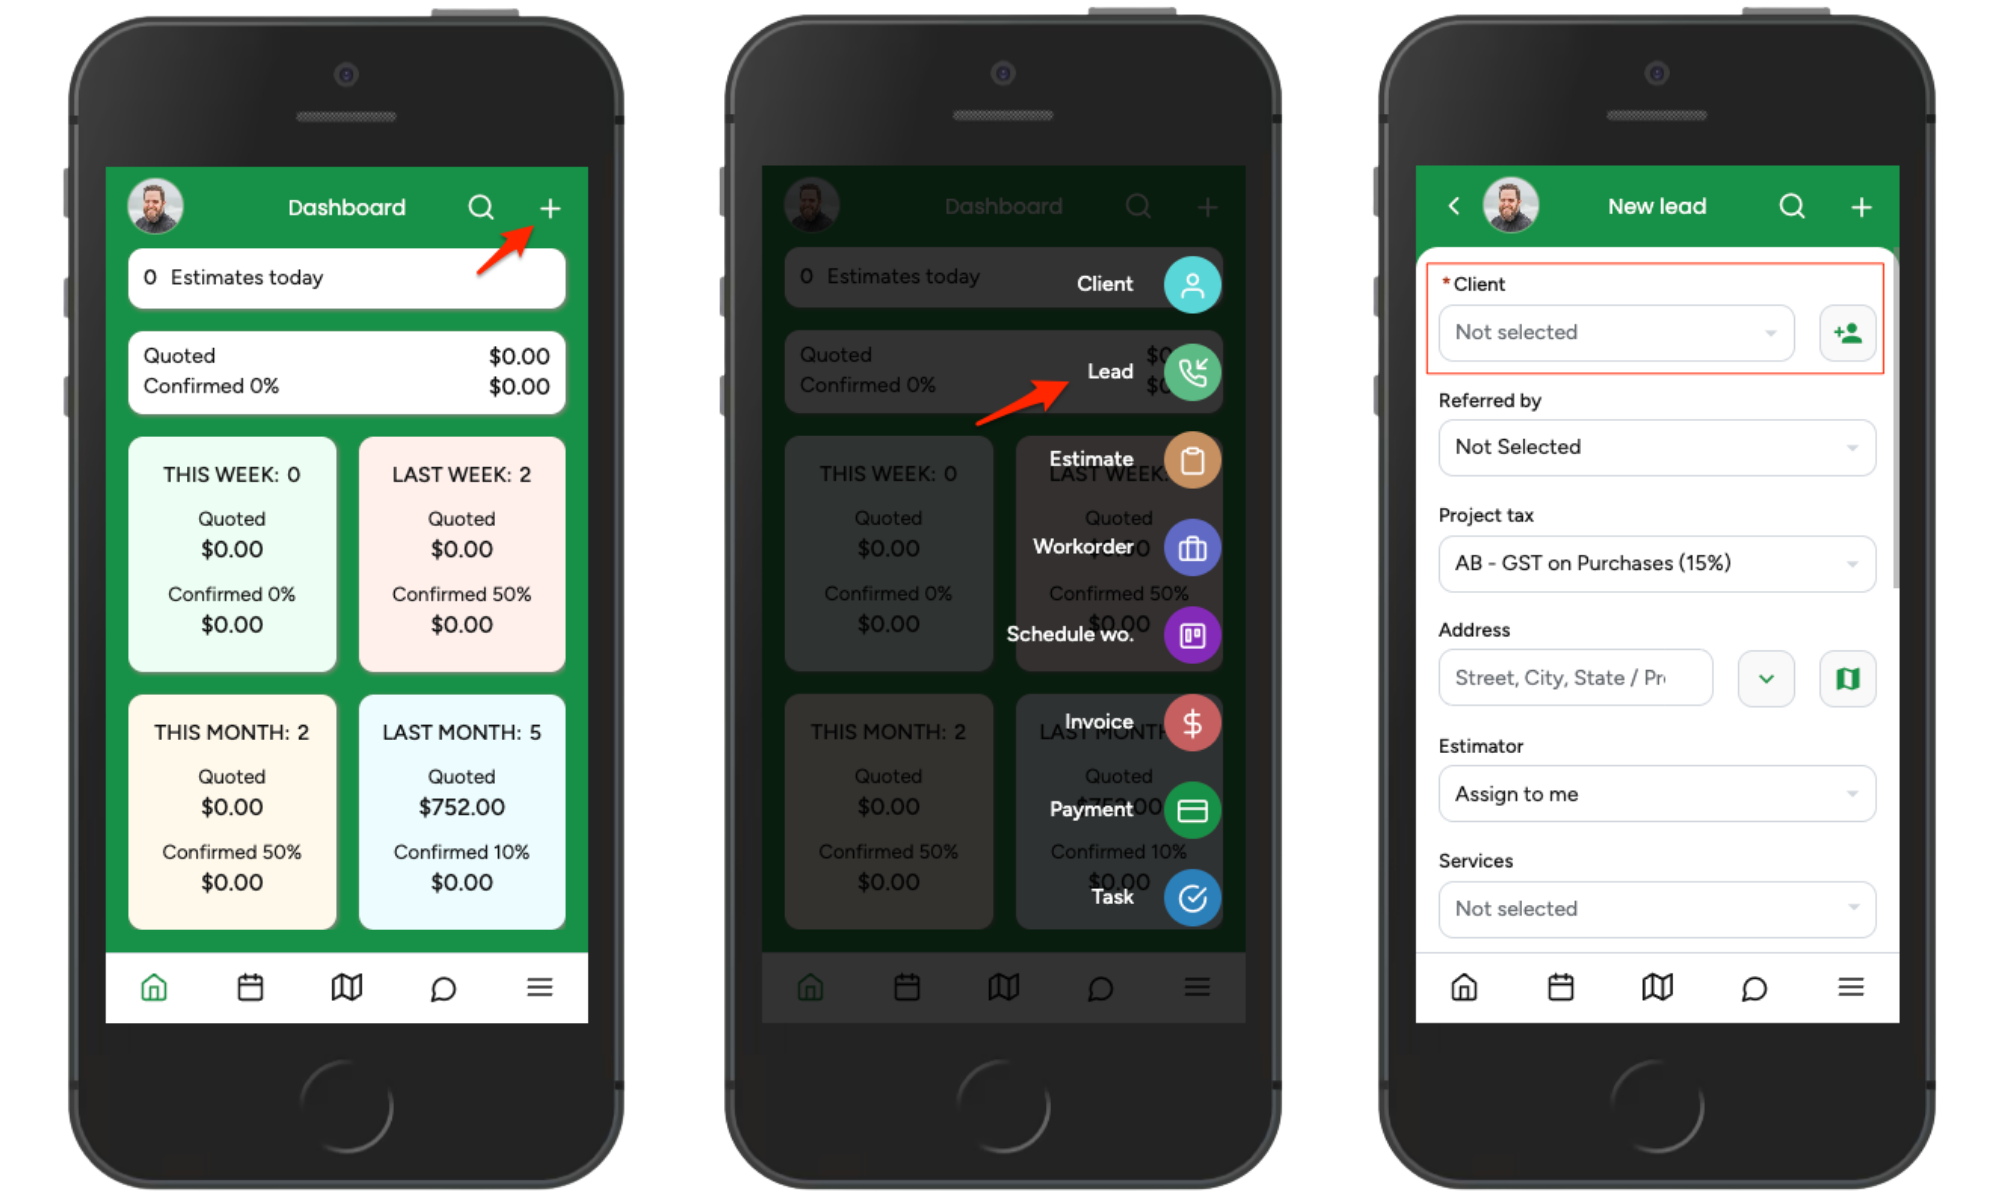
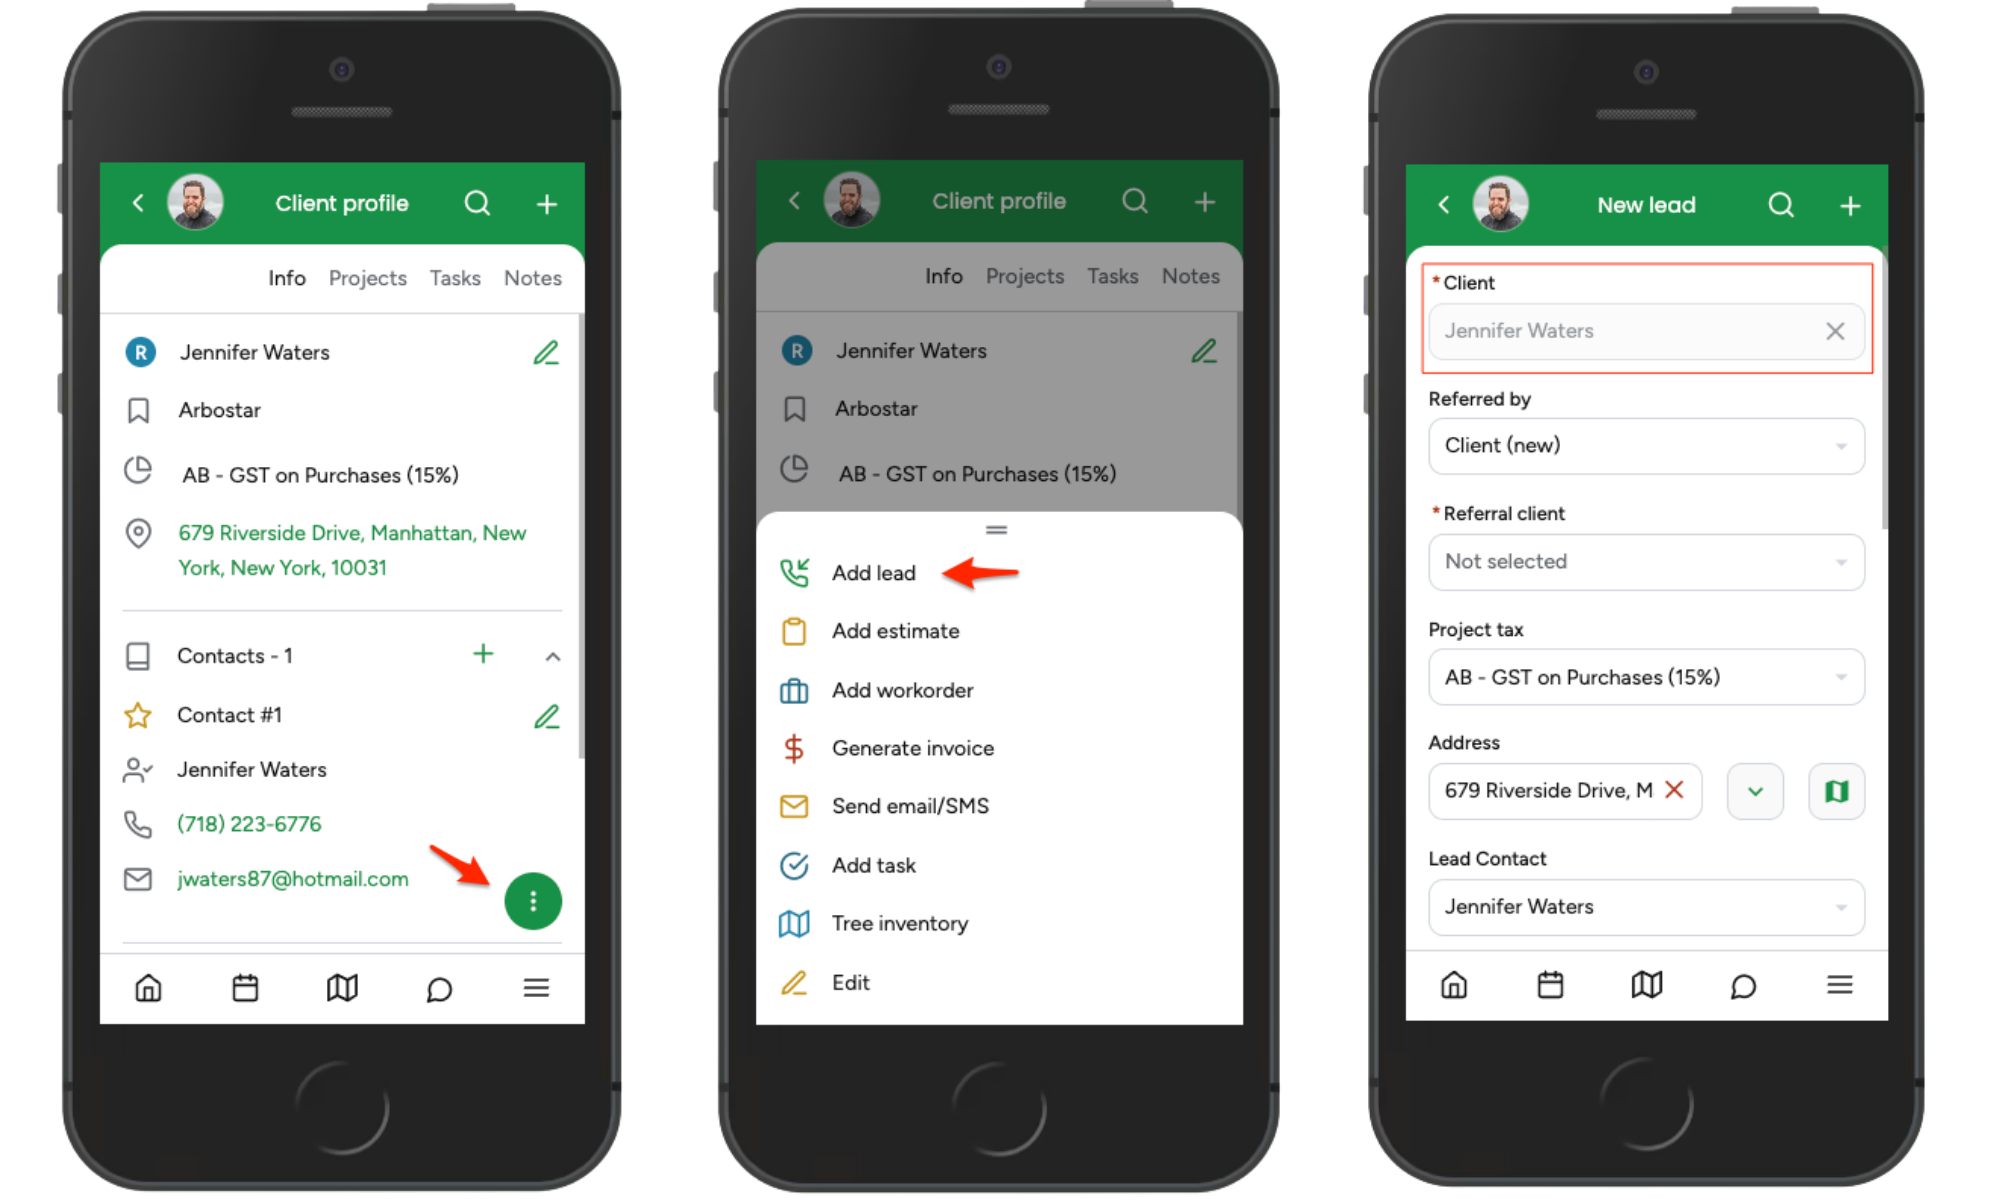
From Client Profile:
Open the Client Profile.
Tap Options.
Select Add Lead.
The Client is automatically selected.
Step-by-Step: Creating a Lead
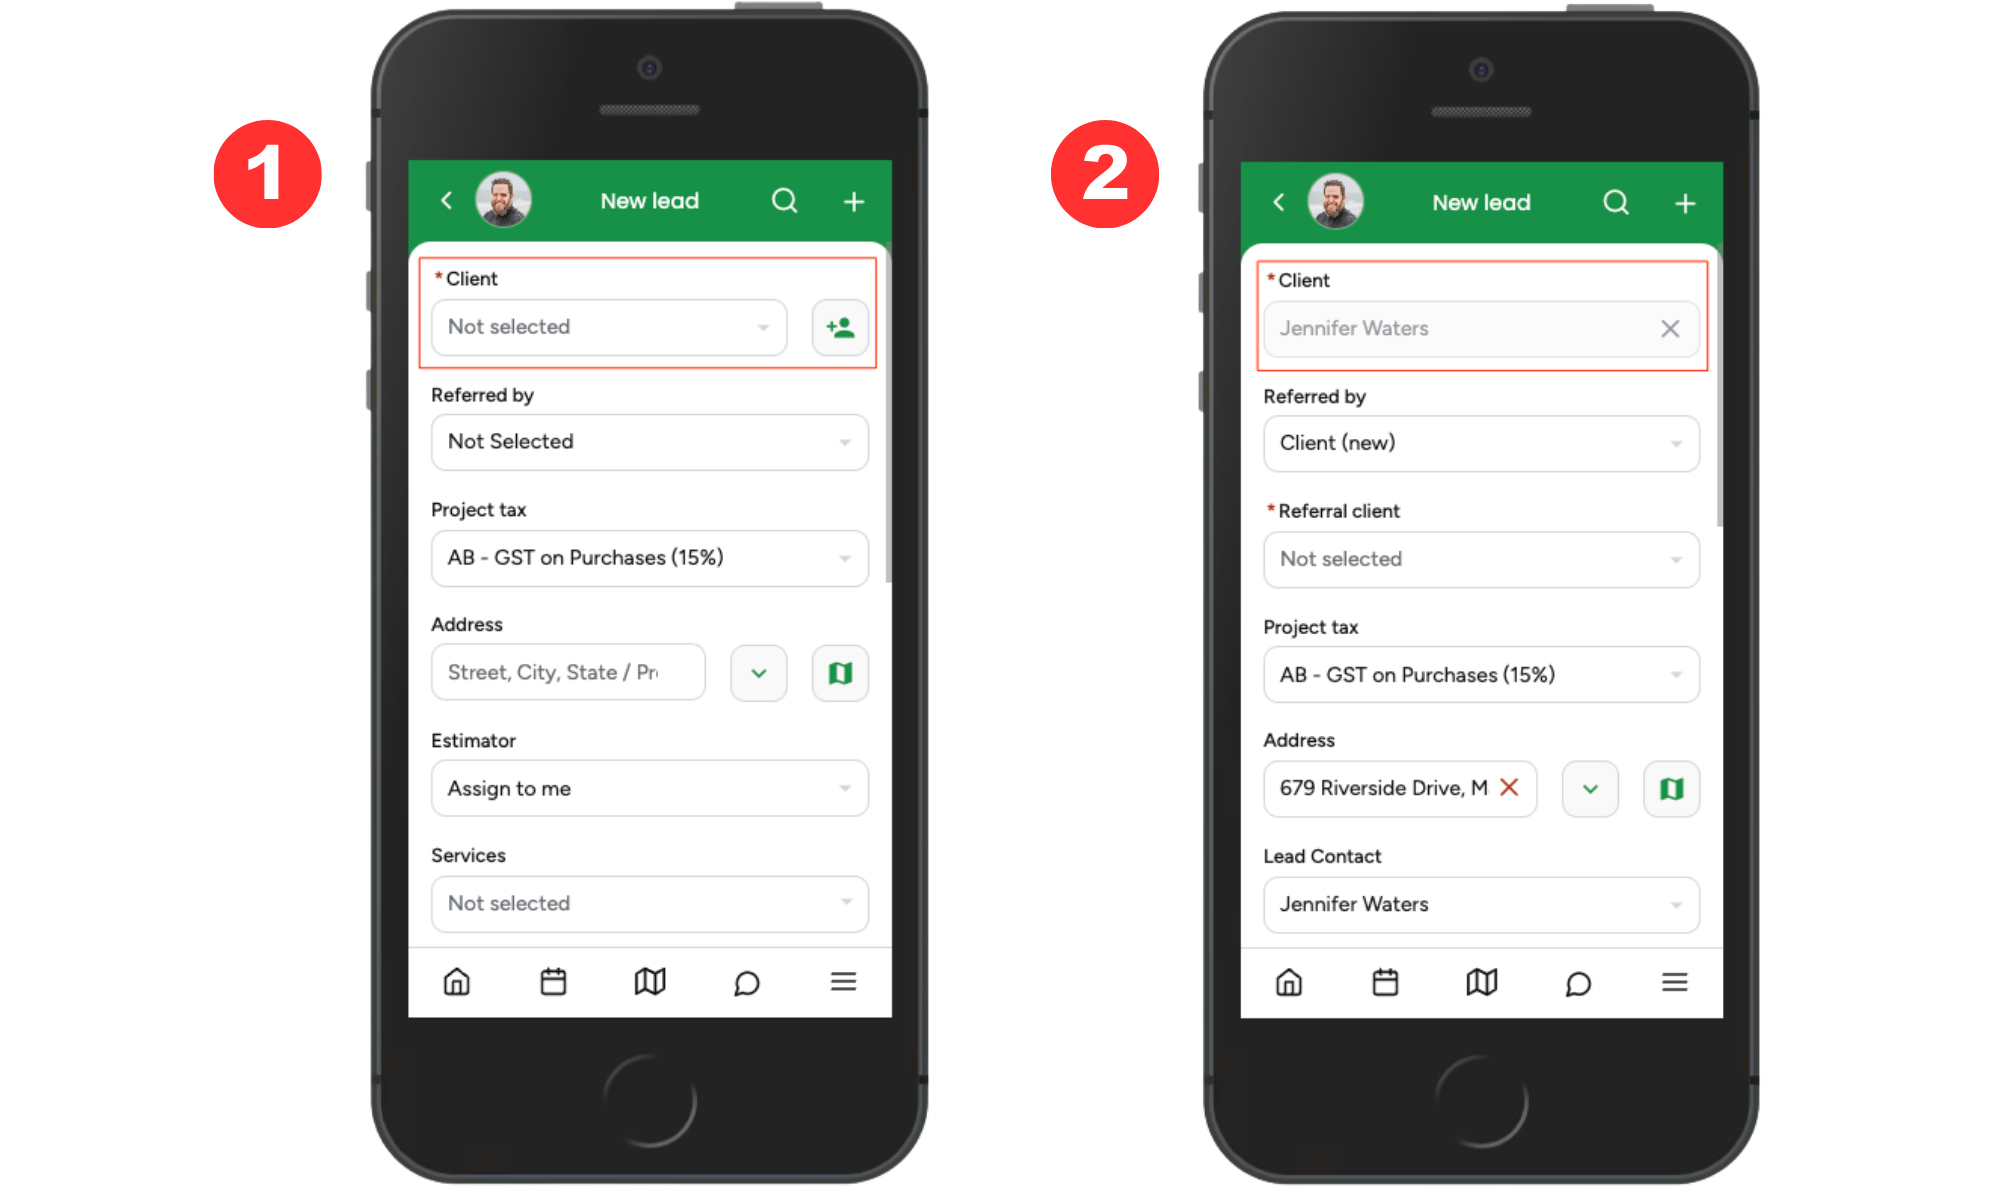
Step 1: Select the Client
If you open the form from the Create Menu, choose an existing Client or create a new Client.
If you open the form from a Client Profile, the Client is already selected.
Note: Each Lead must be assigned to a Client.
Step 2: Fill Out the Lead Details
After selecting or creating a Client, complete the Lead form with the following information:
Lead Source
The Lead Source Details field allows you to add more specific information about how a lead found your business when creating a lead and select how the lead was referred to you. The list is based on the References set up in Company Management.
If the selected Lead Source allows additional details, the Lead Source Details field will appear. Enter the required information using letters, numbers, and spaces only, with a maximum of 256 characters.
On the Lead Profile in the mobile app, the Lead Source is always visible and clickable. When tapped, you can change the Lead Source, and if additional details are allowed for that source, a Lead Source Details field will appear where you can add or edit information, which will be saved and displayed on the Lead Profile.
Project Tax
Select the applicable tax for the project.
The Auto Tax feature automatically applies the correct tax rate based on the address and can be enabled for U.S. companies and adding/editing/removing Tax rates is configured in the Prices Management section of Company Management. The selected Client Tax will be selected for each new Lead as default. However, for each individual case, the system allows selecting a different tax system if needed.
Address
The Address field is visible and pre-filled with the Client’s current address.
Tap the field to select from:
The Client’s main address
Addresses used in previous Leads, Estimates, Work Orders, or Invoices
Note: If a saved address has a Project Address Name, the name will appear next to the address in the dropdown, making it easy to identify specific project locations.
Start typing to see matching Client addresses and Google address suggestions.
You may also enter a new address manually.
Lead Contact
Select the contact person for this Lead.
If the contact person is different from the Client, you can add another contact from the Client Profile.
Estimator
If you are a support user with the Estimator role, this field is automatically assigned to you.
Tap the field to choose a different Estimator from the list, if needed.
Services, Products, and Bundles
Select what the client is booking:
Services
Products
Bundles
Tags
Tags help organize and group Leads.
Tap to select from existing tags or create a new one.
Lead Description
Enter details about the project.
This may include client instructions, landmarks, or additional notes.
Attachments
Tap the “+” icon to upload files such as photos or PDFs related to the Lead.
Priority
Select the Lead priority:
Regular
Priority
Emergency
This helps Estimators understand urgency.
Contact Via
Choose the Client’s preferred contact method:
Call
SMS
Email
Example of a filled Lead profile:
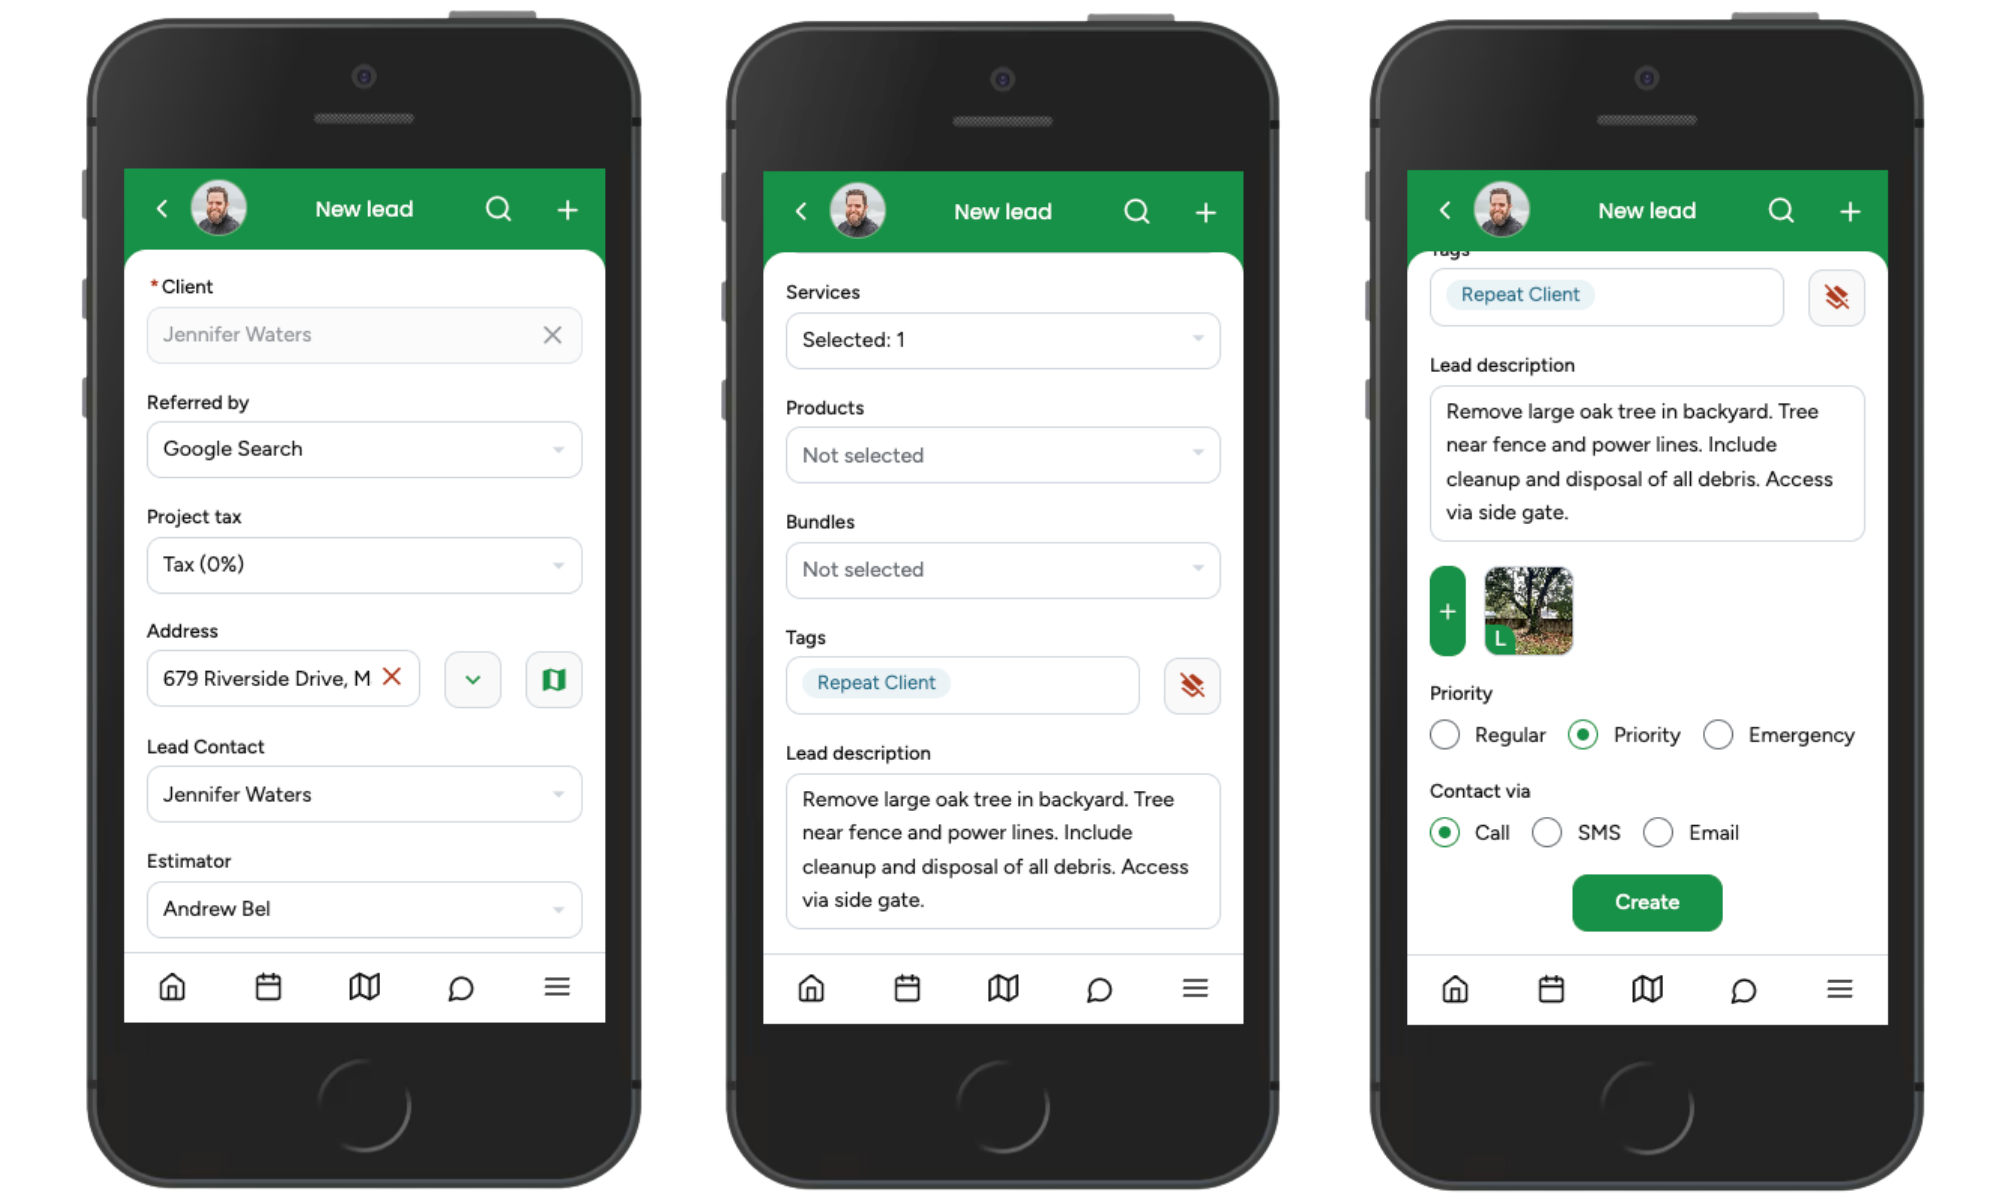
Once all required fields are completed, tap Create to save the Lead.
When all mandatory fields are filled out, the system allows saving the entered data, and the new Lead will be added to the selected Client.
The fields' types and rules are filled out within the same validation rules and logic as on the Web version. Click here to learn how you can create a Lead offline.