
In this submodule you can add services, products, and bundles to be used in the estimation process. See those products and services that were disabled (hidden) by switching the toggle on and off.
Overview
In Estimates → Services, you can find all the preset services and products.
Services have orange icons in front of them, while products are marked with green icons.
You can edit existing services and products by clicking the pencil icon, or disable them by clicking the eye icon.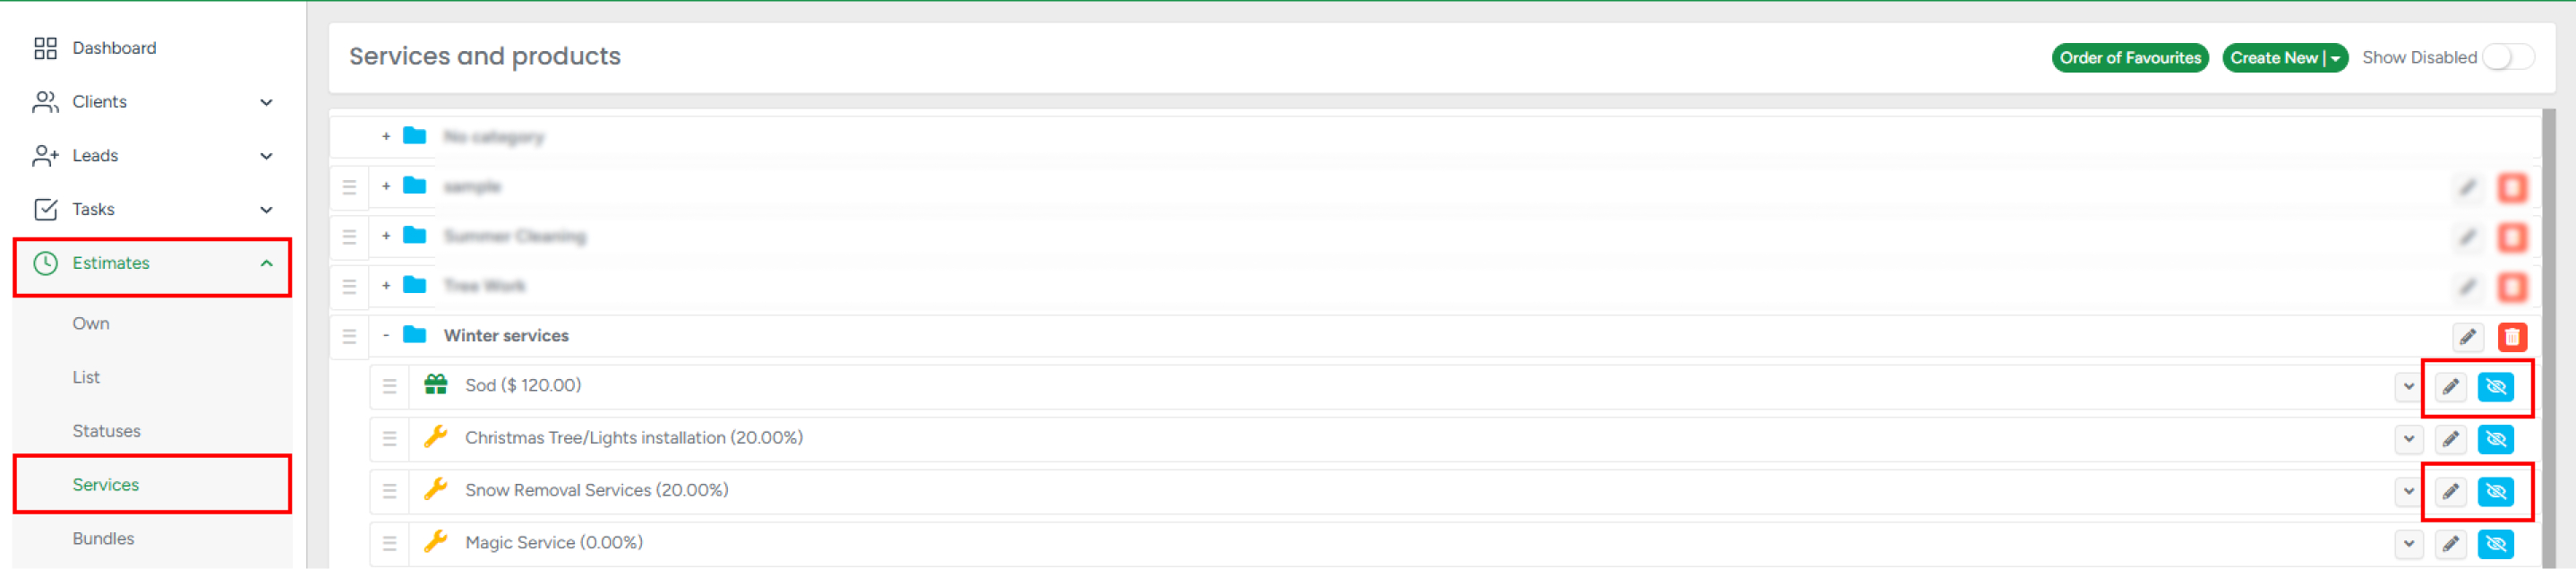
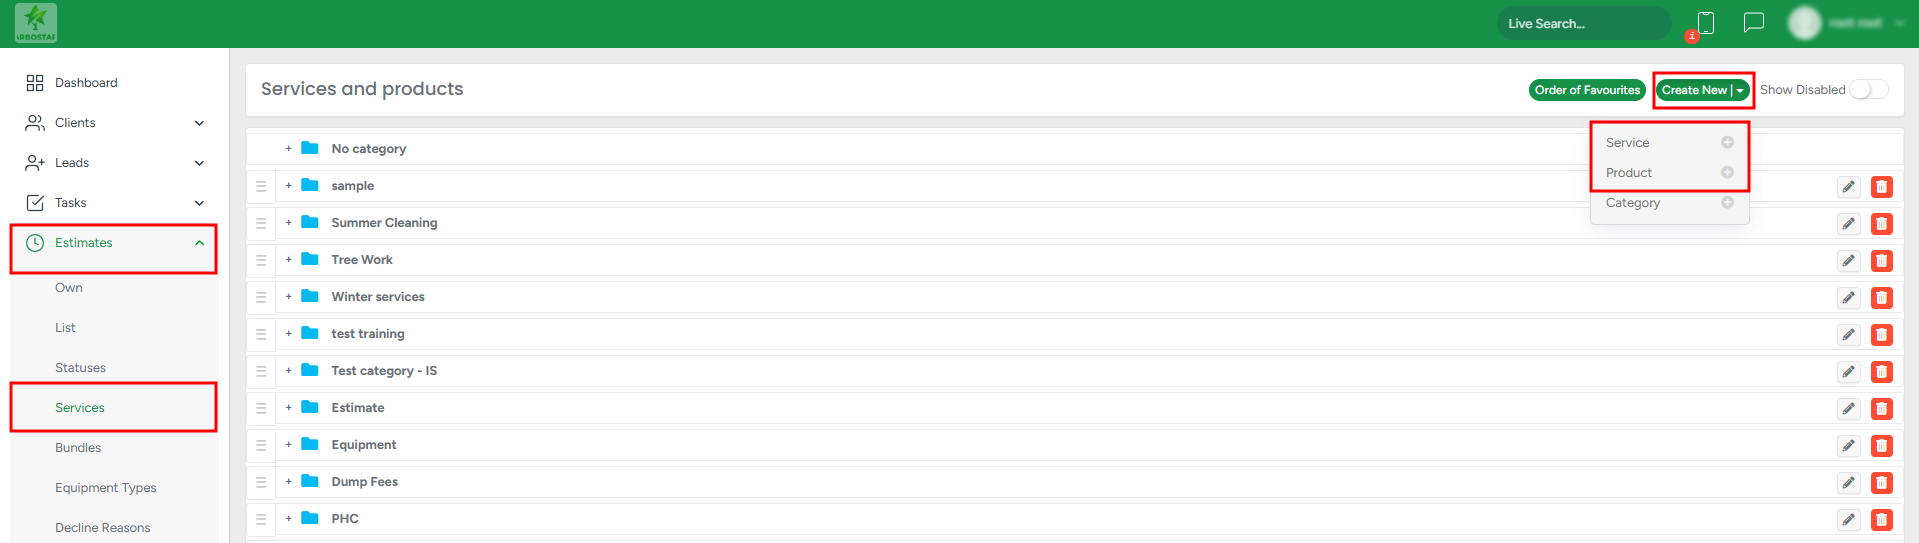
To create a new service or product, click Create New in the top-right corner, select either Service or Product, fill in the required specifications in the pop-up window, and click Save. Below, let’s take a closer look at each type of entity that is created.
Service
- Once you select Create New → Service, you will see the Create/Edit Service modal window.

Service name - add a name for your service here.
Default description - in this field, the service description should be added. The text field is resizable by clicking and dragging the bottom right corner of the input field.
Markup % - how much profit in percent the user wants to receive from a service (pure income). Please note that the value that is added here, while creating a new service, will be auto-populated in the respective field in the calculator (under Calculations).
Cost - sets the price for the service.
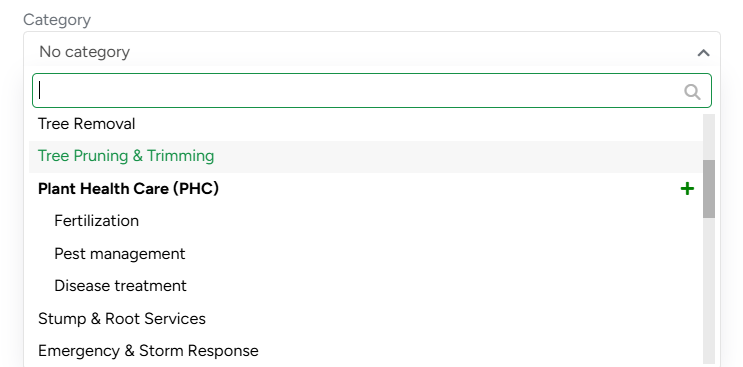
Category - determines to which existing category the new service will belong.
Crew - determines what type of crew will be selected by default for this service. Similar to Markup% (see above), all selected crews here will be auto-populated in the respective field in the calculator (under Crew).
Service Equipment and Service Attachment - for each service, you can select the necessary equipment type from the drop-down list. Clarify what specific equipment or attachment you want to use according to the available characteristics. All this information can be specified in the other submodule - Equipment Types. Similar to Crew and Markup, all the data selected here will be populated in the respective field while using a calculator to assess the service within the estimate.
Service Tools - select tools or other equipment that will be used by default for the service. Similar to Crew and Markup, all the data selected here will be populated in the respective field while using a calculator to assess the service within the estimate.
Mandatory/Optional/Recommended - select one of the mentioned options. Depending on your choice, the service will be later shown within the Estimate PDF/Customer Portal if Mandatory/Optional, and will be hidden if Recommended.
Non-taxable - defines whether any taxes will be applied to the service.
Collapsed view - defines how the service description will look within the estimated profile.
Add automatically this service to the Estimate creation page - set any service to be automatically included on every new estimate. This allows companies to set up consistent, repeatable line items like marketing prompts, disclaimers, or common services — no more forgotten items!
The auto-added servies are marked with a tooltip: “This service is added automatically by default. Please note that you can edit, delete this service, or disable the automatic addition of this service when creating an Estimate in the web settings.”
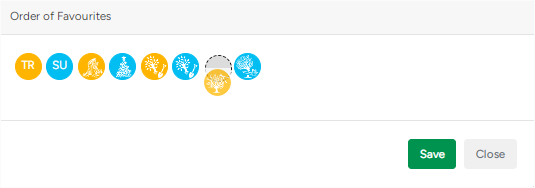
Is Favorite - here, you can define a new service as a favorite and link a specific icon to this service.
Show on Request Generation Form - when checked, this service will appear as an option when a potential client fills out the ArboStar Request Generation Form on your website.
Finally, by clicking +, there’s an option to add more sections of Service Equipment, Service Attachment, and Service Tools if needed.
For services, adding details such as cost, markup percentage, crew assignment, or marking it as a 'favorite' will help automate the estimation process on the Create Estimate page. To learn more about how estimate pricing is calculated, see the article: How the Estimate Price Is Calculated.
When creating an estimate, if you enter a product’s cost, it will automatically be included in the estimate’s total amount.
You can sort products and services as well as product/service categories and subcategories by dragging and dropping them.
Product
- Once you select Create New→ Product, you will see the following modal window.
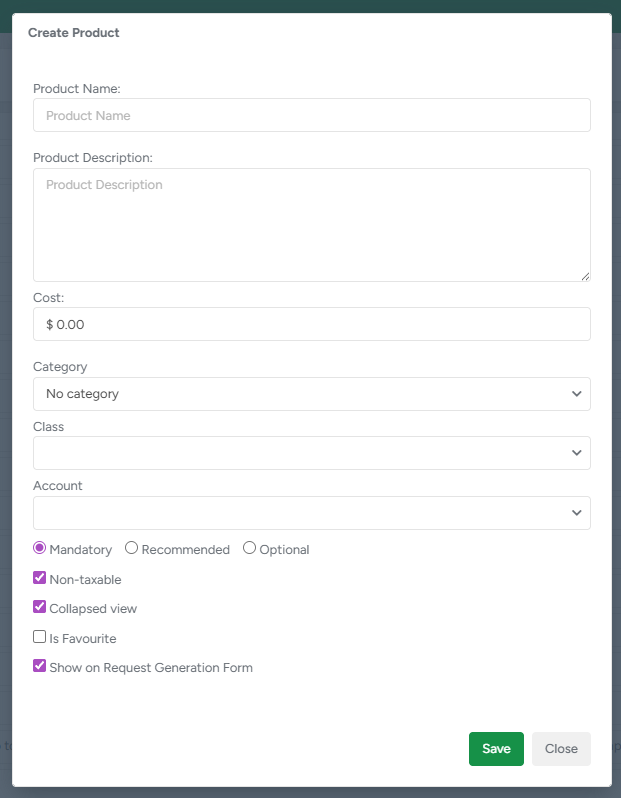
Product name - add a name for the new product.
Product Description - input field for adding the description of the new product.
Cost - Cost - sets the price for the service.
Category - determines to which category the new service will belong. You can either click an existing category or select a New category.
Class - if the company has QuickBooks and utilizes classes, then here the user will see the list of classes from QuickBooks.
Mandatory/Optional/Recommended - select one of the mentioned options. Depending on your choice, the service will be later shown within the Estimate PDF/Customer Portal if Mandatory/Optional, and will be hidden if Recommended.
Collapsed view - defines how the service description will look within the estimated profile.
Is Favorite - here, you can define a new service as a favorite and link a specific icon to this service.
Show on Request Generation Form - when checked, this service will appear as an option when a potential client fills out the ArboStar Request Generation Form on your website.
Caterogy
- Click Create New → Category to access the create/edit category modal window.
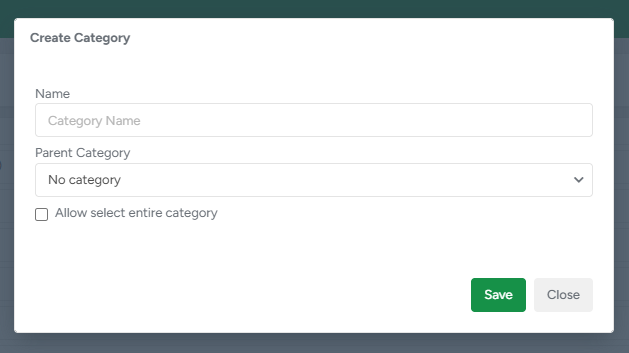
Under Name, add a custom name for the category.
Parent Category - selects a specific category from the drop-down list. The newly created category will be created as a child category, within the selected one.
Allow select entire category - press the check mark next to this option, to automatically add all services within this newly created category to the estimate.
Press the Eye blue button to show/hide the service or product.
Click the Pensil button to edit the data within the service/product/category.
Bundles
In Estimates → Bundles, you can view all preset bundles. To edit a bundle, click the pencil icon; to disable it, click the eye icon.

- To create a new bundle, click on the green Plus sign in the top right corner.
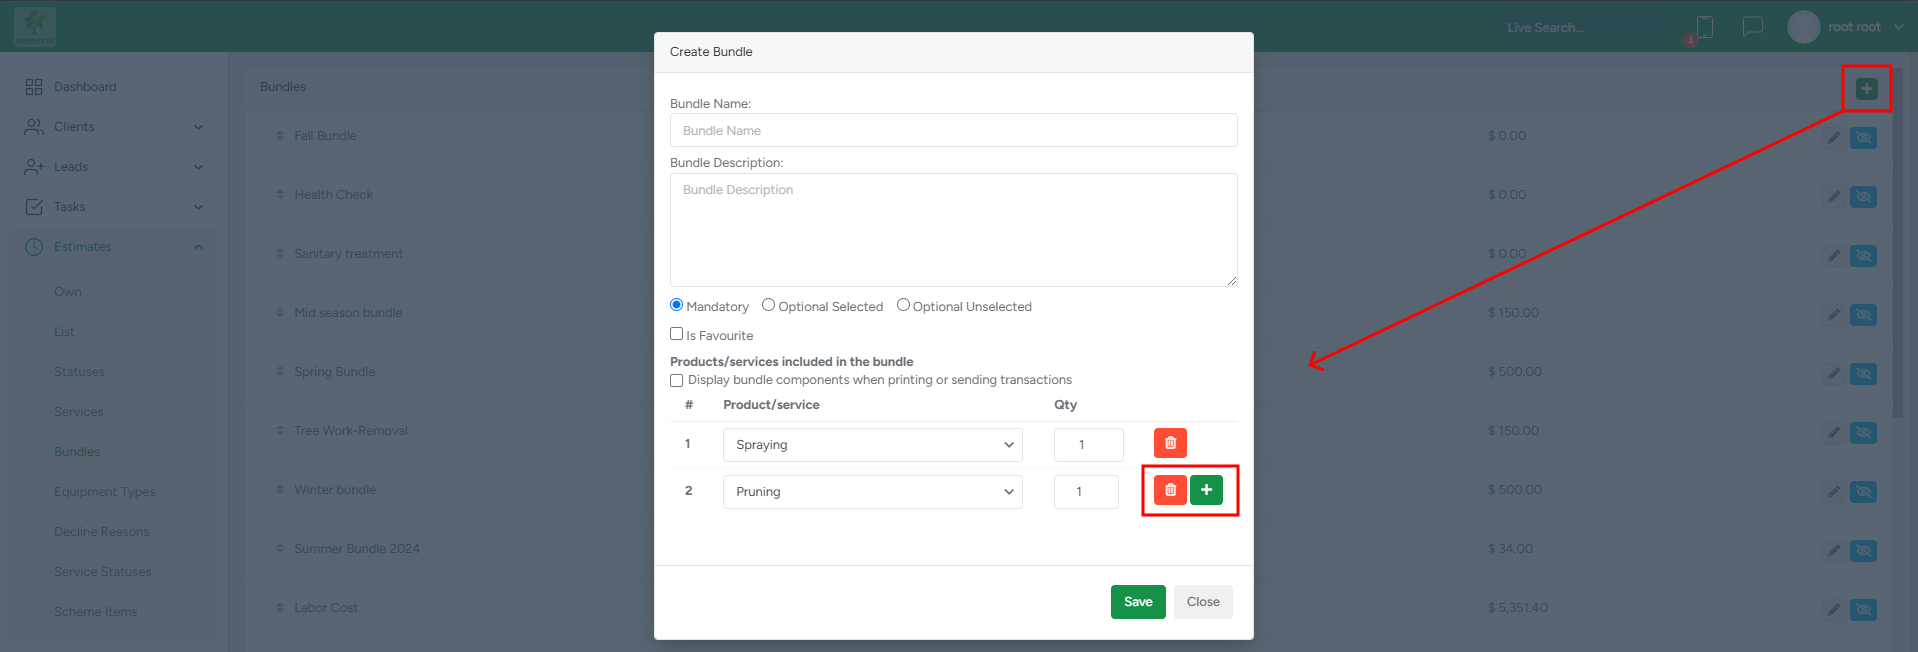
- To add a product or service to the bundle, select it from the Product/Service list and enter the desired quantity.
- To remove an item, click the bin icon next to it.
- To include additional items, click the green plus icon.
- If you want the bundle components to appear on the estimate PDF, check the corresponding box.
- For quick access on the estimation page, mark the bundle as a favorite by ticking the Is Favorite icon.
- Once all details are set, click Save to complete the process.
When adding a bundle to an estimate, you can also manually edit it, for instance, delete a service or a product from it, or change the sum of a product/service.