
View Client Profile
To reach the Profile page of an existing Client, navigate to Clients > Clients List submodule:

On the Clients List, click on the Name of the Client and navigate to the Client Profile page:
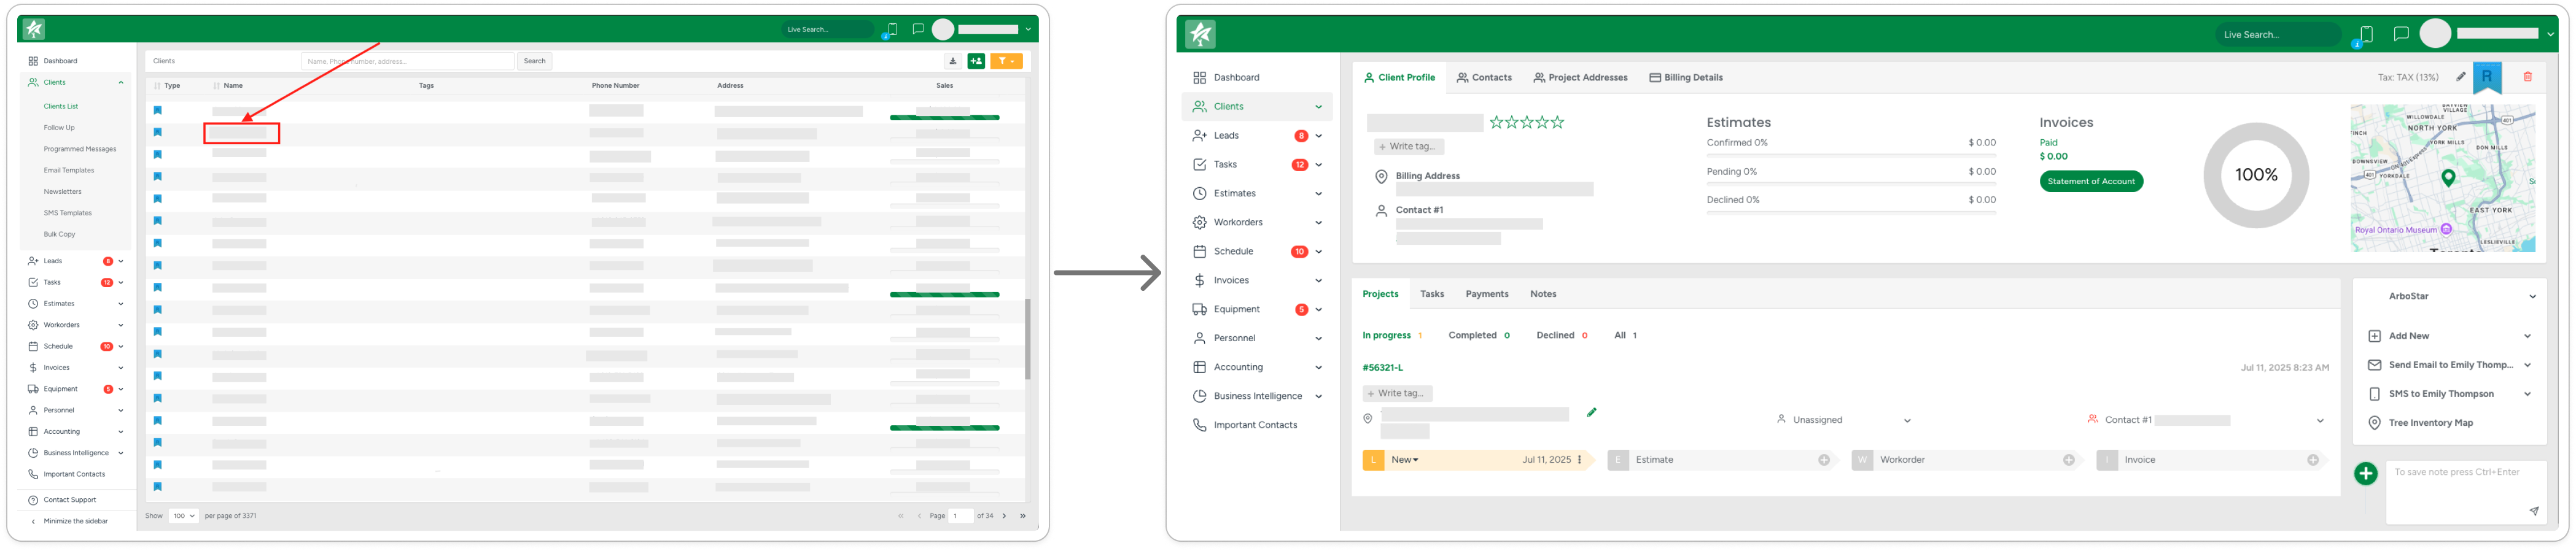
On the Client Profile, you can see the general information about the Client, send emails or SMS, create Estimates, and more.
Edit Client Profile
On the Client Profile page > Client Profile tab, you can view and edit the Client's general information. A map on the right displays the Client's location:
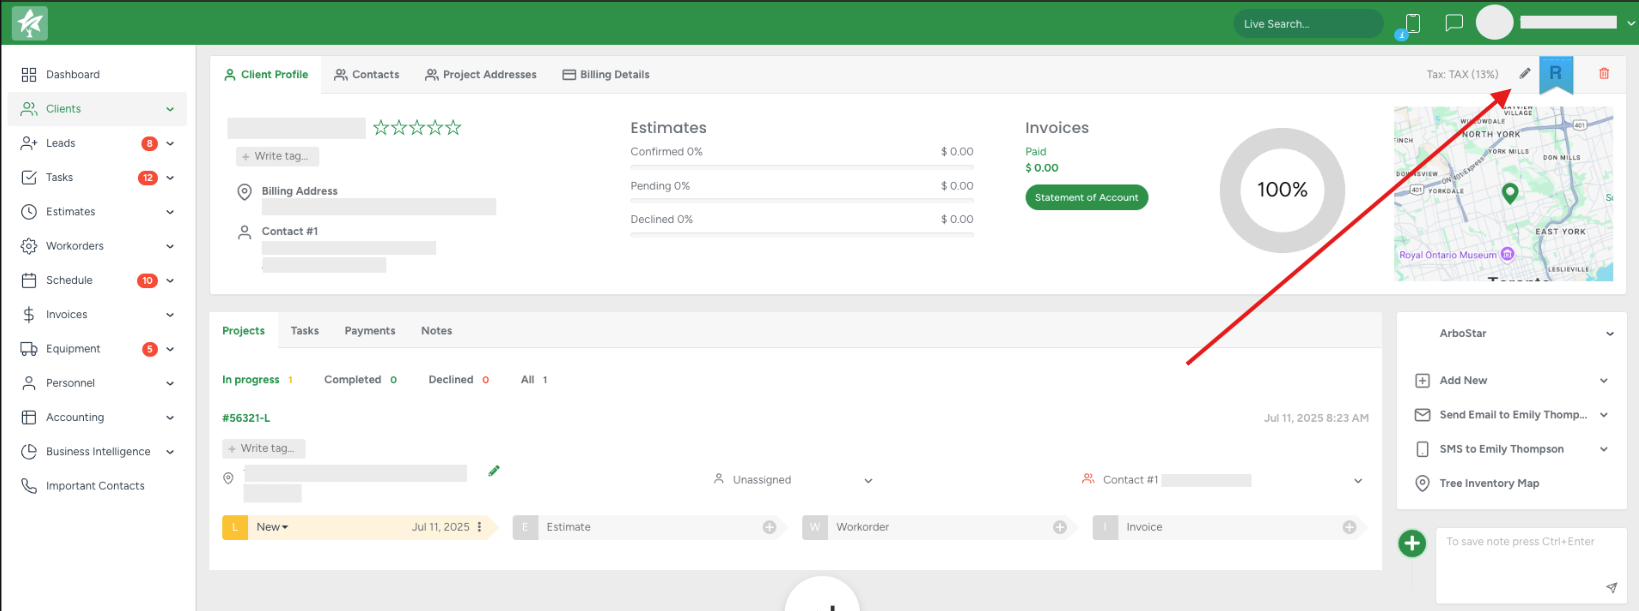
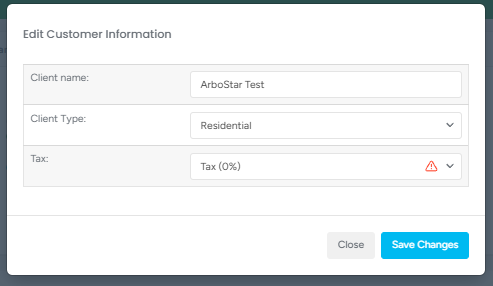
Clicking on the pencil ✏️icon enables you to edit customer information:
- Client name
- Client type
- Tax
The Auto Tax feature automatically applies the correct tax rate based on the address and can be enabled for U.S. companies and adding/editing/removing Tax rates is configured in the Prices Management section of Company Management. The selected Client Tax will be selected for each new Lead as default. However, for each individual case, the system allows selecting a different tax system if needed.
The following Client's data can be edited:
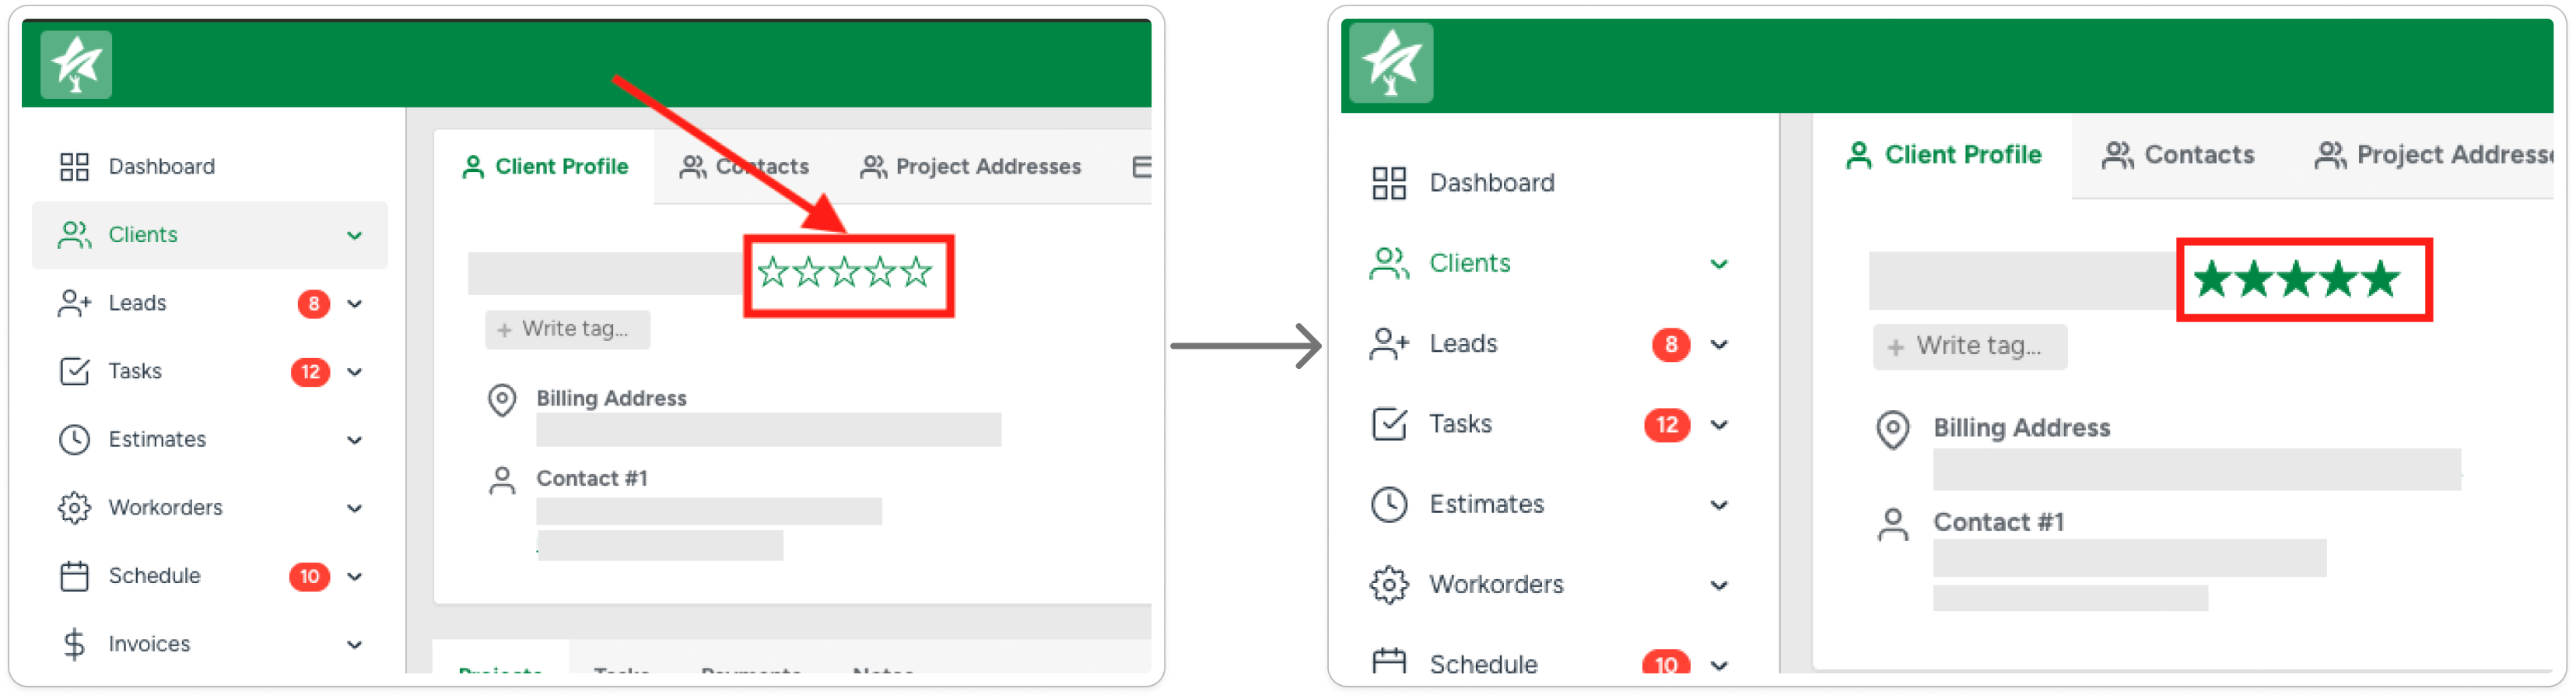
Client's Rating: Select the desired number of stars (1-5) to rate the Client.
Tags: By clicking it, you can create a new tag or choose (auto-complete option) an already existing one:
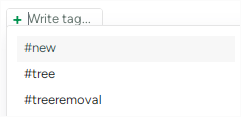

Tags are used to filter Clients in the Clients List and throughout the platform. When you search by Tag by simply clicking on it in the list, the system will display all Clients associated with that Tag.
For existing Clients, you can add a new tag to the Client's profile by entering it in the Tag field. To remove an existing Tag, simply click the 'Remove' icon.
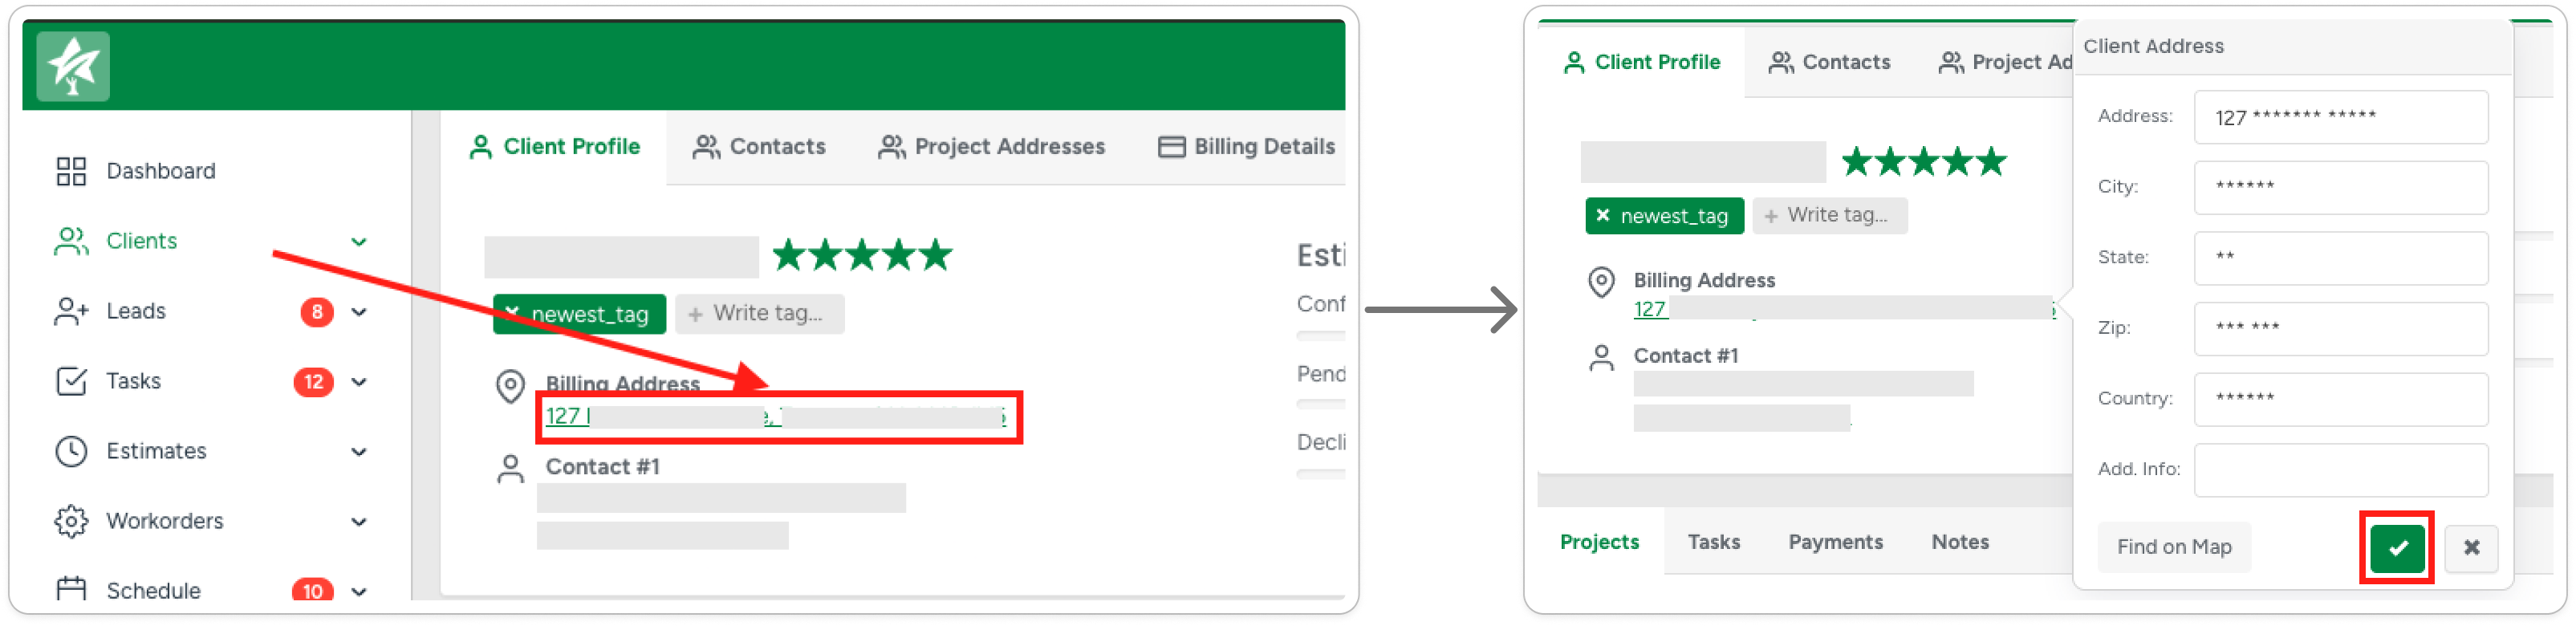
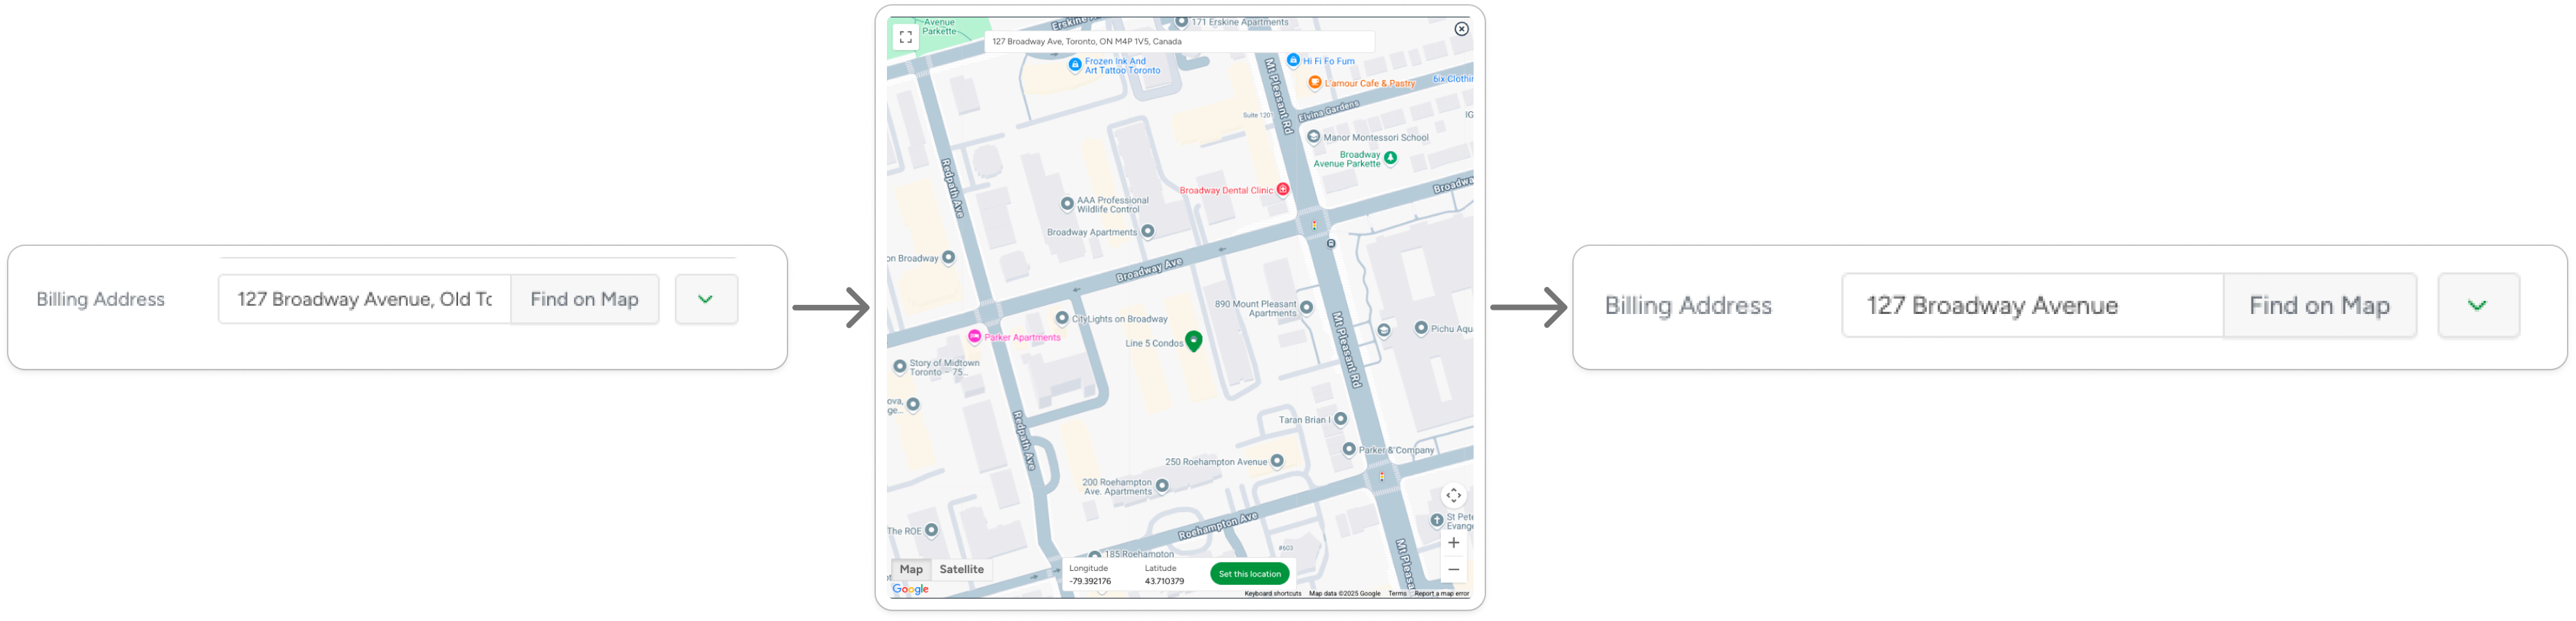
- Billing Address: To initiate editing the Address, click on the address line. In the Edit Address form, change the information with valid data and save the changes to update the Billing Address:
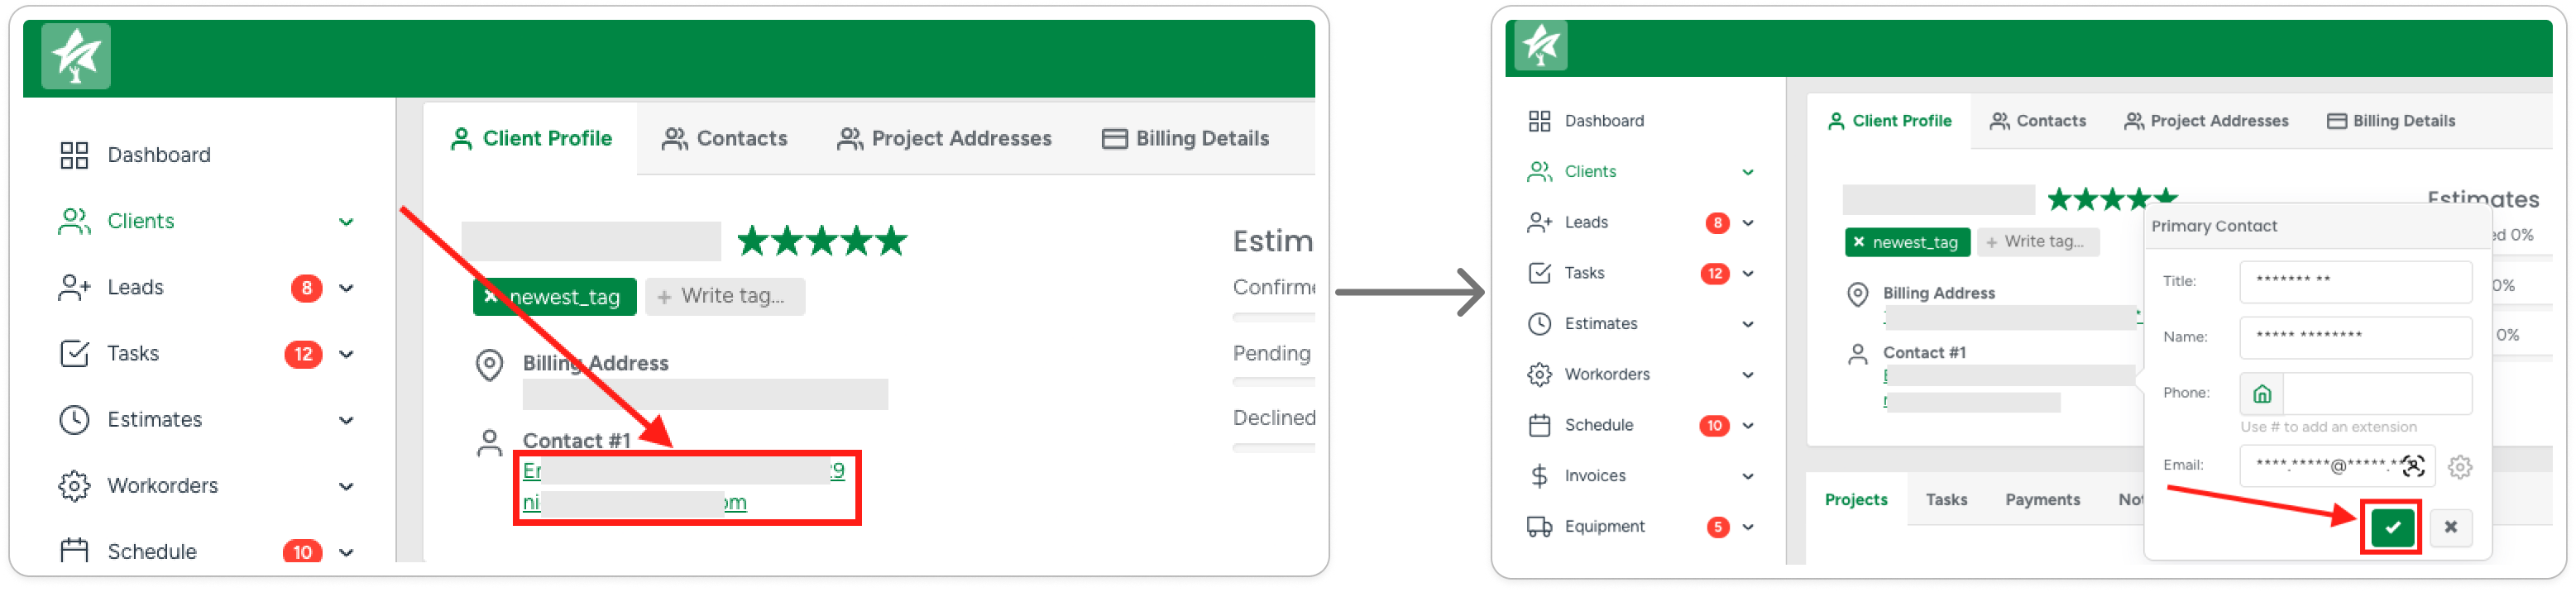
- Contact: To edit the Client's Primary Contact data (Title, Name, Phone, Email), click on the Client's Contact information line, edit the necessary data, and submit the changes:
Delete Profile
To initiate the Client Profile deletion, click the 'Remove' icon. On the removal confirmation, enter the password and confirm the removal:
Please note that the Admin-level access is required to confirm the deletion process. Once a Client Profile is deleted, it cannot be restored.
Contacts
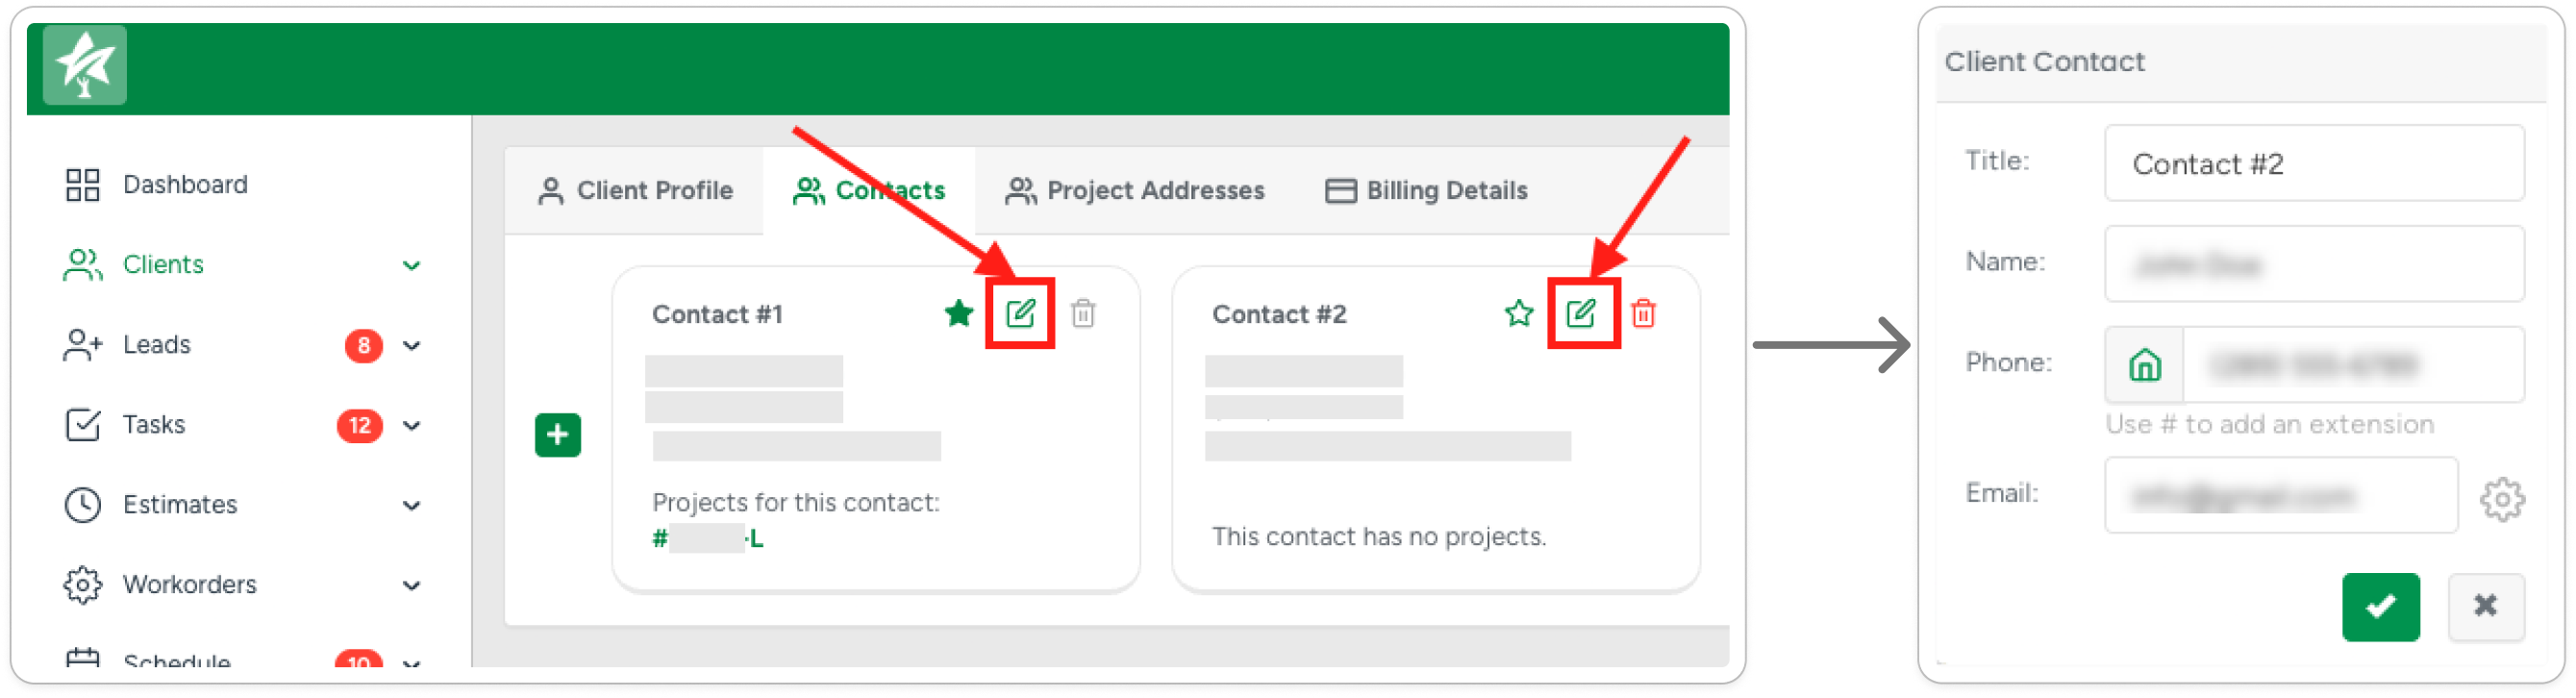
- To view and manage the Client's Contacts, click the Contacts tab:

Edit Contacts:
- Add new Contact: Click the '+' icon to add additional Contact. Then, enter the required information in the pop-up window:

- Edit Contact info: To initiate editing, click the 'Edit' icon. On the Edit Contact form, change the necessary data and submit the changes.
- Mark as Primary: Mark Contact as Primary by clicking the 'Primary' icon. Only one Contact can be marked as Primary: selecting new Primary Contact unmarks the previous Contact:

- Remove Contact: To initiate the Contact removal, click the active 'Remove' icon. On the confirmation pop-up, confirm the removal:
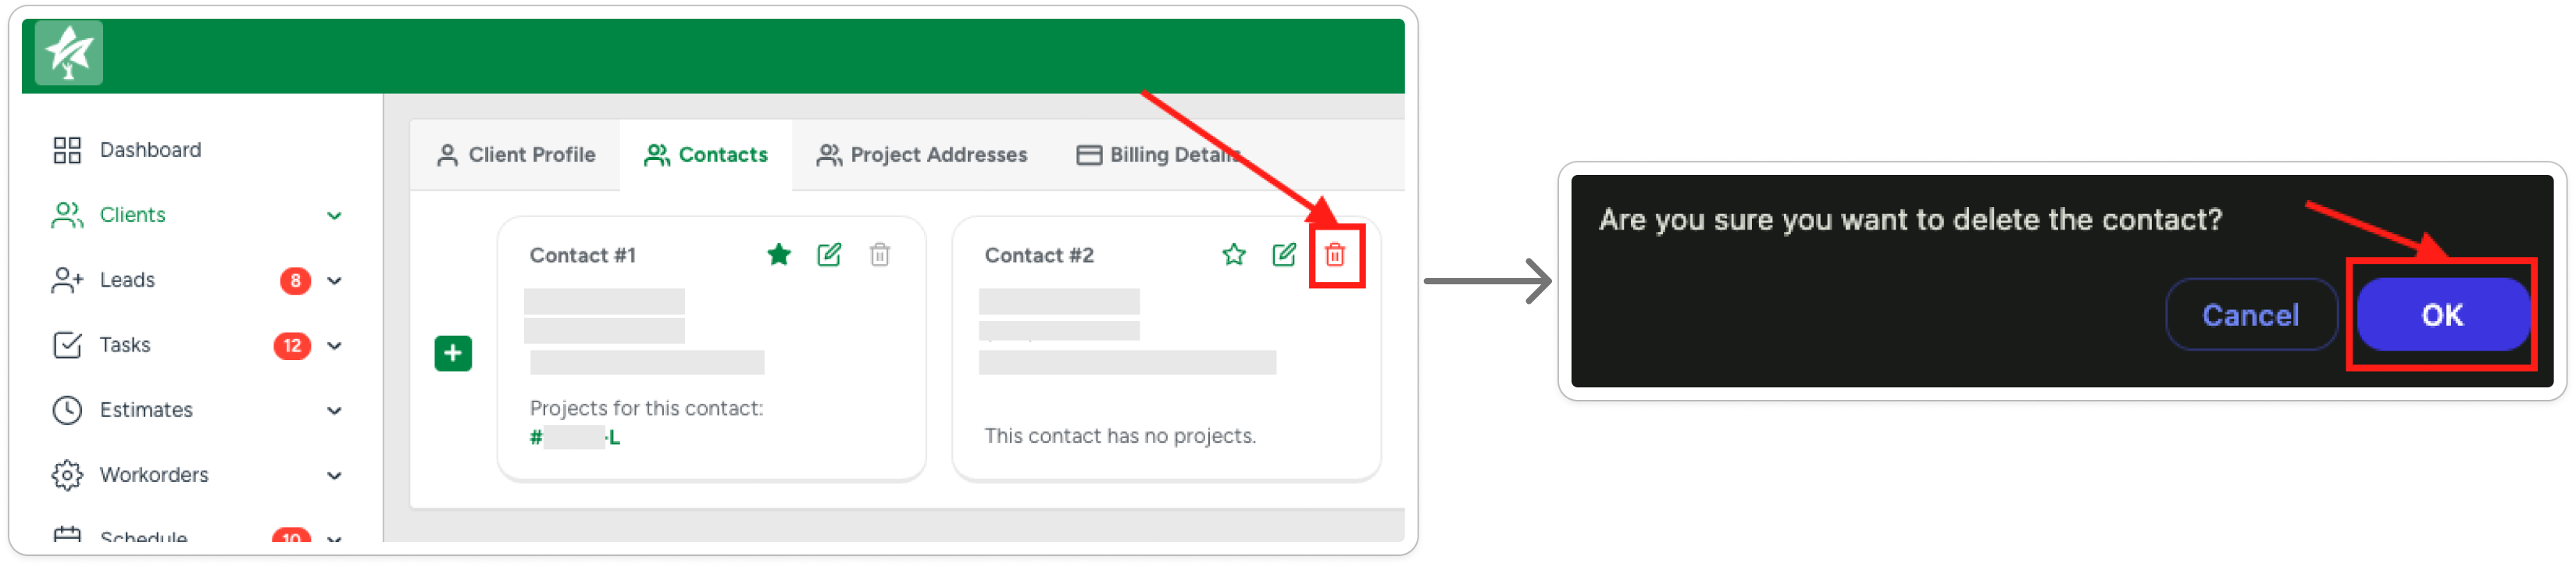
The Primary Contact can not be deleted: mark a different Contact as Primary to allow the removal. If only one Contact is added, it becomes Primary automatically and
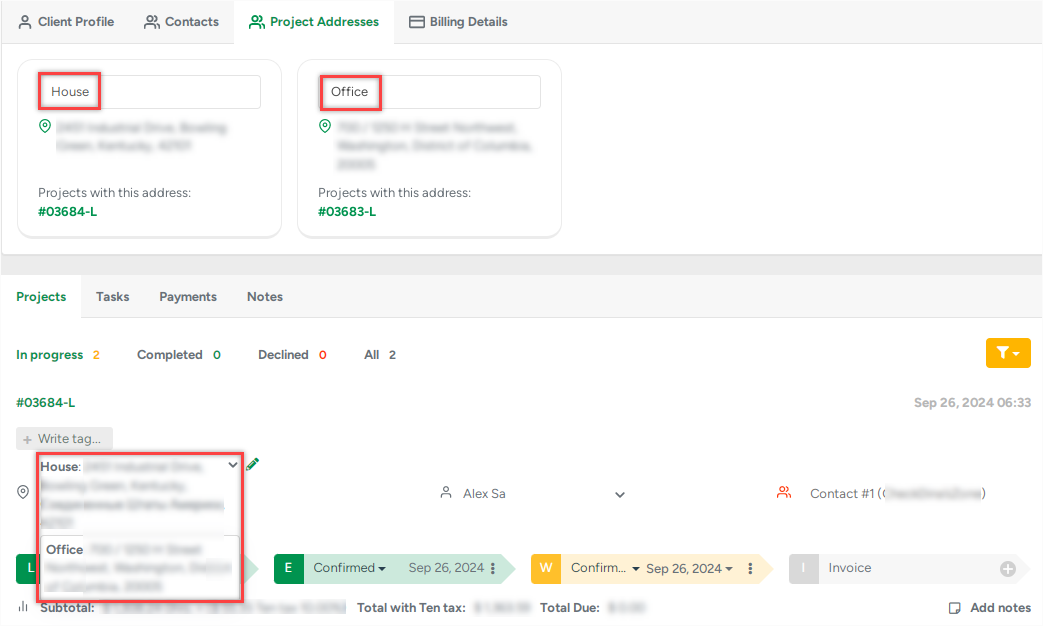
Projects Addresses
The Project Addresses section allows you to assign custom names to project locations. These names will appear on the Estimate PDF, Invoice PDF, and in the Customer Portal.
Click the pencil icon to open the Lead Address pop-up, where you can edit the address.
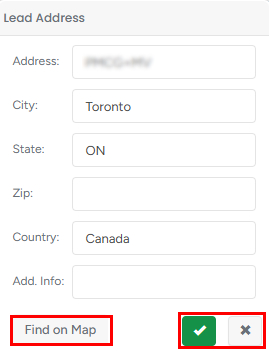
By clicking the Find on Map button, the Google Maps pop-up appears that allows set the location more precisely:
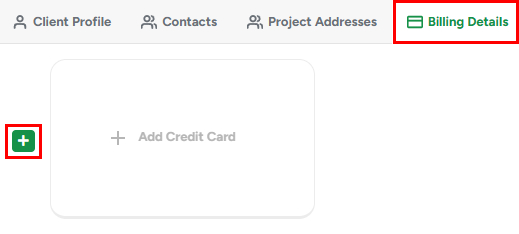
Billing Details
The Billing Details tab allows you to add and store the client’s billing information, such as credit card details, for use in future transactions.
To create a new billing record, click the + icon.
The client’s saved credit card information will appear on the screen. To make changes, click Edit billing information to expand the view.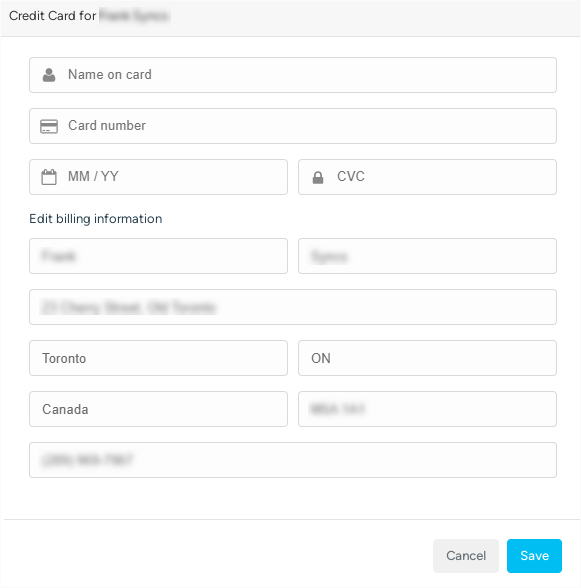
Sidebar Options
More options are available on the right side of the client profile:
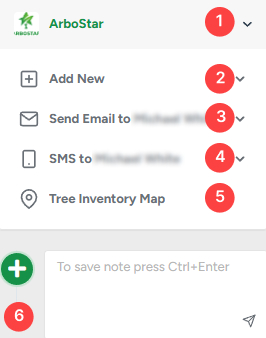
1. Select the service Brand for the client by clicking it to open the list of available brands.
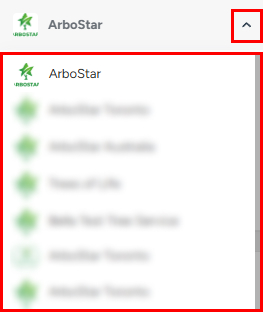
The expand option appears if there is more than one brand. When you switch the brand within a specific project, all company contact information will update accordingly on the Estimate and Invoice PDFs, as well as in the Customer Portal for that project.
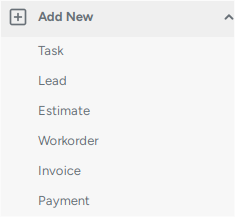
2. The Add New expanded list.
3. Send an Email to the client from the list of available options. By clicking it, the list of available Email templates opens.
4. Send an SMS to the client from the list of available options. By clicking it, the list of available SMS templates opens.
5. Navigate to the tree inventory map.
6. The text box (for notes) is located just under the sidebar panel, and it can be used to store additional client information.
- To add a note, please fill in the text and click Control + Enter.
- To remove the note, click on the bin icon under it.
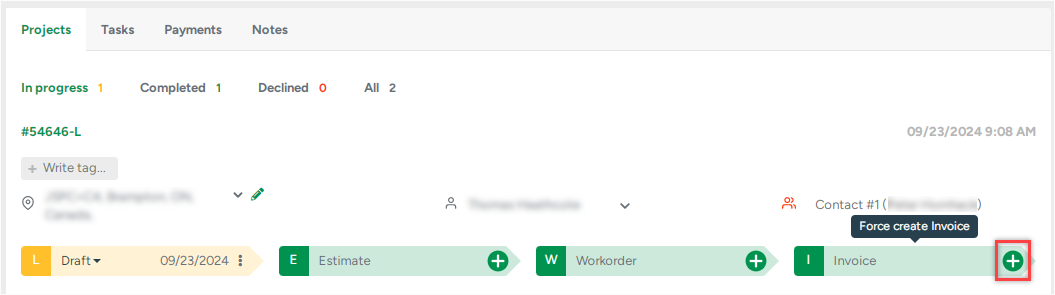
Projects
The Project tab displays all existing projects, categorized by their status: In Progress, Completed, Declined, and All.
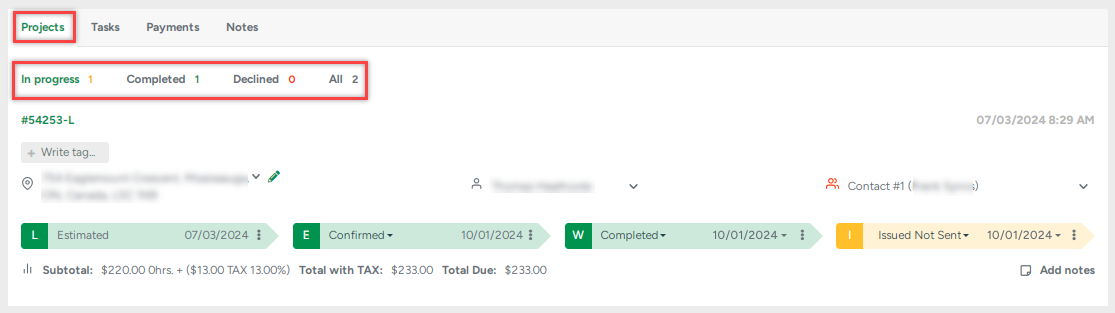
Newly created projects appear under Projects → In Progress. The project workflow is designed to help you easily track each project’s stage, assign contacts, and update the status of each step—all from a single page.
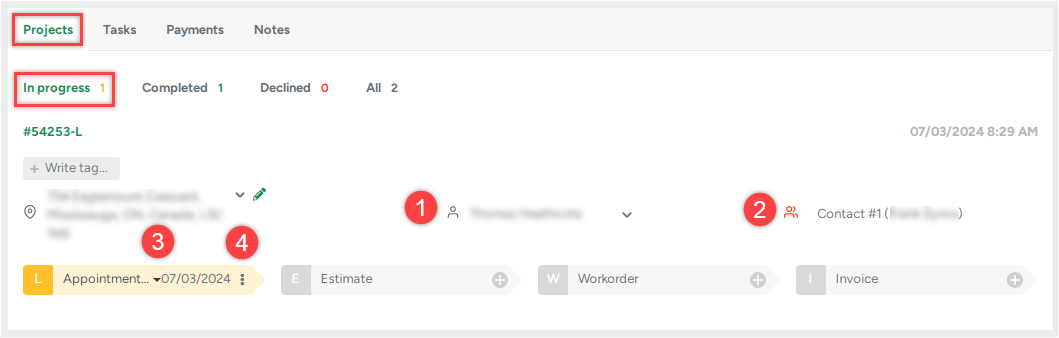
1. Assign an Estimator:
Click on the estimator’s name and select an employee from the list.
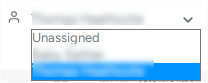
2. Assign a Contact:
Click the client’s name and choose a contact from the list (if multiple contacts are available).
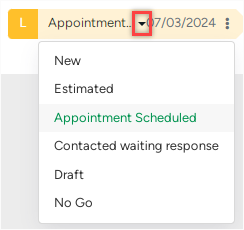
3. Change Project Stage Status:
To update the status of any project stage (e.g., Lead), click the drop-down menu and select the desired status.
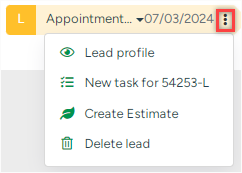
4. Access More Options:
Click the three-dot icon to open a pop-up menu with additional actions.
5. Open Profiles:
Click on the letter icons to open the corresponding profiles:
L for Lead
E for Estimate
W for Workorder
I for Invoice
6. View Workorder Schedule:
Click the date on the Workorder to see all jobs created, their scheduled dates in the Crew Schedule, and the assigned crews.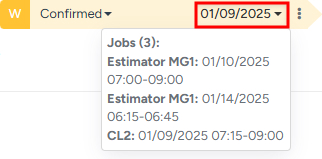
Project step shortcut
You can skip any project step, which can save time for office managers in certain situations. To manually create a skipped step, hover over the step icon and click the + sign that appears.
Sorting Projects
To improve project navigation, use the Sort By option. This dropdown appears next to all project tabs and is visible only when there are two or more projects listed.
Sorting Options:
By Creation Date (default)
Lead
Estimate
Workorder
Invoice
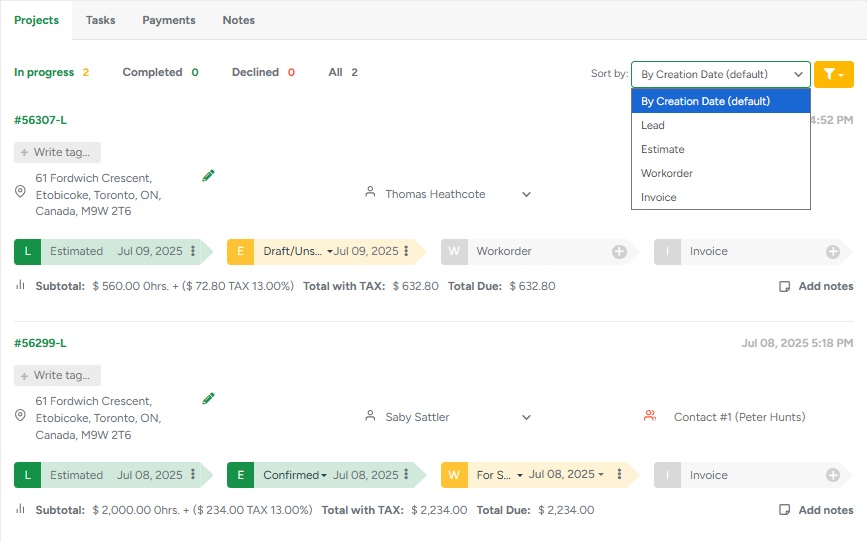
Sorting is applied per tab, meaning it only affects the list of projects in the currently selected tab. For example, if you're in the In Progress tab and sort by Invoice, it won’t change how projects are sorted in other tabs.
Each sorting option arranges projects by the most recently updated record of that type. For instance, selecting "Estimate" will sort projects by the most recent estimate. If a project doesn't have the selected item (e.g., no invoice), it will appear lower in the list.
When sorting by:
Lead, Estimate, Workorder, or Invoice – the most recently modified ones are displayed at the top.
Creation Date – projects are sorted by the original date they were created, regardless of their current status.
Projects without the selected item (e.g., a project without an invoice when sorting by invoice) are shown at the bottom, following this order: Invoice → Workorder → Estimate → Lead.
When a sorting option is applied, a standard loading spinner is displayed to indicate the change is in progress.
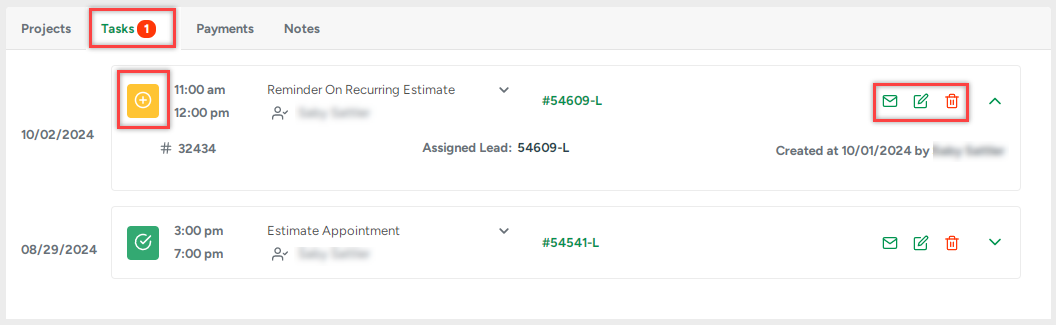
Tasks
Once tasks are created for a client, they appear in the Tasks tab within the client's profile.
For each task, you can:
Send an email to the client regarding the task
View details, update the task status, and add a description
Edit task information
Delete the task if no longer needed
For more information on tasks, you can find it in our Create a New Task / Schedule Appointment article.
Payments
All payments made by the client are listed in the Payments tab of their profile. From there, you can edit or delete individual payment records.
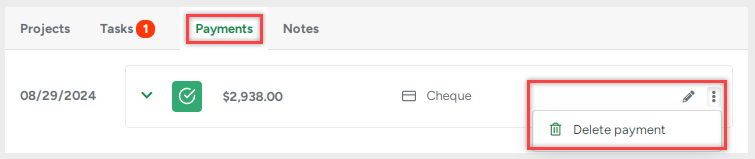
If a credit card was selected as the payment method during the payment creation process, clicking the three-dot icon allows you to view additional details or issue a refund.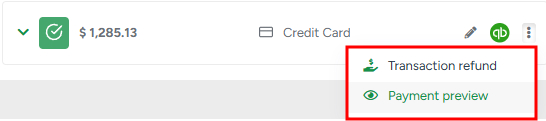
Here’s a sample payment preview: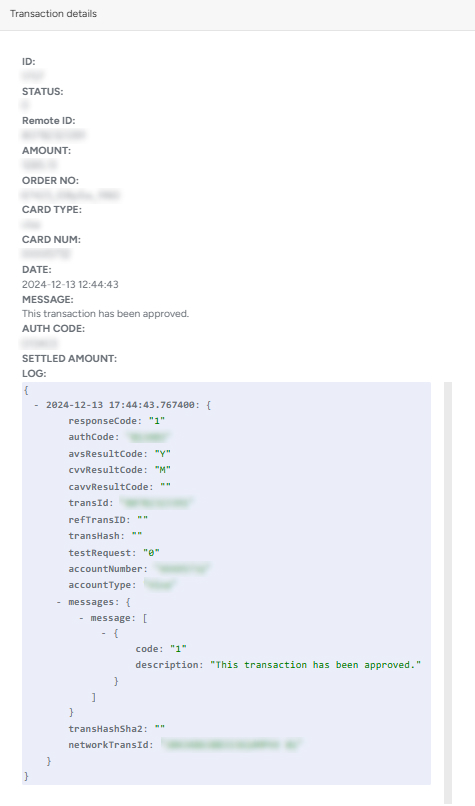
Notes
You can manually add notes and upload files to the client profile.
Click here for more information about Client Notes.
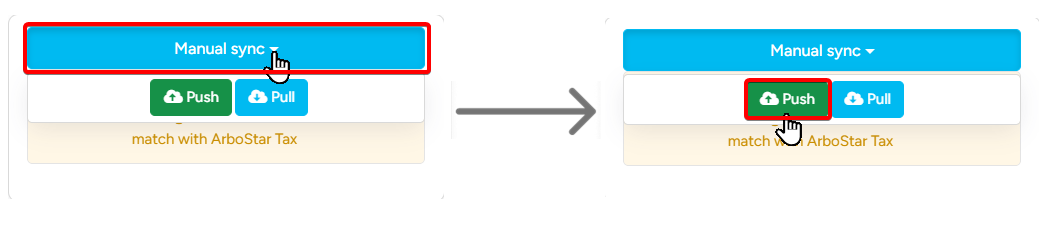
QuickBooks integration
If you have an active integration with QuickBooks, you can perform a manual synchronization of the individual invoices or the entire profile.
This can be useful if, for some reason, there is a synchronization delay or error.
Navigate to the client's projects, and you will see the small circular QuickBooks icon: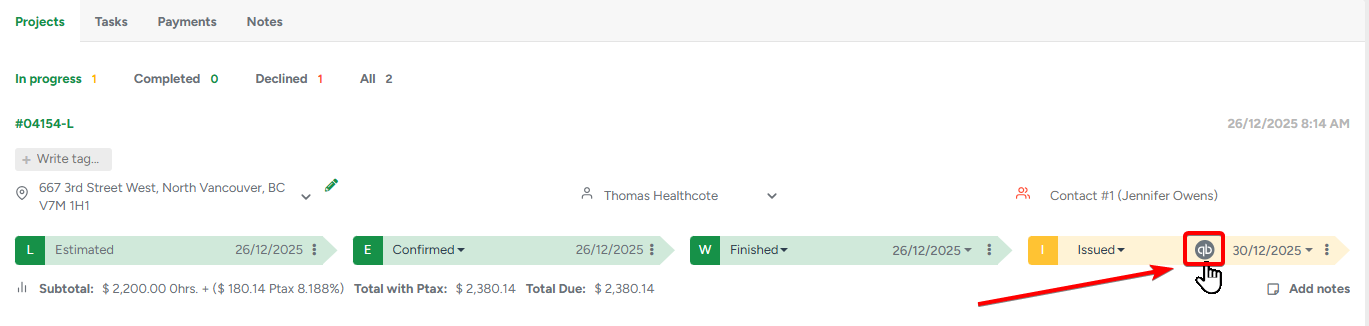
Depending on the synchronization status, the button can be 4 colors:
 synced successfully
 synced with warning
 not synced
 error
error
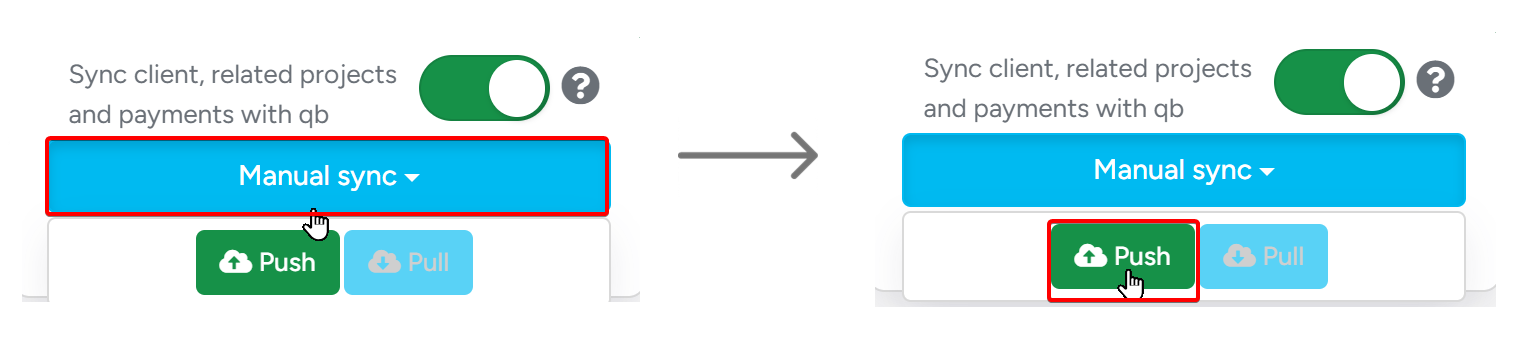
Individual invoice manual sync:
- Click on the QB button to see the logs(history) of all synchronization attempts for this invoice

- Click on the "Manual sync" dropdown to see the sync options and click on "Push" to force-send the invoice to QuickBooks
Client's profile manual sync:
- At the top-right of the client's profile page, you will see the same QB button
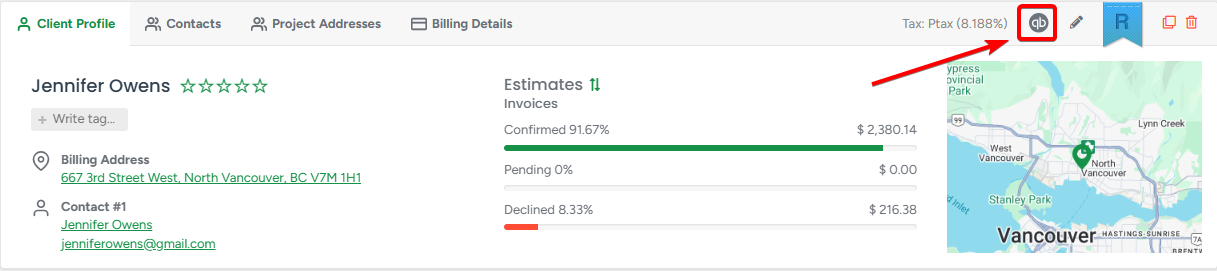
- Click on it to see the sync menu, and the rest is the same as with the invoice
The sync toggle:
Unlike the invoice view, the Client profile includes a synchronization toggle.
Disabling this switch will stop sync for the specific client and automatically reload the page.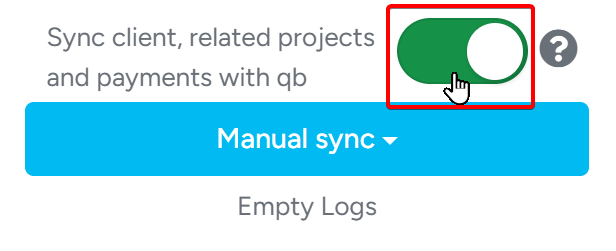
Troubleshooting Tip: If manual syncing fails for an invoice or profile, toggle this switch Off and then On again to reset the connection.