Manage Payroll Efficiently
ArboStar's Payroll Calculations submodule provides a powerful tool for efficient payroll processing, ensuring accurate and timely employee payments. Its user-friendly interface and robust functionality facilitate the tracking of employee hours, calculation of overtime pay, and generation of detailed pay stubs. This feature streamlines the process of updating employee information by eliminating the need for individual edits of each employee's pay rate or hours worked.
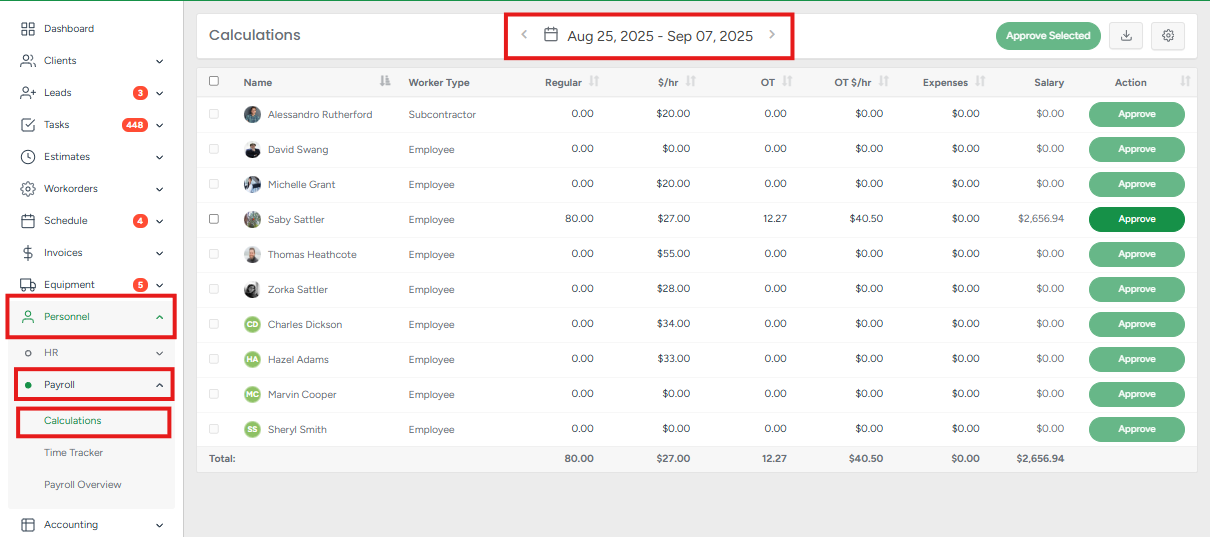
- Navigate to Personnel → Payroll → Calculations.
The list is filterable by time period. Users may navigate to previous or subsequent payroll periods using the directional arrows or select a specific period from the calendar. To access the desired time period from the calendar, click the Date field. From the calendar, you can select a time period or click Today to access the current payroll information.

You can modify or input an employee's standard and overtime hours, as well as their hourly and overtime rates. Furthermore, expenses can be added. The salary will be calculated automatically based on these parameters.
- To edit regular hours, hourly rates, overtime hours, or overtime rates, click on the value and input the new hours or rate in the corresponding fields.


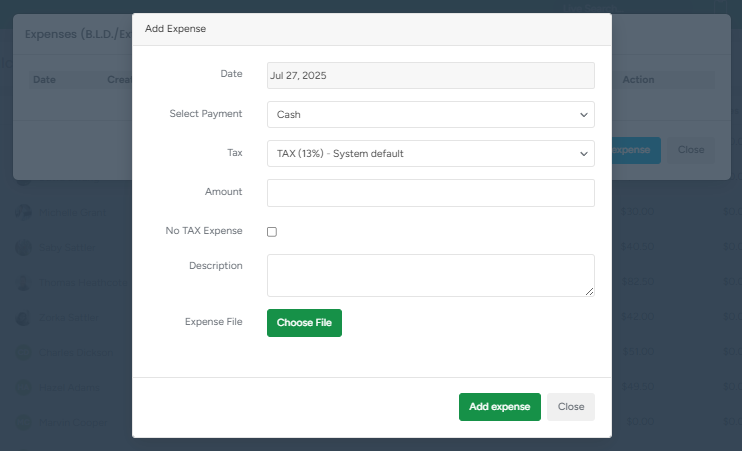
The Add Expense feature allows you to log, categorize, and track expenses directly in the system. This helps maintain accurate financial records, streamline reporting, and ensure proper expense tracking for each job or project.
Date - Select the date of the expense.
Select Payment - Choose the payment method used for the expense (e.g., Cash, Credit Card, Bank Transfer). This helps with bookkeeping and reconciliation later.
Tax - Select the applicable tax rate for the expense. The default system tax will be pre-selected but can be changed if needed.
Amount - Enter the total amount of the expense before tax (if tax is applied).
No TAX Expense - Check this box if the expense is not taxable. This will override the tax field and save the amount as tax-free.
Description - Provide a short description or note about the expense (e.g., "Fuel for truck," "Equipment repair"). This helps in reporting and identifying expense categories.
Expense File (Optional) - Upload a file or receipt image associated with the expense. This is useful for recordkeeping and proof of purchase. Click Choose File to attach a document or image from your device.

Once you've filled in all the info, hit the Approve button to save your changes and confirm the payroll. You can also select multiple employees at once by checking the box next to their names (or the one at the top to select everyone), then click Approve Selected.

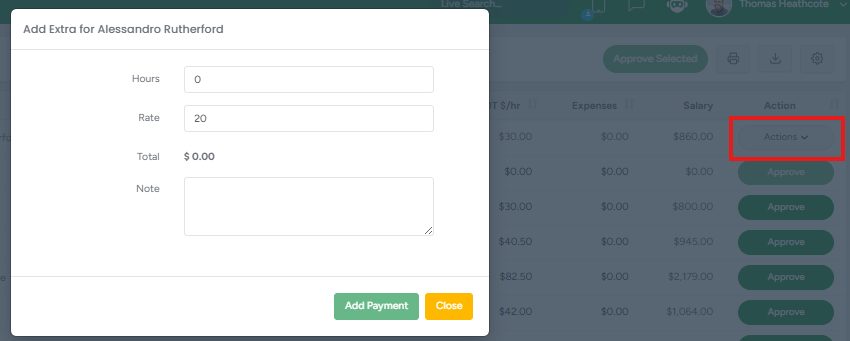
- To undo any manual modifications, please select Actions and then choose Cancel.

- Add Extras enables you to add hours, modify the rate per hour, and add notes for additional payment.

Click Print PDF to access the payroll information for the employee for the chosen time period. If you choose the CSV format, the file will be downloaded to your device.
For the PDF option, after accessing the payroll overview file in a new window, you can print or download it.

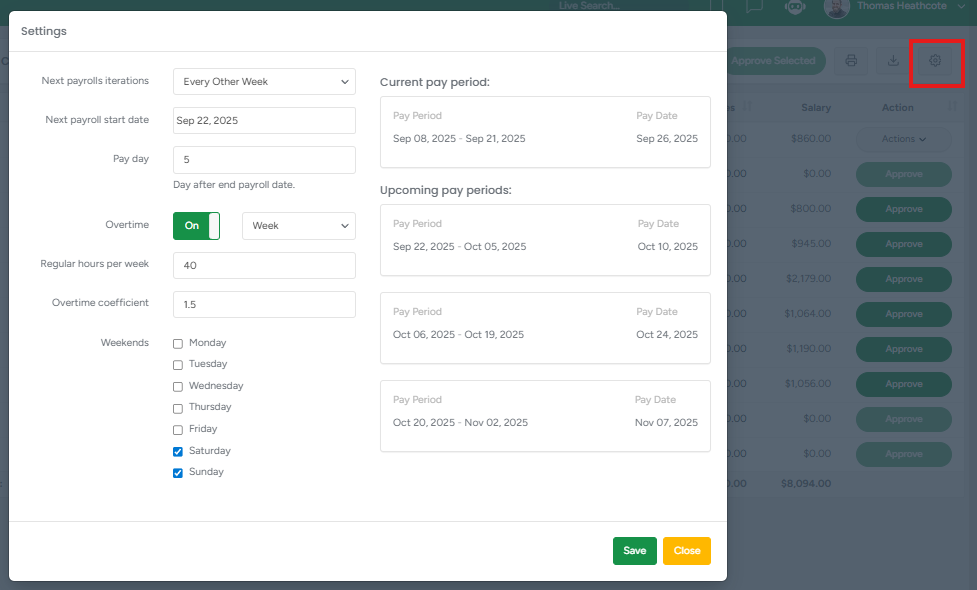
You can also access settings by clicking on the Gear icon in the top right corner. In settings, you can fill in general payroll information and see the upcoming payroll dates.
What the next payroll iterations and start date should be,
- How many days after the end of the payroll date is the payday,
- Switch the overtime option on or off,
- Set regular and overtime hours,
- Set what days of the week are considered workdays.
 After making the required changes, don't forget to click on the Save button to save the changes.
The Payroll Calculations also support exporting the data to Inova. To learn more, visit the dedicated article.
