
The ArboStar API provides a set of endpoints designed to allow developers to interact with the application's core data, including brands, invoices, leads, requests, and tasks.
Getting Started: Base URL and Authentication
First of all, where do I find it?
Before we explore the API, we will need to get an API key. Think of it like a long password.
You can find it by going to Company management → API Access Management
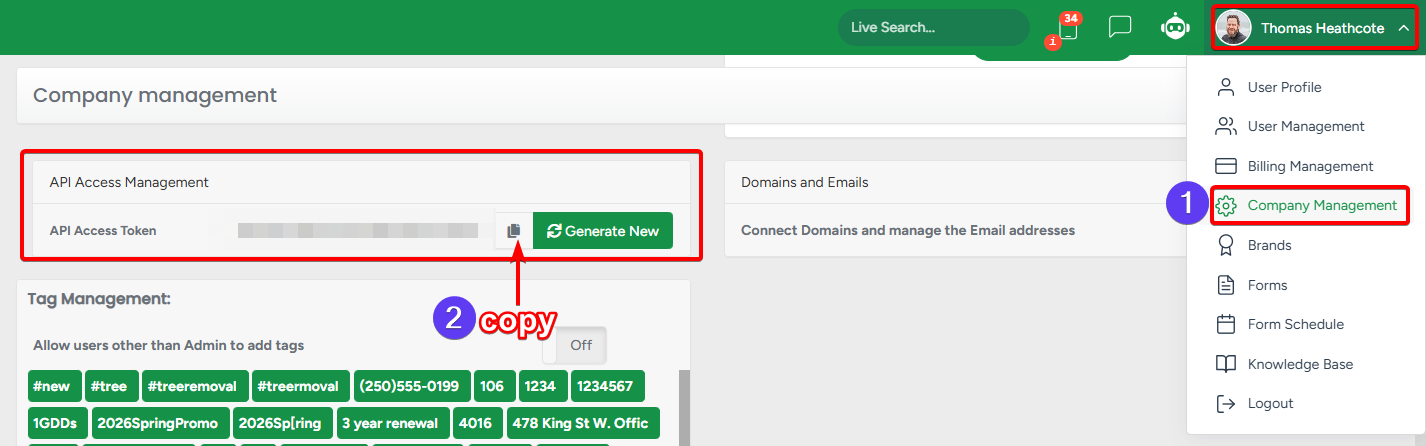
WARNING: Never give your API key to a third party or expose it in any way.
ArboStar API is very restrictive and has limits on requests per minute, but exposing your API key is always a bad idea.
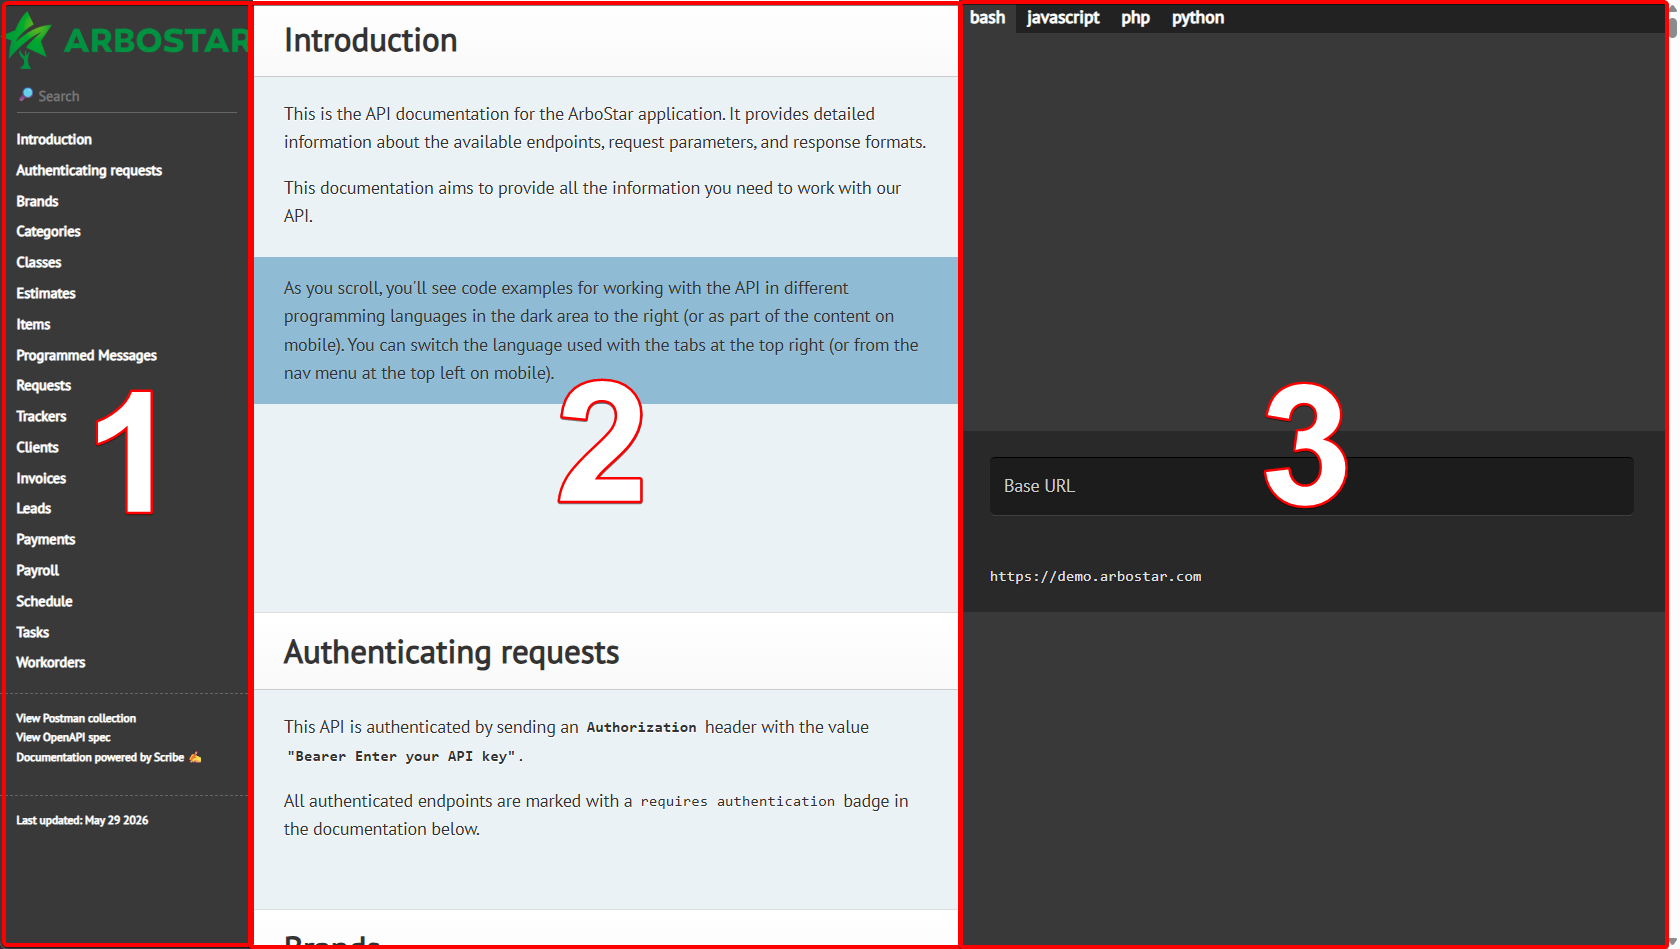
The API documentation can be accessed by going to https://your_comany_name.arbostar.com/docs/api
- your_comany_name - is your company ID, the same one you use when you login on the app
- /docs/api - the route to the API documentation
The API documentation page is visually divided into 3 sections:
- Endpoints - a list of endpoints that ArboStar exposes for you to make requests to
- Description - a comprehensive description for each endpoint that explains every field and explains how to make a request
- Scripts - an example of requests and responses using the given endpoint
Sending a simple GET request
Let's start with something simple and use the Brands endpoint to send a simple GET request.
ArboStar's API documentation has built-in tools to send requests right away, so you can play with it before you start implementing it somewhere else.
Click on "Brands" endpoint on the left and then click on the "Try it out" button.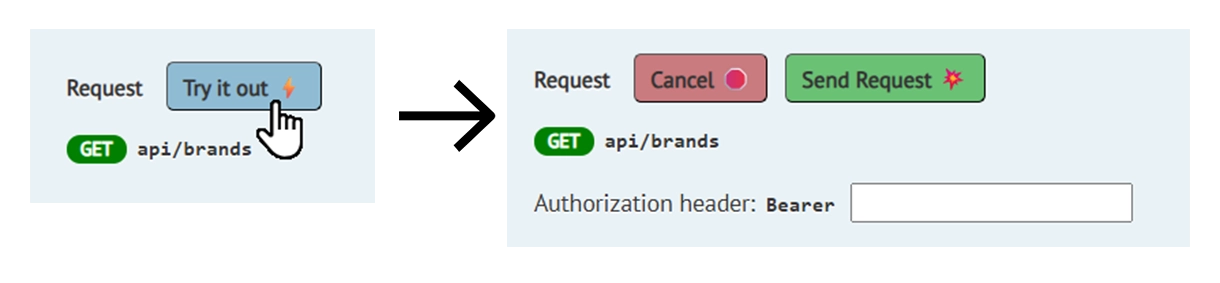
You will see two buttons and a text input named "Authorization header".
This is where you paste your API key from before, to be able to send requests to ArboStar.
After that, click on the "Send Request" button, and you will see the response to your request on the right side.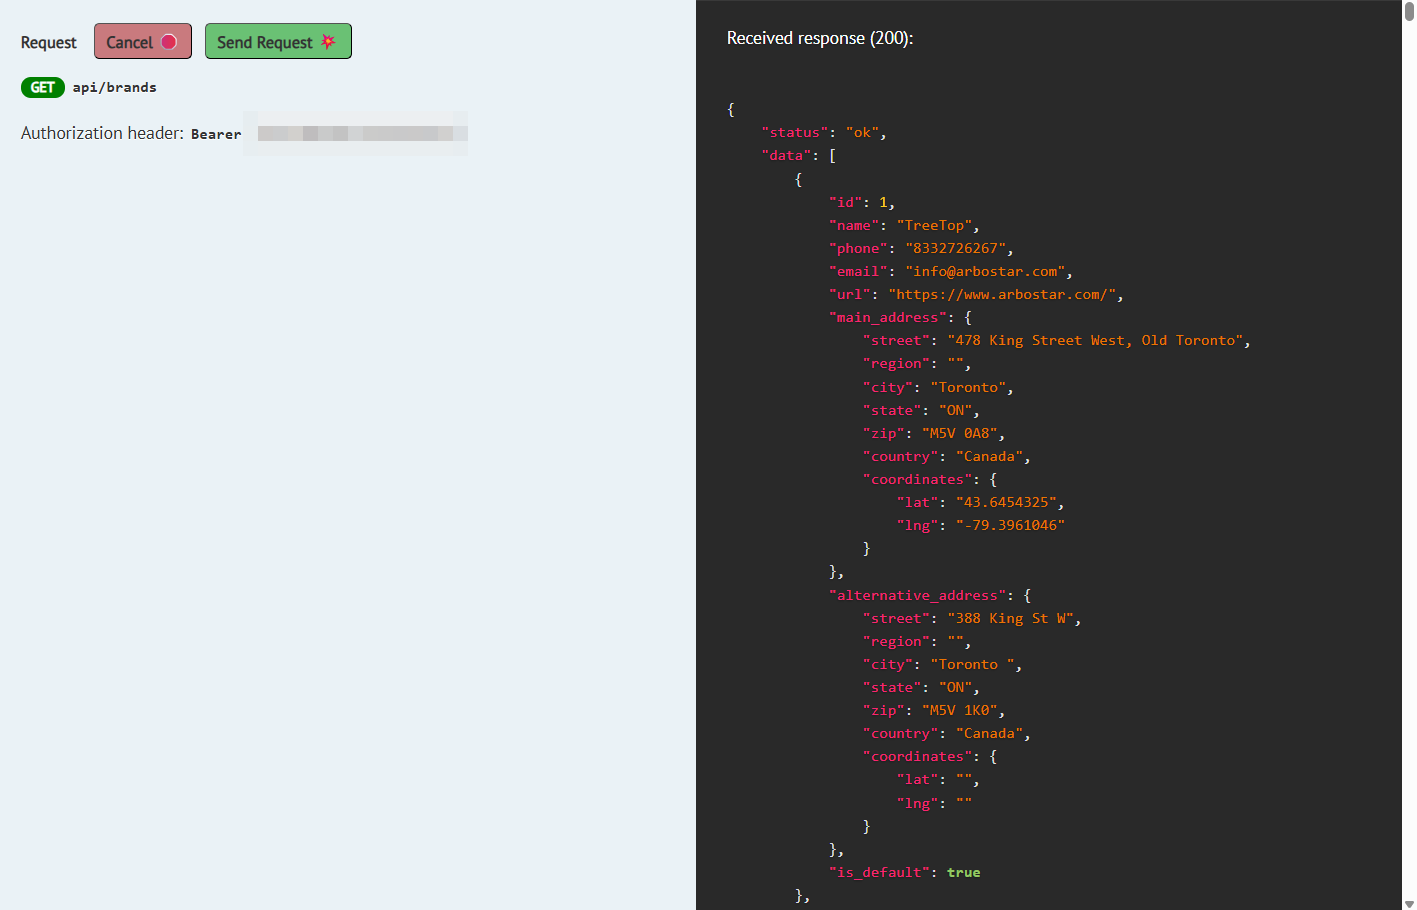
This blob of confusing text is called JSON (JavaScript Object Notation), and it's the most popular format to work with APIs.
If you look closer, you can actually see that the data is all structured "key": "value" pairs, every brand is enclosed in curly braces, and each parameter that has child parameters, like address, is also enclosed in curly braces.
For better readability, we recommend using code editors with syntax highlighting, and the ablility to collapse enclosed data.
Sending a POST request
Let's use the Requests module and make a new request using the API.
Find the Requests → Create a new request endpoint and copy an example from it.
For this example, we will use Postman to make a request:
- Open Postman
- Click + to create a new request
- Choose POST for the request type
- Paste your request example
Next, on the Headers tab, find Authorization key and replace the "Enter your API key" part with your API key.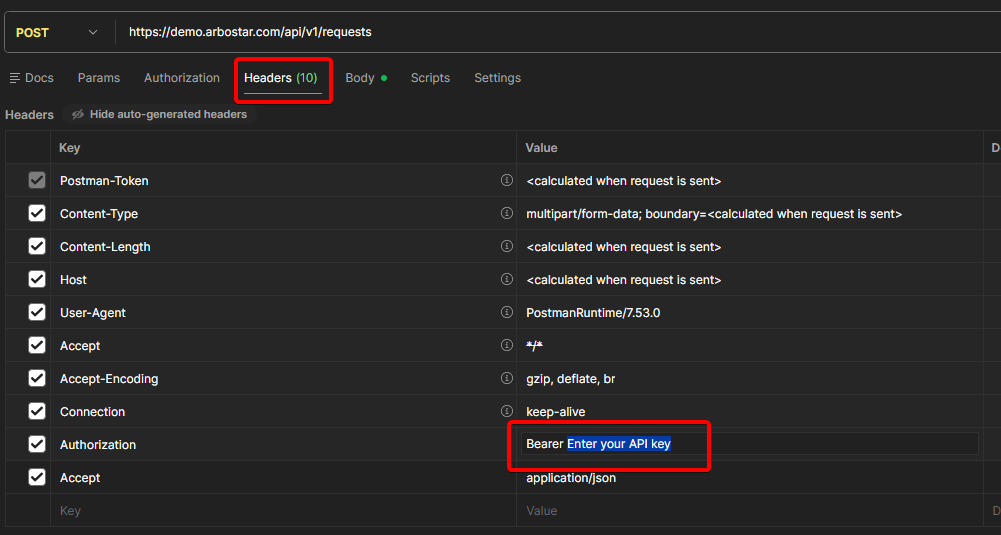
Now we are ready to send a request. Click on the Send button and look at the response and response status.
- If your request was correct, you will see a JSON response with the new Request, and the request status should be 200 OK
- If your request was incorrect, for example, you forgot to add an API key, you will see an error message, and the request status will be 401 Unauthorized