Create a Crew
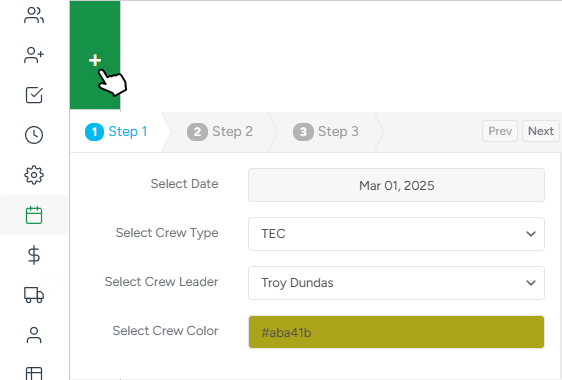
Click the big Plus button on the Crew Schedule to start assembling a new crew from scratch. The creation process consists of three steps.
- Step 1. It allows you to set the operation day, choose a crew type, assign the crew leader, and select the crew's color. After all is set, press the Next button.
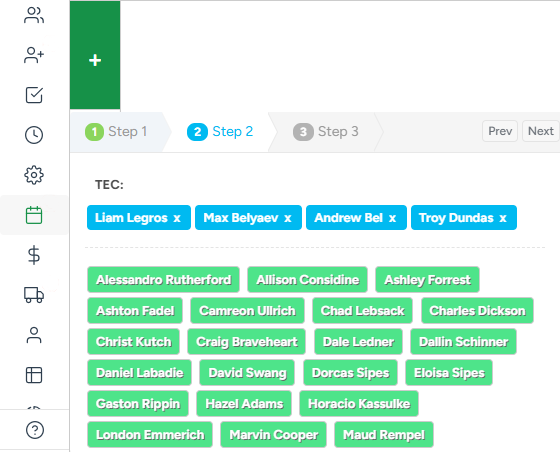
- Step 2. Here you can add available fieldworkers to the crew.
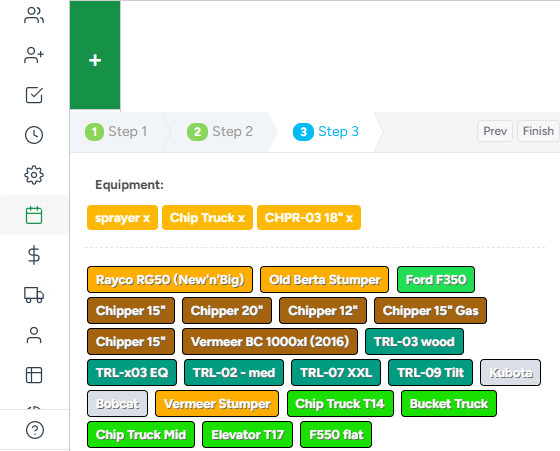
- Step 3. To finalize the creation process, please select tools and equipment that the crew might need for the job.
Edit a Crew
- To edit a crew at any time, click on the Crew Type field at the top of the crew.
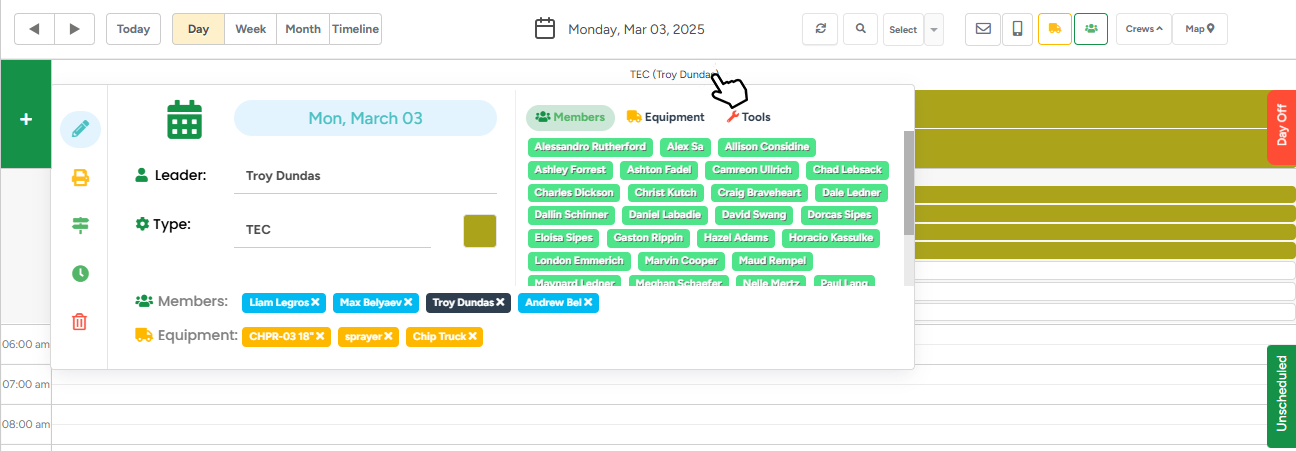
The newly-appeared pop-up window consists of four tabs. Under the 1st tab, you can edit crew details, change the crew type or leader, edit the crew color, and add or remove crew members, equipment, or tools.
- To add a new crew member, equipment, or tool to the crew, click the required item from the Members/Equipment/Tools section.
- To remove a crew member, equipment, or tool from the crew, click the X next to the item.
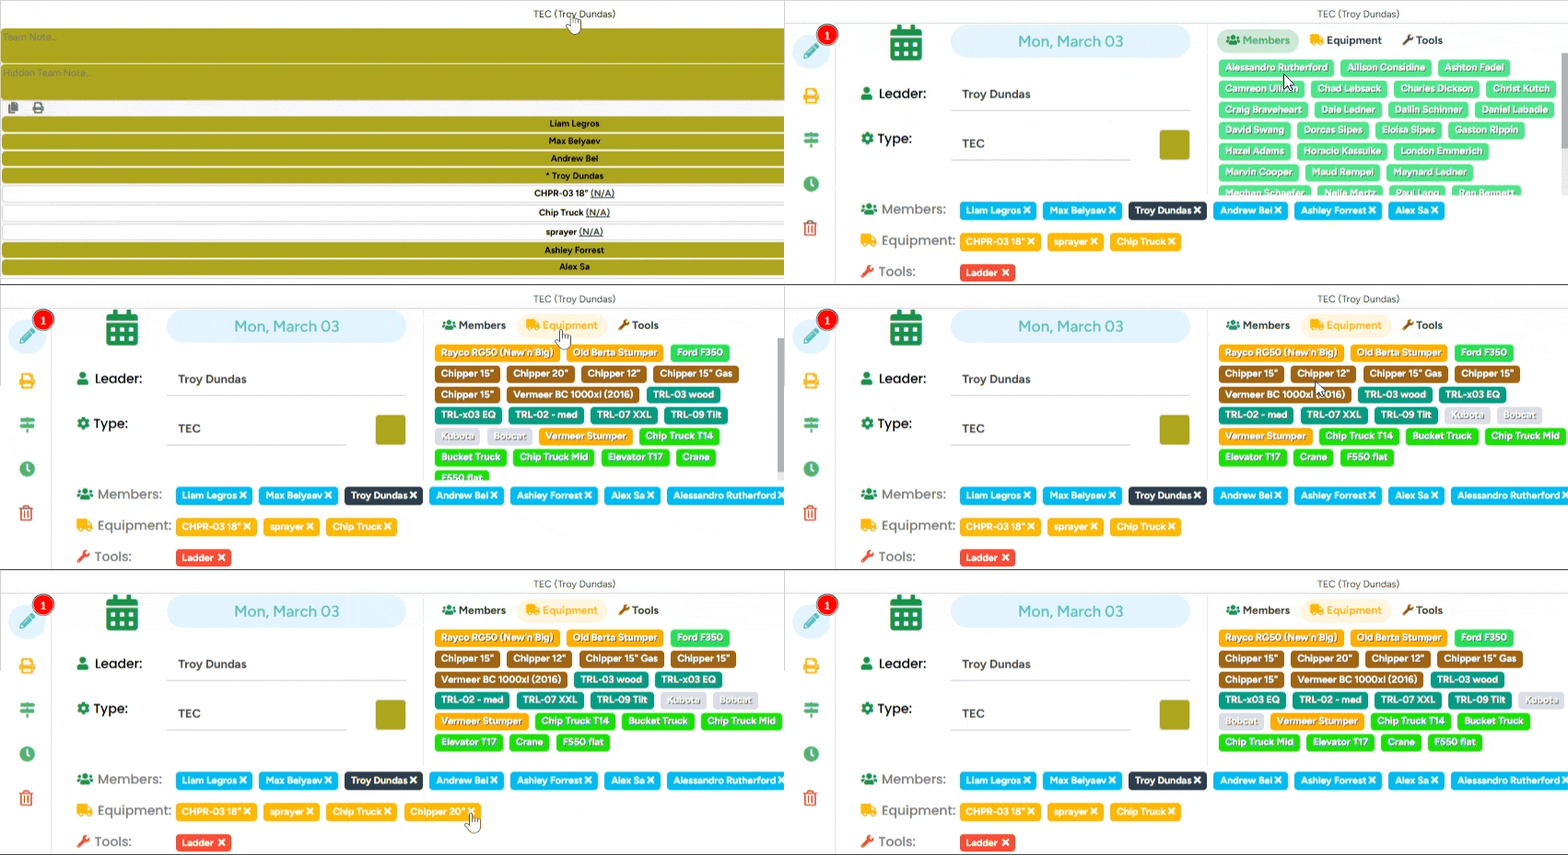
The leader role can be assigned only to a member that has previously been added to the crew. If the user is not yet part of the crew, add the user from the Members section that is the right side and then choose as the crew leader from the Leader drop-down list.
Alternatively, you can add crew members and equipment from Free Members and Free Equipment in the top right corner by drag-and-dropping them to the crew.
Under the 2nd tab, you can access the Workorder overview PDF, where you can download or print it.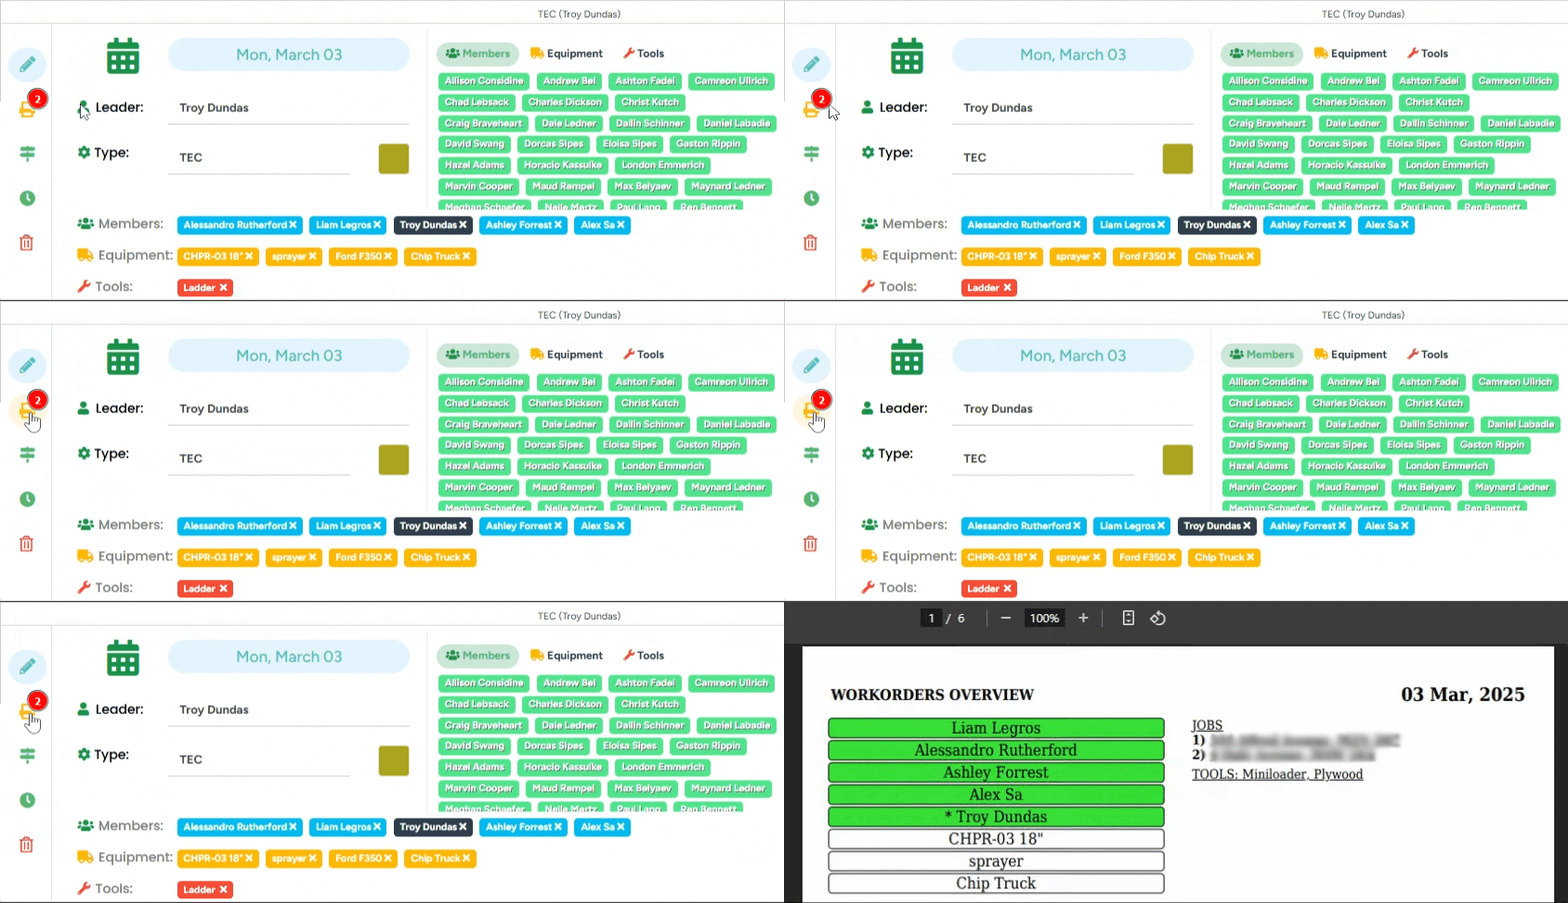
Note that you can also access the workorder overview PDF by clicking on the Print icon under Crew notes fields.
Under the 3rd tab, you can optimize the route for the crew, helping to set the most cost-efficient route when multiple jobs are scheduled. Once you press the Optimize Route button the day tasks will be rescheduled automatically.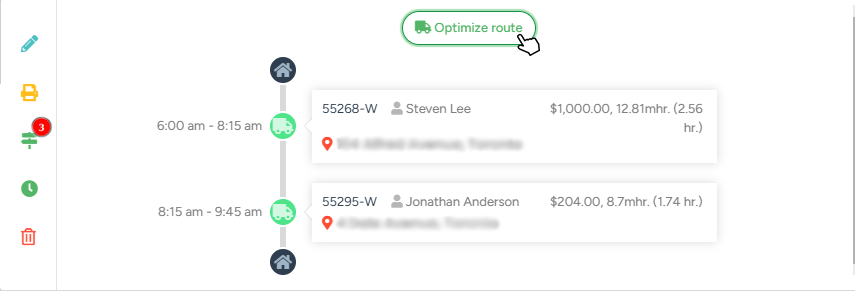
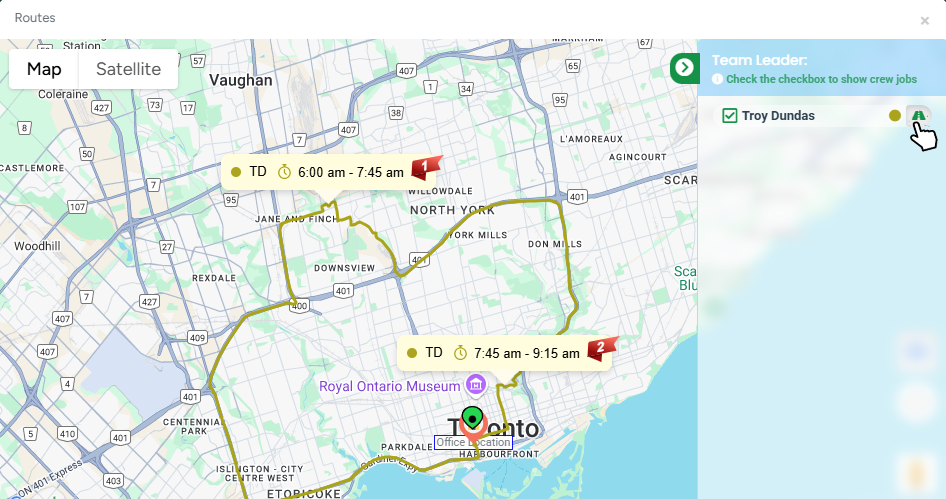
The routes can be viewed by pressing the Map button on a daily crew schedule.
- To view the routes for a specific team, click on the blue Teams button.
- From the sidebar menu tick the boxes next to the required team leader(s) to access their scheduled jobs.
- If you click on the Route button next to the team lead, the team’s route will be available on the map.
Under the 4th tab, you can access the Apply Actual Job Time feature. This allows you to adjust job time frames based on actual data reported by Crew Leaders through the app. It is specifically designed to always reflect real-time operations on the Crew Schedule.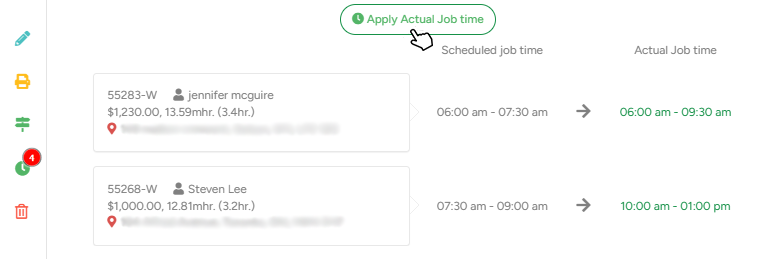
The actual time can be applied only if the job was finished by fieldworkers or the job's start and finish time was set manually.
The 5th tab is the delete crew action button that always asks for your confirmation. 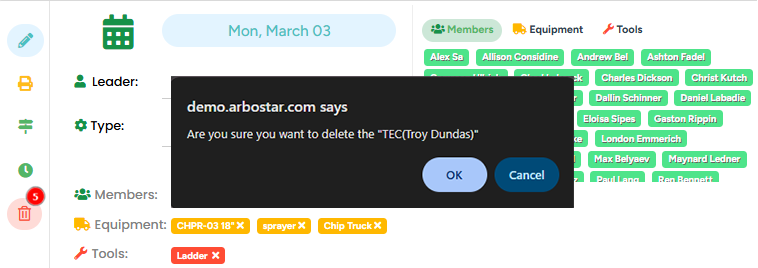
Copy a Crew
If you need to copy the crew with the same lineup to another date, click the Copy button under the notes section and select a date from the calendar. To customize what gets copied, click the arrow button next to Copy—you can choose to copy only crew members, include equipment, or copy events as well.
Note that for the multi-day job you need to duplicate jobs for the same crew for a certain period. The timeline mode is designed to assist you with planning.
Team Notes
Under the Crew type field you can add notes for the team:
- If you want to add a note that will be available both for the crew team members and the office team, please use the Team Note section.
- If you want to add a note that is visible only to the office managers, please use the Hidden Team Note section.

To learn how to schedule a job for your crew click here.
