
Tree Inventory Fields Management is where you configure how trees look and what information they contain across your entire system. You decide which fields appear on trees, what your clients can see on PDFs and in the Customer Portal, and how your team captures tree data in the field.
To access it, go to Company Management → Tree Inventory Fields Management.
System Fields
Every account comes with a set of built-in fields that are always available. You can rename most of them and set default values, but they can’t be deleted.
Field | Type | Notes |
|---|---|---|
| Tree # | Unique ID | Auto-generated number. Always visible to your team and clients. Cannot be changed. |
| Tree Species | Select | Sets the pin color on the map. Optional — trees without a species assigned appear as grey pins. |
| Condition | Select | Optional field for recording the health or condition of a tree. |
| Notes | Text | Free-text field for any observations or comments about the tree. |
| Files | Files | Photos and attachments for the tree. |
| Tags | Multi-select | Labels for organizing or categorizing trees. |
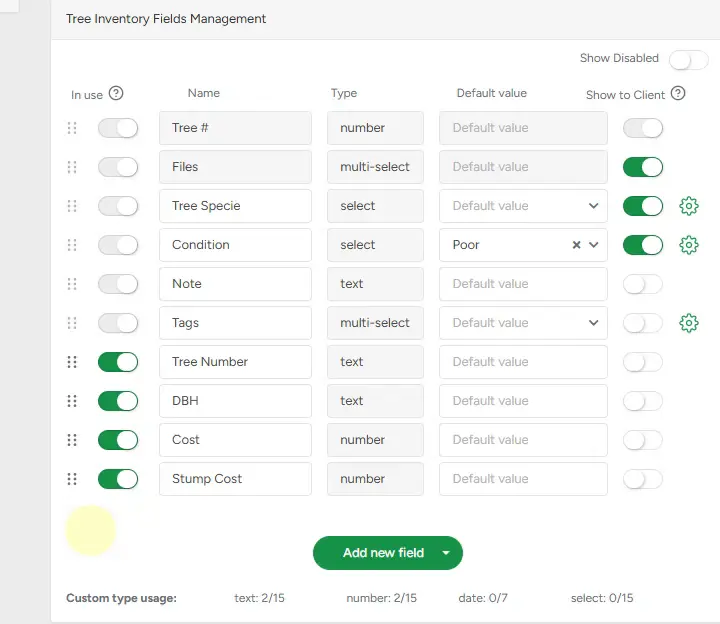
Controlling Field Visibility
Each field has two switches that control where it appears:
| In Use |
When In Use is on, the field is active and appears in the tree form, in Tree Details, and everywhere else trees are displayed. Turn it off to hide a field you don’t need right now — the data already saved in that field stays safe and comes back if you turn it on again. |
| Show to Client |
When Show to Client is on, the field is visible to your clients in the Customer Portal and on PDFs (estimates and invoices). Turn it off to keep a field internal — your team sees it, but clients don’t. |
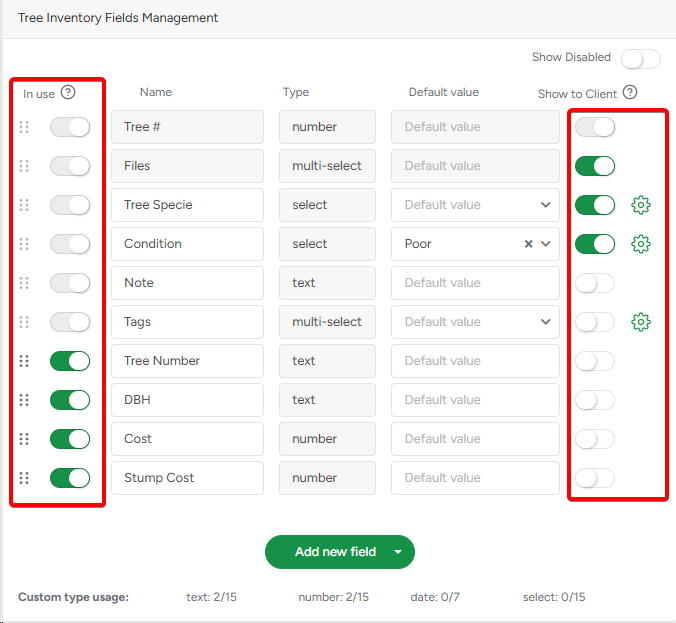 |
A field must be In Use before it can be shown to clients. If you turn In Use off, the Show to Client switch is automatically disabled.
If a field is active but has no value filled in for a specific tree, it won’t appear on PDFs or in the Customer Portal for that tree.
Show to Client is on by default for: Tree #, Files, Tree Species, and Condition. Tree # is always shown to clients and cannot be turned off.
Field Order
The order of your custom fields in the list is the order they appear everywhere — in the tree form, in Tree Details, in the Customer Portal, and on PDFs. Drag and drop your custom fields to arrange them the way that makes most sense for your team.
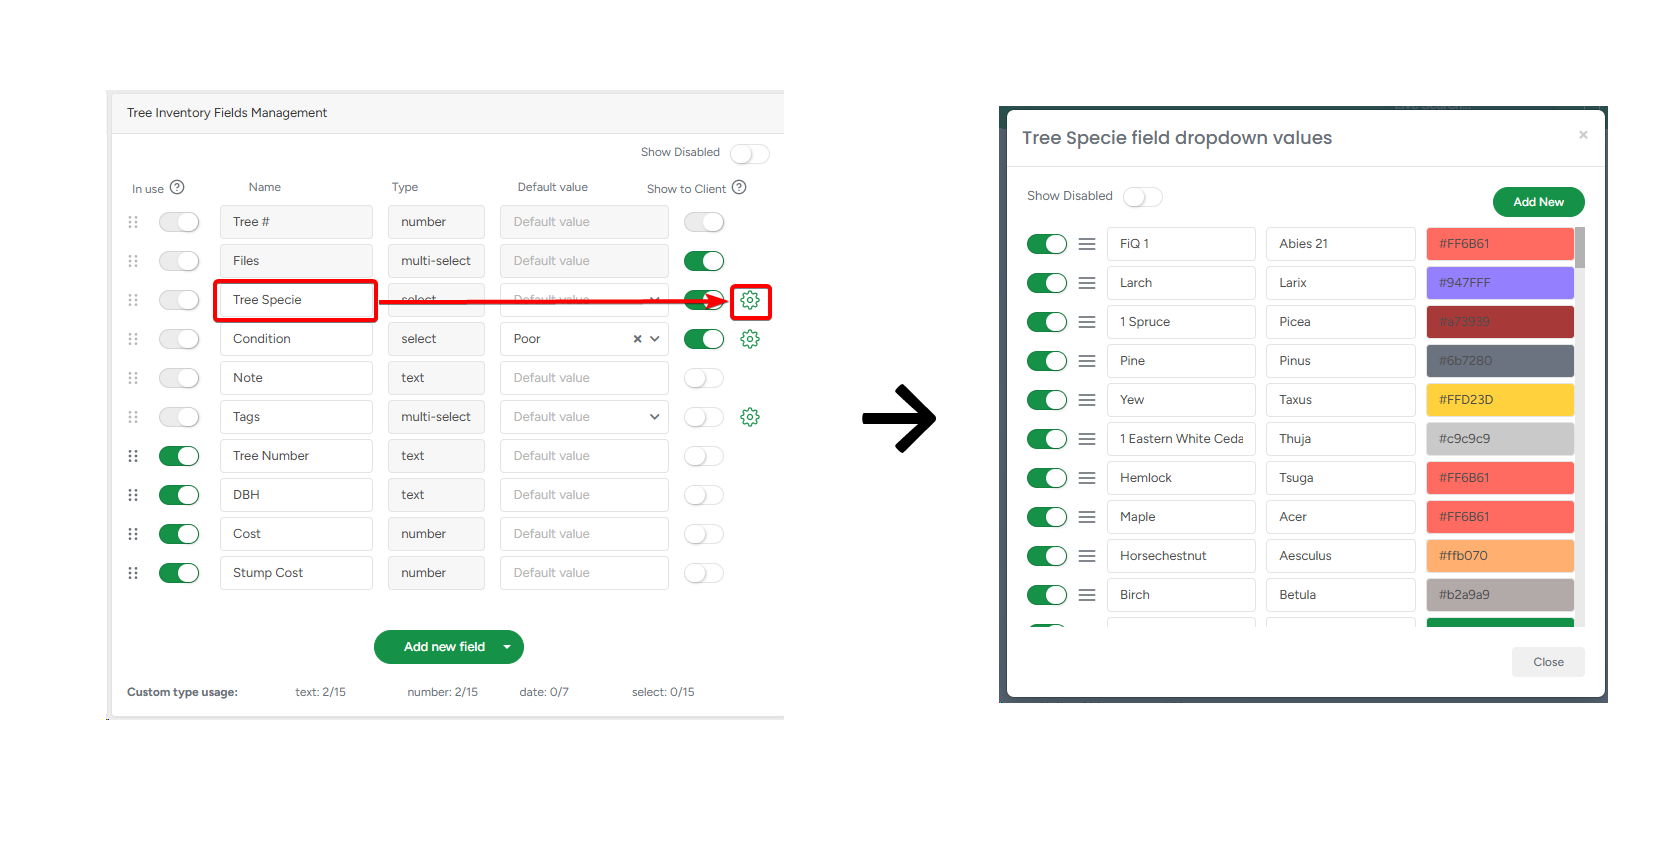
Configuring Tree Species
Tree Species controls the color of tree pins on the map, so it’s easy to see at a glance what types of trees are on a property. You set the color for each species value in the settings.
To manage your species list, click the settings icon next to Tree Species in the Default Value column. From there you can:
- Add new species values
- Edit the name of any species
- Choose a color for each species — this is the pin color that appears on the map
- Reorder species by drag-and-drop
- Disable species values you no longer use (they won’t appear as options when adding new trees, but existing trees keep their value)
At least one species value must always remain active.
Any changes to species names or colors apply immediately to all existing trees across your account.
Configuring Condition
Condition works the same way as Tree Species. Click the settings icon next to Condition to add, rename, reorder, and enable or disable condition values.
Configuring Tags
Tags is a multi-select field you can use to label trees with anything that’s useful for your team — work type, priority, zone, or anything else. Manage your tag options from the settings icon next to Tags.
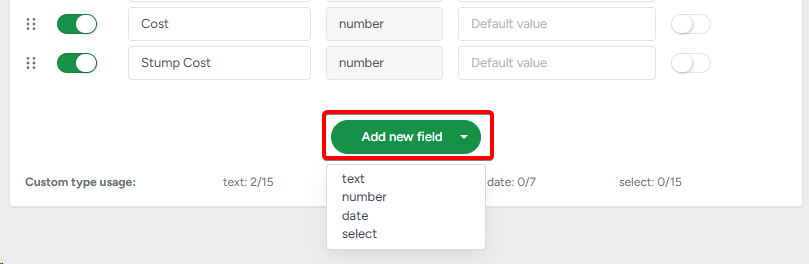
Custom Fields
If the built-in fields aren’t enough, you can add your own. Click Add New Field and choose a field type:
- Text — for notes, descriptions, or any free-form information
- Number — for measurements, ages, or other numeric values
- Select — a dropdown with one choice (e.g. Risk Level: Low / Medium / High)
- Date — for inspection dates, planting dates, or any date-based information
The date format for Date-type fields is set in Company Management → Date Format Management.
You can create up to 15 fields of each type, except Date which is limited to 7. A usage counter at the bottom of the page shows how many you’ve used.
Renaming a custom field updates the name everywhere immediately. Disabling a custom field hides it from all views, but the data is preserved — re-enable it any time to restore visibility.
Default Values
You can set a default value for any field. When a new tree is created, the field is automatically pre-filled with that value — saving time when most of your trees share common characteristics.
Default values only apply to trees created after the change. Existing trees are not affected.
How Changes Affect Existing Trees
What you change | What happens |
|---|---|
| Field name | Updated immediately everywhere |
| Field order (custom fields) | Updated immediately in all views |
| Turn a field off | Hidden everywhere; data preserved |
| Disable a select option | Existing trees keep the value; new trees can’t select it |
| Default value | Only affects newly created trees |