
Tree Inventory is available on the ArboStar mobile app for both estimators and field workers. Estimators use it to place trees on the map, assign services, and build estimates on site. Field workers see trees and their services on the job, mark work as complete, and navigate the property using the map.
This article covers both flows: how to work with Tree Inventory as an estimator, and how trees appear and work on the job for a field worker.
Estimator Flow
Opening Tree Inventory
You can open Tree Inventory from three places in the app:
- From a Client Profile: tap the 3-dots menu → Tree Inventory. The Tree Inventory Map opens for that client. If no map exists yet, one is created automatically using the client’s billing address. If the client has multiple maps, the last opened map is shown. Tap the map name in the top bar to open Manage Maps and switch between maps or create a new one.
- From a Lead Profile: tap the 3-dots menu → Tree Inventory. Works the same as from a client profile. When you create an estimate from this flow, it’s automatically linked to the lead.
- From an Estimate: tap + Trees to open the map. If trees are already added, you can also open the map via the Trees block 3-dots menu → View on map.
| From a Client / Lead Profile |
| 3-dots menu → Tree Inventory |
| 3-dots menu → View on map |
Working with Trees on the Map
The map shows all trees as color-coded pins with Tree # labels. Colors correspond to Tree Species as configured in Company Management. Your current location is shown as a blue dot if location access is enabled. At low zoom, trees cluster automatically — zoom in to see individual pins.
The bottom action bar gives you access to all map tools:
|
|
Trees List and Filter
Tap the Trees List icon (top left) to see all trees on the current map as a list. Each tree shows its filled-in details — empty fields are not displayed. Tapping a tree in the list jumps to it on the map and selects it. Each tree in the list has a 3-dots menu with Edit, Delete, and Clone actions. Tap the Filter icon to filter trees by field, files, notes, Tree #, Tree Species, or any custom fields configured in Company Management. A badge shows the number of active filters. Tap Apply to filter, Clear to reset. |
The Clone option is available from the Trees List 3-dots menu and from the Edit Tree screen 3-dots menu. Cloning copies all fields except Files and History. Each cloned tree receives a new Tree #.
Trees List Bulk actions
To manage groups of trees directly from the list view on the mobile app, each tree includes a checkbox, and you can also select all trees to perform bulk actions. |
 |
Trees in Estimates on the App
After selecting trees on the map using Select Mode, tap Create Estimate (from Client or Lead Profile) or Add to Estimate (from an open estimate) to add them to an estimate.
On the Create / Edit Estimate screen, trees appear in a dedicated Trees block. Each tree shows its details and the services assigned to it. You can:
|
Every tree in the estimate must have at least one service assigned. If you tap Create Estimate or Update Estimate and any tree has no services, an alert appears: “Each tree must have at least one service assigned. Please add a service or remove the tree from the estimate.”
Services assigned to a tree on the map are only saved once that tree is added to an estimate. If you assign services to a tree on the map but don’t add the tree to an estimate, the services won’t be saved.
Trees in Workorders
When an estimate is confirmed, the Workorder Profile on the app shows the same Trees block with all trees and their assigned services. Tap View on map to open a read-only map showing all trees in this workorder.
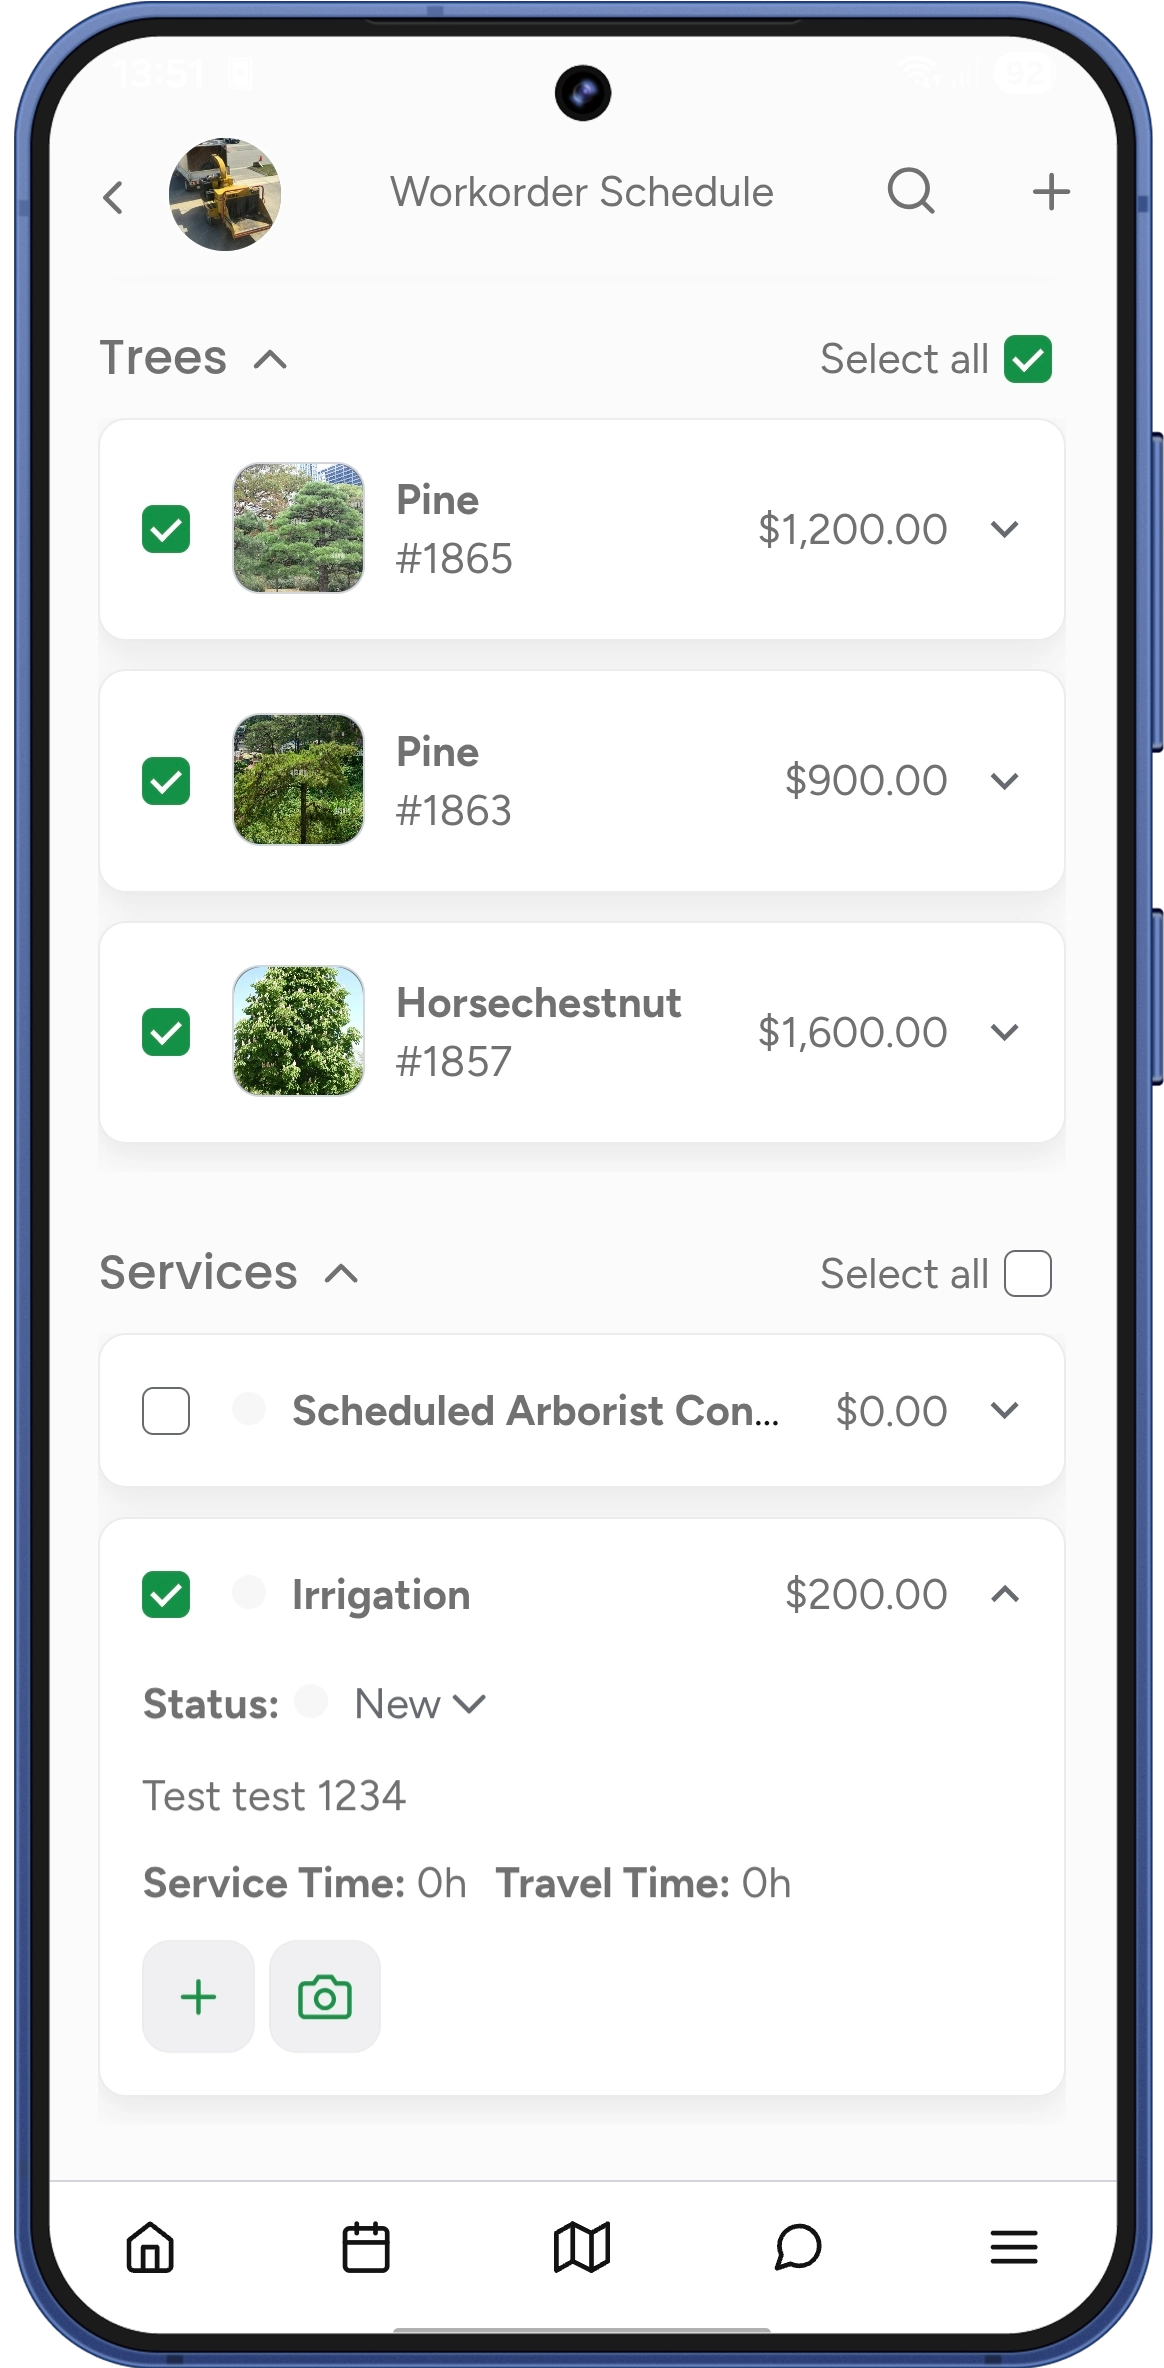
Scheduling a Workorder
When scheduling a workorder, a Workorder Schedule screen opens showing a Trees block and a Services block. Use the checkboxes to select which trees and services to include in this particular job. Each block has a Select all checkbox. Selecting all in the Trees block selects all trees along with all their assigned services. Selecting all in the Services block selects all standalone services, products, bundles, and groups not assigned to any tree. You can also select individual trees or individual services within a tree — in any combination. |
 |
Trees in Invoices
The Invoice screen shows the same Trees and Services blocks. You can invoice an entire tree at once (all its services) or select individual services within a tree. Tap View on map next to the Trees block to open a map showing the trees included in this invoice.
Field Worker Flow
Trees on the Job
When a field worker opens a job that contains trees, a Trees block appears on the Job Profile screen alongside the standard Services block (for services not assigned to any tree).
For each tree in the job, the card shows:
- Tree photo (tap to open the full gallery)
- Tree # and filled-in details (tap to expand or collapse the card)
- List of services assigned to that tree for this job
- A checkbox next to each service
Before tapping Start Work: all checkboxes are read-only. The field worker can review the job plan but cannot mark anything as done yet.
After tapping Start Work: checkboxes become active and the field worker can mark services as done one by one or tree by tree.
Marking Services Complete
Each service under a tree has a checkbox. The behavior depends on the Edit Job Service Status Access permission configured per user in User Management:
- If the permission is ON: checking the box immediately changes the service status to Completed globally, across the entire system — but only after the field worker taps Save & Finish on the Job Summary screen. Until then, the change is local to the job.
- If the permission is OFF: checking the box marks the service as done in this job only — it does not affect the overall service status in the estimate. This is simply a way for the field worker to track what has already been done in this particular job.
| If the permission is ON: |
| If the permission is OFF: |
On the estimator’s side, progress indicators appear next to the service: a green checkmark means the service was marked done in all jobs; a yellow checkmark means it was marked done in some jobs but not all.
These help the estimator understand the progress on the ground and decide when to manually set the final status to Completed or Declined. Once a status is set manually, all job checkboxes for that service become read-only.
Completing a Tree
When a field worker checks all services for a tree, that tree automatically moves to the Done tab. Unchecking any service moves it back to To Do. The To Do / Done tabs apply to the entire job — both trees and standalone services.
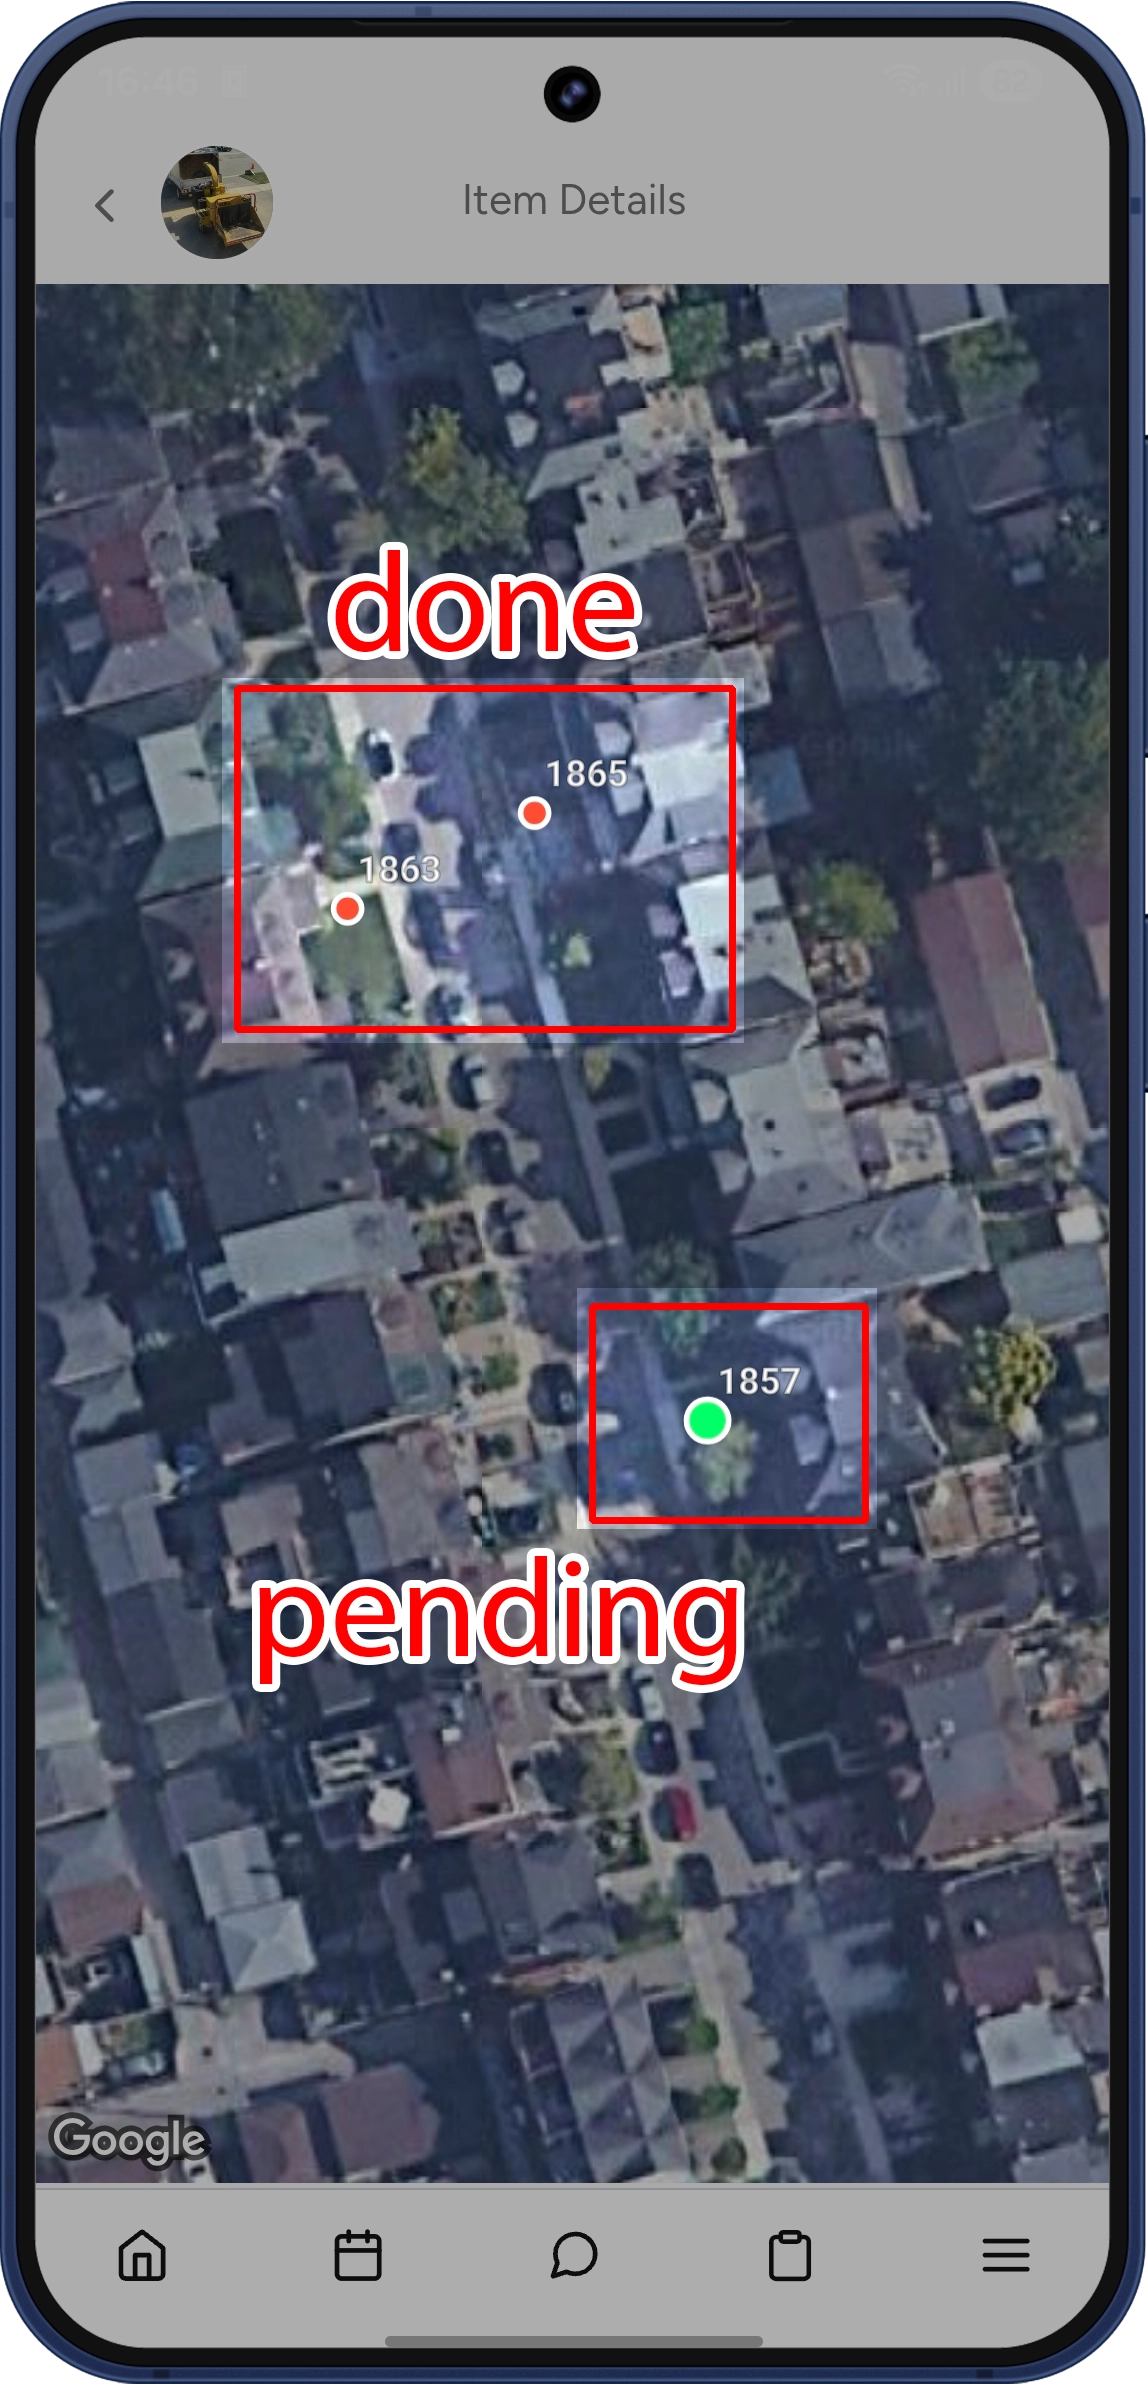
Trees on the Map During the Job
There are two ways to open the map with tree details during a job:
From the tree’s details panel on the map, the field worker can check services as done and fill in reports — everything syncs instantly with the Job Profile. The panel also has a Travel to Tree button that opens an external navigation app with the exact location of the tree — useful for finding a specific tree on a large property. |
The map gives a visual overview of progress:
This lets you see at a glance what’s left to do across the property. |
 |
Job Summary and Reports
After tapping Finish Work, the Job Summary screen appears. The field worker fills in the Ride time, Start work, and Finish work fields (all required), and reviews which services are in To Do and Done. A Report field is available for each service assigned to a tree. The field worker can add text notes and attach photos. Reports are optional — they do not block the field worker from completing or finishing the job. An optional Job Report Note can be added for the job overall. Once all required time fields are filled in, the Save & Finish button becomes active. Tapping it saves the job and all the work recorded during it. |
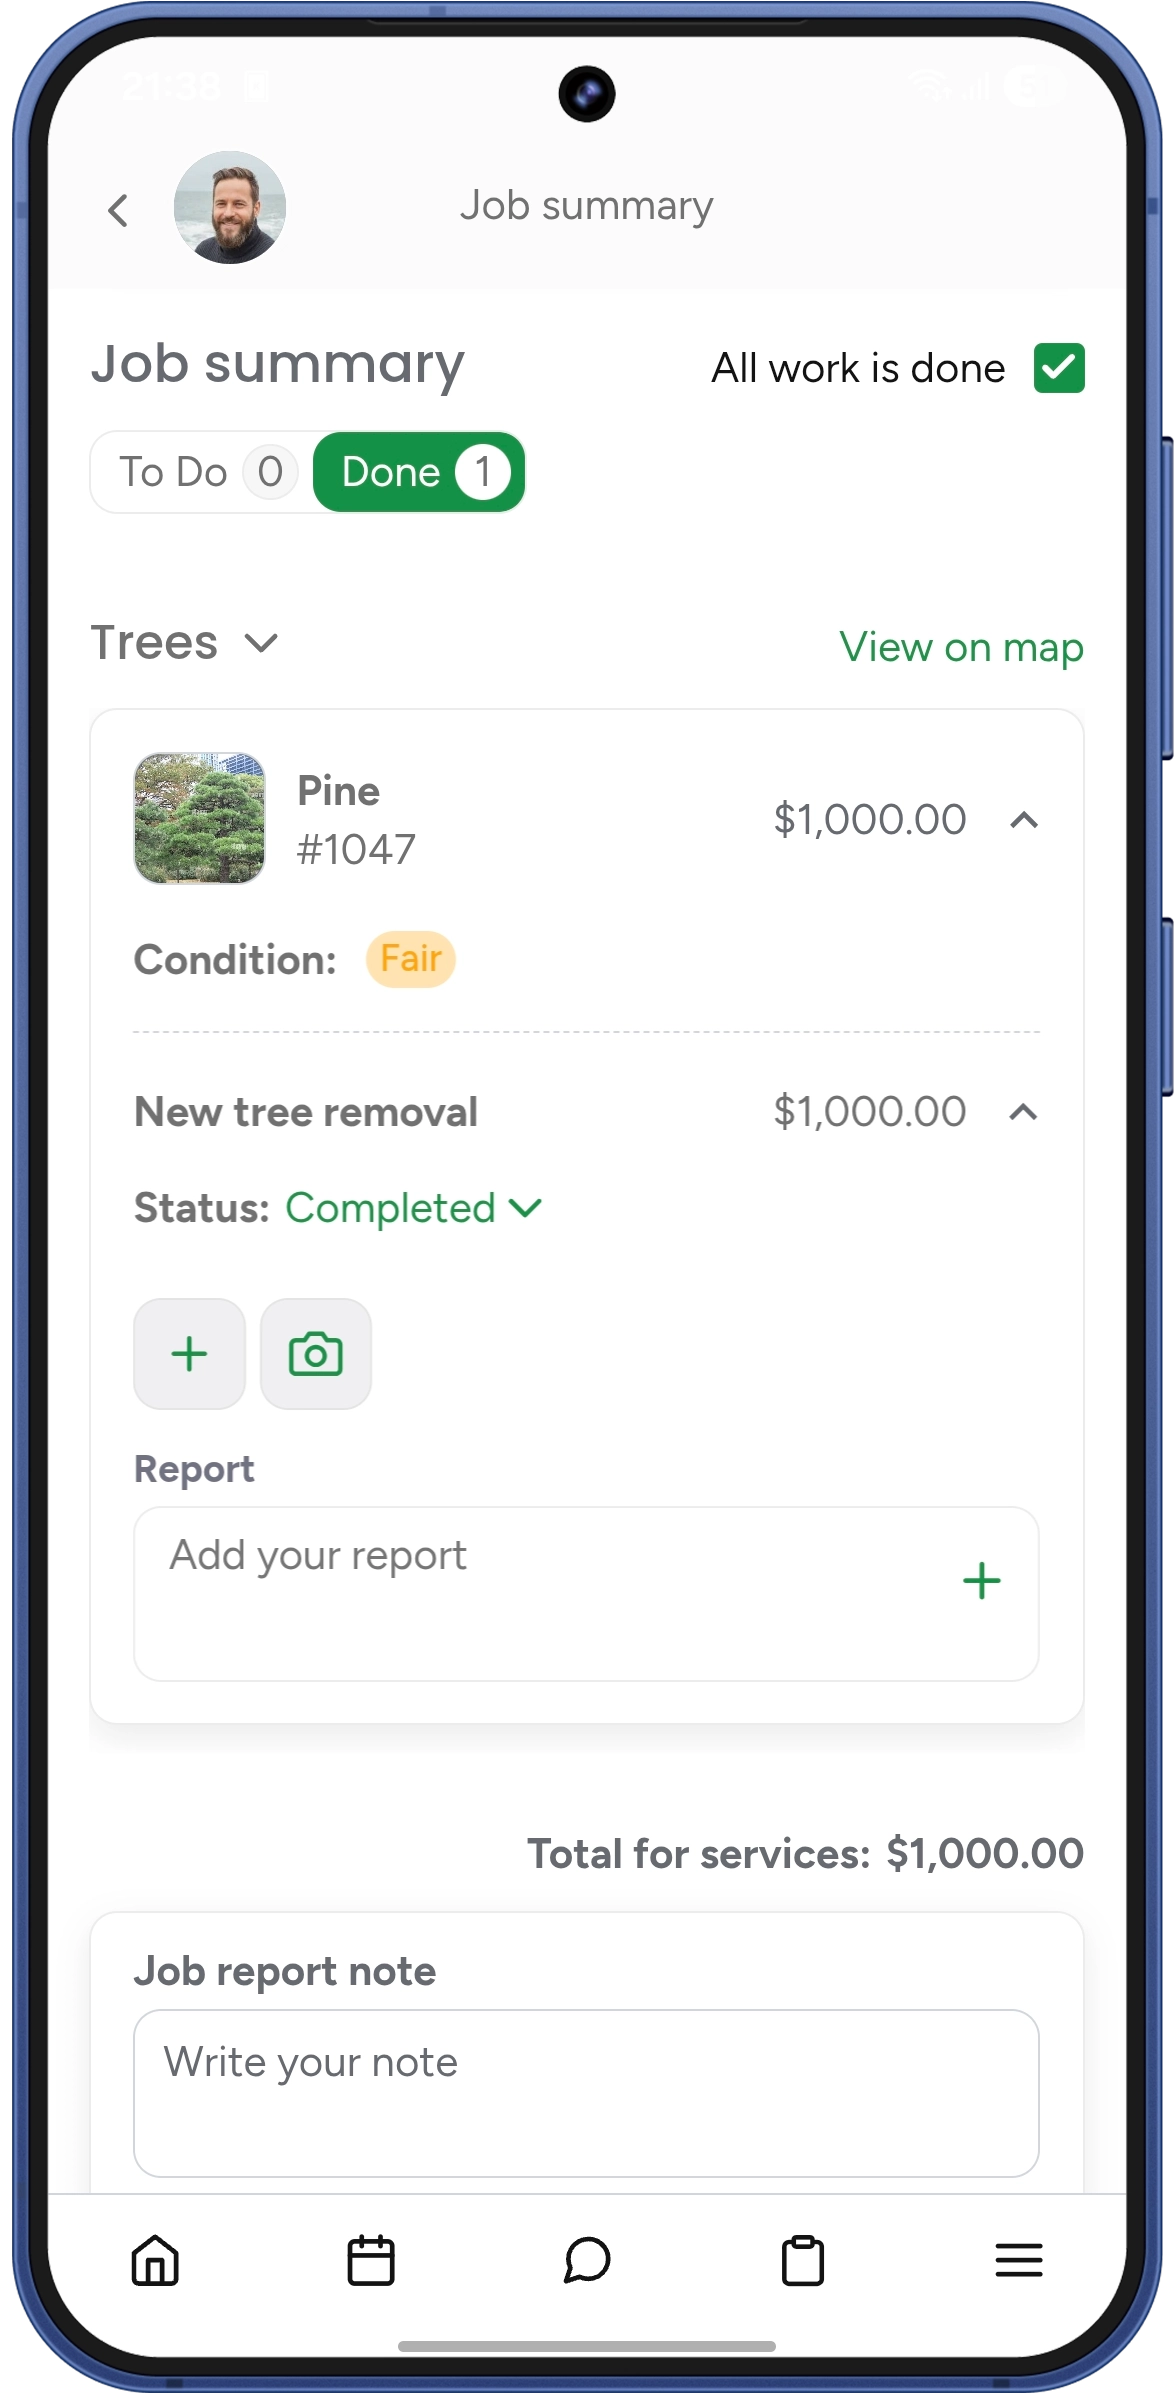 |
Reports let field workers document the work done on each tree — add before/after photos, describe what was performed, or note any observations. This information stays attached to the tree’s history and can be reviewed at any time.
Additional Work
Field workers can add extra services to a job via 3-dots menu → Add Additional Work. In the current version, additional work can only be added as standalone services, products, bundles, or groups — it cannot be assigned to trees. The Trees block and its services are locked while adding additional work.