
The Tree Inventory Map is an interactive map of all trees at a client's property. You can open it from the Client Profile for general inventory work, or from an Estimate to work with trees in the context of a specific job.
The map itself works the same way in both cases. This article covers everything you need to know about the map: how trees are displayed, how to create and edit them, and all the available map tools.
Opening Tree Inventory Map
From the Client Profile:
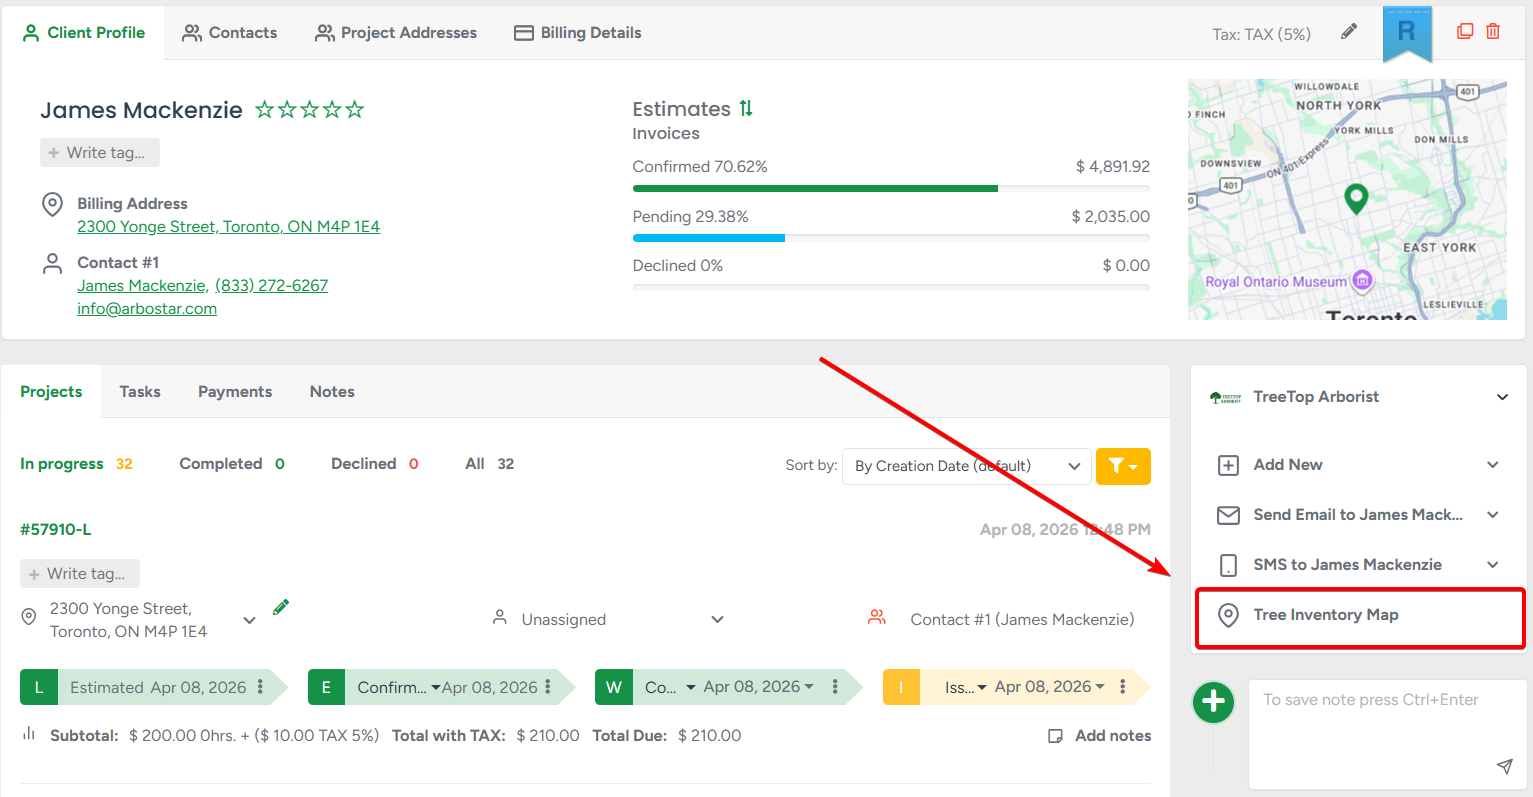
| Web: Open any client profile and click Tree Inventory Map. |
 |
| App: On the client profile, tap the 3-dots menu → Tree Inventory. |
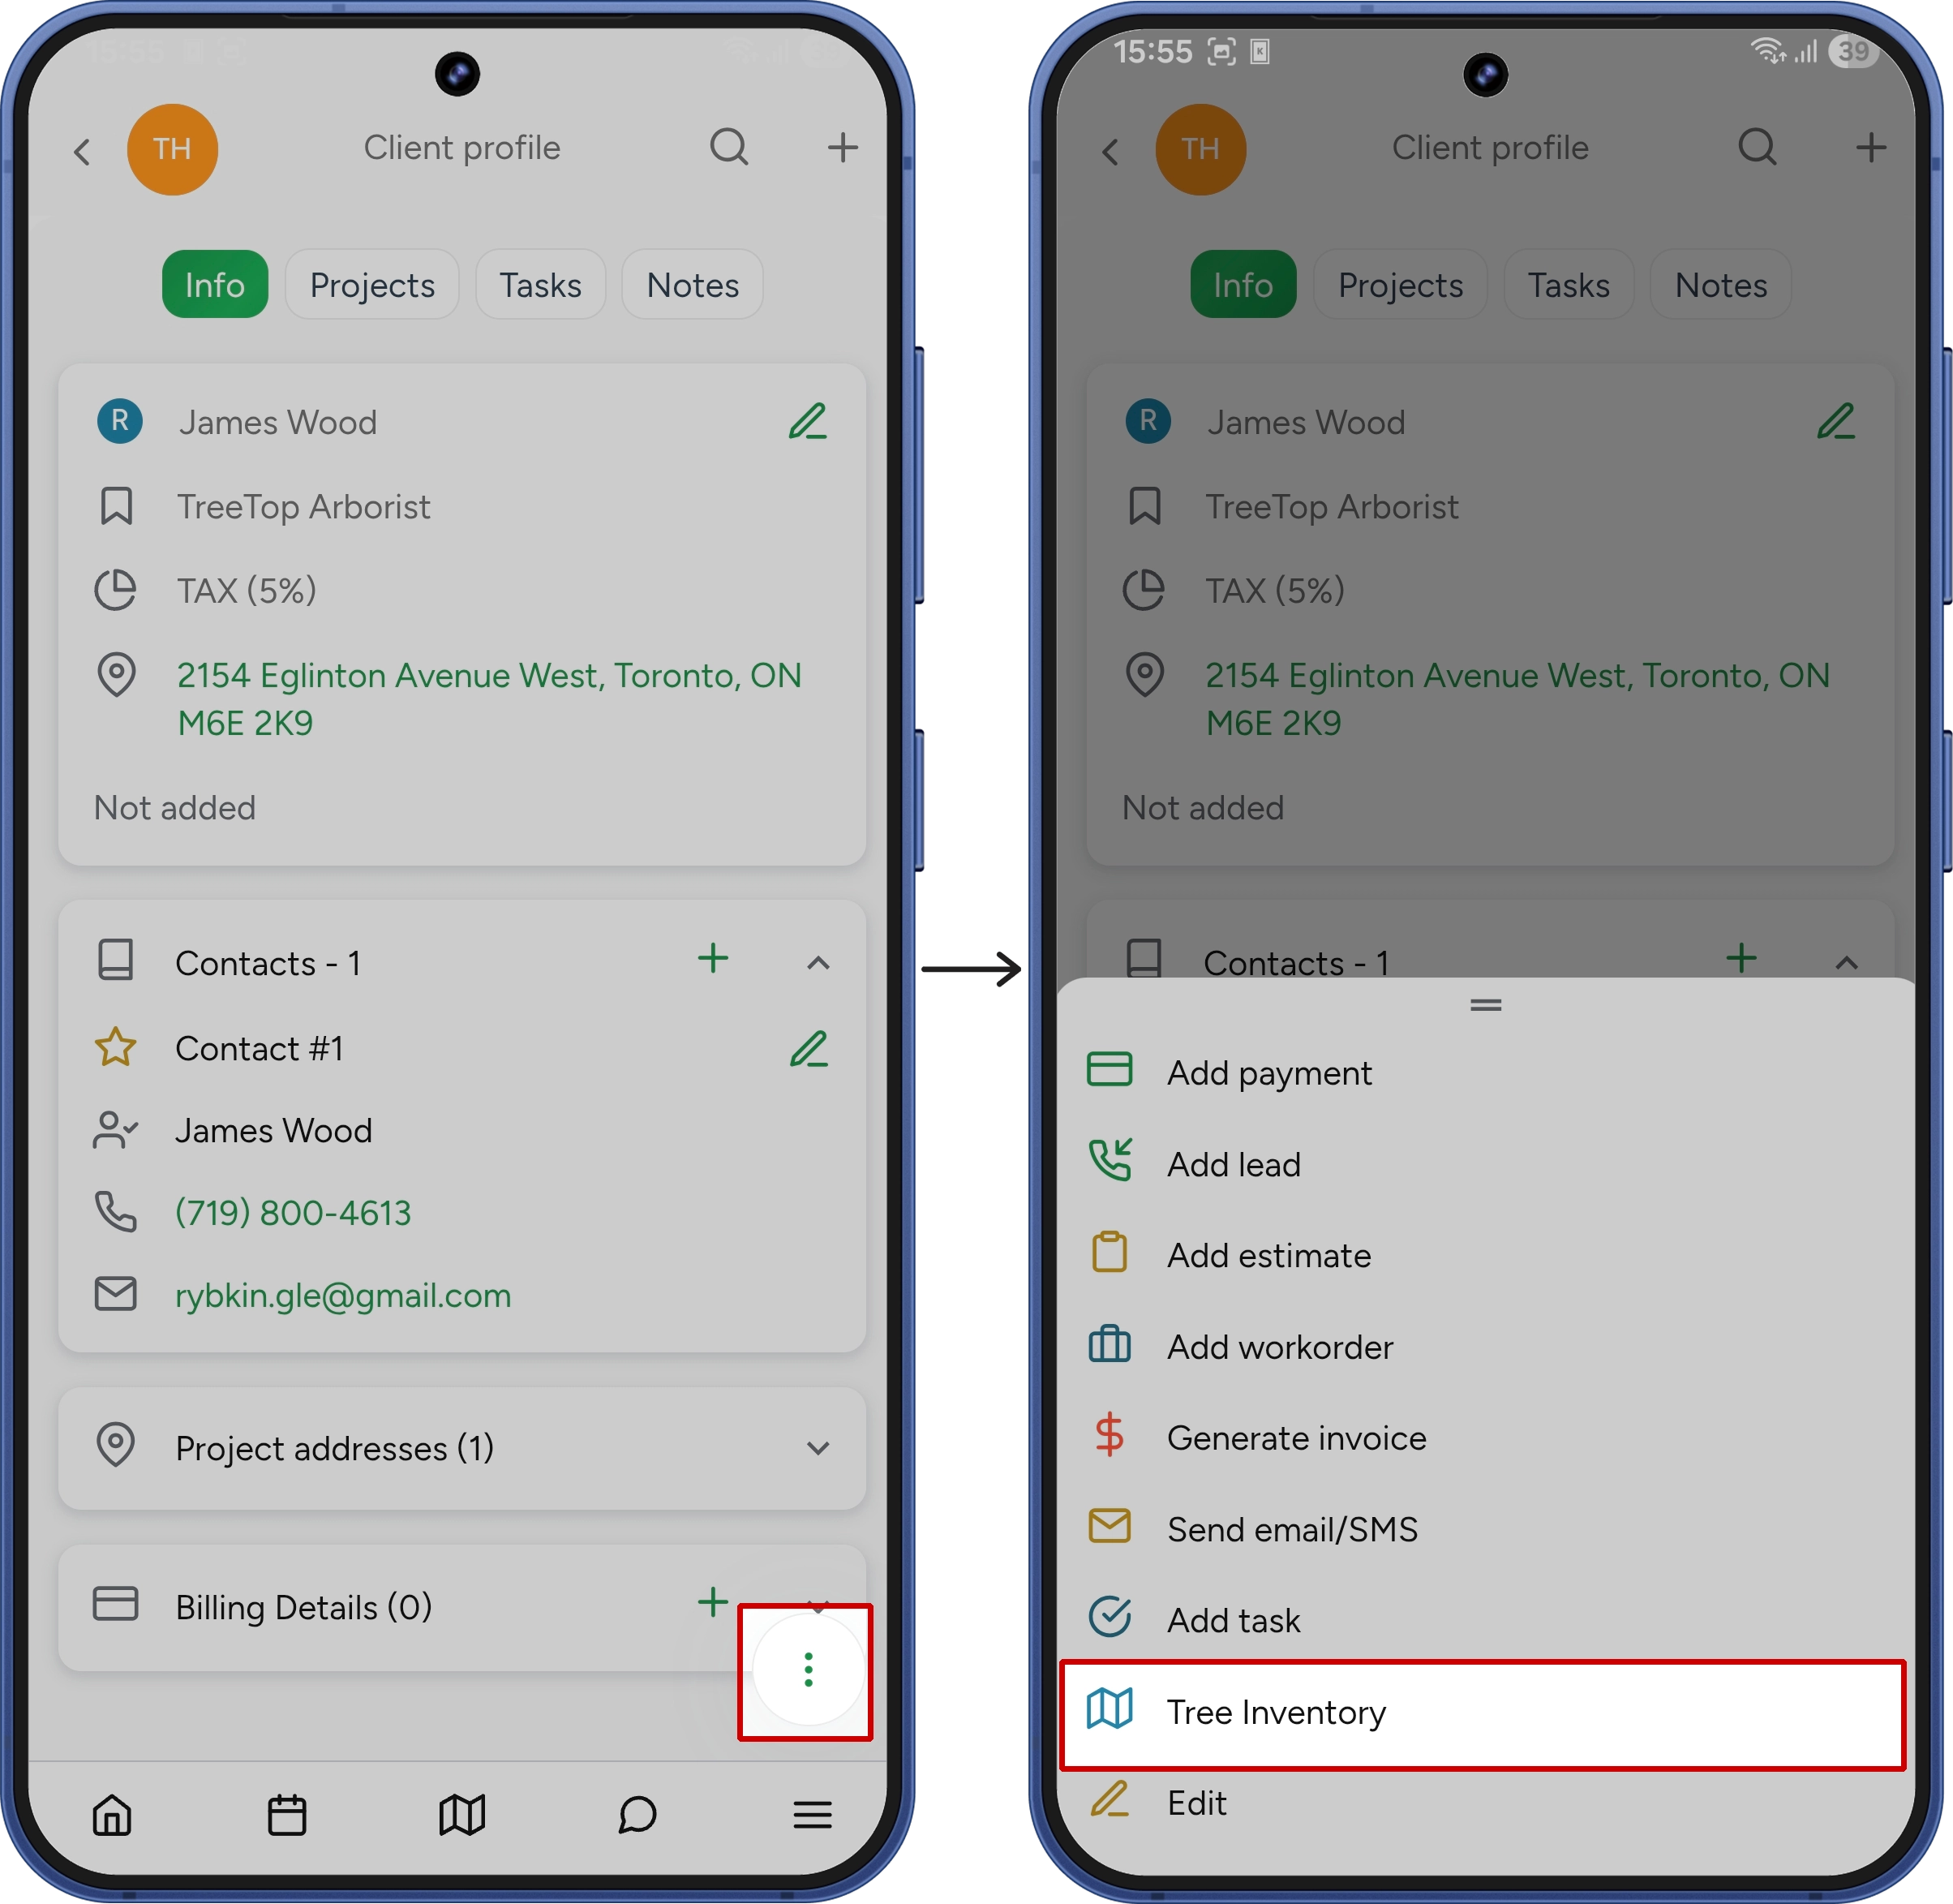 |
If no map has been created yet, one will be created automatically using the client's billing address as the starting location.
From an Estimate:
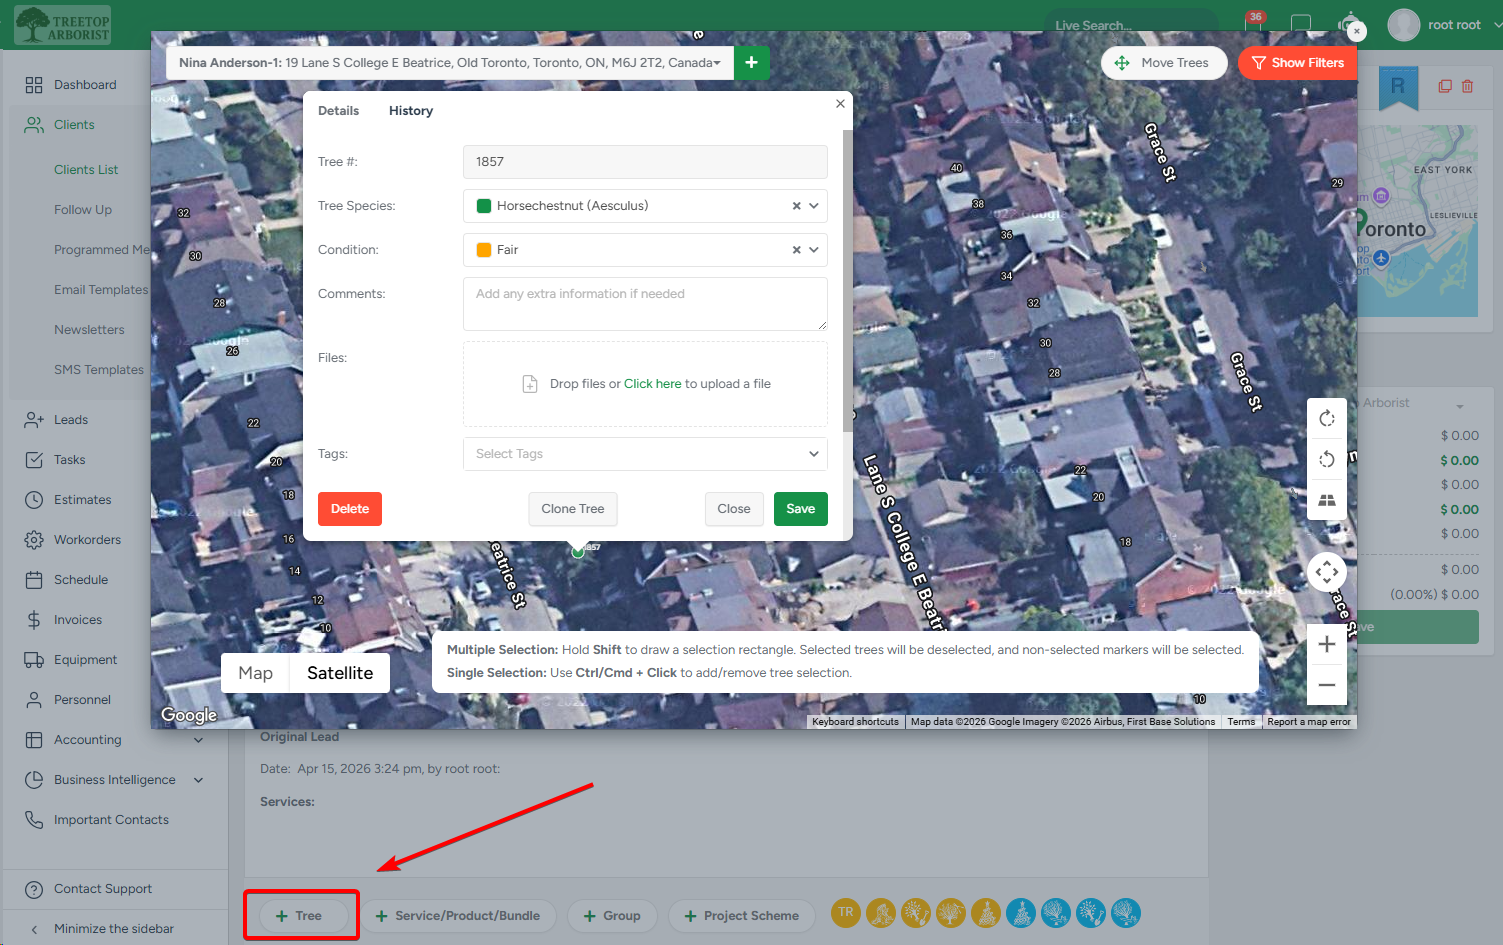
| Web: On the Create/Edit Estimate page, click + Trees or Add or Edit Trees on Map. The map opens in a modal window in the context of the current estimate. |
 |
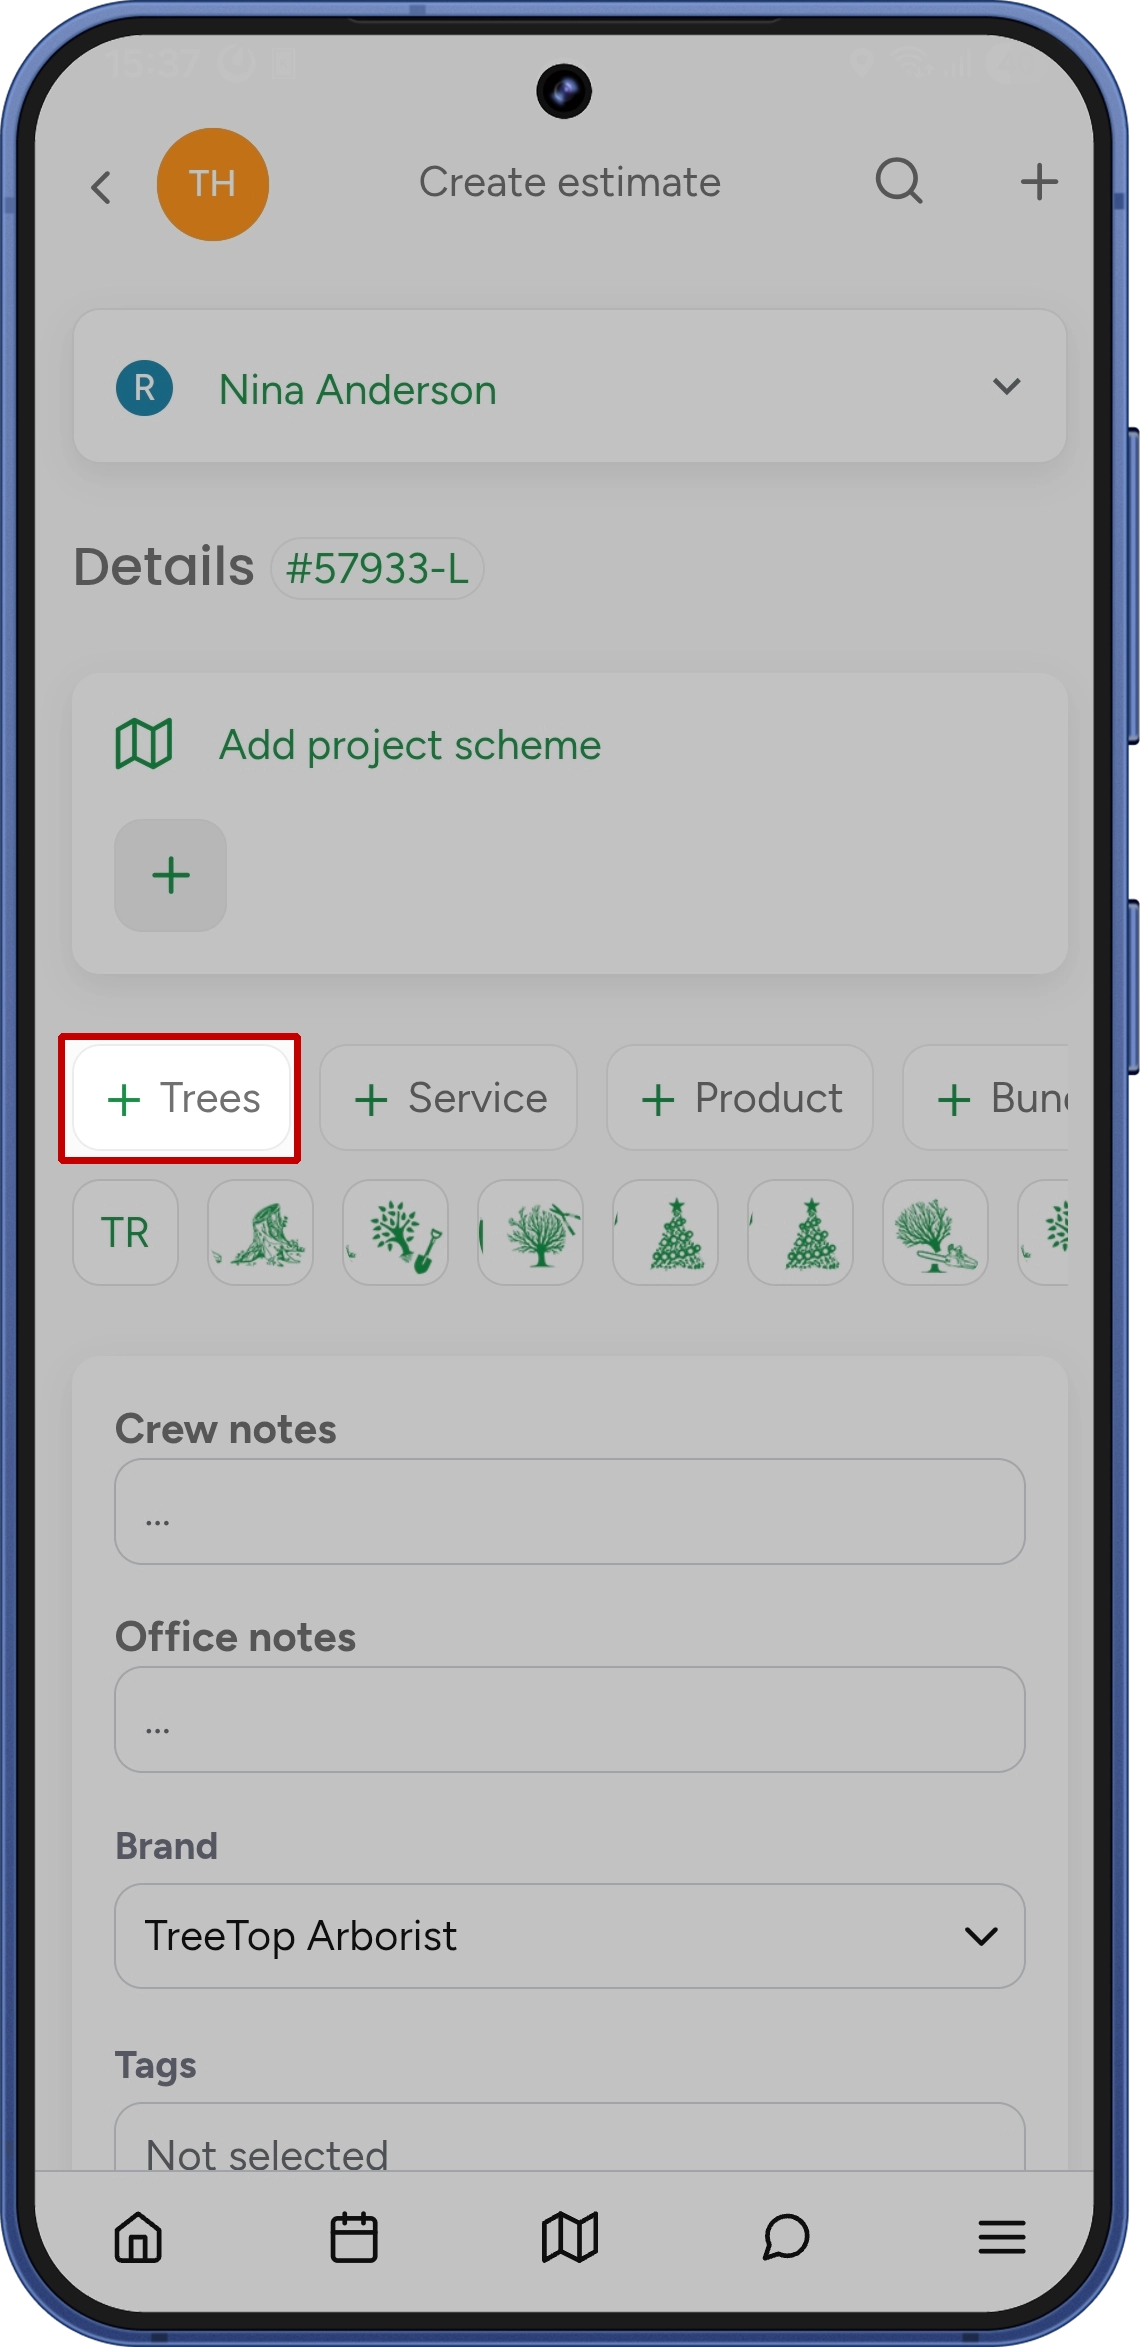
| App: On the Create/Edit Estimate screen, tap + Trees. |
 |
Setting Up the Map
Managing Multiple Maps
One client can have multiple Tree Inventory Maps — useful for clients with several properties or large sites divided into zones.
- Switch between maps — use the dropdown at the top of the map page (web) or tap the map name in the top bar (app) to open Manage Maps.
- Create a new map — click the + button (web) or Add New Map (app). The Address field is required. The Name field is optional — if left blank, the address is used as the map name.
- Edit a map — you can change the name and address at any time. If you change the address, the map center will shift — but all existing trees will stay exactly where you placed them.
- Delete a map — a map can only be deleted if none of its trees have been added to any estimate. If a tree from that map is in an estimate, the Delete button will be disabled.
Working with Trees
How Trees Are Displayed
Each tree appears as a colored pin on the map. The pin color corresponds to the Tree Species value assigned to that tree — colors are configured in Company Management → Tree Inventory Fields Management → Tree Species settings. Trees without a species assigned show as grey pins. The Tree # is always displayed next to the pin. |
When you zoom out, trees automatically cluster together. Zoom in to see individual pins. |
Creating Trees
On web: Double-click anywhere on the map to place a new tree. A details window opens immediately so you can fill in the tree's information before saving.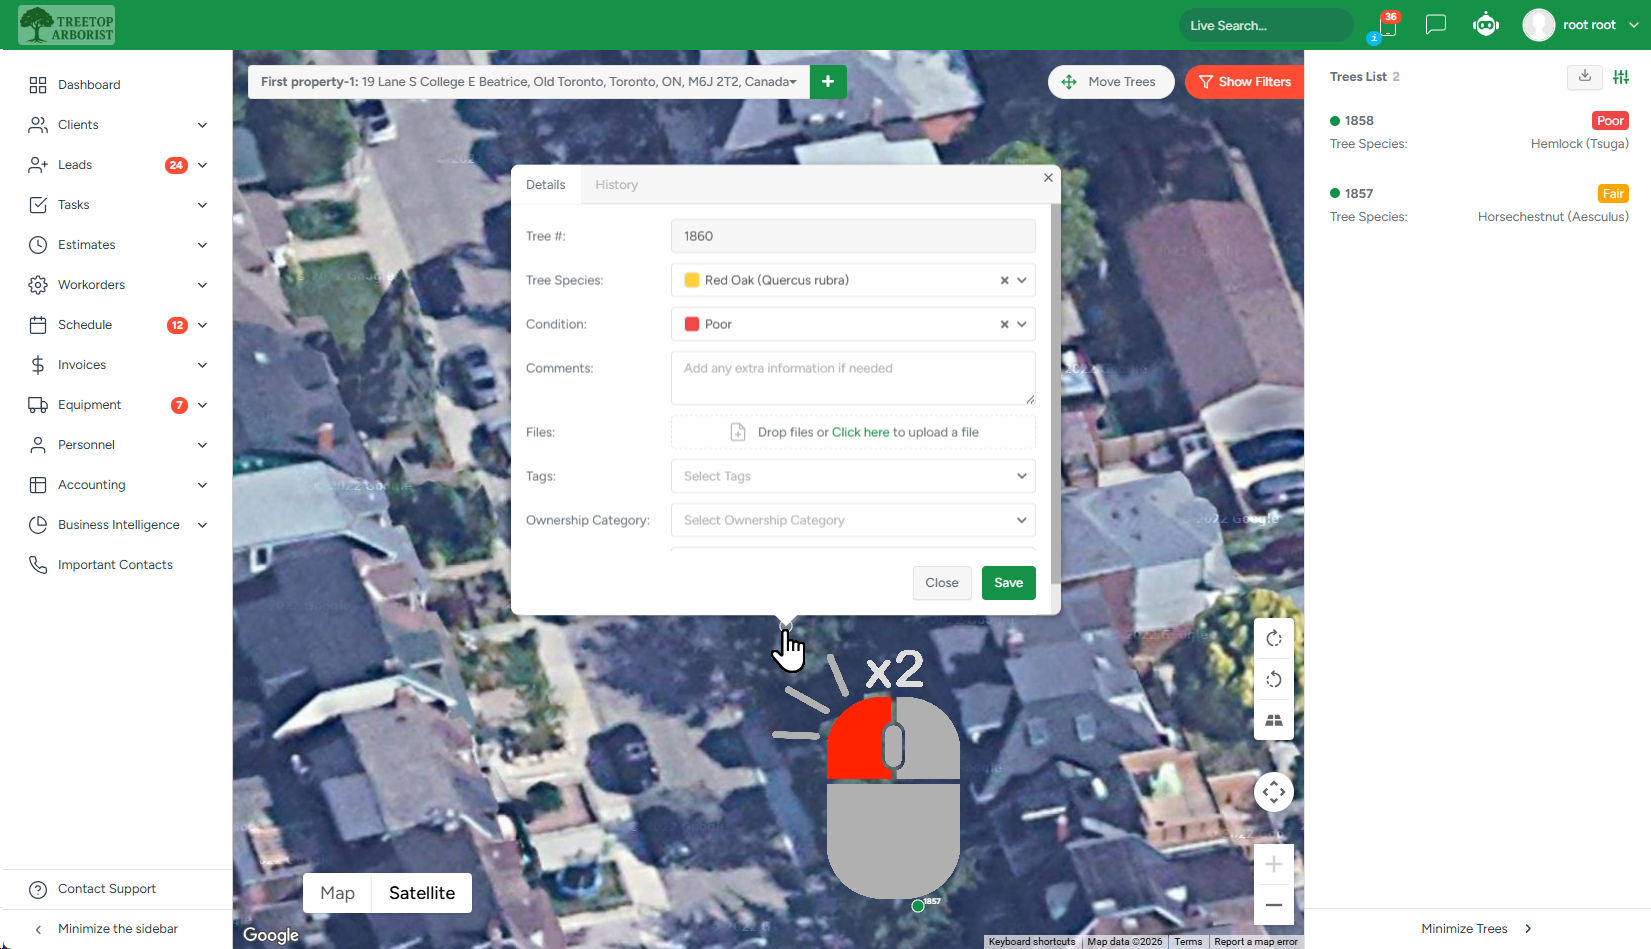
On mobile: Tap Add in the bottom action bar to enter Add Mode, then tap the map to place trees. A new tree screen opens after each tap. Exit Add Mode by tapping Stop Adding. You can also search by tree species. |
Tip: You don't need to fill in every field when creating a tree. You can add species, condition, notes, and files later by editing the tree.
Tree Details
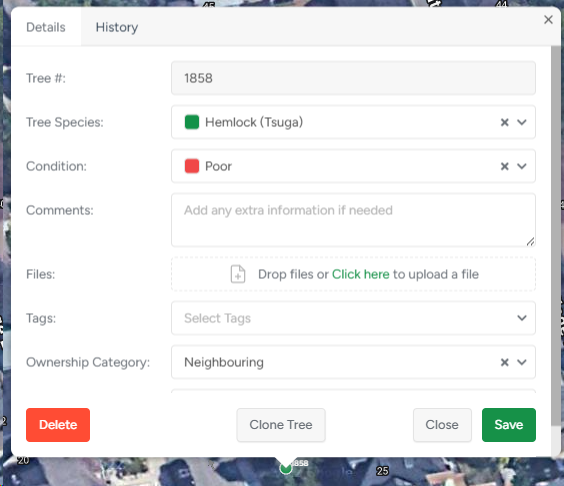
When you open a tree (by clicking/tapping its pin), a window with two tabs opens:
Details tab - all fields* for this tree:
|
|
History tab - a complete record of everything that has happened with this tree: when it was created, when its details changed, which estimates it appeared in, which jobs were performed, which invoices were issued. You can also use |
|
 filters to narrow down the long history of changes to only those you are specifically interested in.
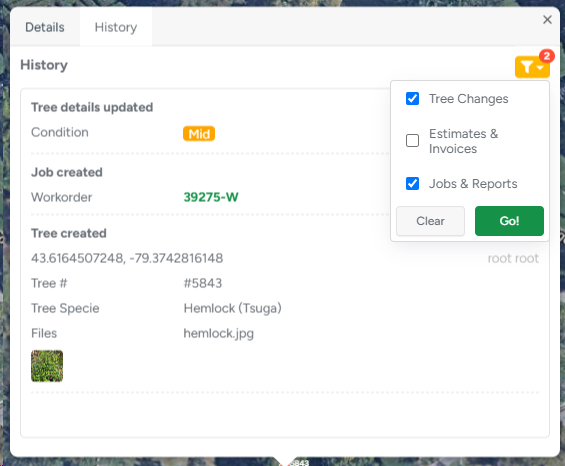
*and any custom fields your company has configured in Company Management. Fill in as many or as few as needed.
Selecting Trees
You can select one or more trees to perform bulk actions (delete, edit, add to estimate).
On web:
|
On mobile:
|
Selected trees are highlighted in green. The selection count is shown in the top right of the map.
Editing Trees
Single tree: Click/tap the tree's pin to open its details, make changes, and save.
Multiple trees (Bulk Edit): Select several trees and click Edit Selected (web) or Edit (mobile). A shared edit window opens. Only the fields you change will be updated. Fields you leave blank will not overwrite the existing data on individual trees. Tree # and Files are not editable in bulk edit mode.
Moving Trees
On web: Click Move Tree in the toolbar to enter Move Mode. Drag any tree to its new position. Click Stop Moving to exit. |
On mobile: Tap Move in the bottom bar to enter Move Mode. Tap and hold a tree, then drag it to its new position. Tap Stop Moving to exit. |
While in Move Mode, other actions (select, create, add to estimate) are temporarily unavailable.
Cloning Trees
Cloning is useful when you have many similar trees to add to the map quickly.
On web: Open a tree's details and click Clone Tree. The details window closes and clone mode activates — each click on the map creates a copy of that tree with all its fields pre-filled (except Files and History). |
On mobile: Open a tree's details → 3-dots menu → Clone. Tap the map to place copies. Exit clone mode by clicking/tapping Stop Cloning. |
Cloned trees receive new Tree # values following the normal numbering sequence.
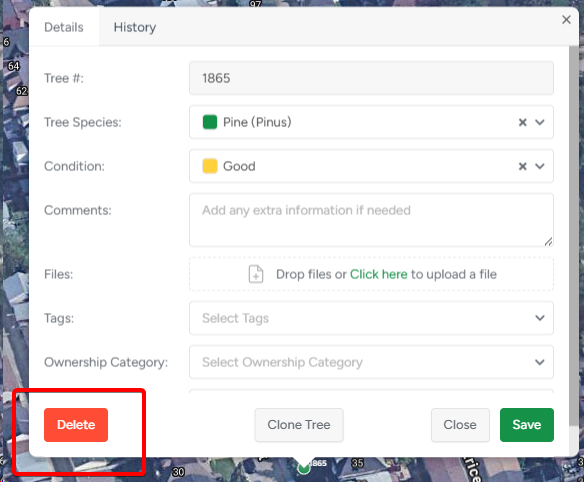
Deleting Trees
Select one or more trees and click Delete. A confirmation alert will appear.
| If the tree has never been added to an estimate: The tree is deleted from the map after confirmation. |
 |
| If the tree has been added to an estimate: Deletion is blocked. An alert explains that the tree cannot be deleted because it's linked to an estimate. To delete the tree, you must first remove it from all estimates that contain it. |
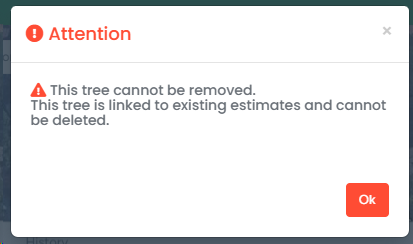 |
Navigating the Map
Filtering Trees
Use the Filter button (funnel icon) to filter which trees are shown on the map:
- Tree # — search by tree number
- Only with Files — show only trees that have photos or files attached
- Tree Species — filter by one or more species values
- Only with Comments — show only trees that have notes filled in
- Custom fields — any custom fields configured in Company Management appear here, with appropriate filter controls (text search, number range, date range, or dropdown)
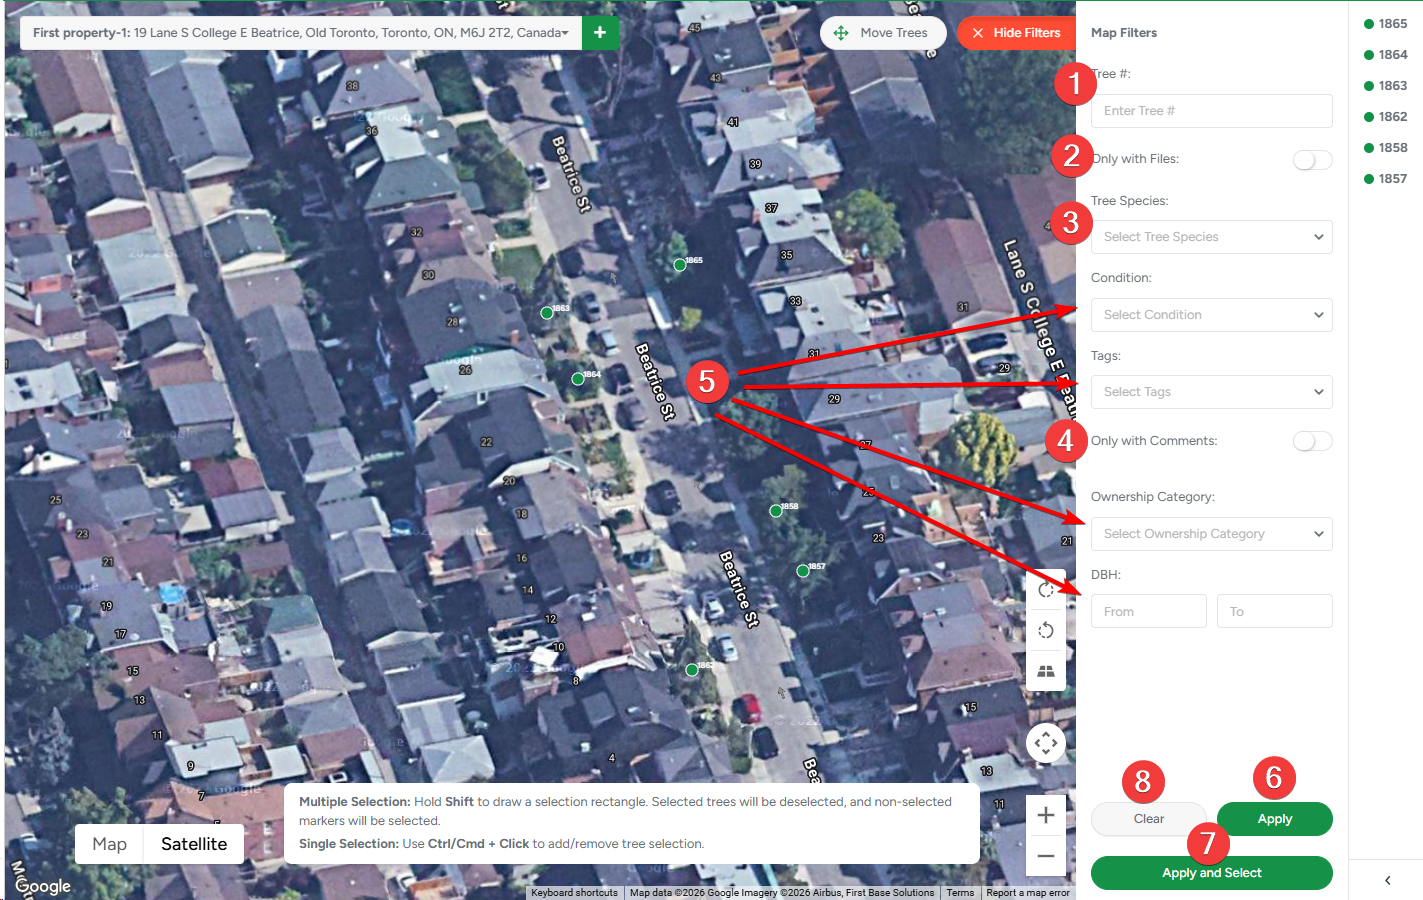
Filters affect both the map display and the Trees List panel. Three buttons are available after setting filters:
- Apply — applies the filter and updates the map and Trees List
- Apply and Select (web only) — applies the filter and automatically selects all matching trees on the map
- Clear — resets all active filters
Trees List Panel
On the web, a collapsible Trees List panel shows all trees on the current map in a list view. Clicking a tree in the list highlights it on the map and scrolls the map to center on it.
You can customize which tree fields are shown as columns in the list — use the column settings in the panel to choose what information is displayed. Tree # is always visible and cannot be hidden.
On mobile, tap the Trees List icon in the top bar to open the list. Tapping a tree in the list jumps to it on the map and selects it. |
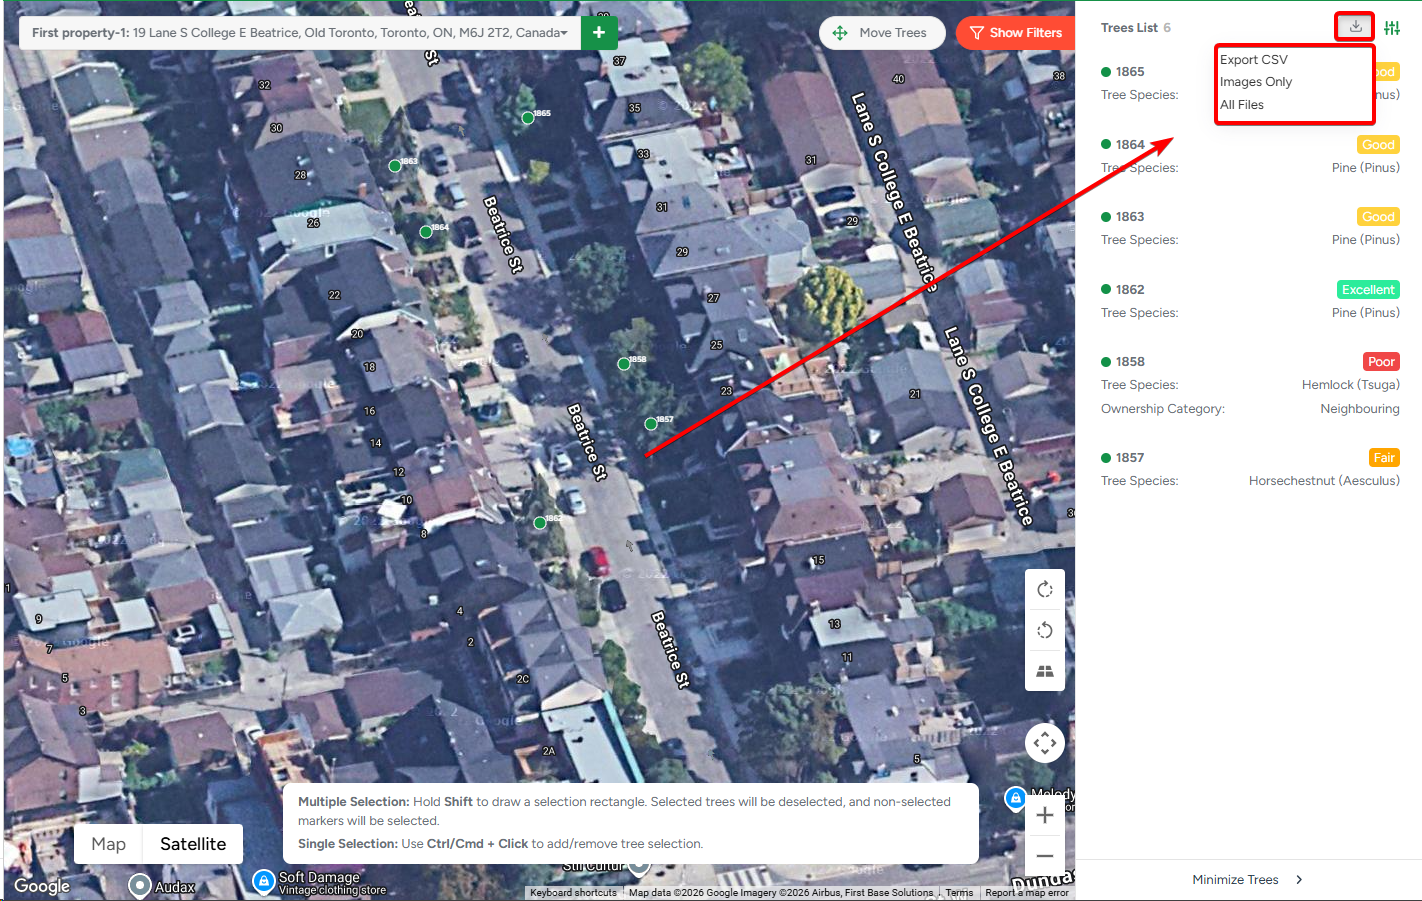
Exporting Tree Data (Web only)
Click the Export button on the map to download your tree data. The export includes only the trees currently visible on the map — if a filter is active, only the filtered trees will be exported. Three export options are available:
- CSV — all tree data in spreadsheet format
- Images Only — all files attached to trees
- All Files — both CSV and attachments in one archive
Files in the archive are named by Tree ID and organized in a single folder named after the map.
Creating an Estimate from the Map
When working from the Client Profile (not inside an estimate), you can select trees and start an estimate directly from the map:
- Select one or more trees
- Click Create Estimate with [X] Selected Trees (web) or Create Estimate (app)
- You'll be taken to the Create Estimate page with the selected trees already added.