When a new request is received, an email notification is sent to the default email brand.
- To access this submodule, navigate to Leads → Requests.

The badge count next to Requests shows the total number of new requests in the system.
Clicking any check box makes buttons Confirm Selected and Declined Selected, active and visible above the list and next to each entry. Thus, when selecting all entries or a specific one, you can either confirm or decline all requests or a specific one.

The action of clicking Requests History redirects you to the Requests History page, where they can view and modify all approved and declined requests.
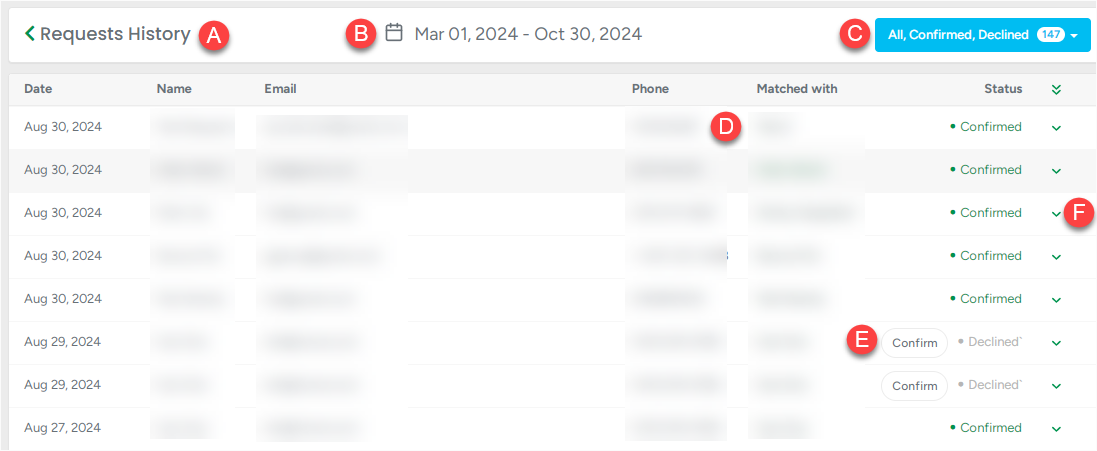
Request History example:

A. Clicking < next to Requests History redirects you back to the Requests page;
B. Clicking the calendar allows you to select a specific date for which you want the data to be displayed on this page. When clicked, the following options are available: Today, Yesterday, Last 7 Days, Last 30 Days, This Month, Last Month, and Custom Range;
The system will display the date picker window if you choose the Custom Range option.
An example of the date picker window that appears. You should select the first and last dates of the desired period. Clicking the Apply button will submit changes, and the Cancel button will close this window.
C. Clicking the blue filter button allows you to filter all the Request History entries by Confirmed, Declined, or All existing entries. By default, values All, Confirmed, and Declined are pre-selected. The badge count next to each status (All, Confirmed, Declined) shows the number of requests with each status within the system;
Blue filter button example.

D. Clicking the client’s name redirects you to the client profile;
E. Clicking the Confirm button confirms the selected request and changes its status;
F. Clicking the v button expands the request and shows additional information: Address, Details and Attached Files.
Expanded request view example.
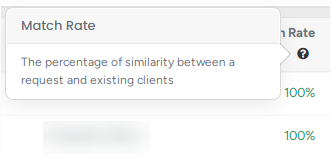
The Match Rate shows the percentage of similarity between a request and an existing client.

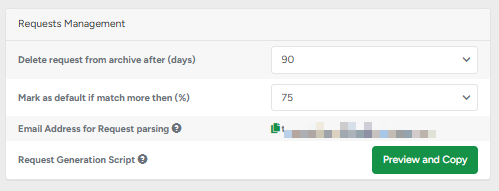
Within Company Management → Requests Management section, you can adjust the acceptance Match Rate by changing the value next to Mark as default if match more then (%).

Clicking this button or anywhere on the entry blank space will expand and show additional information such as address, details, and attached files (similar to Requests History, see the V expand button functionality - point F).
Clicking Confirm marks the request as confirmed or Decline marks the request as declined.

