
The User Management page is mainly used by admins in order to create employee profiles and store their personal and corporate information, such as emails, phone numbers, role in the company, etc.
To access the page, navigate to your profile icon at the top-right corner, then select User Management from the list.
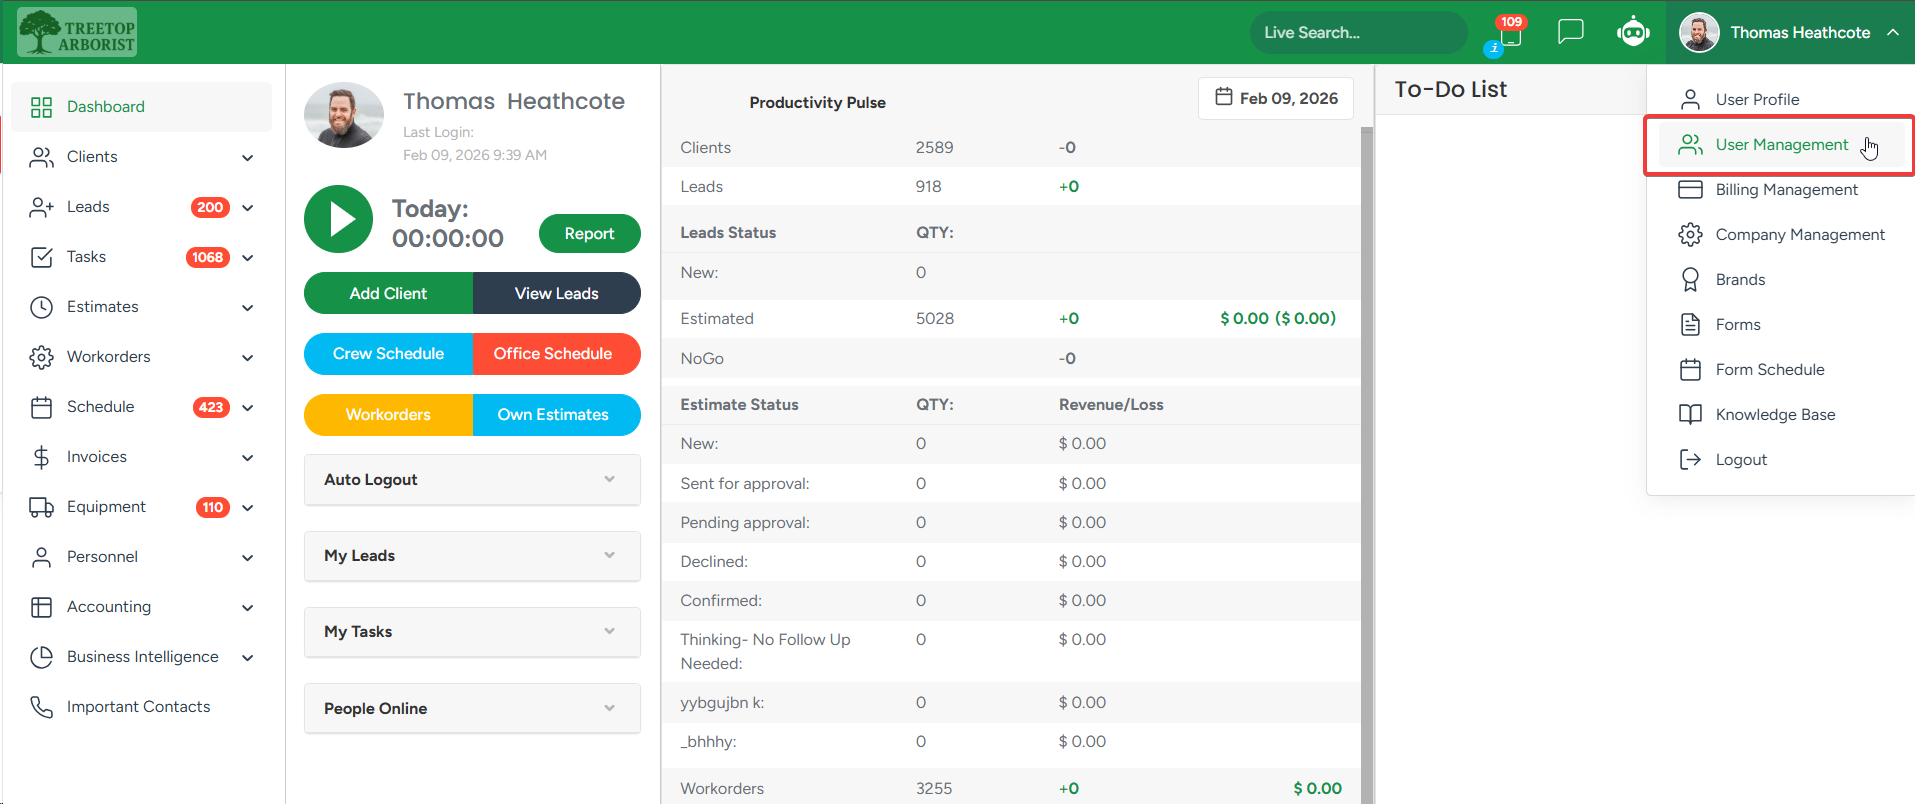
Note that the following features are applicable for users with admin permissions.
User management page
Here you can see all the users in the system, filter or export them:
- Download a PDF with all users
- Filter by status (all, active, inactive, dismissed)*
- Filter by name and licence type (field, support)
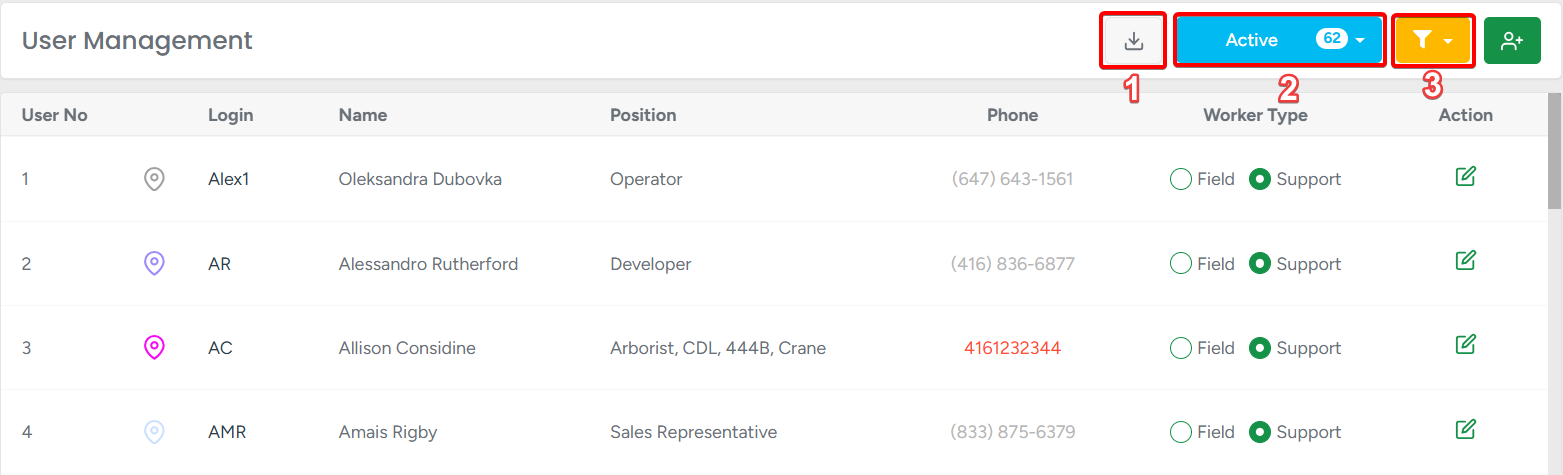
*inactive or dismissed status is the only way to remove a user from the main list, deleting users permanently with all their related data is not possible
Logging in as another user
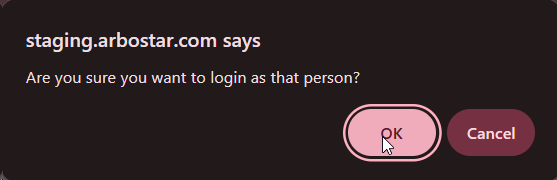
If you click on a user's login name in the login column, you can log in to the system as that user.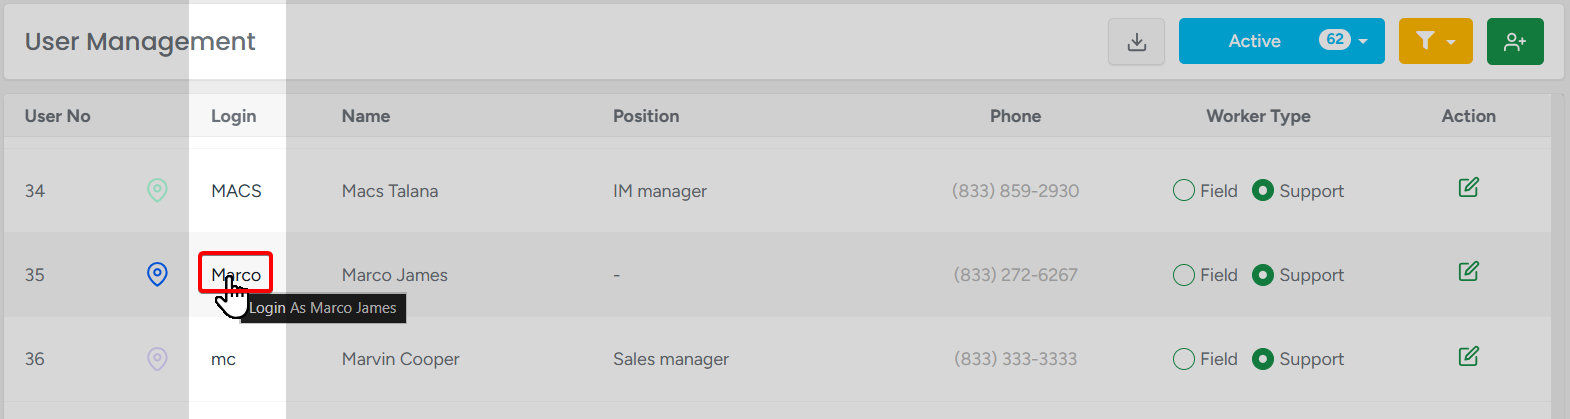
↓
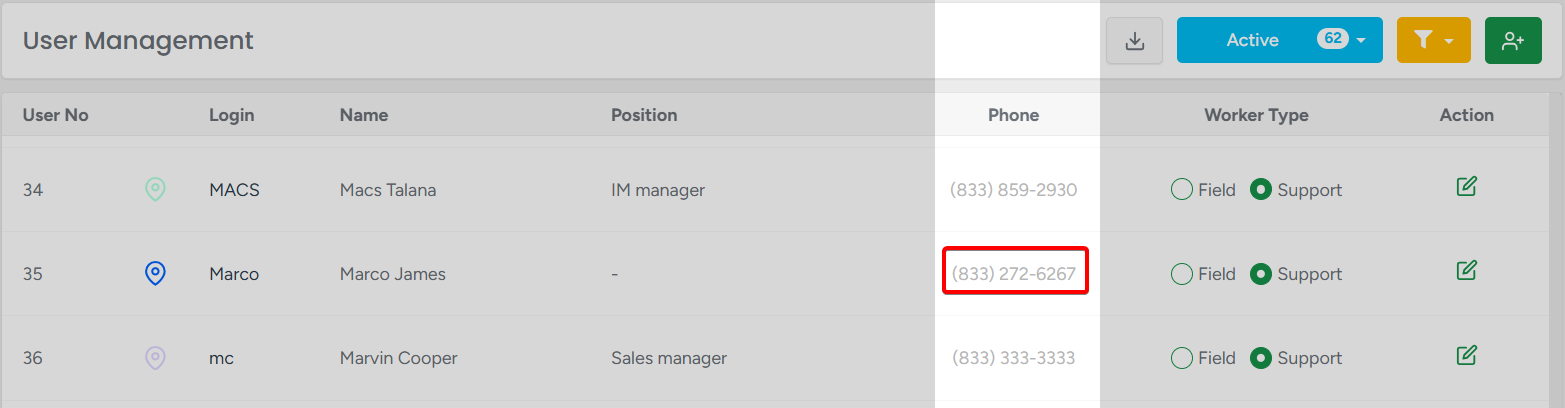
You can call the user if IP telephony is connected for the company by clicking on their phone number.
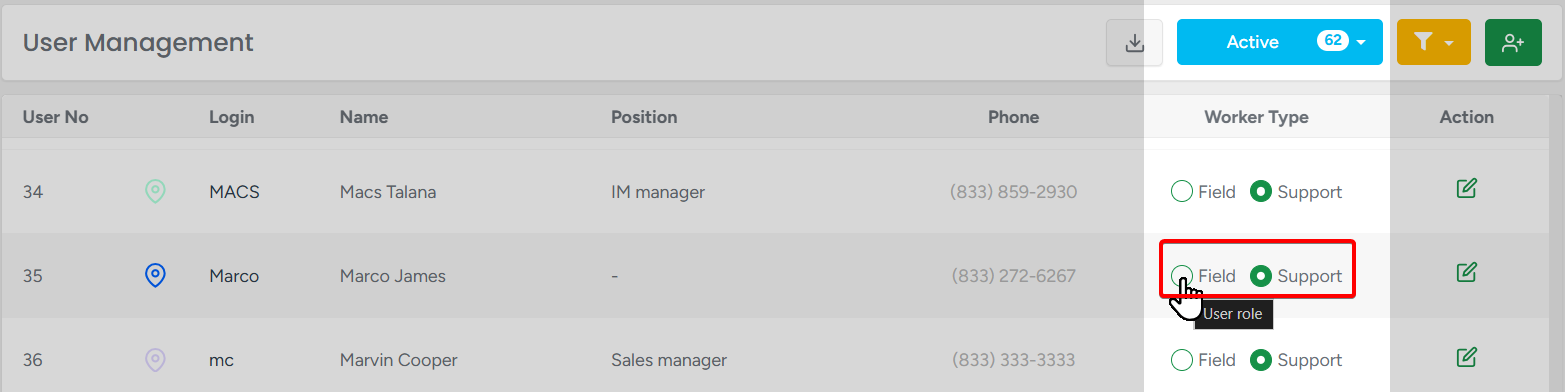
User type can be changed by clicking on the Field or Support in the Worker type column.
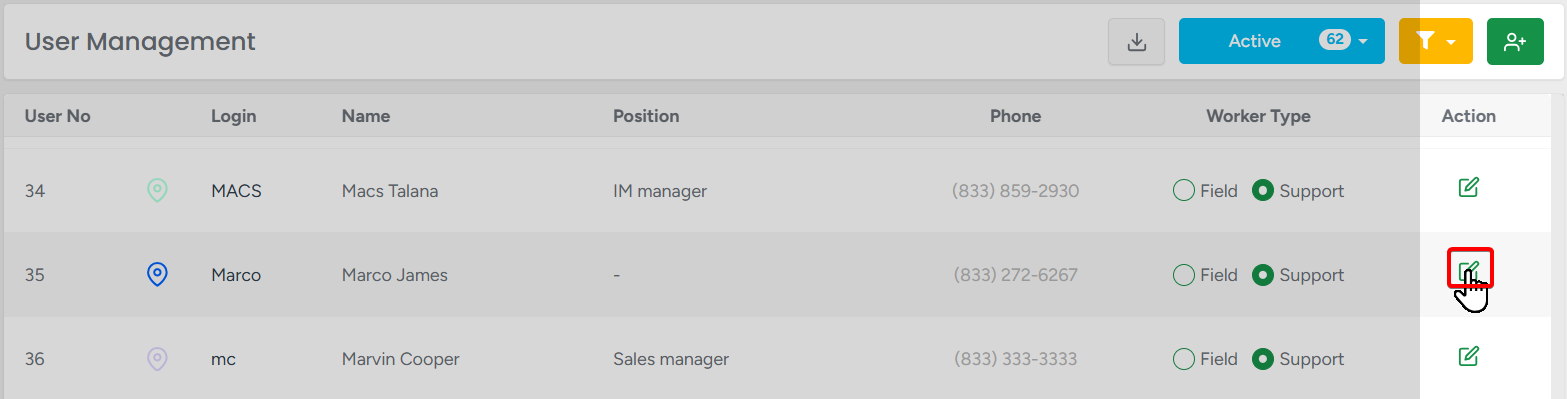
If you want to edit user details or access the user profile, click the Edit ✏️ button.
Adding a user
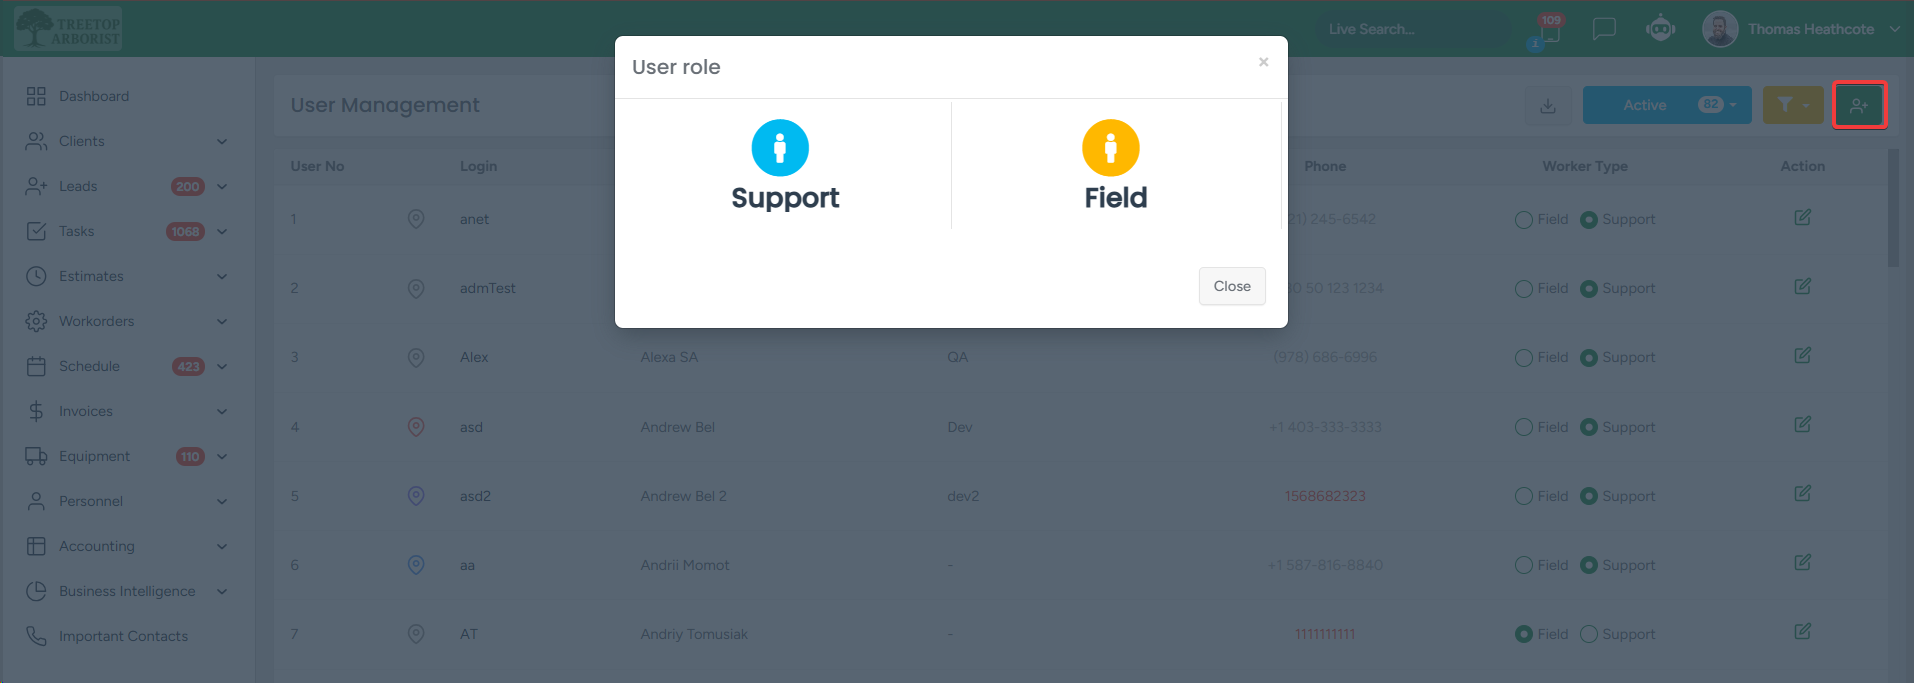
On the new page, you'll be able to see the list of existing users.
To add a new employee, click the plus icon in the top-right corner.
The pop-up notification gives two options: support user with a full list of settings for the system or a field user with limited settings.
The user profile consists of 4 sections:
- The Overview section - fill in the basic information about the user.
- The Payroll section - information related to employment (hourly rate, shift time, etc.).
- The Documents section - upload personal documents (driver's licence, IDs, etc.)
- The Permissions section - fine-tune users' permissions to fit their needs.
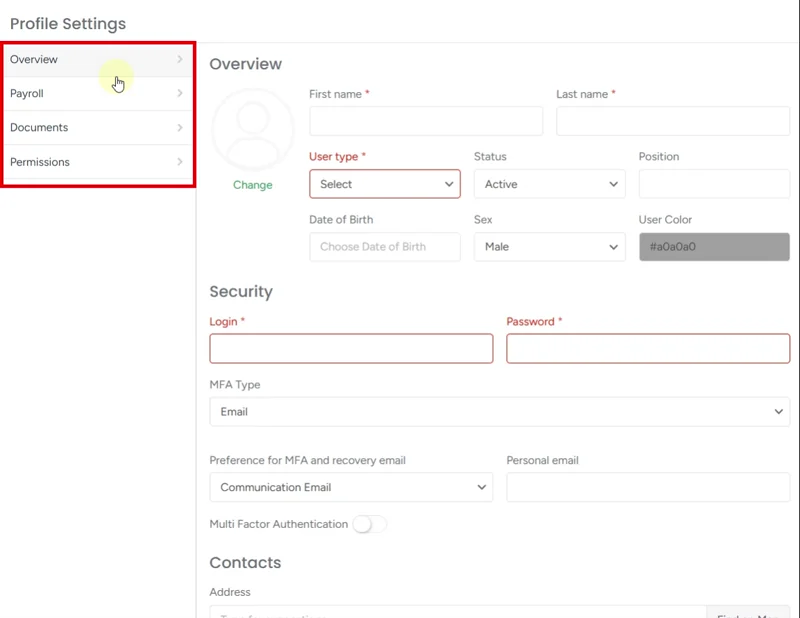
The overview section
- Overview
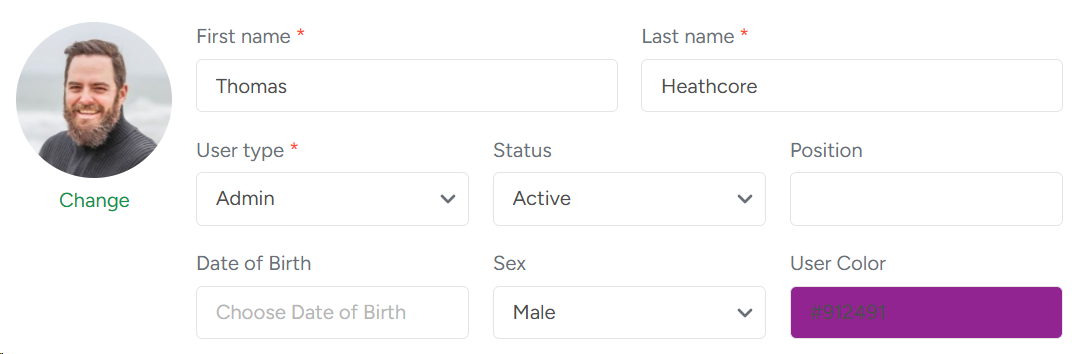
- First name & Last name - fill in the user's name
- User type - set or change the user's type (admin/user)
- Status - choose the current status for a user (active/inactive/dismissed)*
- Position - fill in or change the user's position in the company (it will be displayed on the user management page)
- Date of birth - fill in or change the user's date of birth
- Sex - choose the user's sex
- User color - assign a color for the user (it can be used in other parts of the system)
*Use status inactive or dismissed on users you want to remove
Arbostar does not delete users permanently to preserve data for older reports.
- Security
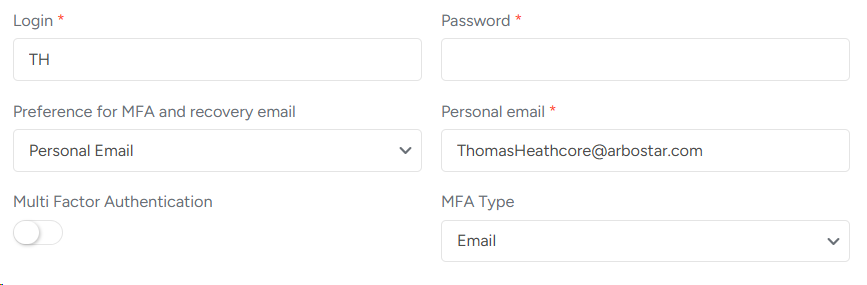
- Login and password - fill in the login credentials for the user
- Preference for MFA and recovery Email - choose which email (personal or contact) will be used for multi-factor authentication
- Personal email - place for the user to fill in their personal email
- Multi-factor authentication - turn on or off the multi-factor authentication for the user
- MFA type - choose the preferred method of auth message delivery (Email or SMS)
- Contacts
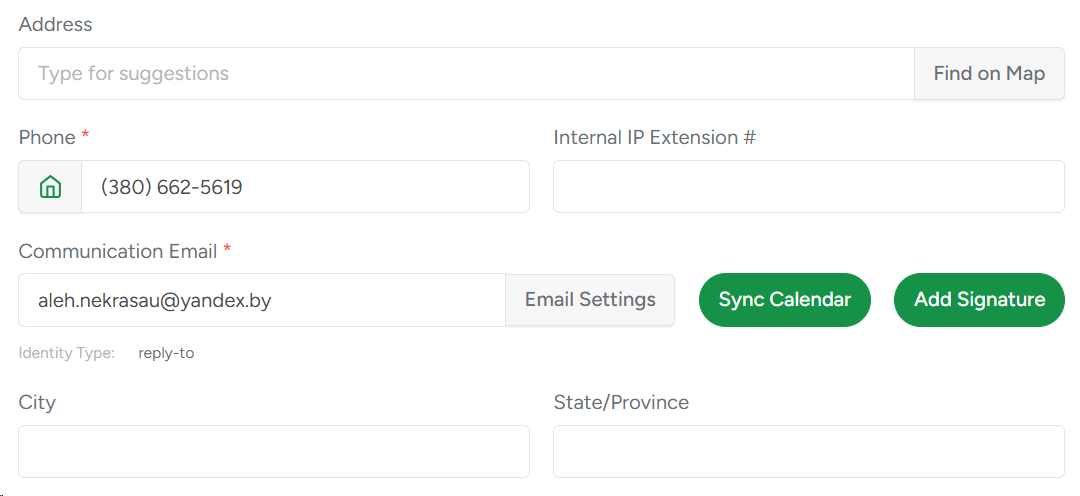
- Address - fill in or choose on the map the user's address
- Phone - fill in the user's phone information
- Internal IP extension - fill in the user's phone IP extension information (for VOIP integration)
- Communication Email - fill in the user's communication email (this one will be used in the system as a default sending email)
- Sync Calendar - you can sync a user's Office Schedule with Google Calendar or iCal
- Add signature - configure your Email signature for
- City & State / Province - fill in the user's location information
The separation of Communication email and Personal email fields allows you to use personal email for multi-factor authentication for example. This is especially helpful for companies where the communication email is a shared office address.
If 'Personal email' option is selected, the personal email field becomes required.
Payroll section
- Employment Info
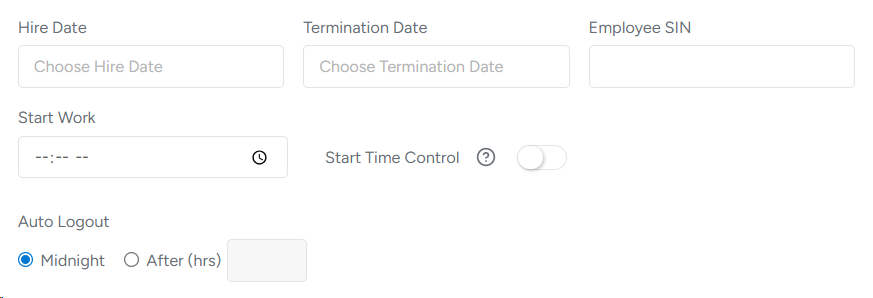
- Hire Date & Termination Date - fill in the information about the employee's hire and termination dates
- Employee SIN - fill in the user's social insurance number
- Start Work - specify when the employee starts their shift
- Start time control - an option to restrict login to 15 min before and after the Start Work time
- Auto Logout - specify when the user will be logged out of the system
The Auto Logout feature is needed for creating snapshots of the entire system for backup purposes.
- Payroll
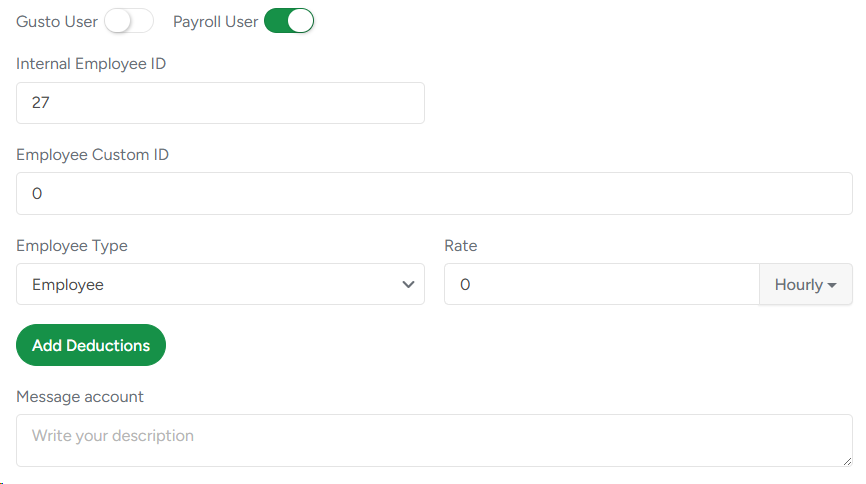
- Gusto user & Payroll user - specify if the user will be displayed in Gusto or Arbostar payroll, or both
- Internal EmployeeID & Employee Custom ID
- Employee Type - specify the type of employee (full-time or subcontractor)
- Rate - Enter the user's pay as either an hourly wage or a flat yearly salary
- Add deductions - Add any necessary pay deductions (you can include multiple line items if needed)
- Message account - add a custom employee note
Add deductions and Gusto user options only available if Gusto integration and deductions are activated in the Company Management
Documents section
In the documents section, you can add up to 100 documents to the user profile and set the expiry notification date, which the employee receives to their business communication email.
To add a new document, click the green Plus icon
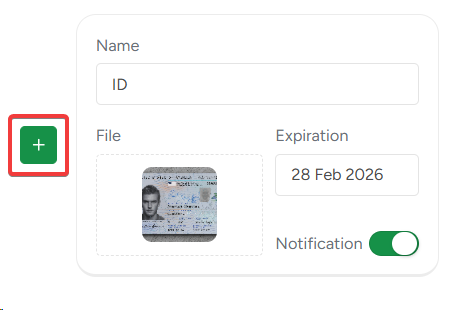
- Name - enter the name of the document
- File - attach a file (image or PDF)
- Expiration - set an expiration date for the document
- Notification - specify whether the user wants to receive a notification when the document reaches the expiration date.
Permissions section
Permissions are specifically designed to give you extreme flexibility. Each employee can have access only to certain parts of the system, depending on their roles.
General section
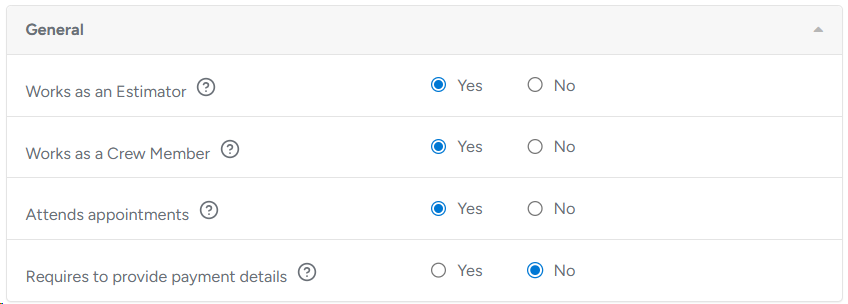
- Work as an Estimator - specify if the user is an Estimator so they can be assigned to estimates and appear in Estimator lists, filters, and scheduling.
- Work as a Crew Member - specify if the user is a Crew Member so they can be added to crews, scheduled on jobs, and track their work time in the mobile app.
- Attends appointments - specify if the user is available for appointments so they can be selected as an attendee when booking or assigning site visits.
- Requires to provide payment details - if said to "Yes", it requires the user to submit payout/billing details (e.g., bank or card) in their profile (the system will keep prompting until provided)
Clients and projects section
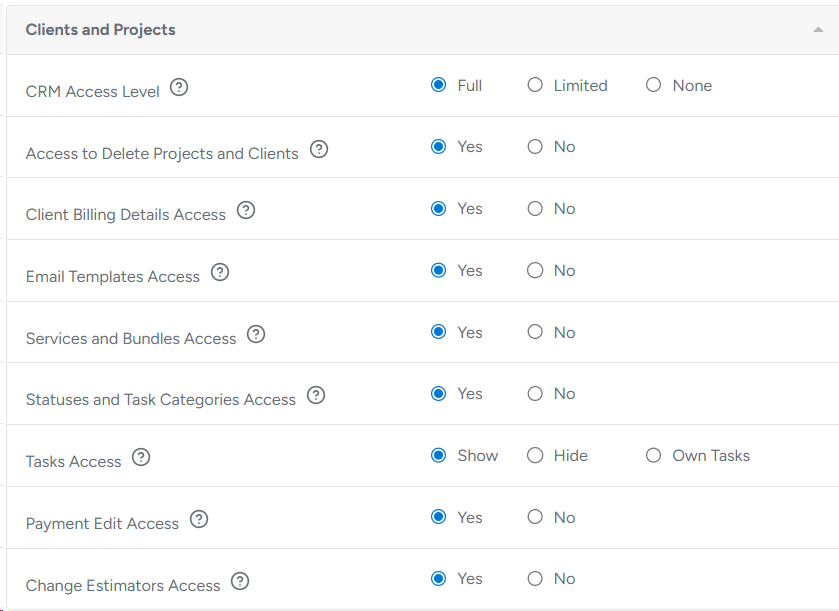
CRM Access Level
Controls user access to clients and projects:Full: Access to all clients and projects; can create new ones.
Limited: Access only to own clients/projects; can create projects for own clients.
None: No access to clients or projects.
Access to Delete Projects and Clients
Allows deleting leads, estimates, workorders, invoices, and changing final statuses.Client Billing Details Access
Enables viewing the billing details section in a client’s profile.Email Templates Access
Grants access to create and manage email templates under the Clients module.Services and Bundles Access
Grants access to Services, Bundles, Equipment Types, and Add-ons in the Estimates module.Statuses and Task Categories Access
Allows managing statuses for Leads, Estimates, Workorders, Invoices, Decline Reasons, and Task Categories.Tasks Access
Controls visibility of tasks:Show: User sees all tasks, and their tasks are visible.
Hide: User’s tasks are hidden; sees others’ tasks.
Own Tasks: Only sees own tasks; others are hidden.
Payment Edit Access
Allows editing invoices and deposit payments.Change Estimator Access
Allows assigning or reassigning an estimator to a project.
Scheduling & Operations section: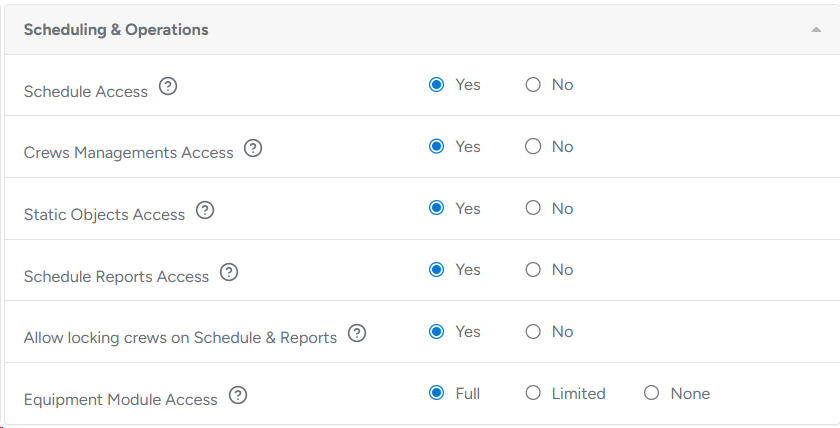
Schedule Access
Grants access to the schedule module.Crews Management Access
Designed to manage crews and mark worker absences. Requires Schedule Access.Static Objects Access
Enables viewing and managing static map elements in the Schedule. Requires Schedule Access.Schedule Reports Access
Grants access to schedule reports and job-related reports from other modules.Allow locking Crew on the Crew Schedule Access
Allows locking crew assignments and statistics on the Schedule and Job Reports.Equipment Module Access
Defines equipment access:Full: The user has access to all items of the equipment module.
Limited: The user has access to their own items in the equipment module.
None: The user doesn't have access to the module.
Field Operations (Mobile App) section: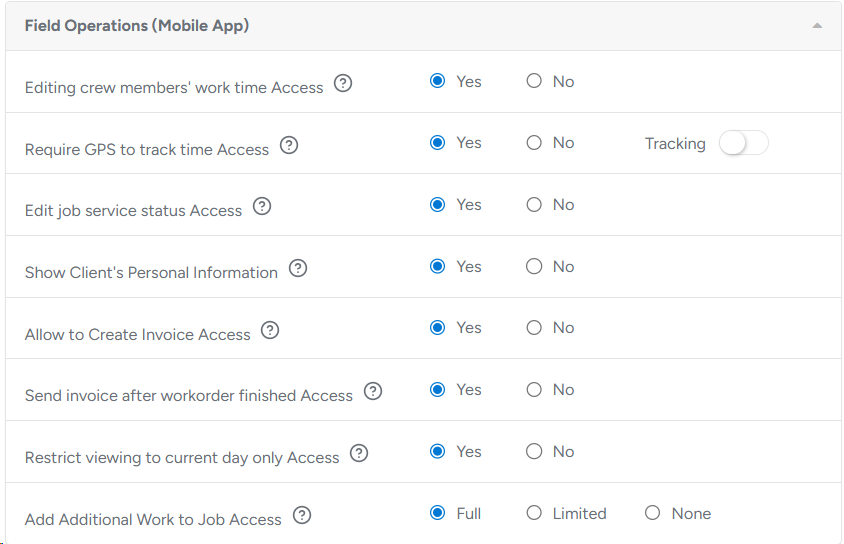
Editing Crew Members' Work Time Access
Crew leaders can add or edit crew members' work time in the app.Require GPS to Track Time Access
Enables GPS tracking to start/stop time tracking via the app.
If Tracking is enabled, the user's location will be continuously recorded throughout the workday (from Clock In until Clock Out).Edit Job Service Status Access
Allows updating service status from “New” to “Completed” on the app (triggers invoice creation).Show Client's Personal Information
Lets admins control whether fieldworkers can view client contact details in the ArboStar APP.
Allow to Create Invoice Access
Lets crew leaders generate invoices in the app after services are completed.Send Invoice After Workorder Finished Access
Allows sending invoices directly to clients from the app after a job is completed.Restrict Viewing to Current Day Only Access
Restricts date navigation in the app — only today’s agenda is visible.Add Additional Work to Job Access
Crew leader's permission to add extra work during the job:Full: Can view/edit services, totals, and re-sign estimates.
Limited: Can view services (without prices/totals), can’t re-sign.
None: Can’t add additional work.
HR and Payroll section: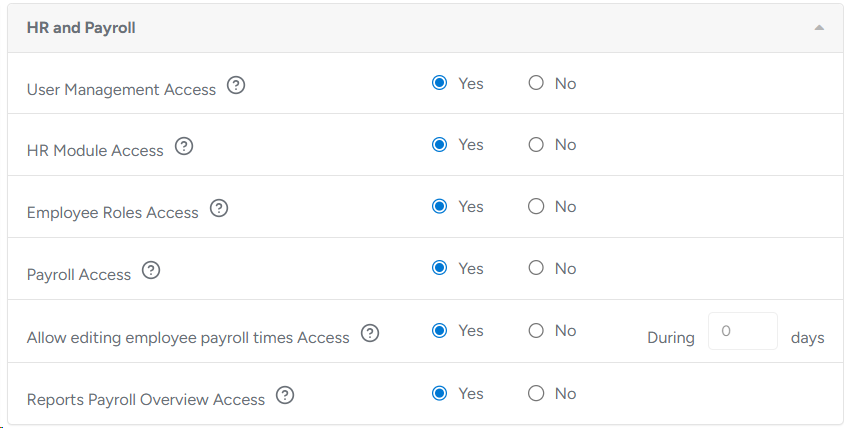
User Management Access
Grants limited access to manage users in the system.HR Module Access
Enables access to HR submodules and personnel-related Business Intelligence (BI) reports.Employee Roles Access
Grants access to edit employee roles. Requires HR Module Access.Payroll Access
Grants access to payroll calculations and time tracking (TimeTracker).Allow Editing Employee Payroll Times Access
Enables editing payroll times after completion, limited to N days.
If this field is empty or equal to 0, you have no limit on the number of days to edit.Reports Payroll Overview Access
Allows access to the Payroll Overview submodule.
Analytics and Reports section: 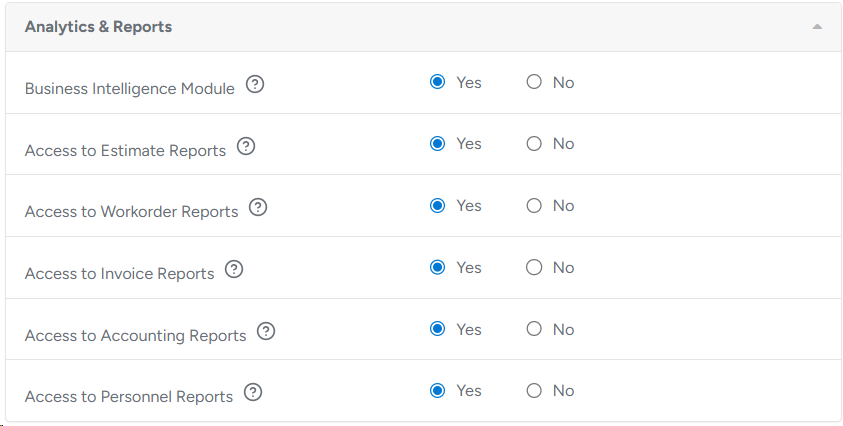
Business Intelligence Module
Master control for BI access. Must be enabled for other BI permissions.Access to Estimate Reports
Grants access to Business Intelligence > Estimates. Requires BI Module.Reports Workorders Access
Grants access to Business Intelligence > Workorders. Requires BI Module.Reports Invoices Access
Grants access to Business Intelligence > Invoices. Requires BI Module.Access to Accounting Reports
Grants access to Business Intelligence > Accounting > Expenses. Requires BI Module.Access to Personnel Reports
Allows viewing employee-related reports under BI. Requires BI Module.
Productivity and User Tools section:
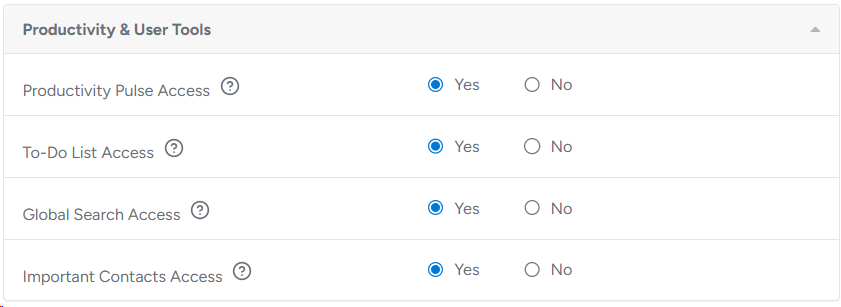
Productivity Pulse Access
Grants access to the Productivity Pulse dashboard metric.To-Do List Access
Enables the To-Do List feature on the user’s dashboard.Global Search Access
Grants the user access to the live search feature (available only on the web).Important Contacts Access
Allows access to the Important Contacts module.