Programmed messages are automatic, and manual client follow-ups are triggered when certain conditions are met.
Programmed messages can be automatic (used when you want to send email or SMS messages) or manual (when you want to be reminded about phone calls or emails).
- To access this submodule, navigate to Clients → Programmed Messages.
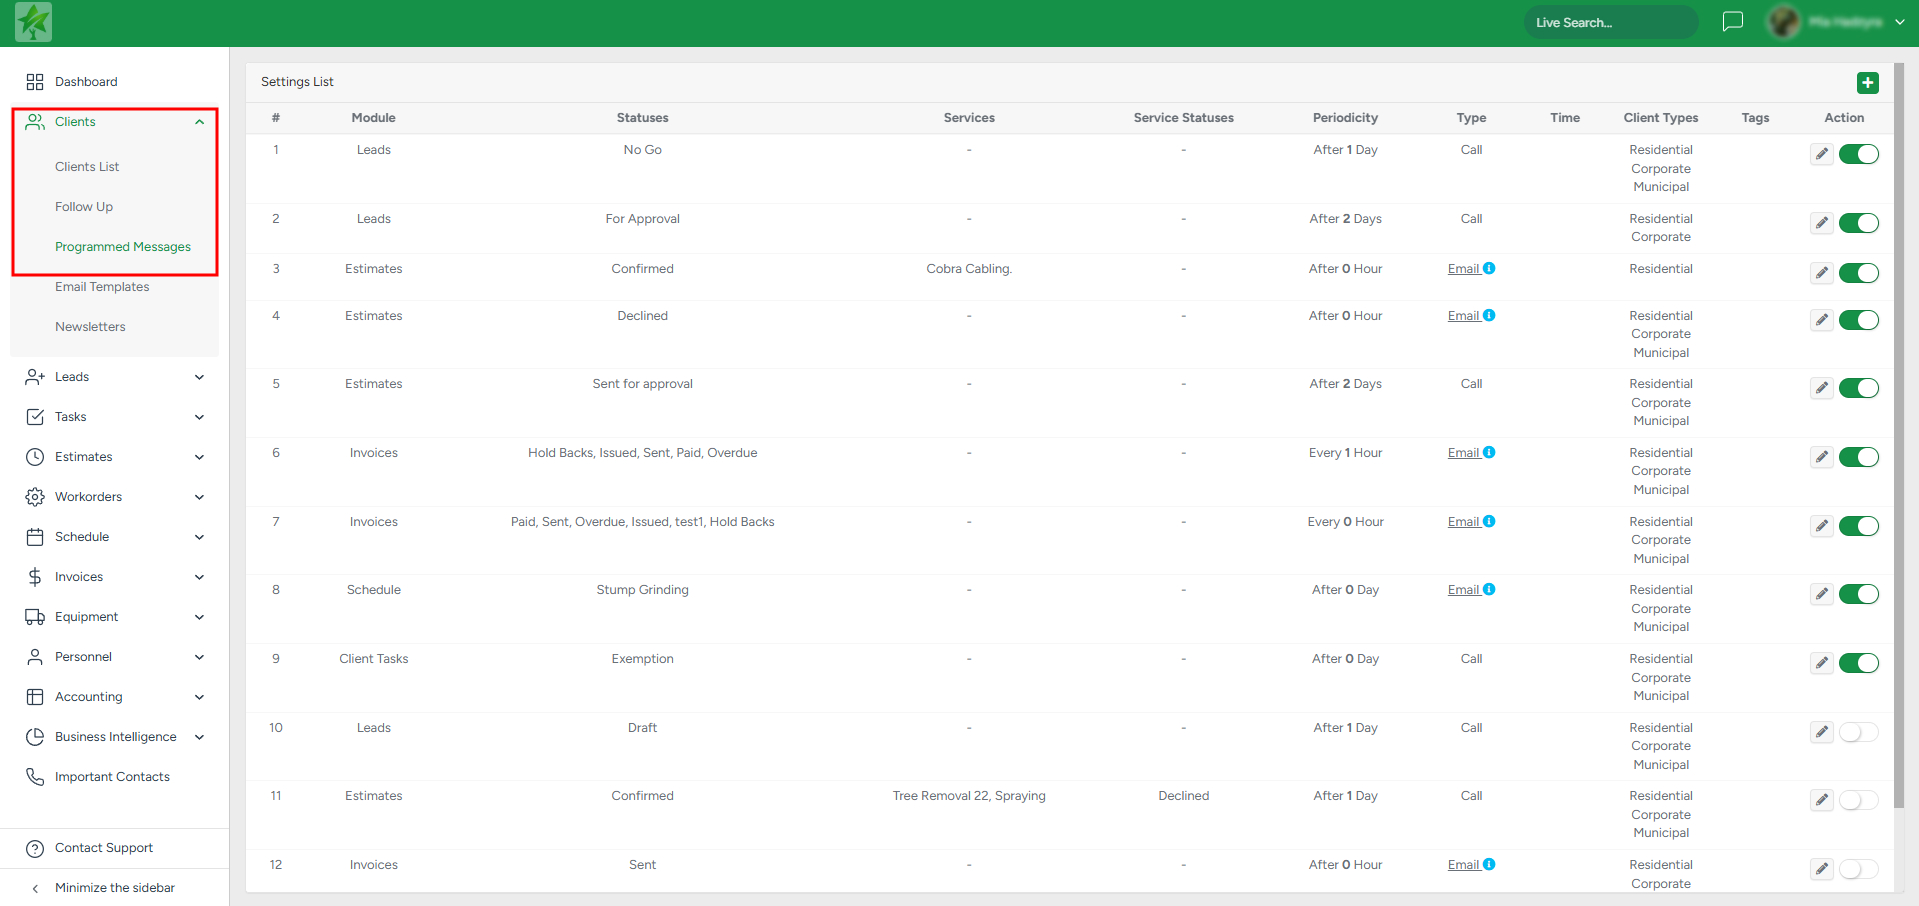
Create a Programmed Message
1. Start: Click the + icon in the top right corner and choose the necessary information in the pop-up window.

2. Configure Details: After clicking the + icon, the Add modal appears where you can make necessary adjustments:
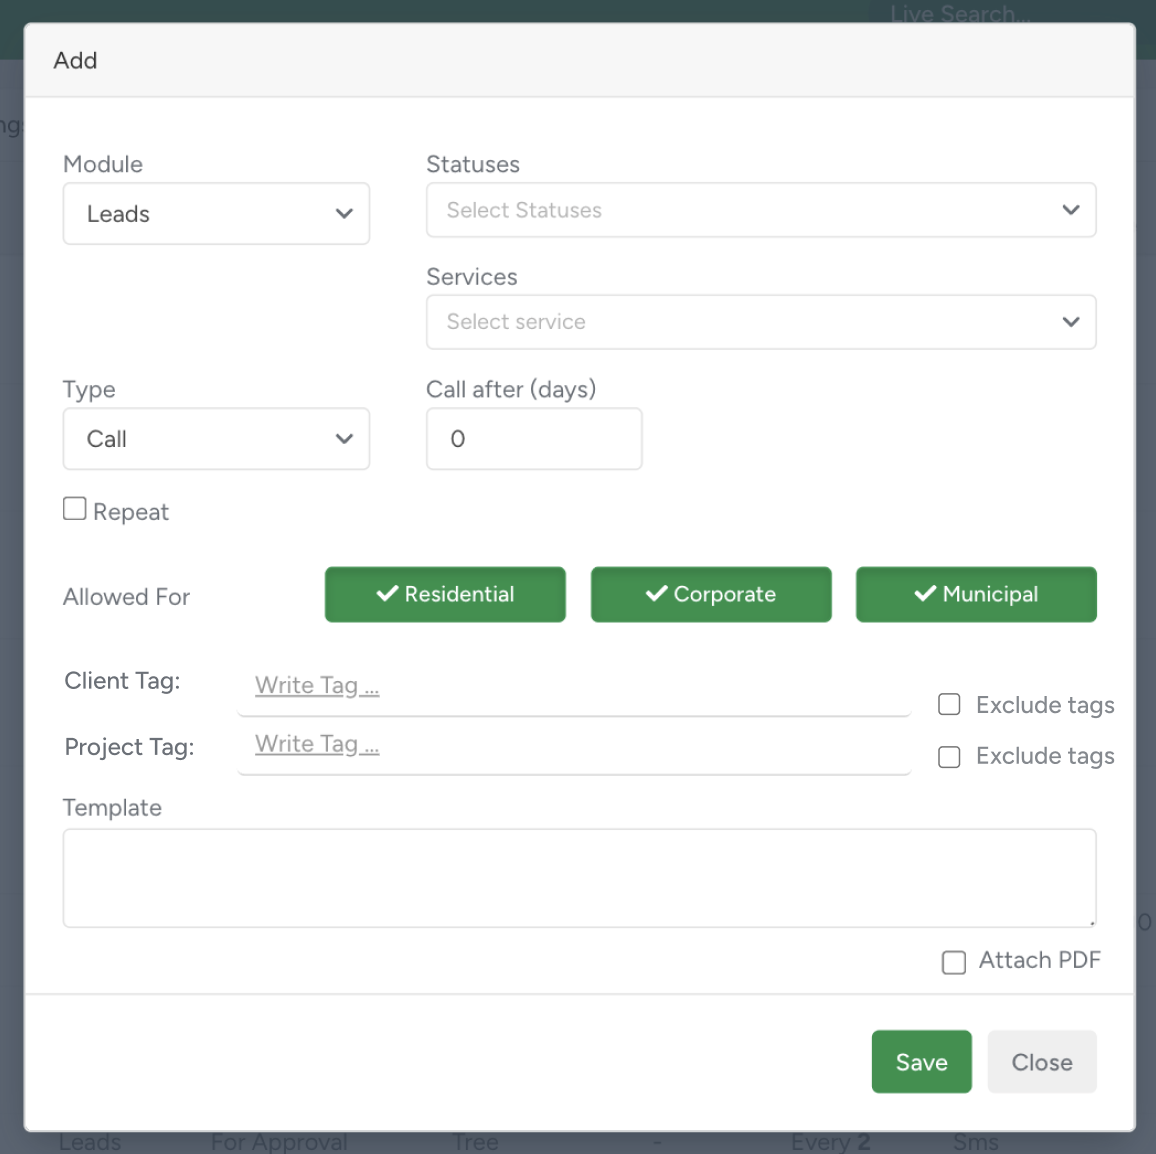
Module: Choose the related module (Leads, Estimates, Workorders, Invoices, etc.). The options you see depend on the selected module:
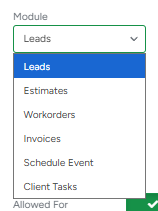
- Leads: Specify lead status and services;
- Estimates, Workorders, Invoices: Define statuses, services, and service statuses;
- Schedule Event: Select the Workorder status;
- Client Task: Choose the task category.
Type: Select how the message will function:
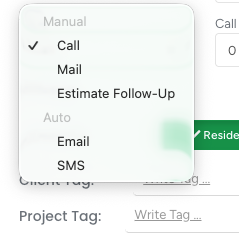
- Manual (Call, Mail or Estimate Follow-Up): This option is used for follow-ups that require manual communication with the client. These appear later in the Follow-Up submodule.
- Auto (Email or SMS): Automatically sends messages based on preset parameters.
Repeat: Enable this option to send messages repeatedly based on the schedule you define:
- Send after/Call after: Set the interval (e.g., 1 day, 1 week). Example: if Send/Call After is set to 1 day and Repeat is checked, the system will send the message daily.
Repeat is only available for Leads, Estimates, Workorders, and Invoices modules.
Allowed For: Select client types (Residential, Commercial, or Municipal). By default, all types are included. Clicking a type will exclude it from receiving messages.
Client Tag
- Triggers messages or reminders when the linked client has at least one selected client tag.
- Supports multiple selections with the same dropdown and autocomplete behavior.
Project Tag
Triggers messages or reminders only when the related project has at least one selected project tag for the project.
Supports multiple selections with the same dropdown and autocomplete behavior.
Exclude Tags option
Unchecked (default): include records with the selected tags.
Checked: exclude records with the selected tags.
Client Tag and Project Tag exclusions work independently.

Template:
To attach a PDF, tick the checkbox on the bottom right, under the Template field.
- Specify the text message (for both reminders and automatic messages):

Statistics for Automatic Emails: For automatic emails, performance statistics are available. Hover over the blue i icon in the Type column within the Programmed Messages submodule to view metrics such as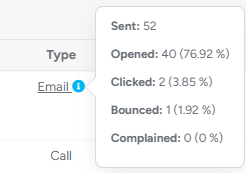
- Emails sent;
- Open rates;
- Click-through rates;
- Bounces;
- Complaints.
Editing and Managing Messages
Edit: Click the pencil icon to adjust any details of an existing programmed message.
Toggle Status:
- Messages with the toggle in the "on" position are active:

- To stop a message, click the toggle to switch it off:

Programmed messages ensure you never miss a follow-up, whether it’s a manual reminder or an automatic message. Set the right parameters to stay connected with your clients efficiently!
