Track and Manage Sales
Classes are only available to clients who use Quickbooks synchronization.
The “Classes” feature allows to track sales as well as create separate sales reports for the selected class in Quickbooks. In one invoice services and products may have different classes.
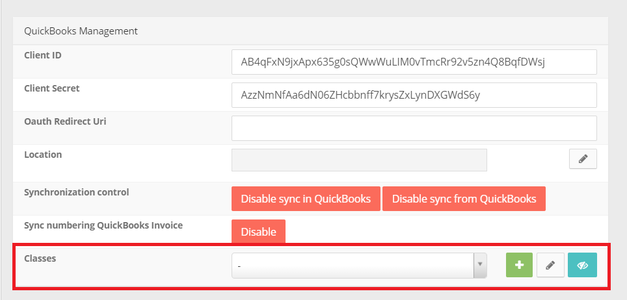
To access the classes, please navigate to the “Quickbooks Management” section in the “Company management” module.

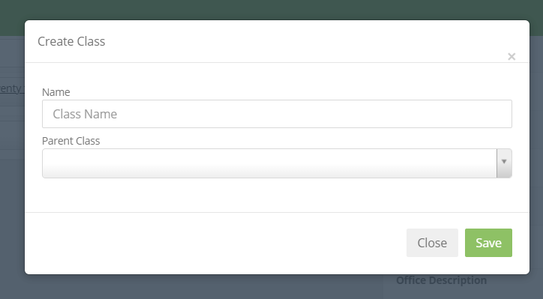
To create a new class, please click on the green “+” sign and fill in the information in the pop-up window.

A class may serve as a “parent class” or as a “Child” class to another class. “Parent Class” hierarchically groups a class or a set of classes (child classes). If you do not choose a “Parent Class”, the newly created task will automatically become a “Parent Class” itself.
- To edit an already existing class, please choose the class from the drop-down menu and click on the “Pencil” icon.
- To make the already existing class inactive, please choose the class from the drop-down menu and click on the “Eye” icon.
- To make a class that was previously deactivated active, please choose the deactivated class from the drop-down menu and click on the “Eye” icon as well. The deactivated class has “(deleted)” written next to the “class” name.

Classes are available in “Create a New Estimate” for services and products:

- If the service/product has already been assigned a QB class, it will automatically show in the “QB Class” section.
- To change/add QB Class in “Create a New Estimate”, please click on the drop-down menu and choose the appropriate class from the list.
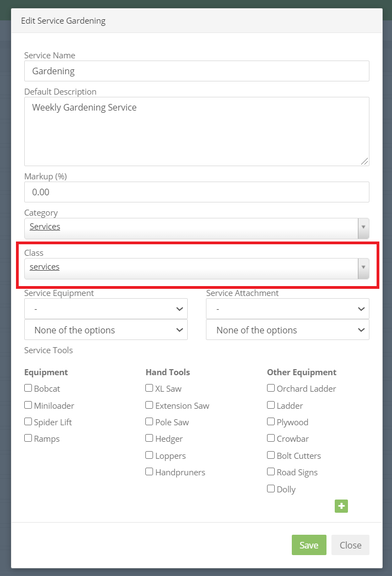
To add a class to a service, please navigate to the Estimates → Estimates Services.

Please click on the “Pencil” icon to edit. In the pop-up window, please choose the appropriate class and click “Save”.

After that, the QB class will automatically be added to the service in “Create a New Estimate”.
To add a QB class to a product, please navigate to the “Estimates” → “Estimates Products” and carry out the same actions as in the case of “Estimates Services”.
Classes can also be added when creating a new service/product.
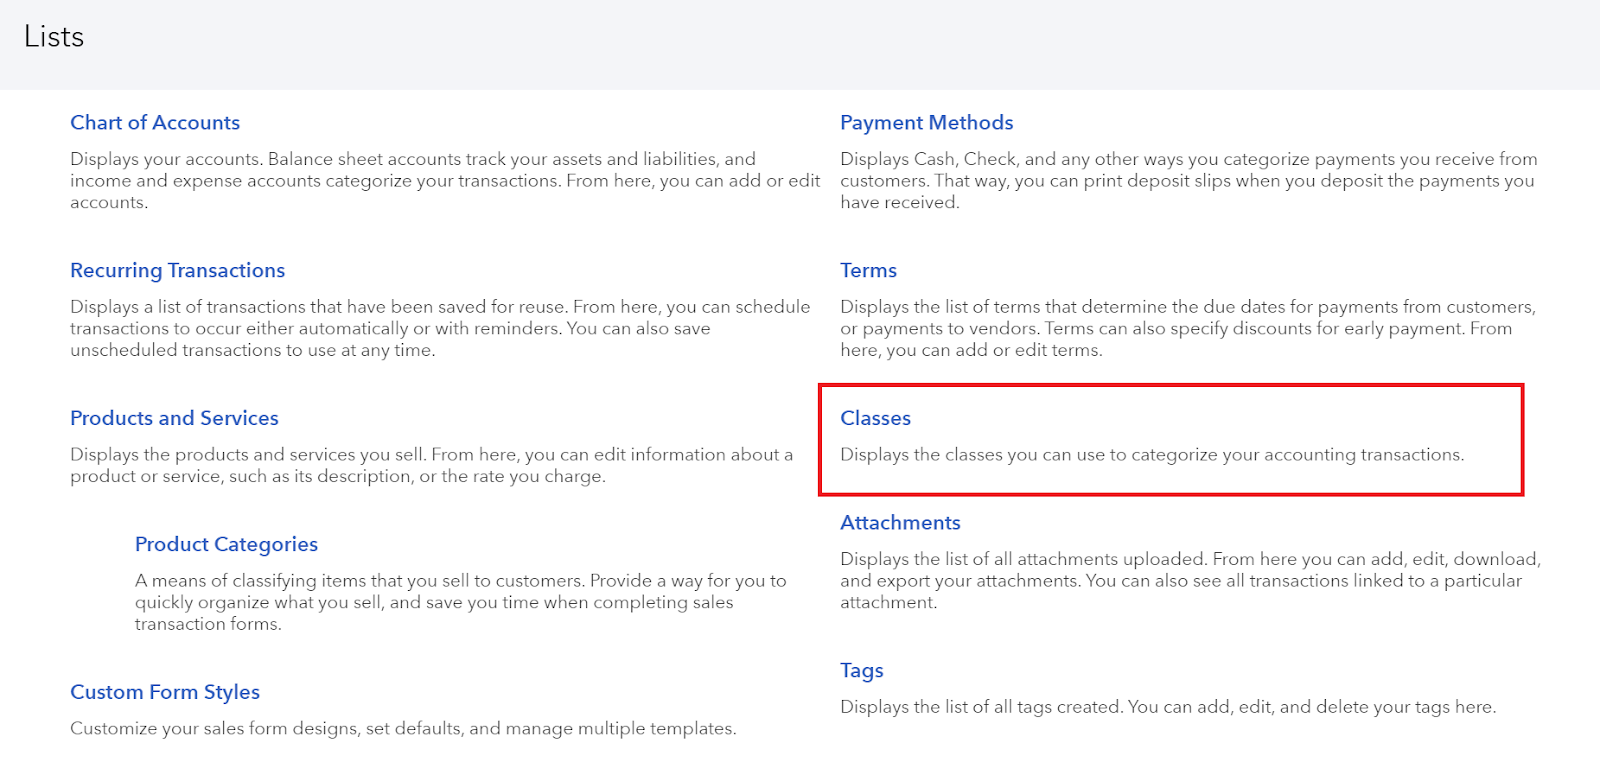
Classes are also available in Quickbooks. To access, please log in to Quickbooks, click on the “Settings” icon in the top right corner, choose “Lists” → “All Lists”.

On the “All Lists” page, please click on “Classes”.

Here you will find the list of synchronized classes.

- To get a report for the particular class, please click on the “Run report”.
- To edit the class, please click on the “Arrow” symbol and choose “Edit”.
To make the class inactive, please click on the “arrow” symbol and choose “Make Inactive”.
To get a report for all the existing classes, please click on the “Run Report” in the top right corner.
- To create a new class, please click on the “create” icon in the upper right corner.

After the new class is created, it will automatically synchronize and be also added to the class list in the company domain when two-way synchronization is on.
