Manage lead approvals
Once the user confirms the request, they create a lead for the new client or merge it with an existing one, assigning the For Approval status. This review process helps to avoid the creation of duplicate clients.
- To access this submodule, navigate to Leads → For Approval.

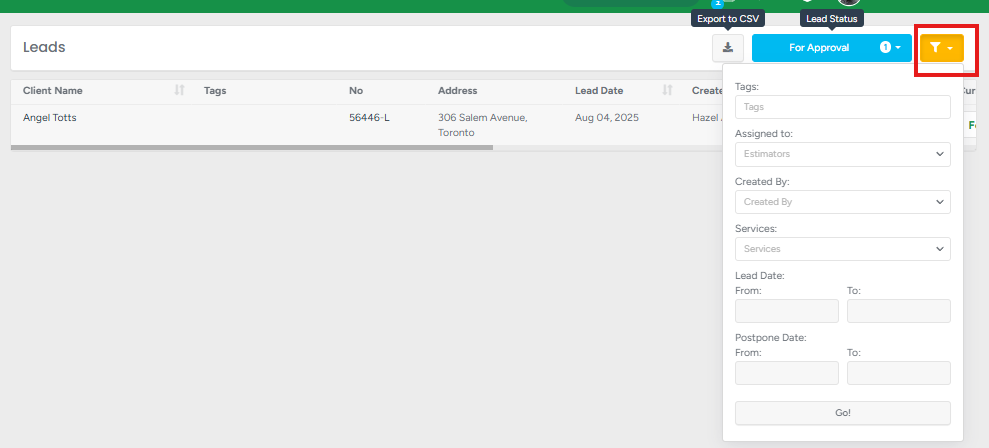
Clicking the blue filter button allows you to filter the data on the page by status. The filter automatically selects the For Approval status by default. The badge count is next to each status and next to the For Approval submodule name. It shows the actual number of leads with a specific status out of all leads in the system.

Clicking the yellow filter button allows you to filter the data on the page based on the following:
Tags added to the project;
Assigned estimators;
Services mentioned within the lead;
Lead date;
Lead postpone date.

Clicking the client’s name redirects you to the client’s profile.
- Clicking the sort icon next to:
Client Name sorts the data on the page from A → Z. If clicked twice, from Z → A;
Lead Date sorts the data on the page from the oldest to the newest date. Clicking twice will sort the dates from the newest to the oldest.
Created By, sorts the data on the page from A → Z. If clicked twice, from Z → A;
Assigned To, sorts the data on the page as follows: first empty entries in this column and then from A → Z. If clicked twice, from Z → A and then empty entries;
Postpone, sorts the data as follows: first empty entries in this column and then from the oldest to the newest date. Clicking twice, from the newest to the oldest, and then empty entries;
Clicking the lead redirects you to the lead profile;
Clicking the dropdown changes the current lead status to the selected one from the dropdown;
Clicking the eye button redirects to the lead profile;
Clicking the leaf button creates an estimate within the project.
