Feedback Page Improvements
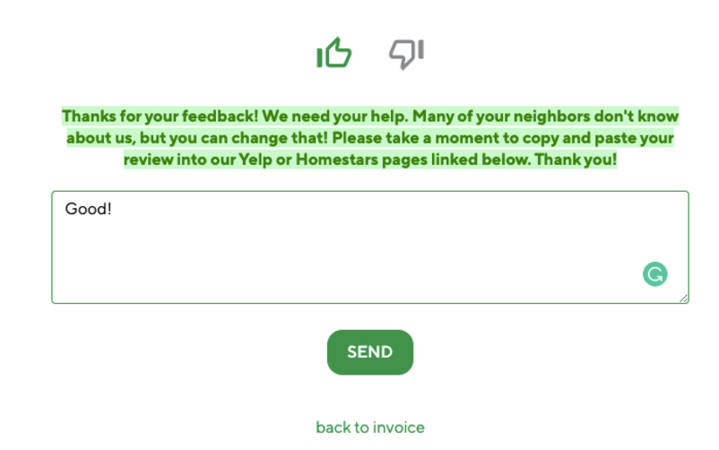
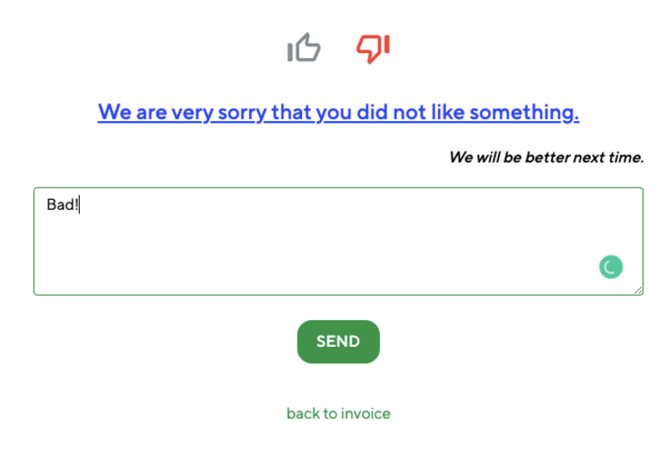
Your clients can easily leave you feedback on the Invoice Portal page now. When sending an invoice to the client, clients can click on the updated “Like” and “Dislike” buttons that will forward them to the respective page.

On the feedback page, the client has an option to change the “Like” to “Dislike” and vice versa.

To edit the message the clients see on the Feedback page, navigate to the “Brands” → “Review Settings” → “Like message” or “Dislike message” section.

Here you can edit the Portal Feedback Message:
Optional Services
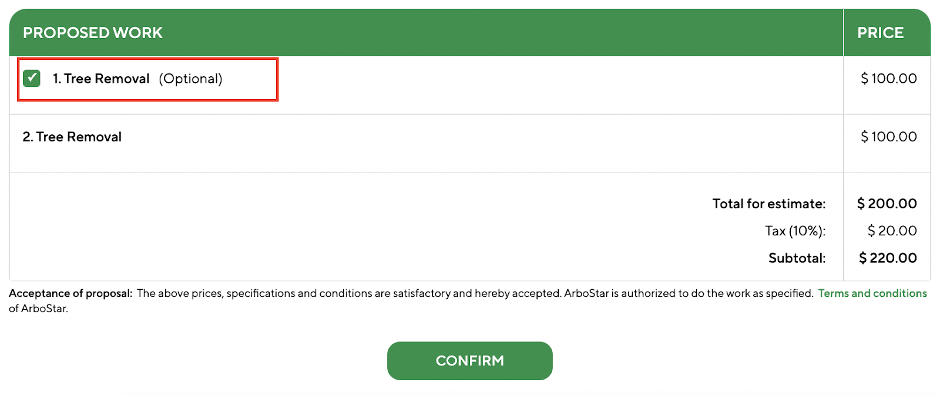
When receiving an estimate PDF, customers now have an option to accept it in full or partially.
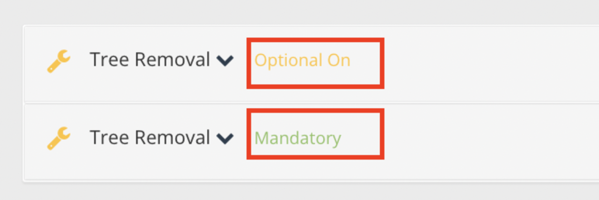
For that, during estimation, estimators need to mark services and products as “optional”. To mark as “optional", click on the field next to the preferred service/product/bundle.
After the Estimate is sent to a client, the client on the portal has an option to either confirm the service/product/bundle by ticking the box next to it or decline.
Geolocation on the Form page
This feature is useful for tracking a field worker's location when they are filling in the form.
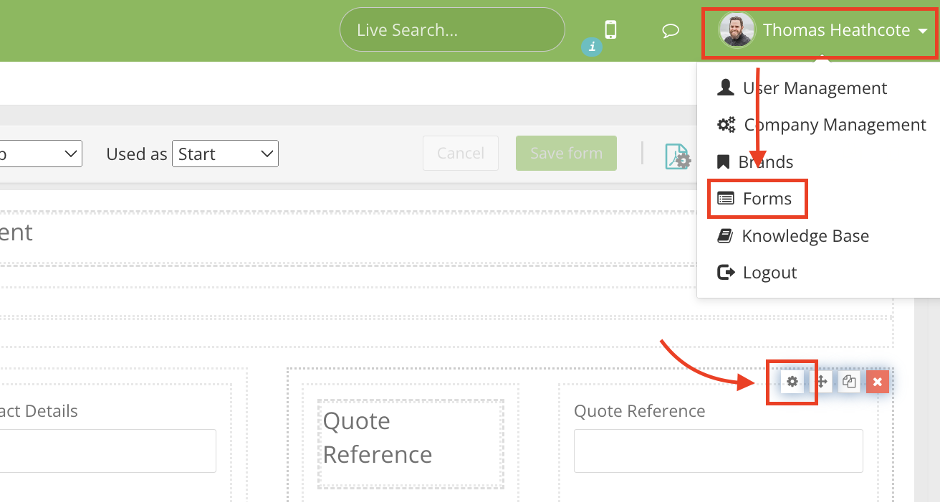
The feature can be enabled in the “Forms” module. Click on the “Pencil” icon next to the required form to edit. On the “Edit Form” page, click on the “Edit component” icon above the preferred component.
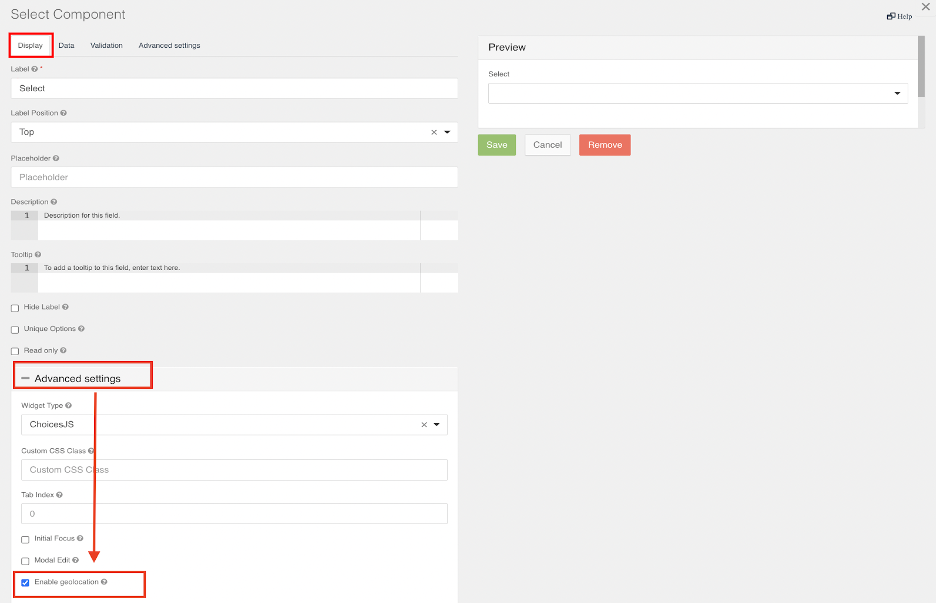
In the “Display” section of the component click on the “Advanced Settings” and tick the “Enable geolocation” box.
After enabling geolocation, when a user fills in the form, in the form components where the feature is enabled, you can see their geolocation by clicking on the “Map” icon.

Changing estimate status to “Declined”
If you need to decline a service on the estimate stage, you can easily do it by just changing the status of it to "Declined".
The status cannot be changed to “Completed”, unlike on the WO page.
Office schedule “Address” as Card Title
If you prefer to see the office address on the Office Schedule Cards instead of a client’s name, you can enable the “Office Schedule “Address” as card Title” in the “Schedule Preferences Management” section of the “Company Management module”.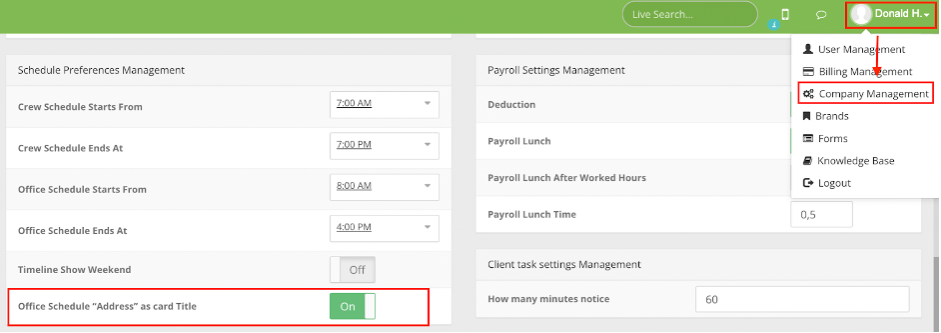
After enabling, in the “Office Schedule” section of the “Schedule” module all the tasks that are ticked as “Office tasks” will show the office address on the schedule page.

Schedule report
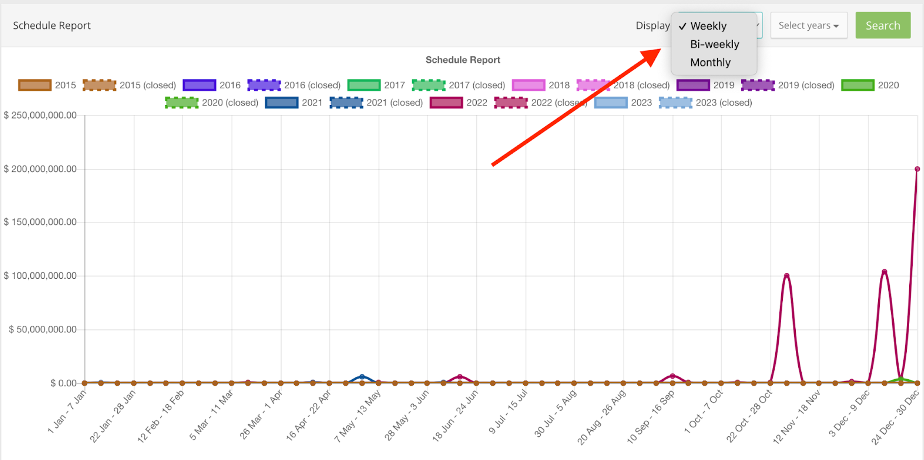
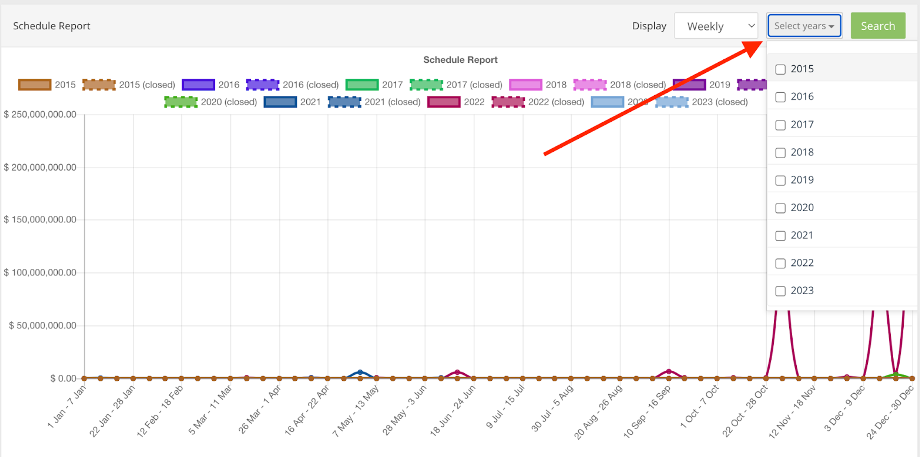
You can now select the required years and periods in the "Schedule report" section.
Creating new Task from Lead Pin and displaying lead files
This feature is for comfortable usage for office workers. All the lead files are now available on the Leads Map when clicking on the lead's pin.
It is also possible to schedule an Estimate appointment straight from a lead pin.

Workorder Disable Required Form
If the job start form for a specific Workorder is not mandatory, it can be disabled. This will save some time for the crew leader on-site.

Workorder Performance Report
This report helps you evaluate the work performed, how correctly they were estimated and in what date range they were completed. To access the "Workorder Performance Report" section, navigate to the "Business Intelligence" module, then choose "Workorder Performance".
