
These statuses help track the life cycle of individual estimates and provide insights into your company's overall performance.
To access this submodule, navigate to Estimates → Statuses

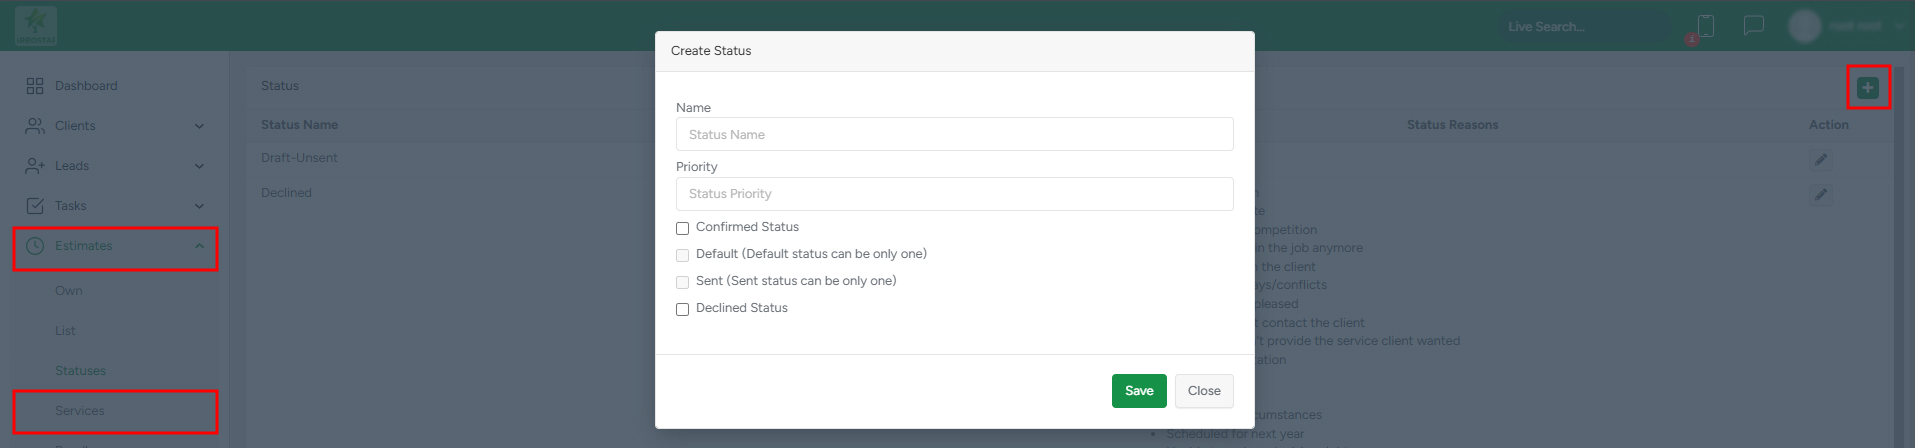
Adding a New Status
1. Within Estimates → Statuses, click the + button in the top right corner to add a new status.
2. A modal window will appear, allowing you to configure the following:
- Create a status name
- Set the status priority
- Specify whether it is a Confirmed or Declined status
- Provide Decline Reasons (if the status is set to Declined).
Managing Existing Statuses
Editing a Status Name
- Click the pencil icon to rename an existing status.

Enabling or Disabling a Status
- Click the eye icon to enable a hidden status and make it visible in the system.

- Click the crossed-out eye icon to disable and hide a visible status from the system.

Important: Default statuses (those without blue eye or crossed-out eye icons) cannot be enabled or disabled.
By managing statuses effectively, you can optimize estimate tracking and gain better performance insights for your company.